Strike Vector

Strike Vector

143 ratings
Welcome to Strike Vector, You Suck: Tips on How to Improve Your Game
By RespawningJesus
I know why you are here. You played some Strike Vector, and noticed that it is not all sunshine and rainbows. You keep crashing into walls, going negative each round, getting pissed off at almost everything, and calling every weapon that kills you OP. We have all been there at one point. Strike Vector is not an easy game.

This is where this guide comes into play. This guide will teach you the core basics that you should focus on to help you out. This guide will push you into the right direction. Do keep in mind that this guide alone will not help you. You can only help yourself. All this guide can arm you with is knowledge. Yet, with this knowledge, you will slowly improve. Or you could just chicken out and go play some CoD.

Screw CoD. Welcome to Strike Vector.
   
Award
Favorite
Favorited
Unfavorite
Starting Out
Okay maggot, listen up. Set up your controls and other options to something that will be comfortable for you to play. I do NOT want to hear any lip out of you! You are dirt, you are worthless! You are terrible at this game, and you came to ME for help, so you might as well be appreciative of the time and effort I am spending on you!

Once you have done the easiest thing you could ever do for this game, time to start flying. Wait, where are you going? The battlefield? No, no, no, no. That is where people with their big kid pants go. You need to quit crashing into walls like an idiot if you ever want to do well. Find the Solo Flight mode ASAP, and give me twenty!


Note: This screenshot was taken quite some time ago, in the days of Beta. The map names have changed, and the Create button is replaced with the launch button.

Solo Flight is a great place for beginners to start their journey. You can learn the ins and outs of the maps, see where those health pick ups are, and most importantly, learn how to fly.

Choose a map, and hit that Launch button. You will start to rocket foward and soon you will be flying. Get used to flying at different speeds. Start simple. Fly out in the open, get used to how turning and rolling feel. Hit space to switch to Hover; see what you can do there. Now, try to fly in between obstacles. Start slow, then go fast. It is okay to crash here; it is a safe place. Consider it your special place.

Once you are comfortable with flying, on to phase two!

Flying Tips
Okay, you can fly now. Yet, flying by yourself where there is no pressure is different than flying with flying in the middle of a warzone. People will shoot you. If you are playing in a team mode, every time you crash, you cause your team to lose a point. More importantly, it will also cause you to lose a point.

Note: Points are kills. Everytime you crash, you get -1 kill. If you are playing Team Deathmatch, or TDM, you will cause your whole team to lose a point, which means your top players need to work harder just to make the team go positive. Also, it helps your opponents out as well, since it gives them a little more wiggle room to pull ahead. Yes, team scores CAN go negative, so be careful not to crash a whole lot.

So, how NOT to crash? Easy, slow down when navigating through tight spaces. When you get better you can navigate the ins and outs of the maps like a pro.

What to do whenever you think you will crash? Hit Space. You may have noticed that you have no brakes. You can boost foward no problem, but you cannot slow down in Plane mode! So you must enter Hover mode. It is very difficult to crash while in Hover mode. If you want to brake faster, you can hold down the S key, which is the key to move backwards while in Hover mode. Also, note at how Hover mode will re--align you with the horizon, so if you start rolling when in hover mode, this is why. Also, Hover mode will not keep you perfectly rooted in place; you will sway side to side a bit, so if you are trying to hide, while you go for a bathroom break in the middle of a match, you might float away from your hiding spot.

Note: Although it is difficult to crash in Hover mode, do not enter Hover mode at the last second. Your momentum could end up killing you. Also note that you cannot enter Hover mode while you are boosting through a Boost Ring, or using the Booster ability, so boost wisely!

Keep in mind that whenever you activate the afterburners, you will show up on radar. You do not show up on radar if you are in a "passive" state. (In Plane mode, but your finger is off the afterburner.) You also do not show up on radar when you are in the Hover mode. Keep this in mind if you want to keep a low profile.

Using your roll keys, A and D, are incrediablly vital for navigating. It will help you sqeeze in some tight areas and navigate them quickly.

Also note that you can scrape the walls a little bit on your sides, belly, or top, you will take a little bit of damage. However, if you go face first into an object, you WILL die. With this in mind, try not to rely on it to save you every time. You get the wrong angle, and even if it does look like you are safe, the game might not agree with you. Hover mode is just safer.

You can also use Hover mode to turn really fast, allowing you to perform sharp turns. This is going to be a very important skill to utilize. If you cannot master quick turns, then you will not be able to fight effectively. See what you can and cannot do with Hover turns.


Tips for Combat
Okay, now that you are a better at flying, you can start to worry more about fighting.

Without an understanding of how the game's movement system works, you will find yourself on the wrong end of a gun frequently. Hover quick turns are vital in combat, both for offensive and defensive reasons.


This is your loadout screen. Go through it, and find the weapons and abiltities that you think will work best to your play style. If you do not have a play style, then choose a weapon that looks fun to use.

Note: For beginners, I would reccommend Homing or Swarm missiles, but try not to dual wield them. Although effective when used right, they can only be so good: better players will know how to deal with you, to the point that you will not even be able to kill them in a firefight. Also note if you use them with a dying passion, you WILL get flak from other players. Try using a weapon you want to get good with in conjunction with swarms or homing if you are going to use them.

To use a lot of the weapons in this game, you will have to lead your targets. For example, the gattling guns will require you to lead the target, but the reticle does not have to be far from your target. So long as you can keep the reticle in front of where your target is going to be, then you will be fine. For weapons such as rockets, you will need to move the reticle much farther ahead of them to take in account to the slower projectile speed of the rockets.

In case you could not pick up on it in my examples, leading your target means firing where they are going to be by the time your shots can hit them. Different weapons require you to lead farther ahead than others, and vice versa. The only weapons that you do not really have to lead with are Swarmers, Homing Missiles, and Shotgun.

Homing Missiles, however, require you to hover your targeting reticule over your target for a couple of seconds before you can fire. You will hear a beeping noise when you are beginning to pick up a lock on a target. You can also see a red box blink around your target. Once you have a complete lock, you will hear a buzzing noise, and the red box will glow brighter than before. All you have to do is fire away before the person you are locking onto gets out of your sights. If you are getting locked onto, then you will hear a beeping noise, and the words Lock On will flash red in the middle of your screen. Once they have a complete lock on you, then the Lock On words will stay red until you shake the missile. The beeping will get faster when the missile gets closer to you.

Note: Homing missiles can also lock on to friendlies, so be careful you do not lock on to one of your teammates by accident! If you are being pursued by a missile, then you can fly really close to somebody, so that the missile locks on to them, instead of you! So you can make the mssile lock onto another enemy, or another one of your allies. Keep in mind that you do need to get pretty close to them to make this work right.

Use Hover mode to stabilize your shots. The slower you move, the more accurate you will be, but it will also mean that you will be easier to hit. You can use the boost dodge in hover mode to help give you a small boost in speed to either the left or right. Just double tap the left or right keys to boost in that direction. You can also barrel roll in Plane mode to allow you to dodge incoming missiles or fire. (Although barrel rolls are not as effective as some would like it to be.)

If you have a missile locked onto you, try using the environment to cause the missile to crash into a wall. You can also use Boost Rings, the Booster ability, or Ghost ability to shake Homing missiles. You can also use the barrel roll to avoid it, but it requires strict timing. Using the reverse view in Plane mode helps achieve this at times.

When you die in combat, do not hit that Left mouse button so quickly! You can still control your ship, despite it burning up, and crashing to the earth. Sometimes you can catch an enemy in the explosion of your final blaze of glory, taking both you and them with you! Do note that the explosion is not very powerful, so if they are not near death, then they will survive the splash damage. The only way to kill them for sure is if you can cause your burning ship to crash into them, which is pretty difficult. Still, no harm in trying, right?

Note: Enemies who are in this "crash and burn" state will show up on your radar as a flashing enemy, so use this to stay out of their way. Also, try to move on when you kill someone. No reason to gloat over your kill when you still have a match to win, right?


These are health pickups. Learn where they are in all of the maps, as they are vital. You spawn in with 100 health, but your health can be at a maximum of 150 at any given time. Each Health pickup gives you 25 health. One of the first things you should do is to find two of these to get your health up to the maximum of 150. 150 is the magic number. Try keeping your health up whenever. Bring along Nanomachines if you want to keep it safe.

USE THE RADAR. This is your best friend. It will help you pick fights, as well as avoid them. Some people find the radar difficult to read, but it is fairly simple: Orange/red arrows shows an enemy is within radar range. If you see a line coming from their arrow, it means they are either above or below you, assuming you are aligned with the horizon. A line that goes up means the enemy is above you. If the line from the arrow is heading down, it means they are below you.

Note: You show up on radar whenever you boost with afterburners, fire your weapon, or if you are spotted by another enemy. You also show up on radar as a flashing arrow whenever you are in a crashing state.

Whenever you get close enough to an enemy, you will see an orange diamond appear around them. Enemies are only hightlighted if they are within radar range and in your line of sight. Enemies who can be tagged by this diamond who are not in your line of sight will show up as an arrow on your HUD, pointing you in their general direction. This arrow can be seen at the corners your targeting circle. (Will supply image of these arrows soon.) This makes it easier for you to track and hit targets. You can still hit people, even if they are not highlighted by this diamond, but it is rather difficult to do so, due to how small the Vectors can be from that distance. Not only that, but your targeting circle will turn orange whenever you are detected by an enemy.

Note: If you have the Specialisation called Echelon Prism, then you can detect enemies even farther, so you can see this diamond a lot sooner than most people could. If people have the Smooth Operator Specialisation, then you will have to get closer to them in order to detect them, allowing these players to avoid being seen unless they want to be seen.


To Sum It All Up


Source of Image: http://www.strikevector.net/forum/general-discussion/a-guide-to-strike-vector-beta-img/

Cheers to prophet for making this funny, yet informative comic strip of Strike Vector. Keep in mind that Stalker mines has been nerfed, so they are not as strong as the comic implies.
Thank You!
Thank you for reading this guide! Tell me on things that I can add, or things to make my guide better, as this was my first guide ever. More experienced players, feel free to leave additional tips that would be helpful!
49 Comments
RespawningJesus  [author] 13 Feb, 2015 @ 3:13pm 
@AvoidTheVoid, I haven't played this game in a good while, so I am not sure how the balance of the game is right now. I enjoyed using rockets myself, and I usually ran the explosion radius increase perks on them.

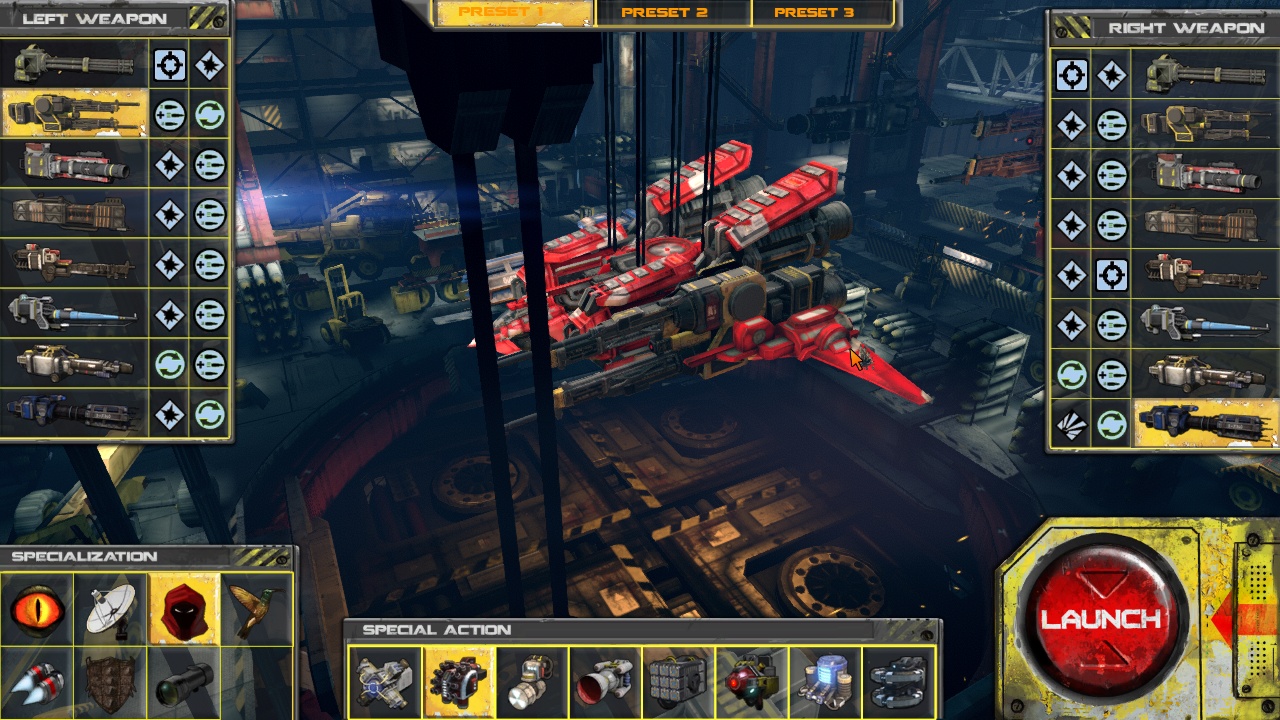
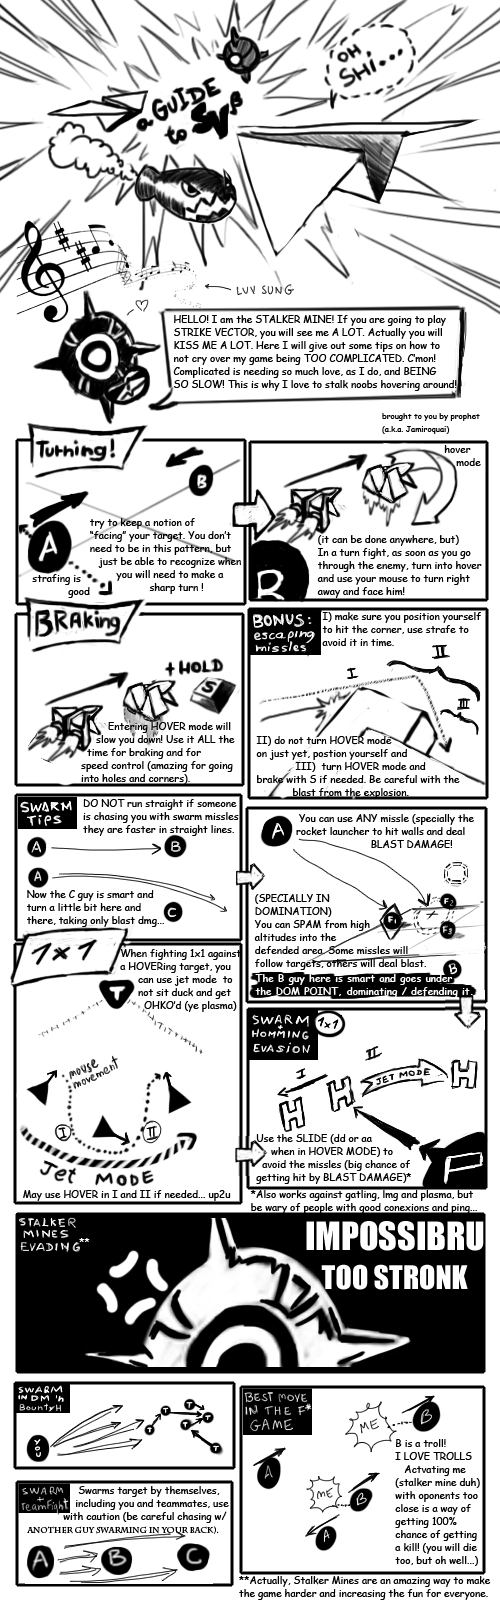
However, when I did play the game, I do remember Stalker MInes got nerfed, as well as Swarm Missiles. Other things probably got nerfed and buffed over the period of time that I stopped playing, which was around the time Titanfall came out, so any balance updates there may have been since March of last year, I am out of the loop on.
AvoidTheVoid 13 Feb, 2015 @ 5:35am 
@RespawningJesus I am a beta player that quit like a month after the game was released.I hit max level fast and was stomping newcomers in an enjoying way.Now that I wanna make a comeback into the game what weapons should I use,i heard homings got nerfed.I liked rockets tho.Thanks:D
RespawningJesus  [author] 6 Feb, 2015 @ 2:30pm 
Glad to see you are enjoying it so far. Some of the screenshots may be a bit outdated, but the tips should still help.
ExcessiveForce 6 Feb, 2015 @ 3:43am 
Very well written guide! I'll add it to my favorites and read through the whole thing as soon as I got the time.
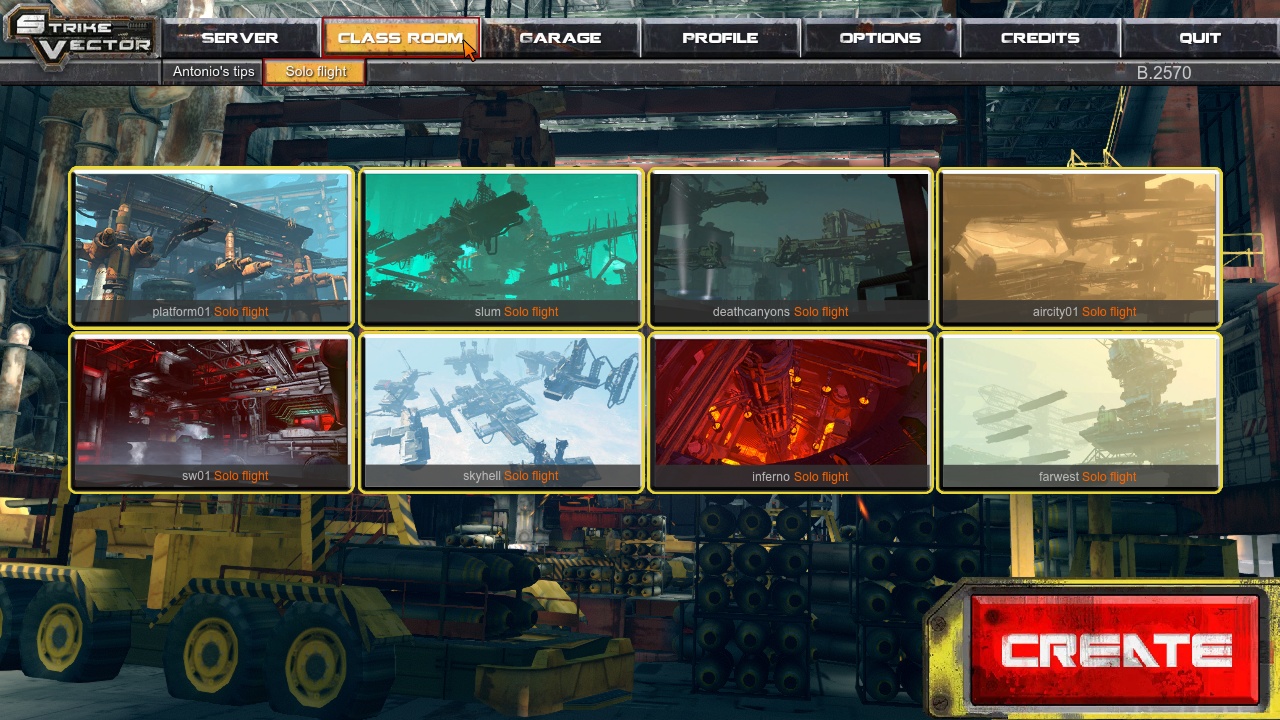
I was actually doing surprisingly well in my first two matches. Maybe because I played a few singleplayer flight games before. Strike Vector's flying model is more fun though. MUCH more fun.
Scorched 29 Jan, 2015 @ 9:49am 
Well done!
CommandoSifflard 18 Oct, 2014 @ 1:38pm 
Well done. Another tip : " Mystery Button " will reset your xp but you will have the next Prestige or rank. It can be usefull to know it.
GLaDOS 11 Aug, 2014 @ 8:24pm 
Thanks for fixing it, this is a great tutorial and it really helped me to enjoy the game, thanks alot ^-^.
RespawningJesus  [author] 11 Aug, 2014 @ 1:43pm 
Cold Fusion, thanks for telling me that the final image is missing. Luckily I saved it to my hard drive before the forum link went dead for some reason. I will try to get the image back up and running again.
Munchkin896 11 Aug, 2014 @ 11:00am 
cant even get game to run
GLaDOS 11 Aug, 2014 @ 9:46am 
Missing final image.