CARRION

CARRION

97 betyg
[Slightly Outdated] How to make Custom Levels
Av cuni
A guide for making maps, I'll see how advanced it gets but I'll keep it basic in the beginning.
24
6
3
   
Utmärkelse
Favorit
Favoritmarkerad
Avfavoritmarkerad
Intro
Hello! Welcome to my guide to basic/advanced mapping. I'm gonna teach you how to make your very own custom map! I'm not the best at describing so sorry if I make any mistakes, if I spot any I'll edit them!
Required files/programs
First of all the most important question: What do I need to start mapping?

Simple! You need Tiled [www.mapeditor.org]a free map editor you can download from https://www.mapeditor.org/
(The entire game is made in Tiled, did you know that?)

Once you got Tiled get yourself the latest Debug Map[drive.google.com] (V8 as of writing) by me for a collection of objects that you can then simply copy and paste into your level, as you can have multiple level tabs open.

Secondly the empty files[drive.google.com] are useful so you have a quick blank file with all the required Layers and correct settings.

Now, if you read this you should have Tiled and the Debug Map (and the empty files if you want).
If you do, continue reading.
Preparing for your first level
Obviously getting used to new programs and how they work can be problematic, but don't worry I'l ltry to keep it simple.

Now move your Debug Map and empty files into Levels and Scripts (.json in Levels; .cgs in Scripts).
Now let's continue, just for fun: open any level from the full game. Hm... there are alot of red crosses aren't there? We can sort that out, simply head to CMD (Carrion Mapping/Modding Discord)[discord.com], head to #tutorials and download the TileSet for the full game and put that into your Content folder under TileSets.

Or extract the tiles.xnb yourself. (Make sure to keep the tiles.png in your TileSet folder though!)

If the red crosses still appear where tiles should be, on your right there should be the tileset on the bottom, click on the wrench to go to their properties.

That should open a new tab, at the top click on TileSet -> TileSet Properties, that should change a tab on the left.

There it should say "Image" and then just select the tiles.png in your TileSet folder.
If you've done everything correctly your tileset should look like this.


Now the final step for preparation is... think of level idea! What do you want to create? What theme? How difficult will it be? It's easier to draw out a sketch before actually making your level, but since this is a tutorial for the basics, I'm gonna make a few simple square-rooms to show how it works.

Now let's get mapping!
Part 1: Making your first room room
Now let's start mapping!

Make a copy of emptyFix.json and emptyFix.cgs and name them how you want your level to be named, some names can cause issues like names with underscores ( _ ) in them or even spaces, so try to keep it one word. I'm gonna call my map SteamGuide.json and SteamGuide.cgs for simplicity sake.

Heres a few shortcuts that might come in handy:
Tile layer shortcuts (Require Background, BG-Details, Foreground or FG-Detais layer to be selected):
T - equip your Tileset brush; automatically connects to other tiles (you can also select it under Terrains)

B - equip a brush for single tiles; for fine details
E - erasor
R - select Tiles
F - fill in tiles
Del - delete selection


Object Layer shortcuts:
S - tool to select objects
Ctrl+D - duplicate selected object
O - edit polygons (more advanced)
Hold Ctrl - for snapped-moving (super helpful)
Hold Alt while resizing - snapped-resizing (super helpful aswell)
Del - delete selection


(thats all I can think of currently)

Alright let's place your first tiles. Make sure you're on the Foreground layer, press T and start outlining a simple room. You can hold shift, click at one spot (still hold down shift) and click at another point to make a straight line easily. Like this:


Now fill in the Background layer as well so it looks good:


Nice! The Collision is now ready.
Part 2: Making it playable
Now head into the Debug Map and look at the Chamber Category. And pick one that you like.


Select the one you want (For the Guide I'll use the Lab), press Ctrl+C (copy) go back to your map and press Ctrl+V (paste) to get it in your map, that is the whole point of the Debug Map:


Oh! By the way! Layers are really important! So keep every object on the right layer, if you're unsure what goes on what layer, click on the object in the debug map and it will say which Layer is the correct one. If an object is in the wrong layer it will most definitelly crash your game. (In this case it's obviously Chambers)


Now press S, select the chamber (if it isn't already) and hold down Alt while resizing it to overlap your Border tiles. (If you clicked it again when it was selected already it will go into rotate mode, simply click on it again and it should go back to resize mode) Like this:


(Remember not to make the chamber too big)

Now let's place the character in and see how it looks, shall we?
Go back to the Debug Map and grab yourself one of the "monsters" from the Starter Pack at the top.


Now head back to your level and paste it in. Remember what I said before about layers? Consider this your first test, figure out which Layer the monster goes into. Here's the solution: Objects.


Which brings me to another thing!
You may have noticed there are some similar layers, Objects and Objects+ for example. The "+" doesn't mean anything, it's just an additional layer for detailing. You can have objects in either the Objects or Objects+ Layer, it really doesn't matter.

Now that you have the player, a chamber and tiles in your map, it's already playable! Head in-game and load your map with "load_level (name)" in this case: "load_level SteamGuide" (capitalization doesn't matter, for more detailed level loading, check out my other guide on that if you haven't already).

Let's see what it looks like ingame.

Hey it worked! ...but it's very dark. Why don't we add some lighting?

Head back to the Debug Map, grab yourself one of the lamps and stick em into your map! You can also fiddle around with the lamp settings if you'd like (in the custom properties on the left).


Hmm... I suppose that's better but still a bit dark.


That's more like it. I increased it's radius and added 2 more.

Now let's make an actual goal for the level. All we need is atleast one checkpoint/hive and a goal object. Both can be found in the starter pack.


There we go! Now if I use the hive... the goal opens and the level is complete!


Wow! How simple it is to make a level in Carrion right?... right...? ....


...Oh fuc shi fu-
Part 3: Scripting
And of course... life is not simple. But scripting can be. (I'm only gonna go over simple scripting for now)

Phew... where do I even start? Let's just open a simple door.

Grab yourself a switch and a door from the Starter Pack and place them in your map.


Damn... now our beloved goal is behind a door.


Well why don't we flip the switch to open it? ..........it doesn't do anything. Let's make it do something!

Now your .cgs file comes in play. Open it up with any text editor, I recommend Notepad++ though.

Now we want to set up a simply "input -> output" system. But we need to somehow tell the game what is what, let's give the switch and the door both a unique name. Simply select them and in the tab on the left assign it a "Name", anything works, you just need to know what is what to not get confused in your own script. I'm gonna call them switch1 and door1. (Make sure you change the "Name", not the "Type" !)


Now back to the Script, remember when I said "input -> output"? It is quite literally that!

Just change input to your switch's name and the output to your door's name.

...just don't forget the semicolon at the end of the line ( ; )

Now save the file and head back ingame!

No way.

It works. (Atleast it should work)

Anyway, now you should know the basic principal of mapping. If you got any questions, ask them below or in the discord.
Part 4: Finding out what went wrong
If your game ever decides to crash you can open up the gamelog and see exactly what happened! The gamelog is located under \AppData\LocalLow\Phobia\Carrion\gamelog.txt! At the very bottom it should say the error, its a big pile of nonsense and one line of what the issue is, just fix the issue and you're good to go!

A second type of error can be if your game doesn't crash and no "input -> output" system works, that is most likely because you used a name that already existed or there is a simple misspell in the script, here you can simply open the console and read what the red line says.

If you happen to come across an error and have absolutely no idea how to fix it, post it in the Guide comments or ping me on CMD cuni#0001 so I can help you out.
The End
This is the end of the guide, I'm not good at explaining but I hope my dumbass made everything make sense and easy to understand. Feel free to ask questions if you need help.

- cuni
30 kommentarer
Huggestly 7 mar @ 16:57 
How do I transition the player between rooms?
Шпинат 15 nov, 2024 @ 7:01 
I couldn't understand why the game wouldn't launch the new version of the level, but it turns out I was in the wrong add-on:GDNormal:
Giraudo 13 aug, 2024 @ 14:19 
To anyone that somehow ended up here, this tutorial is 4 years old. And it was made before the Workshop integration update. So yeah, some things changed since then:
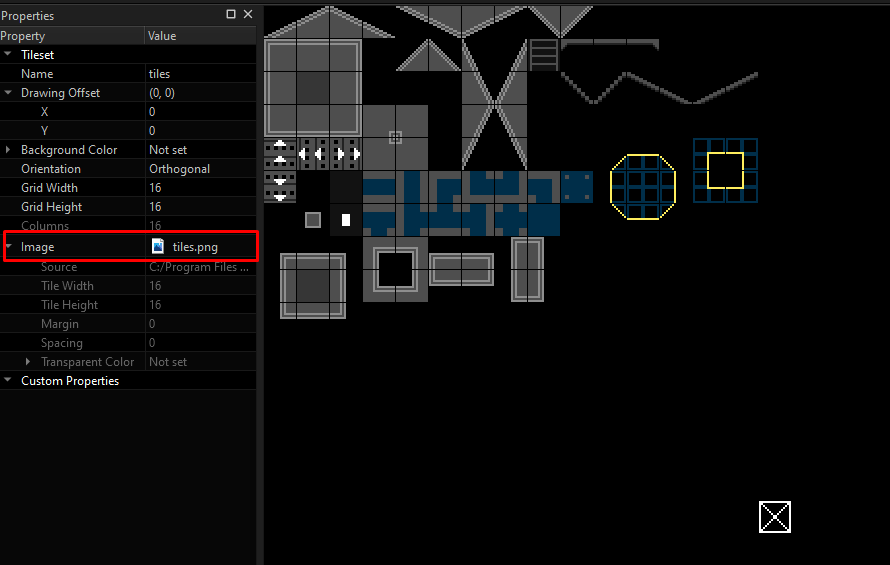
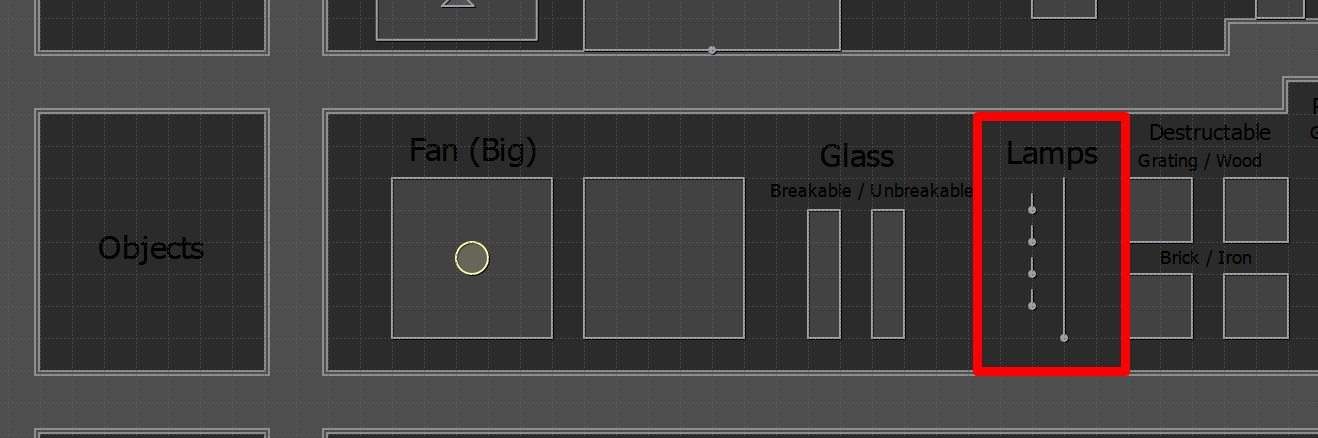
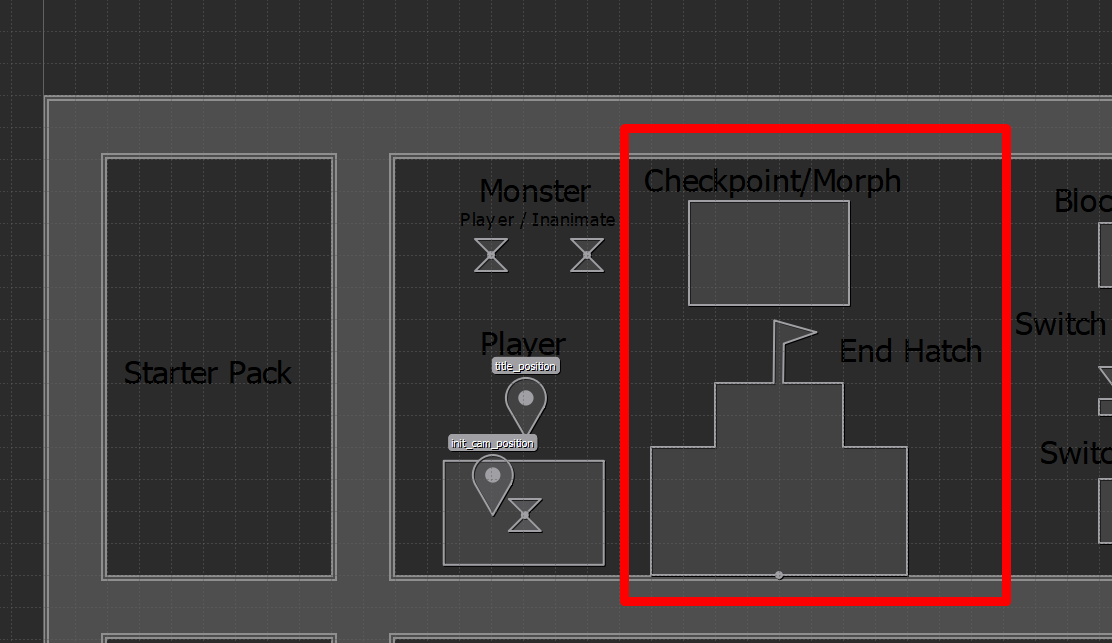
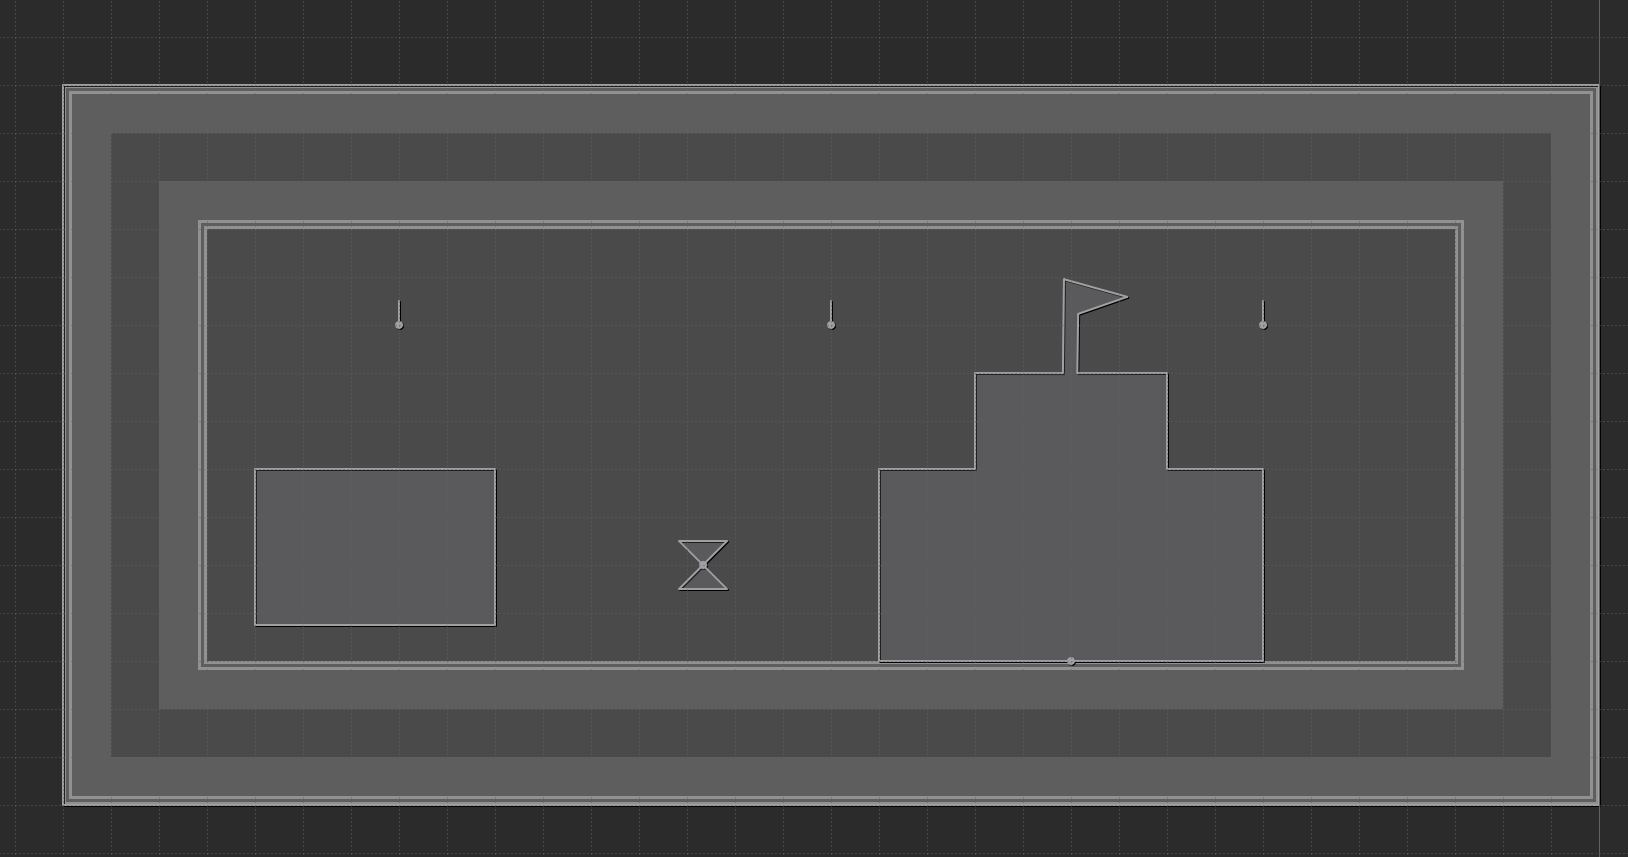
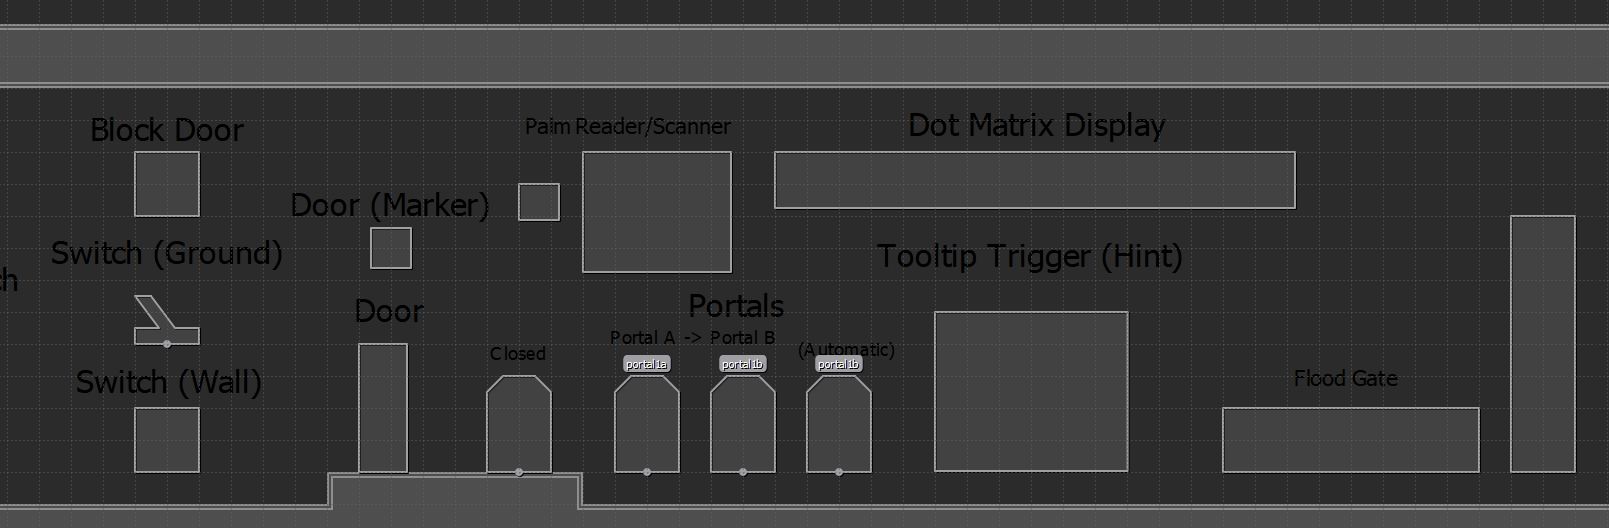
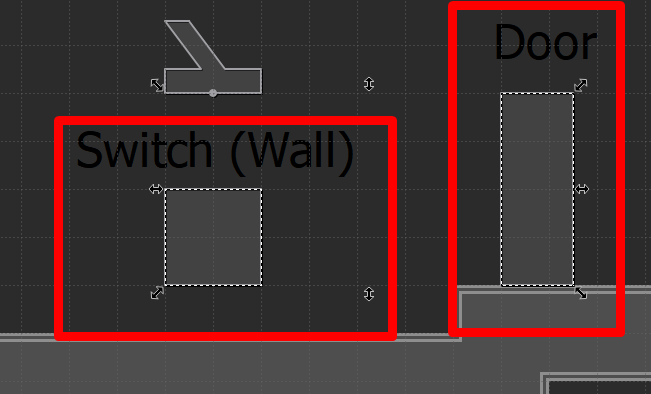
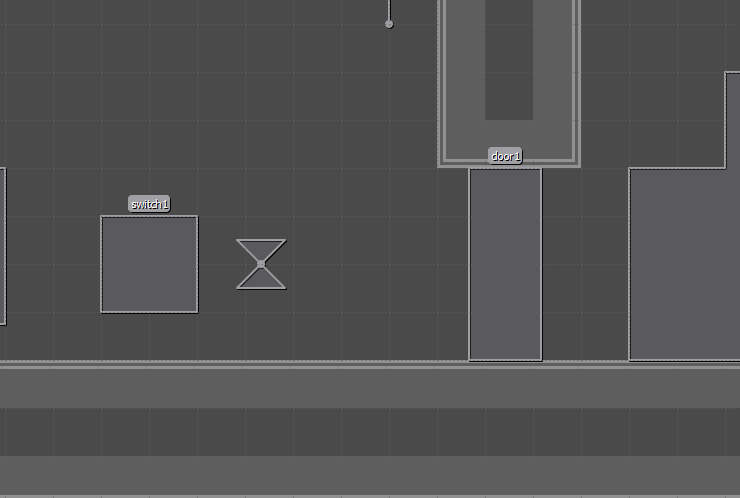
- You don't need the empty files anymore if you own the game on Steam. The UGC Toolkit generates everything for you now;
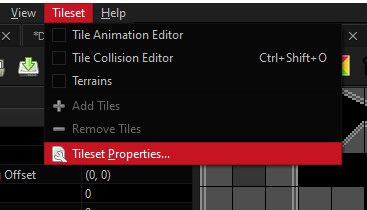
- Any version of Tiled newer than 1.8.9 will not work properly. They changed one property and it broke pretty much everything.
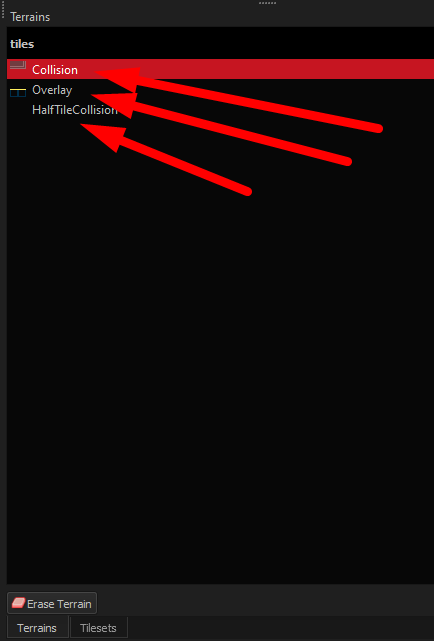
- You don't need to download and setup a TileSet or anything. It comes with the game now.

There are also a bunch more things, but for now, if you need a newer tutorial, here you go [carrion.wiki.gg].
Embassy Company (J.W) 29 feb, 2024 @ 0:46 
For some reason after i downloaded Tiled it did random things like crashing explorer and opening mail.
P0B 11 nov, 2023 @ 13:21 
i can't find the error in the GameLog.txt
ntap283 21 jun, 2023 @ 16:22 
:/ uhhhhhhhhhhhhhhhhhhhhhhhhhhhhhhhhhhhhhhhhhhhhhhhhhhhhhhhhhhhhhhhhhhhhhhh
Big pile of flesh 30 dec, 2022 @ 17:13 
i downloaded the latest version of tiled then i found out i needed 1.3.1 or around there so i downloaded that and now i have a UGC that wont open i require help
Paxtonvds 4 sep, 2022 @ 21:52 
Can you fix the google drive error for the empty files?
cuni  [skapare] 5 aug, 2022 @ 15:40 
get the devtools from the workshop, edit the textures, use the content pipeline to pack it back together and replace it in your games content folder
Tata 5 aug, 2022 @ 15:31 
make a guide on how to make reskins on the creature