Jet Lancer

Jet Lancer

64 ratings
100% Achievement guide (Jet Lancer)
By Aldahe
100% achievement guide for Jet Lancer. Includes tips for missions and bosses.
6
2
   
Award
Favorite
Favorited
Unfavorite
Introduction
Hey, welcome to my guide on how to get every achievement in the game. The aim of this guide is to clearly explain how to get each achievement so its easy to understand. I'll try to keep this guide as spoiler free as possible by not talking about the ending and using spoiler tags/warnings when mentioning the true ending route (explanation of how to get the true ending route will not have spoiler tags so I wouldn't recommend reading the true ending section if you want to find out yourself).

A lot of this guide will also be giving tips for ACE ranking missions and bosses as these will be required for getting the 2 hardest achievements in the game.

I would recommend doing atleast one playthrough before reading further as i'll be talking about a lot of the late game missions as well as most of the modules and weapons in the game.

I'd also recommend checking out horheristo's ultimate video guide for the game as it goes in detail on how each weapon and module works as well as showing a lot of hidden mechanics you may not notice. (This helped me a lot with some of the bossfights and achievements!)

https://www.youtube.com/watch?v=33AtjNdot1s


This will be my first guide so please leave feedback if there's anything I've messed up, left out or if certain parts of the guide don't make sense/need further explaining and i'll try to do the best I can to respond.

Story related (22)
These achievements are story related and cannot be missed. You'll get them by just progressing through the story on your normal and NG+ playthrough.

Do a Barrel Roll!
Complete the tutorial


Ball of Guns
Defeat FOOL


Snakes on a Plane
Defeat TOWER


20,000 Leagues
Defeat SWIFT REPLY


Keep Out of Reach of Children
Complete Babysitter Mission


Double Ugly
Defeat Hex & Lex


Tanks A Lot
Defeat STERN REBUKE


It's a bird, it's a plane, it's a... what?
Defeat MAGUS


MegaloArachnoRoboPhobia: Fear of Giant Spider Robots
Defeat EMPRESS


And Tonic
Meet Gin


In Brightest Day
Defeat BLACK KNIGHT


En Garde
Defeat STEEL RIPOSTE


Last Time Around
Begin New Game +


A Tool for Violence
Defeat FOOL in NG+


Loch Ness Monster
Defeat TOWER in NG+


Pequod's Folly
Defeat SWIFT REPLY in NG+


Three's A Crowd.
Defeat Hex & Lex in NG+


Blitzkrieg Bopped
Defeat STERN REBUKE in NG+


Think outside the box.
Defeat MAGUS in NG+


Kill it with Firepower
Defeat EMPRESS in NG+


Lancer to the Heart
Defeat BLACK KNIGHT in NG+


Pierce the Heavens
Defeat STEEL RIPOSTE in NG+
True ending (3)
Ashes to Ashes
Hack BLACK KNIGHT


Defcon 0
Stop the Nuke


From Hell's Heart
Defeat OMEGA RIPOSTE


These achievements are acquired by playing through the true ending route. To get the true ending route, first get to OP38 Black Knight in NG+. Before starting the OP, equip the Advanced Decryption Mod (the module that lets you hack faster and prevents you from being hacked) then start the mission.

After starting the mission, there'll be a hacking bar instead of a health bar on the boss, attack the boss to wake it up and then you'll be able to start hacking it by flying near it. Once you've completed the hack, you'll get the 'Ashes to Ashes' achievement and start the true ending path! The 2 other achievements here are obtained by finishing the rest of the missions in the true ending route.
Miscellaneous/Other (15)
These achievements can be missed and are acquired by performing certain feats during missions. I'll try to order these from common to rarest.

Hanging on by a Hair
Complete mission with one heart remaining


Pretty self explanatory, choose an easy mission like OP2, get close to finishing the mission then let enemies hit you until you're at 1hp then finish the mission. You'll probably just get this one while progressing the story.


Faceplant
Crash into the ground or ocean


Another achievement you'll easily get by just playing. Start a mission then dive head first to your death towards the ground.


Horseshoes and Hand Grenades
Fail bossfight when boss has less than 10% health


Choose an easy bossfight (the first one works fine), get them as close to 1hp as you can without killing them and then die. If you're as unlucky as I was in some bossfights then you'll probably get this by just playing through the story.


Blue Plate Special
Hit 5 different targets with unguided rockets


Equip the unguided rockets as your special weapon as well as the Precise Shooting Module to make their explosion radius bigger. Choose a level with plenty of enemies in it and then fire your unguided rockets at them once they get close to you.


Untouchable
Succesfully evade Megabeam in stealth mission


In OP22 Blinding Strike and OP23 Running Silent, there'll be a laser during the mission that will fire at you 3 times if you make too much noise. To get this achievement all you have to do is get the laser to fire at you by making a lot of noise (firing your weapons a lot) and evade roll all 3 shots that it fires without getting hit. Getting the timing right can be a little tricky but you can always re-activate the laser by making noise again after it finishes firing.


Tango Down
It takes 2 to tango (Win against Pierce in a duel)


In OP18 A Friendly Duel, Pierce will challenge you to a duel to see who can get the most kills. All you have to do for this achievement is get more kills than Pierce by the end of the mission, your rank in the mission is irrelevant. This achievement can be done on NG and NG+.

Recommended loadout: Railgun, Rocket Swarm, Afterburner mod, Charge weapon mod, Overheat blast


Weaponized Exhaust
Destroy an enemy jet with engine backblast.


To trigger an engine backblast, speed up, stop accelerating then turn 180 degrees and use the afterburner. You should see a noticable backblast from the back of your jet, this backblast is much bigger if you're going faster and it can damage enemies.

To get this achievement, you just need to destroy an enemy jet with that backblast. Equipping the Afterburner mod can also help here as it will increase the damage of the backblast and let you use the afteburner for longer.
Miscellaneous/Other continued
Taking off the Training Wheels
Complete a mission with no training modules equipped.


At the start of the game, you're equipped with 3 modules by default (Emergency Stall mod, Evade mod and Shield mod). To get this achievement, unequip these modules and complete a mission, it doesn't matter if you use other modules for this as long as you don't use any of the 3 default ones.


Brace for Impact
Slice through multiple enemies with a single dash


Equip the Dash module, this module will replace your evade roll with a dash which can damage enemies that you dash through. To get this achievement, you just need to dash through 2 enemies at once with a single dash. I'd recommend choosing an OP with a lot of enemies in it like OP37, waiting until they group up around you then hitting several of them with 1 dash.


Worst Idea Ever
Have 20 player owned rockets hacked in one mission.


Throughout the game, there is an enemy type that can hack your guided missiles after firing them and redirect them towards you (their enemy symbol will look like a bunch of 0s and 1s). To get this achievement, you'll need to have 20 of your own guided missiles hacked in a single mission (make sure you don't have the Advanced Decryption mod equipped as that'll massively slow down the speed at which your missiles are hacked).

Equip the Guided missiles special weapon and the Rocket swarm charge weapon then choose a mission where they spawn (OP31 will spawn one right at the start). Then just stay near them and spam your rocket swarm/guided missiles and they should be hacked immediately, keep spamming missiles until you get the achievement.


Automation
Use a drone to hack an Objective.


The drones that spawn by using the Autonomous drone charge weapon can speed up hacking as long as they are placed inside the hacking zone. To get this achievement, you just need to have one of the drones inside the hacking area when the area is fully hacked.

Equip the Autonomous drone charge weapon, choose a hacking mission (OP2 will have the least amount of enemies) then place the drones inside the hacking zone and make sure they're kept alive while the hacking finishes.


Whiskey Tango Foxtrot
It takes 200 to Whiskey Tango Foxtrot


In OP37, destroy 200 enemies*.

*This is a guess based on the achievement's description. I'm not too sure on the details of this one as I just got this achievement on my first playthrough upon completing OP37. If somebody could clarify exactly what you need to do, that'd be extremely helpful!


Jack of all Trades
Complete any mission with autoroll and dash module equipped


Self explanatory, equip the Autoroll and Dash module then complete any mission.


Be Efficient
Finish any mission with an accuracy rate of 90% or higher


Also self explanatory, I'm not sure if accuracy only counts your minigun accuracy or also counts your special/charge weapon accuracy too but just to be on the safe side, make sure to be 100% accurate with both your minigun and your special/charge weapons. (If someone can confirm which one it is then i'll update this).

The best way to do this is to either pick an easy mission like OP2 and take down a few enemies while making sure your accuracy is pinpoint precise or choose a boss battle with a huge hitbox like SERPENT(OP10) as it'll be difficult to miss. (I got this achievement while fighting the NUKE boss).


Don't make the same mistakes twice.
Cause BLACK KNIGHT to self-destruct


Similair to the method you use to acquire the true ending route except you do it on normal instead of NG+.

Equip the Advanced decryption module (the one that increases your hacking speed and prevents you from being hacked), begin OP38 Black knight on your normal playthrough. After starting the mission, there'll be a hacking bar instead of a health bar on the boss, attack the boss to wake it up and then you'll be able to start hacking it by flying near it. Once you've completed the hack the boss will self-destruct and you'll get the achievement (since you're not doing this on NG+ you won't get the true ending route).
ACE achievements (2)
ACE
ACE all missions in Story Mode


ACE+
ACE all missions in NG+


The hardest achievements in the game, to get these achievements you must ACE every mission on your normal playthrough and your NG+ playthrough.


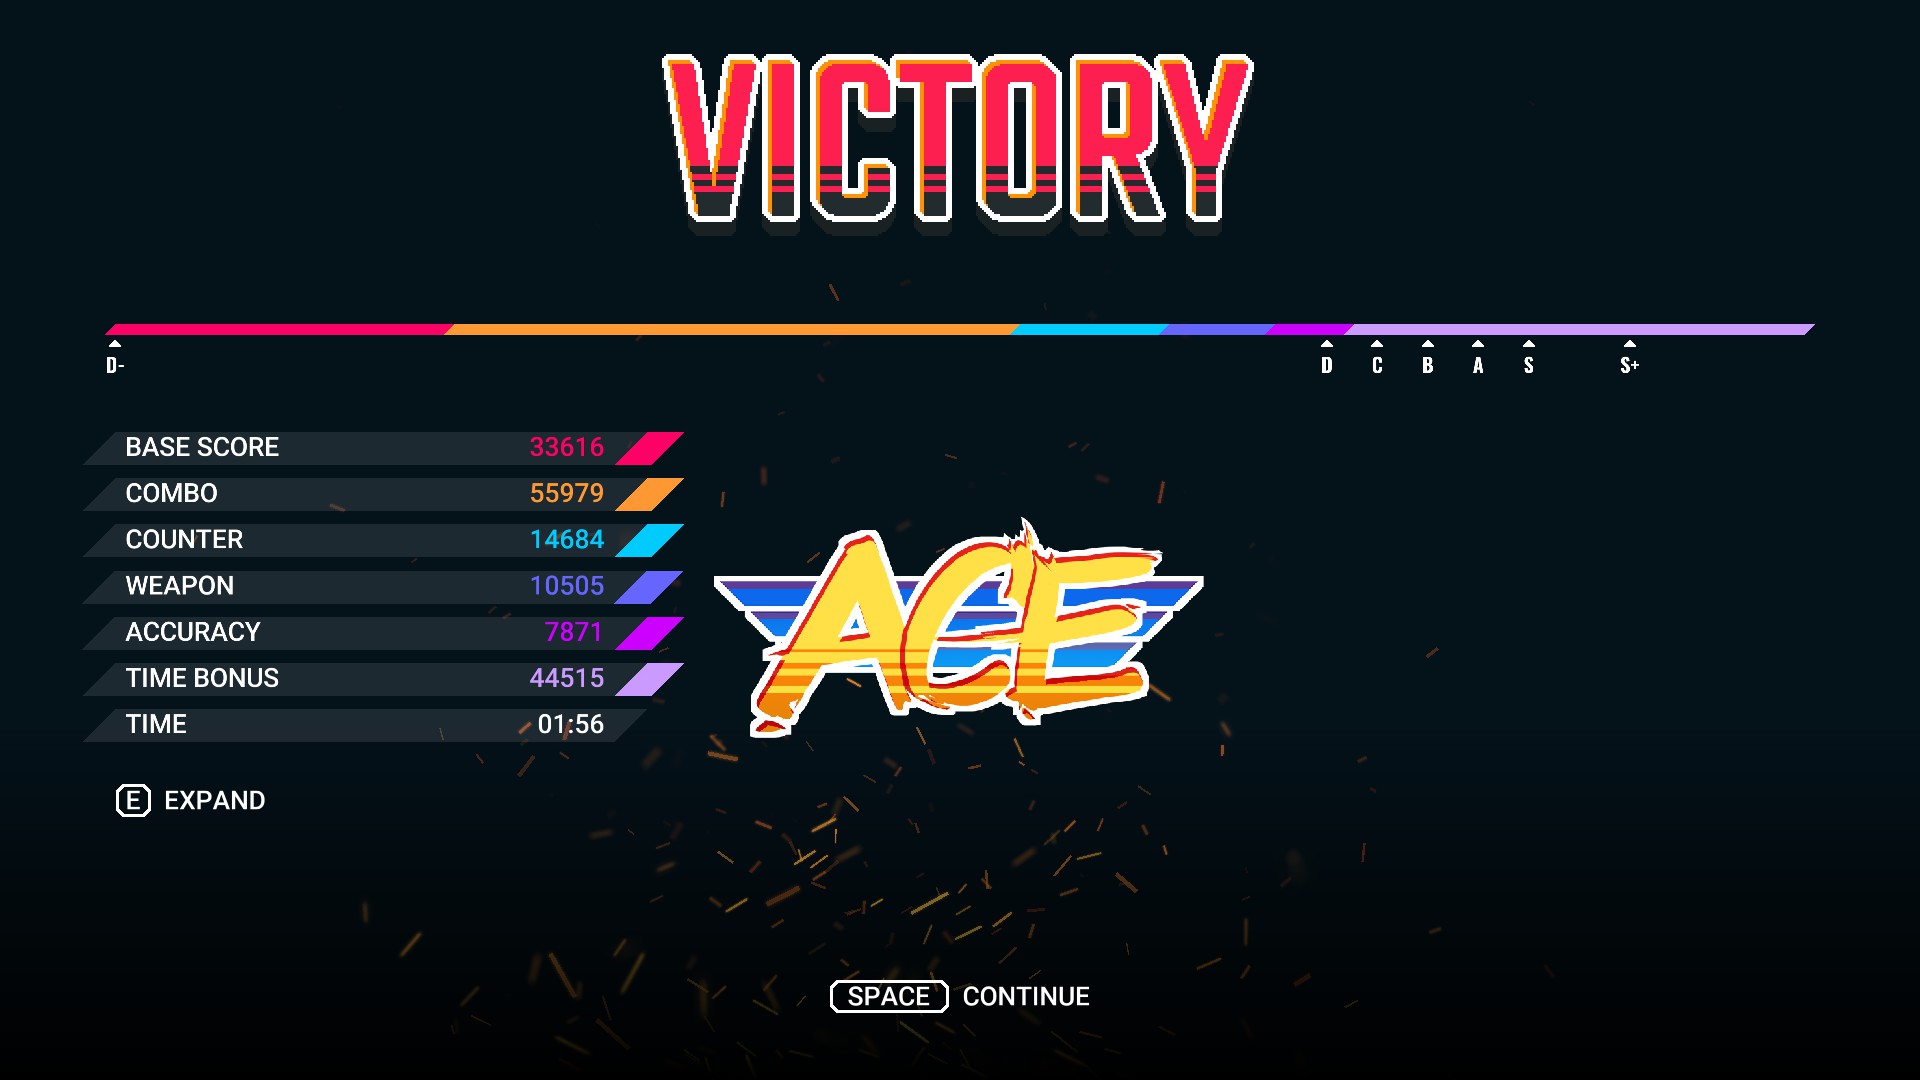
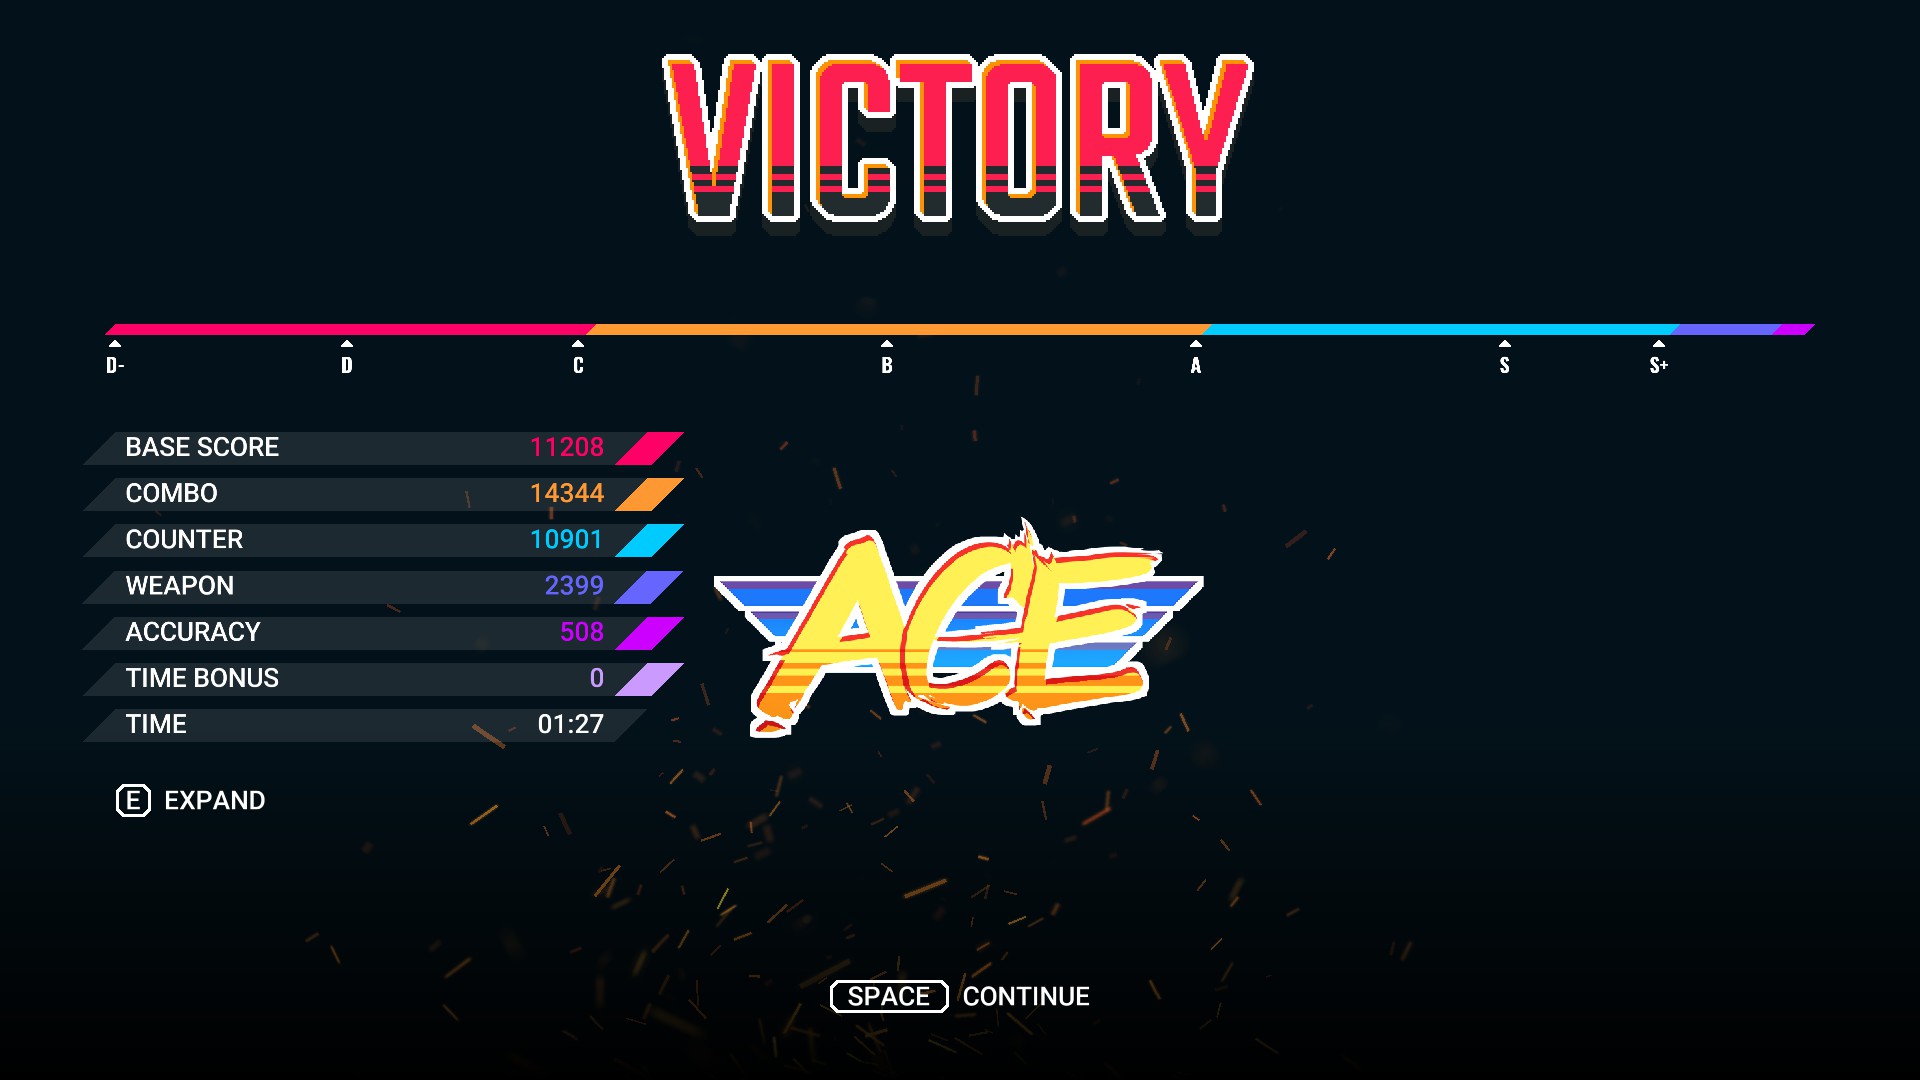
To ACE a mission you need to obtain a high enough score to get an S+ rank AND take no damage during the mission.

Some important notes about acing missions before getting into general tips:
  • Equip the ACE module for any mission that you're trying to ACE. The ACE module will reduce your hp to 1 but give you some nice bonuses like increased speed and increased minigun damage. Since you can't take any damage when acing a mission, you may as well equip this module since it takes up no space in your payload.

  • You'll probably be doing this anyway but make sure to finish a mission before trying to ACE it. Once you finish a mission, if you play it again you'll see a letter on the right side of the screen that tells you your current rank for the mission, this is extremely helpful in boss fights as it'll show the time remaining before you lose the S+ rank. If you try to ACE a mission on your first attempt, this rank won't appear at all, its still doable without it but having the rank displayed during the mission makes acing missions much easier.

  • Guided missiles and Rocket swarm will give you a lower score at the end of a mission so avoid using these as much as possible.

  • Your ranks in boss fights are based on how much time it took to defeat them instead of score so you'll want to be focusing on bursting them down as quick as possible. Accuracy, combo, and counter points will be irrelevant.

  • In scoring missions where you're supposed to reach a target score within a limited amount of time, you can leave the area as soon as you hit the target score by flying to the far left or right side of the screen. This is extremely important as most of the score you get in these missions will come from the time bonus you get by leaving the mission early.


Tips for acing missions
The next part of this guide will be split into 2 sections, one for giving tips on how to ACE most of the mission types throughout the game, the other will give tips on how to ACE the boss levels. I'll be showing the loadouts I use as well as tips and tricks I've come across while playing. I'll be updating these sections if I find any more tips/tricks while playing.
Mission ACE tips (part 1)
Missions
This part of the guide will be giving as many tips as I can on the different mission types you'll encounter throughout the game and how to ACE them.

Mission scoring explained
Before looking at the mission types, I'll be discussing each of the scoring categories here and which ones are the most important.
Most of this is based off speculation, testing done in missions and personal experience with acing missions, so feel free to correct me in the comments if there's anything I get wrong.

  • Base Score - The score you'll get by just destroying targets. Larger vehicles such as tanks, boats, bombers and gun platforms are worth much more points than regular enemy jets. Since 90% of the missions require you to destroy all targets, this isn't a scoring category you'll have to worry about.

  • Combo - The second most important scoring category. Whenever you destroy an enemy, you'll get a combo multiplier for a few seconds, chain multiple kills together to maintain and increase the multiplier to keep your score high.

    The best way to make the most of this is to wait for enemies to group up then destroy them all at once. You can also use the Autonomous drones as a temporary way of keeping your combo multiplier active while you go off and chase other targets.

  • Counter - Arguably the most important scoring category. Whenever you evade roll through a missile, enemy projectile or an enemy's hitbox, you'll gain a score multiplier for around 10 seconds, your minigun bullets will also turn yellow and fire faster briefly. The extra score gained through this multiplier is crucial to getting S+ ranks (especially on NG+).

    The general rule to follow for this during missions is to never kill an enemy unless you have this multiplier active. The dash module can also make it easier to trigger the multiplier as you just need to dash through an enemy/enemy projectile to trigger it (though I've personally never used it) . This is especially important in missions with boats, tanks or bombers that you have to take down as having that counter multiplier active while destroying them will be crucial to getting an S+ rank.

  • Weapon - Based on how much enemies you kill using your special and charge weapon. As long as you use your special and charge weapon regularly (and land kills with them often) then you won't have to actively focus on this category. Also, as said before, never equip the guided missiles or rocket swarm as these will massively reduce the score you get in this category.

  • Accuracy - How accurate you are. As long as you're not holding down the fire button all the time and only fire when necessary then this should remain high.

  • Time bonus - It's up to you whether you go after this bonus or not, I personally ended up having this at 0 in around 90% of the missions I ACE ranked. It's mostly important in scoring missions where you can leave the mission early upon hitting the target score and gain a massive bonus. In non-scoring missions, getting this bonus will require you to speed through the mission ridiculously fast, often giving up on some of the other scoring categories to do so.

    Whether you want to go for this bonus or play it safe and focus on the other categories is down to personal preference. Sometimes this category can be the crucial difference between an S rank and an S+ rank but going after it can also reduce your score in other categories as you'll have to focus less on being accurate and having the counter multiplier active when speeding through a mission.

As of the arcade mode update, there's now 2 meters at the top right of the screen that show your combo and counter multipliers. This is very helpful as it'll show you your current score multipliers and how long you have until they run out.


Hacking missions
These missions are the easiest to ACE rank as they're only dependent on the time taken to complete them.
Recommended loadout: Unguided rockets, Autonomous drones, Afterburner mod, Charge weapon mod, Advanced decryption module, Overheat blast

Once you start the mission, get to the hacking zone as quickly as possible using your afterburner and spawn your drones inside the hacking zone as they'll increase the hacking speed as long as they're kept alive.

Stay inside the hacking zone while fending off nearby enemies and use evade roll as much as possible to avoid damage as the hacking completes, then quickly move to the next zone and repeat the same process of spawning your drones inside and staying inside it while the hacking finishes.
The Overheat blast module will be extremely helpful in keeping enemies away from you while in the hacking zones as it will destroy all low hp enemies and clear all bullets from the nearby area when it is triggered.


Scoring missions
In these missions, you need to hit a certain target score in a limited amount of time while enemies infinitely respawn. As said earlier, you can leave the mission early by flying to the far left or ride side of the screen once you reach the target score.

Acing these missions will require a mix of reaching the target score as quick as possible while also maintaining your combo throughout the mission to get a high combo score.

Recommended loadout: Unguided rockets, Autonomous drones, Precise shooting module, Afterburner mod, Charge weapon mod and Overheat blast

At the start, fly towards wherever the enemies are grouped up the most, drop your drones right in the center of them and then fly away and start chasing other targets. Repeat this process whenever your drones are ready again. By doing this, the drones will take out the enemies in that area and maintain your combo while you go off and chase other targets.

From here, utilize your afterburner to reach enemy targets quickly as well as the Overheat blast to take out huge waves of enemies. The high damage from the unguided rockets will be helpful for dealing with high hp targets such as the sniper jet.

The rank at the top right of the screen will show your current rank in the mission and will include the time bonus you get by leaving early. So if this still isn't S+ by the time you've hit the target score then you will need to stay in the mission until it is.


Mission ACE tips (part 2)
'Keep enemy presence low' and 'Clear enemy area' missions
'Clear enemy area' missions are the most common mission throughout the game and are basically wave clearing missions. Sometimes these missions will only have 1 huge wave of enemies you'll have to clear but other than that they'll mostly be the same.

'Keep enemy presence low' missions will have enemies continuously spawn while a timer counts down. You'll have to make sure not to let too many enemies spawn in otherwise the mission will fail, but these missions are effectively just score attack missions.


Recommended loadout: Unguided rockets, Ultrabeam, Charge weapon mod, Precise shooting module, Overheat blast, Alt fire switch

The bulk of your score in these missions will come from the 'counter' and 'combo' score categories. For this reason, the best strategy I've found for S+ ranking these missions is this:

  1. Stay near the middle of the area in a mission.
  2. Don't shoot at any enemies and instead, wait for them all to spawn and group up near you.
  3. When ready, evade roll through a nearby enemy or projectile to gain the counter multiplier and fire everything you have at all nearby enemies. (The Overheat blast module is especially helpful here for clearing huge groups of enemies).
  4. Repeat step 1

With this strategy, you'll be getting both counter and combo points at the same time when firing everything you have at nearby enemies, after doing this process several times you'll rack up a massive amount of points and should get an S+ rank.


Even when using this strategy though, the scoring requirements for S+ ranking some of these missions is extremely strict (especially in NG+) and will be difficult to pull off.


OP20 and OP26 ('Stop enemy bomber' missions)
These two missions play out like most wave clearing missions except in some of the waves, one or several bombers will spawn and continue to drop bombs until they're destroyed. Failing to destroy the bombs before they land will fail the mission.

Recommended loadout: Unguided rockets, Ultrabeam, Afterburner mod, Charge weapon mod, Precise shooting module, Overheat blast mod (A fully charged Ultrabeam will destroy a bomber in one shot!)

The best way to tackle these missions is to ignore all other enemies and focus the bomber(s) first once it spawns, making sure to evade roll through either a nearby projectile or the bomber itself to trigger the counter multiplier before destroying it as the points they give you will make up a lot of your score in these missions.
Boss ACE tips (part 1)
This section had to be split into 3 parts due to exceeding the word limit.

Bosses
This part of the guide will be focusing on acing bosses and the fastest way to take them down. This part will also assume you're fighting the NG+ version of the bosses (since they're upgraded versions of the normal playthrough bosses, all strategies mentioned here can also be used on their normal versions too).

Hitbox Weaving
Before going further i'll mention this strategy as its extremely helpful in bursting down bosses quickly for the S+ rank.

Hitbox weaving (i'll try to come up with a better name for this strategy :P) is when you evade roll while inside the boss' hitbox so that you gain counter damage (your bullets will turn yellow for a brief period of time and fire faster to indicate this). This strategy is essential to getting ACE ranks in some of the boss fights (namely MAGUS, EMPRESS, STEEL RIPOSTE and OMEGA RIPOSTE).

To give an example, say you're fighting against the first boss, FOOL, while its in the air. Fly straight towards the boss and as you're about to collide with it, use your evade roll. The invinicibility frames from the roll will ensure you won't take damage while inside the boss' hitbox. Shortly after leaving the boss' hitbox, turn 180 degrees and start firing your minigun to get the most out of the increased fire rate. Keep repeating this process throughout the fight and you'll get a huge increase in your overall damage dealt.


I highly recommend watching horheristo's video of him acing all of the NG+ bosses as he shows this strategy perfectly. You can also get a good general idea of how to fight each boss quickly from this video. I'll be including my own strategies as well but try both and see which one you prefer!

https://www.youtube.com/watch?v=r6REkAwVvhk


Note: For some of the loadouts used, I've only mentioned 3 modules. You can use whichever module you want for the fourth one, some people prefer using Supercharged gunpowder and/or the Dash module but I've personally found them too unreliable (though Supercharged gunpowder can be helpful against a few bigger targets like SWIFT REPLY and NUKE).


FOOL (OP5)
Loadout: Unguided rockets, Autonomous drones, Charge weapon mod, Precise shooting module, Eye of the storm mod.

Despite being the first boss, this fight can be a little tricky to ACE because of how little time is given to defeat him. At the start of the mission, charge towards FOOL as fast as possible while evade rolling his laser when it fires.

Once reaching him, deploy your 3 drones as close as possible to him as these will be the main bulk of your damage. Then keep circling around him while firing your minigun and spamming your unguided rockets as much as possible and you should be able to defeat him shortly after he starts ascending.


SERPENT (OP10)
Loadout: Unguided rockets, Ultrabeam, Charge weapon mod, Precise shooting module, Alt fire switch, Overheat blast (Alt fire switch will make the Ultrabeam fire a line of explosives after its initial shot which can be helpful in removing a lot of SERPENT's armor plates).

Overheat blast will make acing this bossfight hilariously easy.

At the start of the mission, charge up your Ultrabeam to max, once SERPENT leaps out of the water, try to line up the beam so that it hits as much of him as possible and fire. Unload any unguided rockets you have at him as he's diving back into the water. At this point use your afterburner and get it as close to overheating as possible without it actually overheating.

When SERPENT re-emerges, get close to him and trigger your Overheat blast so that it hits as much of his armor plates as possible. This should easily take out atleast 50% of his hp in a single blast. The rest of the fight will just be unloading your unguided rockets and Ultrabeam into him when you can and using Overheat blast whenever its off cooldown.


SWIFT REPLY (OP13)
Loadout: Unguided rockets, Dumb bomb, Charge weapon mod, Precise shooting module, Alt fire switch, Eye of the storm (The alt fire switch will turn the Dumb bomb into a cluster bomb)

The main strategy here is to stay above the ship while firing off your unguided missiles, minigun and Dumb bomb. Keep in mind that you'll have to go quite far up if you want the Dumb bomb to split into multiple smaller bombs before exploding. Also make sure to focus hitting the left side of the ship where the turrets are located as that'll have the most targets so you can maximise the damage you're dealing.

If SWIFT REPLY submerges then launch a Dumb bomb at the point where it submerged (where the icon for the boss is) and it should re-emerge after a few seconds. As long as you can see the enemy icon underwater then you'll be able to hit it with your Dumb bomb.

If the enemy icon disappears while underwater then it means that it has fully submerged and won't re-emerge for a while, at this point you will have to restart as you won't have enough time for your ACE rank to wait for it to re-emerge.


Hex and Lex (OP17)
Loadout: Unguided rockets, Ultrabeam, Charge weapon mod, Precise shooting module, Eye of the storm

One of the more annoying bossfights to ACE rank as you're expected to take down 2 mobile targets extremely quickly. The best strategy I had for this fight was to get them to chase you while you're firing at them, to do this: fly away from them in one direction then stop accelerating, turn your plane 180 degrees and start firing so you're basically flying backwards while shooting in the opposite direction.

Try to focus 1 at a time and fire everything you have at them, if you're really lucky you can hit both planes at once with a charged Ultrabeam.

Horheristo's video shows this strategy being used to great effect (timestamp for when he does this is 3:57). https://www.youtube.com/watch?v=r6REkAwVvhk&t=3m58s


STERN REBUKE (OP24)
Loadout: Unguided rockets, Autonomous drones, Precise shooting module, Charge weapon mod, Eye of the storm

The main tactic here will be similair to FOOL/SWIFT REPLY, fly towards the tank while charging your Autonomous drones mod and deploy them as close to the tank as possible then circle around the tank while firing your minigun and using your unguided rockets. The main lasers the tank fires won't damage the drones so you won't have to worry about that.

Another thing to keep in mind is that this boss has multiple parts on it that explode if enough damage is taken and can't be damaged anymore afterwards. By the time you've dealt about 3/4 of the boss' health, the only part you'll be able to damage is the main tank gun. At this point, make sure to place your drones right above the gun so all their shots hit it, if you place them too far to the left or right then they'll just attack the damaged parts which won't do any damage.
Boss ACE tips (part 2)
MAGUS (OP28)
Loadout: Unguided missiles, Ultrabeam, Charge weapon mod, Precise shooting module, Kinetic rod ammo, Alt fire switch (Alt fire switch will make the Ultrabeam fire a line of explosives after its initial shot which can be helpful in hitting MAGUS' core early on and will do a lot more damage later in the fight).

Arguably one of the hardest bosses to ACE rank due to how little time is given (50 seconds or less for ACE rank) and how you'll need to be playing extremely aggressively against him all the time.

Fly towards MAGUS while charging up your Ultrabeam then fire once you get close enough as well as firing off all your unguided rockets. From here, circle around the boss while firing at him and evade roll through the corners of the box to gain counter damage.

Several seconds after doing this, the boss should go into repair mode where its armor plates split and the core is exposed, this will be the most important part of the fight. Start firing away at the core with everything you have while evade rolling either near the core or the armor plates to gain counter damage. You can easily shave off 50% of the boss' hp in this phase. Make sure to leave as this phase ends when the armor plates rejoin with the core.

By this point your Ultrabeam should be ready again, charge it up and fire it at MAGUS. His core will be more exposed now so the Ultrabeam should deal a massive amount of damage, keep firing at him as well as spamming your unguided rockets and he should enter the repair phase again fairly quickly. From here its just a matter of repeating what you did before and finishing him off.

This strategy will be very hard to pull off without dying and will require a lot of practice and patience.


EMPRESS (OP32)
Loadout: Unguided rockets, Autonomous drones, Charge weapon mod, Precise shooting module, Kinetic rod ammo, Overheat blast

A relatively difficult bossfight that can be annoying to ACE rank.
Its worth mentioning that the core of EMPRESS (the section that the pods and missile launchers are attached to) won't deal any damage to the boss when shot so don't bother shooting this at all.

Phase 1: The easy phase, charge towards the boss, unloading all your unguided rockets and deploying your drones when close to the pod. Circle around the pod firing at it while evade rolling through it when possible and it should go down within a few seconds.

Once the pod is destroyed, focus on taking out the 2 missile launchers on EMPRESS before the next phase begins. Taking these out early will make the next phases much less annoying to deal with.

Phase 2: In this phase, 2 blade arms will be attached to the pod and you'll have to attack both of these until they blow up and end this phase (attacking the pod itself deals no damage). The 2 arms that connect the blades to the pod will each have about 10 targets on them (each target being a part of the arm).

Similair to the SERPENT boss fight, the Overheat blast module will make this part extremely easy. As the pod is landing on EMPRESS, start using your afterburner and get it as close to overheating as possible. Once the pod lands and the arms come out, get as close to the arms as you can and trigger your Overheat blast, it should hit all targets on both arms and cause a massive amount of damage. Repeat this process 2 more times and both arms will go down and the phase will be over.

Phase 3: The main goal in this phase is to destroy the pod as quickly as possible before it launches too many rockets at you. Focus fire on the pod as much as possible when it spawns in and deploy your drones right above it as its landing on EMPRESS. From here it'll just be the usual strategy of circling around firing at the pod and evade rolling through it when possible.
Once the pod is destroyed, take out any remaining rockets before phase 4 starts.

Phase 4: Like in phase 3, focus fire on the pod as its about to land on EMPRESS and deploy your drones above it as it lands. The rest of this phase will again be the usual strategy of circling around the pod, firing at it and evade rolling through it when possible. This phase can be slightly luck based since some of the bullet patterns the pod fires are nearly impossible to dodge.


BLACK KNIGHT (OP38)
Loadout: Unguided rockets, Ultrabeam, Precise shooting module, Afterburner mod, Charge weapon mod, Spreadshot

ACE ranking this mission can be a real pain because of how little time you're given to destroy BLACK KNIGHT (40 seconds or less if you want S+ rank).

The main thing to take advantage of in this mission and is key to getting you the ACE rank is the fact that at the start, BLACK KNIGHT will remain immobile and won't start moving until you shoot it (and it will take a few seconds to wake up after you shoot it).

Fly towards BLACK KNIGHT while charging up your Ultrabeam and continuously firing your minigun, once you can see him, fire your Ultrabeam and fire all your unguided rockets. If you pull this off accurately, you should get his hp down to 50% as he wakes up.

The rest of this fight will mostly be chasing BLACK KNIGHT while using your unguided rockets/Ultrabeam whenever they're off cooldown. The Afterburner mod will come in handy when chasing him down and the Spreadshot will increase your minigun damage while doing this. This part of the fight will mostly just take a lot of practice and retries to get right.


STEEL RIPOSTE (The Final Retort)
Loadout: Railgun, Ultrabeam, Afterburner mod, Charge weapon mod, Kinetic rod ammo (Autonomous drones are too unreliable here because of how much STEEL RIPOSTE moves around. I'm using Railgun instead of Unguided rockets because Unguided rockets have a wierd habit of blowing up as soon as you launch them if you're near STEEL RIPOSTE, dealing no damage at all).

Start charging towards STEEL RIPOSTE with your Afterburner while charging your Ultrabeam, angle yourself up slightly so that you'll pass overhead. As you're passing overhead, fire your Ultrabeam at him, this should slow you down a lot and put you in a good position to start firing away at him. Fire your minigun and all your railgun shots at him while trying to stay above him as much as possible. You should get through this phase fairly quickly. After he ascends into the clouds, stay as close to the clouds as possible to save time as you proceed to the next phase.

The rest of the fight will mostly be circling around STEEL RIPOSTE, firing your railgun shots and Ultrabeam whenever they're off cooldown and evade rolling through his hitbox to gain counter damage when its safe to. Attacking the main body isn't essential and you can still easily beat him in enough time to get the S+ rank by remaining away from him and just attacking one of his blades instead.
Boss ACE tips (part 3)
SPOILERS AHEAD
This next section will cover the true ending boss fights, turn back now if you haven't completed the true ending route yet.


NUKE (Never Too Late)
Loadout: Armor piercing shells, Ultrabeam, Charge weapon mod, Supercharged gunpowder, Eye of the storm, Alt fire switch (Alt fire switch will make Ultrabeam fire a line of explosives after its initial shot, this will deal HUGE damage against the nuke if you line it up right!)


This fight is mostly just tedious more than it is challenging. The main strategy in this fight is to stay in the middle and just use evade roll whenever you see that a bullet is going to hit you (you will need to start dodging the bullets in the final phase as the bullet patterns get too fast to evade roll).
You can try dodging the bullets in the first few phases if you can see a bullet pattern that looks too tough to evade roll but most of the time this will just put you into a worse position and kill you.

To maximise damage output and destroy the nuke as quick as possible for the ACE rank, keep your minigun firing all the time, spam your Armor piercing shells and use your fully charged Ultrabeam when they're off cooldown. Make sure to line up your Armor piercing shells and Ultrabeam to hit as much of the nuke as possible for maximum damage (thanks to D3adNight for pointing out that Armor piercing shells work much better against this boss than unguided rockets do.)

Eye of the storm will be especially useful here as you'll almost always be near projectiles. Supercharged gunpowder will also increase your damage output and you won't notice the pushback at all in this fight as long as you keep your thrust on at all times.

Side note: This is also an excellent mission for getting the 90% accuracy achievement on as its very difficult to miss the nuke


OMEGA RIPOSTE (The End)
Loadout: Unguided rockets, Autonomous drones, Charge weapon mod, Precise shooting module, Kinetic rod ammo, Eye of the storm

The true final boss of the game as well as one of the hardest bosses to ACE rank. You'll have to stay close enough to the boss to deal enough damage in time to get the S+ rank but you can't stay too close otherwise most of its attacks will kill you instantly.

At the start, charge your drones so that they're ready to be released once the fight starts. For the initial chomp attack at the start, only evade roll once the jaw is fully clenched and you should be able to dodge this every time (its helpful to know the exact timing for the evade roll since you'll probably be restarting this boss fight around 30 times atleast). After this, immediately fly downwards as OMEGA RIPOSTE will always spawn below you after the chomp attack.

Release your drones as close to OMEGA RIPOSTE as you can as well as unloading all your unguided rockets at him too. The rest of this fight will be similair to STEEL RIPOSTE where you'll be circling around him, firing your minigun and unguided rockets while weaving in and out of his hitbox to gain counter damage when possible. Keep your distance when he's about to attack though as some of the attacks can be fast and catch you by surprise (namely the attack where he shoots multiple streams of bullets outwards).

As stated before in the previous bosses, this will just take a huge amount of practice and patience.
Credits
  • The developers for making this awesome game!
  • horheristo for letting me use his videos in this guide, you can check out his channel here: https://www.youtube.com/user/horheristo/
  • D3adNight for pointing out that Armor piercing shells work much better against the NUKE boss than unguided rockets do.
  • punished bowie for finding the requirements for the Tango Down achievement

Feel free to add your own tips and tricks in the comments and i'll add them to the guide and give you credit for it.
16 Comments
Jynxx 21 Jan @ 5:51am 
Idk if the op or anyone is still playing this game but there is a easy way to ace Magus in like 26 seconds. All you have to do is trick it into doing its attack where it tries to ram you close to the ground and it's health evaporates.
Avi8 14 Nov, 2023 @ 4:05pm 
One warning about the dash module: It heats up your engine and, more importantly, CANNOT BE USED WHEN OVERHEATED. Make it count, manage your heat.
Vantier 18 Jul, 2023 @ 5:37pm 
Pro tip, the person that wrote this guide never mentions the dash-roll other than to say "they never used it". Let me tell you, you should use it. Easily the most broken ability in the game, has made all of the non boss level extremely easy to ACE so far. Just play aggressive as fuck and just dash through every single enemy with an occasional missile in between.
vulpvulpes 10 Jan, 2023 @ 7:06pm 
the video's been taken down, is there another around / is there a text description of all weapons and modules?
ORLOX 30 Jan, 2022 @ 9:30am 
[Be Efficient] can also be done easily on OP3 (because you have 4 buddies on this mission). Make sure to kill at least one enemy with the minigun, and either let your buddies take care of the rest or use the missiles or backblast.
(Emergency Stall mod and Afterburner mod recommended, so backblast is easier to use and you dont crash on the ocean if you try to backblast the ship at the end).

Missiles and backblast don't seem to affect acuraccy because i did OP3 just using those and my accuracy score was 0.
ShadF0x 8 May, 2021 @ 6:05pm 
[Be Efficient] is easy to get on OP1 with Ultrabeam (to sink the first ship) and abusing the dash module for the rest of it. Maybe down 1-2 planes with your minigun.
Aldahe  [author] 17 Dec, 2020 @ 11:42am 
@punished bowie Got it, thanks. I'll update the guide to correct the achievement's description.
Goatsquiè 16 Dec, 2020 @ 9:52pm 
Okay, yeah to get Tango Down, I think you need to WIN the duel with Pierce. In both NG and NG+ I had either tied or lost to him, which I guess can still win you the mission.
Animegal33 14 Dec, 2020 @ 1:42pm 
ok thx that helps a lot Aldahe
Aldahe  [author] 14 Dec, 2020 @ 12:54pm 
@Animegal28
My main piece of advice for that mission is to make sure your counter multiplier is active when destroying the boats as the points you get for destroying boats makes up almost all of the score in that mission.

I just did a few runs of the mission and as long as your counter multiplier is active when you destroy the boats then you're guaranteed to get atleast an S rank by the end of the mission (the remaining points can easily be acquired by destroying the other jets that spawn during the mission).

The easiest way to trigger the counter multiplier before destroying the boat is to stay above it and wait for it to attack then evade roll through its projectiles (you can evade roll through its hitbox too but its very risky so I wouldn't recommend it).

For loadout I'd recommend Ultrabeam, Unguided missiles or Railgun and Overheat blast. Which other modules you bring is up to you. A fully charged Ultrabeam and a few unguided missiles/railgun shots will destroy a boat easily.