Escape First 2

Escape First 2

Not enough ratings
100% Achievement guide and Walkthrough ★ Escape First 2
By marklar
Complete walkthrough of all levels, including all achievements, in the fastest way.
2
   
Award
Favorite
Favorited
Unfavorite
Info

Escape First 2, is an escape room puzzle game. In this guide we will guide you through all levels as fast as possible, getting all achievements.We do not explain how to solve puzzles and skip many steps to speedrun through the game. The guide will include unmarked spoilers!


    Notes
  • Press right click to drop items.
  • You can reset all items to their original position in the menu if anything is lost.
  • Some areas are dark, use flashlight by pressing F.
  • The game has a time limit, but by following our guide exactly you shouldn't have to worry about it

Estimated 100% time: 45m~
Psycho Circus 2
Select "Psycho Circus 2" on the right wall and start a game.

Go to the door. and enter the code CLOWN on keypad.

Go through and pick up the note by the chairs.


Mystery man
Find the Mysterious man's note


Continue going all the way to the end of the area, and enter the following combination near the door
Up Left Right Down Up Right Left Up Down.
Press the middle button and go through.

Enter the code Tora on the keypad near the mirror


The Name Game
Tora? That's greek to me


Go to the chest in the same room, and enter the code : 99832


Fortune teller
Solve the tarot puzzle


Go to the door in the same room and enter:
Left-Up-Left-Down-Right-Up-Rght-Down-Right

Now click in the middle, and go through the door.
Go to the door and enter: 4697.


The madness is over
Complete the circus chapter
Factory
Select "Factory" on the right wall and start a game.

As the game starts go to the device with buttons.
And click in the order as in the screenshot:


Near the medicine cabinet try to pick up the keys near the pipe, they will fall.

Go to the locker with the yellow bird, and enter the code 4212

Open it and press the red button.

Go to the locker near the sinks, and enter the code 4531.
Open it and click on the grey button near the keyhole. (If it doesn't open be sure to press the previous red button again)

I see the code
Move the bathroom's wall


After the wall moved, use the arrows on the machine and spawn a screwdriver, wrench and crowbar.

Pick up the crowbar, and use it on the chain holding the doors of the medical cabinet.
Take the water bottle from inside, and pour it into the pipe where the key fell previously.

Now take the wrench, and use it on the bolt on the pipe at the left corner of the room to make the pipe leak water.
Drop the pipe, and pick up the water bucket.
Pour the water into the pipe where our key fell near the medical cabinet.

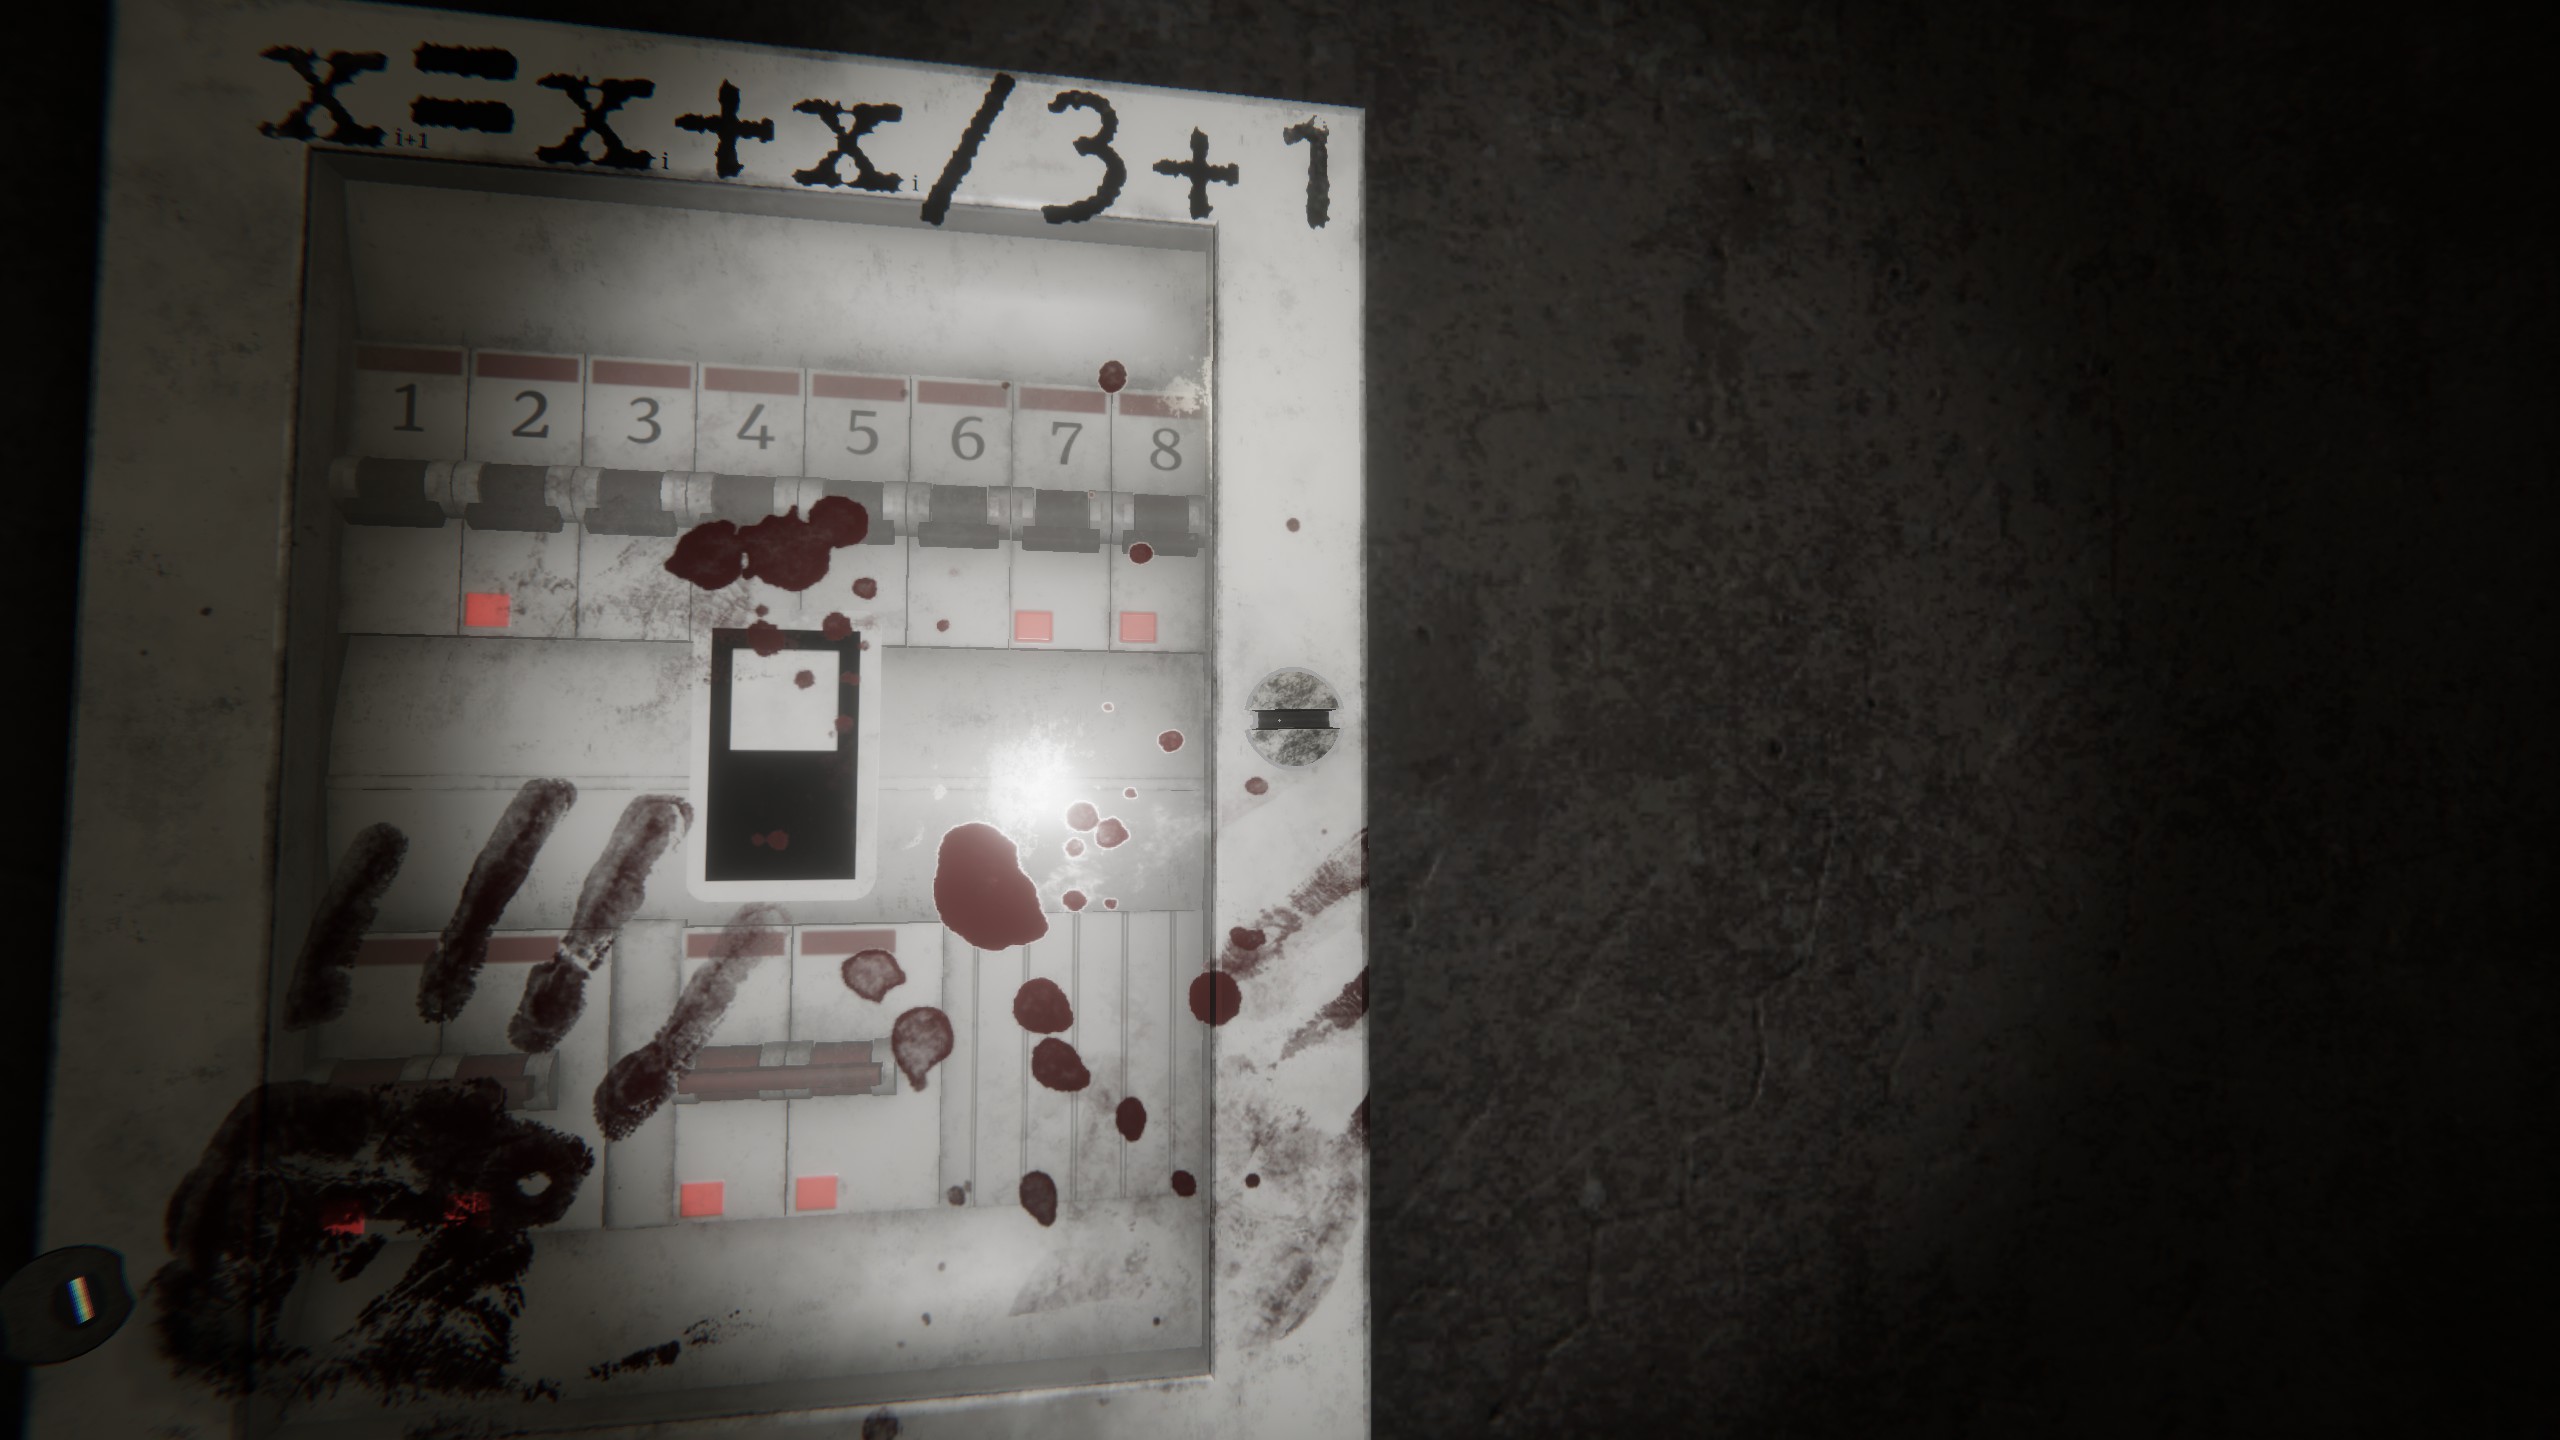
Next take the screwdriver, and click on the button that makes the wall move until you see a white switch box.
Use the screwdriver on the bolt on the right of the white switch box and open it.


Flip switches 1,2,4,6 up.
Open the cabinet next to the switch box, and take a water bottle from inside.
Pour the water into the pipe where the key fell once more.

Click on the button that makes the walls move once.
Pick up the pipes around the room: One is inside the left toilet , another on the floor in the middle of the room, and final is inside the medical cabinet.
Insert them in the following locations (note that one is straight)


Once done, turn on the air compressor.

Pick up the key that came out of the pipe near the medical cabinet.
Use the key on the slot above the button we used to move the walls.
Keep moving the walls until you reach a door, and use it.

Keep them coming, factory!
Complete the factory chapter
Torture chamber
Select "Torture chamber" on the right wall and start a game.

Pick up the torch from the wall, and use it on the rope hanging in the middle of the room.
Once the hammer drops, pick it up and break the brick wall with it.

Prisoner
Escape from your cell


Go through the opening all the way until you reach another room.
Go next to the wall with 6 stones, and rotate them as in the screenshot below. they should flash a light once when done correctly.
After that, press in the following order.


Open the chest under the stones, and put the runestones found inside in the wall on the opposite side of the room.
Put them as in the screenshot below, and take the key.


Use the key on the cell door, and go through it.


Go all the way to the left and pick up the shield.


Turn around, and go all the way to the opposite side of the hall.
Open the door by opening the bolt and place the shield on the wall.


Take 2 more shields in this room and drop them near the wall you just placed the other shield on. We need to rearrange them soon.


Get outside the room via the door you just came in, and keep going until you see a door to your right.
Enter it by opening the bolt lock and find 2 more shields inside. Drop these near the wall as well.


Put all the shields on the wall.
The final solution should look like this.


Take the key from the table to your left, and open the chest behind you with it.


Take the piece of metal inside the chest, and head outside the room.
Turn left into the cell you were in and to and go through the broken wall, on the left is a room with a wall with broken pieces.
Use the piece you carried from the chest, and the ones around the room to fix all the parts.
One part is missing, and will be found inside the chest in the cell.


The final solution should look like this:


Lift it and you should see a weight inside.
Pick it up and drop near the door at the far left of the hall, where we picked up the first shield. there should be another weight nearby.
We will use it later.

Go through the middle door in the hall (where we found 2 shields).
Take the sword from the table.


Place it in the same room on the spot shown in the screenshot:


Get to the cube in the room, and click on the following buttons:
(Note the standing position in the screenshot, there are 3 sides, if you did it right you hear a clicking sound)


Take the lever from inside, and place it on the well.


Keep turning it until the bucket with sword parts comes up.
Pick the top of the sword that matches the screenshot below and place it on top of the sword.


Finally take the last part of the sword that matches the screenshot, from the bucket, and place it on the sword.


The Chosen One
Choose the correct components to make the sword.


Go outside the room, and head to the right.
Get inside the door, near the weights, and enter the code 9765 on the cupboard to the right
Open it and solve the puzzle.


Once solved, open the chest under it and you will see 2 wrights inside.

Now collect all the weights and balance them on the chains.
One weight should be by the door we dropped earlier.
Another near the barrels at the end of the hallway.


And 4 more inside the room where we need to balance them.
This is just trial and error, try to make all weights line up to finish the level.
They should hang at the same height as the screenshot:


We all float down here
Complete the torture chamber chapter
Curator
If you liked this guide please follow our 100% Completion Curator for information on how to 100% a game!
5 Comments
LadyBoss85 13 Jul, 2021 @ 1:34pm 
@Aperaham, im working those cards now, but where to put this code ?
LadyBoss85 13 Jul, 2021 @ 1:16pm 
You do not explain how you got these awnsers.. Too bad.
There also still is an unopened chest next to the "RISK" table..
4/10
Aperaham Smoof 27 Jun, 2021 @ 2:18pm 
Quick explanation for the cards, as I've struggled with it and couldn't find an explanation. Obviously spoilers.
The riddle references the king of hearts, and there's a 1 on the bottom right. I didn't realize what that was until after looking at solutions and looking for the clues I missed.
The Q = II in a heart shape and A = III in a diamond shape are on the walls, while a six of spades is on the floor in the torture chamber. By elimination (and realization that the 1 on the parchment is actually a 1 and means the same thing as the symbols, which is the position in the passcode) the six of spades comes last.
xRaiden 15 May, 2020 @ 4:09am 
Great guide, thanks Bun n Mark! :horns:
チェリーパイ CherryPie 22 Apr, 2020 @ 7:50pm 
Great, thanks! :thumbs: