Devil Slayer - Raksasi

Devil Slayer - Raksasi

108 ratings
Bosses Guide.
By happygiggi and 1 collaborators
An explanation on the bosses and what are the safest way to deal with them.
This guide contains spoilers for obvious raisons.
   
Award
Favorite
Favorited
Unfavorite
Introduction.
This guide will teach you the ins & outs of every bosses.    ⠀⮣
                        ⠀⠀⠀Made by ⟶
Hello, welcome to my guide explaining each bosses!

I'm not a god-like player, and it's not the point of this guide! I'm helping you understand / beat bosses.

I'll show you my way to play, not forcing you to play like this. If you like to cheese with a chain weapon? It's fine!
1. Crazed Magistrate
The crazed magistrate is a dangerous tall guy.

He has 2 assistants to help him in the fight. The green one is healing the boss and buff. The other is agressive with a wand.

The crazed magistrate has 3 attacks:
  • A quick 2 slaps to push back if you're too close.

  • Throwing his plank, which causes you to get knockdown.

  • Book slam: He ready his right hand before slamming it down in front of him, which will stun you if touched. After this attack he will shake his hand off in pain, leaving him open to a bunch of attacks.
Tactic: This first boss should be straight forward. Kill his assistants, mostly the green healer as he do a surprisingly a good job to keep him alive. Bait his book slam attack so he'll be vulnerable to any of your attacks.

Hardmode
  • He throw 3 planks instead of one.
  • No longer shake his hand in pain after the book slam.
2. The Five Oddities
The Five Oddities is a group of 5 insects devil, each with their own elementals attacks.

The 5 bugs are:
  • Brainbug: The leader of the five, he flees away from you and respawn back his fallen comrades.

  • Flamespitter: The fire type bug, he spit fire in front of him, very slow and easy to dodge. His attack break your guard.

  • Venobite: The poisonous type bug, he lunges at you with his mandibles causing you to get poisoned. he has a quick attack.

  • Noxicon: The toxic type bug, spits noxious cloud in front of him that causes you to get stunned, very slow and easy to dodge as well

  • Vinewhip: The pink one, he'll try to latch his tendons to jump onto your head. If he manage to hit you, he'll stick on your head, dealing damage over time and confusing you.

Tactic: Like our characters say, you must aim the brainbug, they're no reason to kill the other bugs (unless to buy you times) as they respawn quickly. Bait the bugs together in a corner then sprint to attack the brainbugs.

Hardmode
  • Everytime the brainbug get hit, it teleport away.
3. Madam Weaver
This boss can only be fought when playing in demonic difficulty

Madam Weaver is a widow spider girl that hold a tailor shop. She isn't poisonous. She's aware of the city's magical plague affecting her but still wants to stay for her deceased husband.
now I feel sad everytime I fight her. ;(


Almost all of her attack have guard break:
  • 2 stab: when very close, she does 2 quick stabs with her pedipalps.

  • Large strike: When at medium range she does one longer strike. Slightly longer range than her 2 stabs.

  • Claw grab: Dramatically extend her pedipalps in a straight line in an attempt to grab you. When grabed she bring you closer to her and bites you. Knocking you down.

  • Reaction attack: After taking enough damages, she respond by spinning forward.

  • Web spit: She makes a line of webs on the ground.

  • Big jump: When very far away, she does a huge jump, trying to land onto you. Making a pile of webs on her landing spot.

When her health reach 2/3 she can do an evasive move, she dodges backward while leaving webs.


The webs slow you down and can entrap you like a net if you stay inside for too long.

Tactic:
She's still a floor 1 boss so her health is low, her attacks are slow and easy to dodge. As long you aren't trapped in her webs, the fight should be fine.
Just dodge and strike, be mentally ready to dodge her Reaction attack.
4. General Nara
The general Nara is the general of the Jianzhou army, and an old rival of Raciel's father. He wield a sword and ride on horse.

He has 2 phase, on horse and then Nara himself.

  1. Horse phase

    He has 2 attacks:

    • charge: The general charges with his horse ending with a very large swing of his sword. The horse causes you to get knockdown. Dodge to his right side to avoid the sword swing.

    • swing: The horse is rearing while Nara is doing a very big swing. The horse will knock you down if you touch him.

    Tactic: Avoid his charge, bait his swing then attack him once, repeat it until he charges again, that's it.

  2. Nara phase


    Nara is wielding a sword, and has the basic moves of sword wielding player.

    • A standards 3 hit combos.

    • A charged attack where he's swirling with his sword.

    • A riposte to counter your attacks, similar to your own.

    Tactic: Bait his swirling attack, then run to do a combo attack at him. If you're not quick enough, he'll dodge/riposte. Use break defense attack if you don't feel safe.

Hardmode
  • No difference on horse phase
  • All nara attack inflict bleeding
  • New attack: Nara now do a 2 diving slashes.
5. Hsing T'ien
The god of war Hsing T'ien is wielding a halberd and shield. Thought he rarely block.
Byleth know this guy since a long time ago.

Hsing T'ien attacks:
  • 3 attacks combo: 2 swings followed by a impale. he can stop mid combo. His swing range is very big. Get closer instead of running away.

  • Shield bash: When too close, he pushes you back with his shield.

  • Charge: He readies his shield in front and charge, easy to dodge and leaves him vulnerable to attacks.

  • Laser: He open his giant mouth to shoot a laser that puts you on fire. He usually do the laser attack after his charge move.

Tactic:Hsing T'ien will try to stay at long range, sprint and attack him as he will swing behind you or charge.

Every attack interrupt him.

Hardmode
  • New slam attack : Do a huge slam that shatter the ground. He keep his shield up will readying this move. Favor this move over the 3 attack combo.
6. Pachi
Pachi is a mythical beast that eat people's nightmares. He so slow it take time to turn around.

He has 4 attacks and a summon.
  • He summons a nightmare worm whom is very slow and explode upon touching you or taking damage.

  • A lunging attack if you're far away but still in front him.

  • A pecking attack if you're close enough.

  • A spinning attack when you're at medium range and not in front of him. Sometimes he'll be stun after this.

  • A screaming attack, he sucks air to let out a big scream, stunning you if you're close enough. It's slow enough for you to attack and dodge at time.

Tactic: Pachi will put your patience to the test, take your time, prioretise killing his nightmare worm first.
Bait his spinning attack and attack when he's stun from it.

Hardmode
  • Pachi summon 3 nightmare worms instead of 1
  • Nightmare worms have bigger explosion radius.
  • Spinning attack launch black projectiles in a circle.
  • Pachi is no longer stunned by his spinning attack.
7. Eastern Depot Overseer
The Eastern Depot Overseer is a high ranked trooper in the flamebringer faction. He mainly uses his sword and has some surprises in his pocket.

his attack consists of :
  • 2 quick slashes attacks

  • A riposte that counter up with 2 quick slashes. He has a slow reaction, he usually try to riposte if you miss your first attack and try to follow-up.

  • Reaction Attack: Once he takes an attack or is blocked, he suddenly steps back then moves forward with a huge swing attack. Always be ready to dodge on his left side when you're attacking him.
After losing some health he'll gains the following attacks :
  • Bombs: Throw 2 Bombs, nothing special, usually followed by the Flintlock move.

  • Flintlock: As long as you stay out of his sword range, he pulls out his Flintlock and tries to land a shot on you.
Tactic: Stay close and be agressive since he can still threaten you at distance anyway. His Reaction Attack is the nastiest move that make the fight difficult, always be ready to dodge to his left side when you're attacking him. Avoid using ripostes or blocks since he can use his Reaction Attack while you're stuck on your counter attack.

You can attack him while he readies his Bombs or Flintlock moves, he can still cancel into his Reaction Attack.

Hardmode
  • Can already shot with the flintlock at the start of the battle.
  • When 1/5 of his health is missing, he shoot twice with the Flintlock while staying locked on you. You must double dodges through the shots.
8. Skeletal Immortal
The Skeletal Immortal is a necromancer responsible of the undead army on the battlefield.

At the start of the fight, they are 2 skeleton pits, spawning crawler skeletons, and a normal sized skeleton on the center of the map. Once he reach half heal, he'll spawn another 2 skeleton pits.

Everytime the center skeleton is killed, after a while he'll respawn only if you're close to the center of the map again.

His attack consists of :
  • Explosive Scroll: Cast an scroll on your position which will explode.

  • Spirit Skulls: Cast 2 slow homing skulls that explode on death. Dies to any hits even when touched, but since the explosion is instant, it is hard to dodge when using short ranged weapons.
He has a cycle: 2 Explosive Scroll, then Spirit Skulls, repeat.

After he has lost half of his health, he use 2 additional moves.
  • Teleport: Focuses then teleports away from you. Into one of the 2 corners spots.

  • Blood Explosion: When you're close, he focuses then casts an explosion on himself. The explosion seems slightly bigger than the visual, be careful. Inflict bleeding.
Tactic: Destroy every skeletons to reduce the number of threats on the map. Attack him when he's doing the Explosive Scroll move, avoid being close when he does the Spirit Skulls move.

After triggering his second phase, do the same thing, but approach him and flee to trigger the Blood Explosion move then counter attack him.

Hardmode:
  • The homing skulls is much faster.
  • The explosive scolls is much bigger and make a cross pattern explosion.
9. Gray Immortal
Gray Immortal is the weakest of the five Immortal.

The gray immortal has 3 phases.
  1. First phase

    • He walk away from you and summons or buff his rats minions to attack you. Kill every rats. Or rush him. Either way he'll go to the second phase.

  2. Second phase

      The most dangerous one, he transform himself as a big rat to fight you. he has 3 attacks.
    • 2 quick claw slash in front of him.

    • A pouncing attack followed by a tail swing. His pounce knocks you down.

    • A very long swirling attack, wich after it he will be stunned, leaving him vulnerable.

    Tactis: Flee from him until he does his long swirling attack, then go at it.

  3. Final phase

    • He goes back to his original form, though weak, he summons 2 clones and cast very slow moving poison balls at you. He teleport away when hurt.

    Tactic: Kill his shadow clones to reduces the pressure, then finish him off.
10. Broodmother Nest
Broodmother nest, like the name say, is a nest of spiders occupied by a couple of giants spiders.

The room is filled with spiders, you can clear the room of spider before attacking the bosses.

The 2 big spiders are very slow, but have a very quick bite attack at close range. This deal heavy damage and inflict poison.

  1. The daddy is the smallest of both, he can spit webs at you, making you unable to move and be stunned. Traped in web with the spiders close to you is garanted death.

  2. The mommy is the biggest one, she lays spider eggs on her tracks.
They both explodes upon death.
Tactic: Clear the room of little spiders if you don't feel confident. Lure one away.
If you have a long range weapon, you can keep them at bay and attacks with timing or you can play around obstacles as their big size make thems struggle to go around.
If close range weapon, trigger their bite attack to dodge and attack quickly, they're quick to bite, be careful.

Fire elemental is very good on this boss. Light the 2 spiders or even one minion on fire and let them collide. their health will drain very quickly.
Hardmode
  • Daddy can spit poison now.
  • Mommy have a pounce attack.
11. Arboreal Maiden
The Arboreal Maiden is a stationary dryad. While easy to dodge, her attacks hurts a lot.

She has mainly 2 primary attacks.
  • A single poison spit attack.

  • Sprouting a "vine ball" at your feet, damaging and making a dangerous obstacle at the same time.


  • She can sprout a row of vine balls around her, forcing you to waste time on destroying the balls to reach her.

  • She can sprout a giant flower which spawn 2 rosethorn maidens (plant girls).

  • Finally, she can hide under ground and wait for "grass spirits" to come and heal her.
Tactic: fairly easy, take your time to damage her while avoiding attacks, destroy the giant flowers at all cost, as the rosethorn maiden are troublesome.

Hardmode
  • Her single spit attack become a triple spit
  • Every seconds, there a root that come from the ground and attempt to impale you. Nothing can prevent the root from attack. The root act independently of the boss.
  • Can sprout 2 giant flowers at same time.
12. Anglerkun
Anglerkun is a huge fish-like devil. He is wild, his attacks even hurt the other monsters that spawn in the arena.

    The arena will periodically spawn sea monsters:
  • The huge sea crabs (blue crab) that attacks with explosive slowing spores.
  • The Loricate Needle louse (small crustacean).
  • The weird fluorescent "plant" that isn't likely going to bother you at all.
They spawn in the water area of the arena.


His attack:
  • Water spit: Cast 3 water explosion in front of him. Can do this while he's out of the view, listen for the audio cue of this attack.
  • Lunge: A huge lunge attempting to eat you.
  • Chain bites: Move forward in a zigzag way while doing 3 bites attack. He always starts at the same side: Left-Right-Left.
  • Tail spin: When extremely close, he spin around and tries to knock you away. Unlike the boss Pachi, he still need to face you to do this attack. Inflicts knockdown.
  • Attraction: When you're far enough. He cast an attraction ring in front of him then do a little lunge attack on the spot. The lunge is so small it barely reach the attraction spot, a little step back is all you need to dodge. The danger come more from the other monsters getting attracted with you. Being hit by the spores and being slow isn't funny.
Tactic: Your best key to win this fight is having a good mobility. The more nimble you are, the more laughable he becomes. As long as you're quick enough or have enough stamina regen to dodge a lot he's manageable. Avoid the water and mostly the explosive spore that slows you down, it's your worst handicap that can get you in trouble.

I noticed a huge opening with his attraction attack. As long they're no small monsters attracted to it, just do a little step back. He'll lunges and stop just in front of you, open to attacks. You can do full combo with most weapons or even charged attack.
13. Leviathan
This beautiful fella is a sea dragon. He carrys a spear imbued with frost element, slowing you if you get hit.


His attacks:
  • Standard combo: One impale followed by a small swing then very large swing. Can be interrupted mid combo.
  • Double swings: If far away, he tries to reach you by doing 2 large swings.
  • Riposte: Block with the spear handle, if he manage to block, counter with a bash followed with a swing. Very good reaction.
  • revenge attack: Everytime he lose a chunk of his health, he answer by doing an impale followed with a swing. Inflict knockdown.
After his health reach half, he become serious and can no longer be interrupted by attacks and react faster. He gain two new attacks
  • Swirling: Moves forward doing a swirling attack, can do one or instantly repeats it as long as you are in front of him. Favor this move over the standard combo and will rarely ever use the standard combo. There a damaging hitbox in front of him at the end of his swirl, so try to go to his sides.
  • Frost Ray: Aim with the tips of his spear and cast a frost ray onto you.
Tactic: Take the boss like a spear user, be agressive and stay very close to him, he'll struggle to hit you. And unlike some other bosses that can fight back with some bash attacks, his only options is trying to accurately hit you or riposte. Abuse the guard break attacks if you can.

On his second phase, he changes his strategy, he's quick enough to stay away and try to attack you with the frost ray or diving to you with the swirling attack. You can wait for him to aproach with the swirling attack to dodge through and counter attack.

Don't be too scared of the slow effect, it'll force you to dodge through his attacks but he'll naturally come close to you while doing it.

14. Forest devil
The forest Devil is a root devil, using a lot of tricks to get you.

his attacks:
  • He plants thorn trap if you're far away, the longer the fight goes on, the more traps you'll have to avoid. The thorn trap stops and stuns you for 2 second destroying it in the process, like the natural ones.

  • Riposte: Block with his shield, if the block an attack, counter with root stab.

  • Shield bash: If close enough, it pushes you back.

  • Spike wave: It summons a wave of spike at your direction, inflict bleeding.

  • Spike burst: Same as spike wave, but around him. Inflict bleeding.

  • Root stab: Use his root to stab you, similar to a spear stab. Very quick and drain health.

  • Root grab: The charged version of root stab, very long range, at least half the room. If it touch you, you're grabed and he drain a huge amount of your health before tossing you.
Tactic: After an patch, blocking with a shield doesn't let him open very long. Everytime you break his block with an unblockable attack you interrupt him. giving more time to attacks. Abuse break attack as he'll usually try to block, only to waste time.

The timing for dodging the charged root grab is about the same time it make the sound.

Breaking his shield block interrupt him. Be his riposte stance or while attacking. With very good timing you can stay close and interrupt his shield bash. Locking him trying to shield bash again, only to be interrupted again, and go on.

He's nasty because of his lots of attacks you'll take more time getting used to him.

Dodge an attack and quickly attack back 1-2 hits, then go away with another dodge because he's likely to use his shield or vine burst. Maybe because I love risky playstyle, I stay spear range, I think it's the good range for dodging and counter attack.

Hardmode
  • Every seconds, there a root that come from the ground and attempt to impale you. Nothing can prevent the root from attacking. The root act independently of the boss.
15. Gelatinous abomination
Gelatinous abomination is a stationary boss, spiting gas at you.


Gelatinous abomination generate a wave of noxious gas that spread everywhere. While the gas are very slow, it hurt a lot and inflict slow.

His health regenerate over time, but it barely noticeable.

He can summons 3 lesser abomination type:
  • Tendril abomination: The eggs, acting as a wall and attacking with protruding tentacle around them. If given enough time, they'll hatches "palpitating abomination", another kind of lesser abomination.

  • Palpitating abomination: The worm type, they attacks with theirs tongue.

  • Exploding spore: Kamikaze spore, gets close and explode. Inflict slow.

  • When gelatinous is at half health, for some time he focuses his gas at you, spreading in a fan-shaped way. Then he'll come back at standard gas attack.

  • Explodes upon death
Tactic: attack between gas. Kill lesser abomination as soon as you can. While he focuses his gas at you, run away and wait for him to resume back to normal.

Hardmode
  • All the gas it emit is focused at you, like he was half health.
16. Willow Immortal
Willow Immortal is a serpentine devil. Tough, agile, quick and deadly. She's a serious foe, do not underestimate her.

Willow is armed with a dual poisoned daggers.

She can summon a "Jade", a quick poisonous snake.

Her set of attacks is similar to the player with the daggers, plus an ability to throw poisonous daggers and revenge attack.

In case you don't know the attacks of daggers:
  1. Normal mode

    • Standard 5 hit combos. The first 2 hit can be blocked. You can't interrupt this attack.

    • Crescent slash: a little dash attack with a wide radius.

    • Charged slash: a long range dash attack, where she charges (faster than the player version) before doing a big lunge.

    • Riposte: same as player version, she block, and counter attack if it blocked your attack.

    • Dagger throw: Throw a poisonous dagger.

    • Revenge attack: After she lose some chunk of health, she respond by doing an almost instant charged slash.

    When she dies for the first time, she wake up in "focused" mode, she also summon a big and slow snake.

  2. Focused mode

    She keeps the same attacks with those additions:

    • Faster movement speed and attacks.

    • Her dagger throw attack becomes a 5 daggers throw, in a fan-shaped pattern.

Tactic: Bait her charged lunge with just walking, after her lunge she'll be open for a combo attack.

If you're confident enough, you can spam riposte at her face.

Once she's in focused mode she's more agressive but the tactic remain the same.

Kinda obvious but having poison immunity reduce a lot of her damages output.

Hardmode
  • The big snake she summon is very fast.
17. Yellow Immortal
Yellow Immortal is a cowardly weasel devil. He like to stay out of your range and do quick lunge attacks or throw gas bombs.


After an update, he's no longer weak to knockback.

his attacks:
  • Lunge: His favorite attack, he prepare his spear then lunge at you with a wide slash. Very quick and accurate, you must dodge through the slash.

  • Quick Slash: When you're too close, he does a quick slash.

  • Throw Bomb: Search in his pocket then throw a gas bomb at you.

  • Fart: Turn to face away from you and "fart", leaving gas behind him :/

  • Tornado Throw: He infuse his weapon with wind, then do a similar "lunge attack" animation, but throw a growing tornado instead of lunging himself. Sprint away when he does this.

  • Revenge Attack: After he loses a chunk of health, he respond by his lunge attack.
Tactic: Bait and dodge his lunge attack and counter, you can do full combo now. Once his hp fall below 2/3, he'll retreat and does the Throw Bomb move, dodge bombs and attacks. When his hp is at 1/3, he'll resume his first tactics.

Hardmode
  • Throw 3 gas bombs intead of one.
  • Some of his attack inflict paralysis.
18. Bandit leader
The bandit leader is a fearsome warrior. Armed with a sword, he's quick, has good range. And some tricks to trap you.


He has a lot of attacks:
  • Dash attack: A dash attack that cover a huge area with long wind up.

  • Standard combo: 2 quicks slashes in front of him.

  • Riposte: The usual block and counter attack. Has a very good reflexe.

  • Swirling: Swirl around with his sword, quick and can't be hurt while spinning.

  • Revenge attack: Everytime he loses a chunk of health, he responds by slightly backing up then does a swirling attack moving forward.
When his remaining health fall under 50%:

Bandits periodically spawn to help the boss.

He has some new moves:
  • Net toss: He throws a net like the reguliar bandits to prevent you from moving, avoid this at all costs.

  • Sand throw: He literally kick the sands into your face. Inflict blindness.
Tactic:
He's a very tough boss. He look like a mix betweens the White Immortal and the Overseer. Treat him like a more agressive Overseer.
His openings are small but every attack interrupts him, allowing to do a full combo if his
Revenge attack doesn't trigger.
Most of his attacks can be blocked, a shield will help a lot.
Avoid the Net toss at all cost as it's an instant lost.

Hardmode:
  • Toss 3 nets instead of one.
19. Great Sandworm
The Great Sandworm, self explanatory. It's the biggest worm you'll ever see.

He's huge, his body is a wall, only his head can be attacked. All of his primary attacks inflict knockdown and bleeding.


He seem to wiggle randomly on the map, and the less health he has, the faster he'll move around.

After some time has passed, a huge rock spawn on the map allowing you to stun him, making him vulnerable to your attacks.

His moves consist of :
  • Lunge: Lunge at you wherever he might be. You can predict this attack as it suddenly lock at you instead of roaming randomly.

  • Bite: To protect himself, he bites You if you're close enough while he roam around.

  • Spit: He spit out his gastric acid on the ground. The acid will inflict poison and slow you down if walked over.

  • Eggs: He spit out 2-3 eggs that hatch into small worms. The small worms are more annoying than a real danger as it keeps you busy.
Tactic:
I suggest to rarely if ever attacking him straight on, since he spams his Bite when you're close.
Fortunately, when the rock spawn and he Lunge into it, he'll be stun and open to heavy damage.
The worm doesn't check if the rock is between you and him, so feel free to hide behind and wait.
Destroy the eggs and the small worms while you wait for the rock to respawn.

Hardmode
  • The sandworm and his small worms are much faster!
20. Wolf and Raccoon Devils.
Wolf and Raccon Devils, nicknamed "Thunder and Wind Immortals" is a loving couple of devilish beast. We have the agressive wolf husband and the supporting raccoon wife.

Husband
The husband, know as "Atlast of the East" is a thunder wolf. All his attacks inflict paralysis.


His attacks:
  • standards combo: basic 3 claw attacks. The third attack can't be blocked and inflict bleeding.
  • Pounce: Pounce forward and emits a electric shock. The pounce doesn't do damage, only the shock.
  • Lunge: His favorite move. He take a stance then do a lunge in an attempt to grab you. If grabed, he eviscerate you. Inflict bleeding.
  • Revenge attack: After losing some health, he respond by a wide claw attack. Inflict bleeding.

If his wife is dead, he enter into a enraged state. While enraged he become insanely quick and no attack can interrupt him.

Wife
The wife named Ivory is a raccoon with the power of the wind. She mostly stay out of the fight and support his husband by casting spells. All her spells have huge cooldown. She's very frail.


Her spells:
  • Push: She push the players back if too close in a effect similar to bosses "rage burst" triggering while calling his husband for help.
  • Wind Blade: Summon a tornado on your position that last a while and inflict damage repeatedly.
  • Mass Wind Blade: Only when her husband is dead, summon lots of tornadoes randomly on the map.
  • Heal: Cast a very slow healing orb that home onto her husband, healing him about a quarter of his health. The orb dissipate after a moment if it doesn't reach his target.

If her husband is dead, she enters a enraged state. But unlike her husband, she isn't outstanding. Only use one more attack.
Tactic:
While it's very tempting to kill the wife as it very easy to do. Nobody want to fight an enraged beast. Focus on killing the husband first before the wife. You can easily lure the husband away from the healing orbs to prevent the heal.

Once dead, the wife can't really struggle against you, kill her.

Hardmode
  • Wife single wind blade is replace by his mass wind blade. In enraged mode she cast Mass wind blade 2 times.
21. Fallen Buddha
Fallen Buddha is a robotic buddha head. Stationary, it'll shoot elementals projectiles at you. The head is surrounded by fire traps.

  1. The head will spit 3 elementals attacks:


    • Fire: Left to right side.

    • Poison: Right to left side

    • Shock: burst

    Two times in the fight the head will summon his hand. The first time the head will leave you alone with the hands.

  2. The hands has 2 attacks:


    • Slamming: He jump away and fall from the roof, trying to crunch you.

    • Pouncing: The hand focus then do a little pounce forward.

    The hand will always alternate between the 2 attacks, they'll never repeat the same attack twices in a row.

Tactic: Dodge betwen the head projectile and attack, while keeping an eye on fire trap.

there are blind spots on the wall next to the head, stay close and he won't be able to shoot you. You can safely trade some attack between his attacks and go back to the blinds spots. (watch out for the fires traps as always)

When the hands come, try to synchronize their attacks, after they both do the pounces you can safely attack them until they jump away.

Hardmode
  • Now summon 2 "tomb guardians" when it spawn the hands.
22. White Immortal
The White Immortal is a edgehog devil with a long sword and good speed.

He has 6 attacks:
  • Sword slam: He aim at you then does a vertical slam with his sword.

  • Sword slashes: Quick 2 sword swing where he can follow up with the sword slam if you're far enough. When his health is low, his swings have a cutting aura, giving bigger range.

  • Hilt push: Push you with his sword hilt when you're too close, knocking you down.

  • Riposte: Block and counter your attacks.

  • Revenge Attack: Everytime he loses some chunk of health, he respond by doing a swirling attack.

    Once he's 50% health. His sword get a "wind cutting" effect, greatly increasing his range. And the charge attack.

  • Charge: He focuses then charges while sliding the sword on the ground, ending his charge with a powerful swing. Cannot be hurt while charging. Charge head-on on you inflict knockdown (and usually end in death since it easily deal massive damage).

Tactic: All his sword swing can be blocked, using a shield is very effective against him as it destabilize him a lot. After an update, his attacks gained a slight wind up, helping to anticipate his attacks.

Without the block option, the fight become very hard. Try to dodge behind him when he attacks and do a quick attack then leave quickly. When he loses enough health and have his range is increased, you can stay far away and bait his Charge attack where you can safely land some hits before fleeing again.

Be careful of his Charge, it's very punishing.

Hardmode
  • Improved charge: Now end the charge with a spinning attack instead of a swing.
23. Acalanatha.
The Acalanatha. is a spirit of thunder. Every attack he does is infused with thunder elemental. Causing paralysis. Since this boss float, it doesn't have any collision with the player. Allowing to dodge under him.


He's very slow, thought he can attack you from anywhere.

his attacks:
  • Thunder strike: Summons a lighting strike on your position, marked by a blue light.

  • Lighting burst: Summons a quick lighting burst in front of him, with medium range.

  • Lighting block: Surround himself in blue aura that block attacks, if he block an attack he counter-attack with a quick slash.

  • Quick slashes: 2 quick slashes in front of him, still doing thunder damage.

  • Storm: Encase himself in a shield and casts lighting strike that circle around him twice. This attack leave him breathless for some second. You can hide under him.

  • discharge: Do a discharge around him, he seem to do this attack when he's out of options like quick slashes and block when you're still close enough.
Tactic: Get close enough to trigger his lighting burst then attack him with defense breaking attacks (he'll try to block).

If you don't have any defense breaking attacks, does 1 hit attack to trigger his shield.

After he lower his block aura, he's free to attack for 1 second.

Wait for his quick slash attack to dodge on his left side and counter him.

Avoid being hit at all cost because the stun induced paralysis can make any mistake lethal.

Hardmode
  • New attack: He start spinning forward and emit electric all around him. Invincible while doing it.
24. Sledgehammer Raksa.
The sledgehammer raksa is a big scary half-breed monster, with his massive health pool and range.

He uses the sledgehammer like the player is able to do, with the addition of a spinning attack.

His attacks are:
  • Standard hammer combo: mirror the player attack, he do 2 swings followed by a slam.

  • Slam: mirror the player attack, with the added effect of shattering the ground further, increasing the range.


  • Spin: He charges then move while spinning around the sledgehammer. Knocking you down.


  • Bash: pushes you back with the weapon grip.

  • Rampage: He rages, then do 2 swings followed by the spin attack. Leave him breathless.

  • Once his health fall below 50%, he summons an axe raksa to help him fight.
Tactic: Bait his swings, get close, he'll continue his combo while you're close enough to attack.

When he does his spin attack, sprint away, or if you're confident enough, stick close to him, it'll swing behind you.

Due to his massive health, the fight is longer than usual, take your time.

Hardmode
  • Can periodically spawn axe raksa
  • Can use his rampage attack sooner.
25. Spirit hunter
The Spirit Hunter is an powerful human assassin. Using tricks up his sleeves, he throws various things at you.


He teleport away when he's hurt and not doing an attack.

He mostly alternate between 2 attacks type unless he teleport close enough to you, it'll be dagger throws:
  • Daggers throw: throw 8 daggers in fan-shaped pattern when you're close enough. His cloak can hurt you too. Inflicts bleeding.

  • Elemental throw: Throw an elemental attacks when far away which could consist of:

    • Fire: 4 ball shots in a burst

    • Lighting: shoots a slow homing ball, you can block/ripost the ball to destroy it, or flee until it dissipates.

    • Spirit: 5 purple balls in a fan-shaped patern that inflict confusion.

Later when his health falls bellow half, he can summon swordsmen to help him in battle, and can use 3 new tricks:
  • Attraction: Cast an attracting ring in front of him. The ring does nothing aside attracting you, so it leave him open to attack while he casts it (if you have long range weapons).

  • Precise explosion: He focuses then casts an explosion on your spot. He usually does this after the attraction attacks. Inflicts confusion.

  • Dark aura: He focuses then everything around you becomes dark, similar to "blindness" debuff.
Tactic: Dodge through his daggers and attacks. If he casts a lighting ball, wait for the ball to dissipate before resume attacking him. Having bleed immunity will help a lot for this boss.

Kill his swordsmen, he's already dangerous enough alone.

When he does the attraction ring you can safely attack him. Unless he has swordsmen with him, they're nothing to worry about it.

You can attack safely after his precise explosion.

Hardmode
  • Instead of summoning swordsmen. He summon a clone of himself.
26. Fox Immortal
The fox immortal is a 5 tailed kitsune devil which love to bewitch people.


When you start the fight, she's standing still with an energy shield staring at you, commenting on your fights.
  • The first wave is against 2 elites fire swordsmen.

  • The second waves is against a pack of wolves, they're like the felines demons with only lunge attacks. Try to fight them one at times.

  • After this, she exits her shield and the real fight begins.
Her moves consist of:
  • Claw attack: A 3 quick claw attacks, she can still track you while clawing. inflicts bleeding.

  • Grab attack: She lunges and does a unblockable grab attack, If she grabs you, she taunts then tosse you away, leaving heavy damage and the bleeding status. Can still be interrupted by any ally that attack her and break you free.

  • Spirit throw: She turn around and throw multiple purple balls in random direction toward you, causes confusion. At least one of the random balls is targeted onto you.

  • Tail slap: She turn quickly trying to slap you with her tail. inflicts confusion.

  • Revenge attack: After she lose a chunk of health, she reponds by doing a big claw attack in front of her, doesn't inflict bleeding.

When her health fall below 50%, she summon 2 clones of herself, with the same attacks and reactions. The clones have less health and won't respawn after their death.
Tactic: Avoid her attacks as the status effect are hurtful. Having bleeding immunity help a lot.

Once she summon her clones, it's where the fun part begins. Keep moving but don't forget to attack to push them back. It's the hardest part of the fight as a little confusion effect or one clawing you is enough to get ganged up.

Fire elemental is very useful against them, light thems on fire and run away, letting them collide.

Alone she's not that hard to deal with, it's her clones that make the fight difficult.

Hardmode
  • Her tail slap is improved, she now move forward while doing it.
27. Unquestionable Demigod
The unquestionable demigod is a Sangha Deva that is defending the mount Skyedge against any trespasser. He's armed with a huge electric whip and a shield.


His attacks are incredibly slow:
  • Whip combo: 2 large swings then a huge forward swirling. Can be interrupted at the start of each strikes, his body emit electric shock, hurting and pushing you back.

  • Giantfist: He shines then throws a giant fist. Inflicts knockdown. Despite the visual, his body doesn't hurt you.

  • Shield charge: Puts the shield in front and charge, knocking you down. If it connects, he'll follow up with a stomp.
Once his health reach 1/2 he gains some new attacks:
  • Power whip: Very similar to the Whip combo except charged with electricity, the final strike is a slam instead of swirl. He can still do the Whip combo so he's enjoying doing both.
  • Swirl: Do a huge standing swirling motion with charged electrical whip.
There nothing crazy to take account beside his body emiting electricity when he does whip attacks.

tactic:
He's very slow it's tempting to dodge too early, so do not panic. When he start his Swirl, dodge to his right side so the swirl will end behind you.

Just try to not hug this guy as the electric shock is instantaneous. Try to keep minimal distance not unike a slime monster. Easier with a good range weapon like hammer / spear.

By the time you encounter him you should be experienced enough, so there shouldn't be any trouble facing him.
28. The Four Heavenly Knights
The Fours Heavenly Knights are 4 Sangha kings that lead the Sangha Devas in the ancien war.

So the fight is with these 4 knights at the same time:

Moli Hai

The "bard" armed with his "Jade pipa". he control the field with his tunes, buffing everyone or disrupting you:
  • Music tune: While outside of any threat, he'll play tunes with a specific buff, the buffs affect everyone in his vicinity, you included. The buff can be:
    • Heavenly March: Increase the movement speed (+20)
    • Serene Lullaby: 50% damage reduction
    • Ponderous Paeon: Slower movement speed
    • Obliteration Aria: +50% attack power
    When he's playing, he never change the buff nor stops playing until he gets attacked.

  • Stun: When close enough he plays a single note stunning you, unavoidable.

  • Charm: When a familiar is close, he casts a slow homing orb truning the familiar against you.
Moli Shou

The "mage", armed with a magic snake that allow him to throw various elemental attacks.
he's specialised in elemental effects:
  • Elemental shot: He shoots 3 projectiles spread in a fan pattern, the projectile can either be poison, electric or fire balls.

  • Snake grab: He extend a spiritual snake that grab you and bring closer to him. Inflicts poison.

  • Ignite: When very close, he ignites the ground in front of him. Inflicts burning
Moli Hong

The "tank", armed with an umbrella that act like a shield when open, or spear when closed.
He also controls gravity:
  • Attraction: When far away he casts an attraction ring that pull you closer and inflicts knockdown.

  • Combo: A swing followed by an open umbrella bash. The umbrella bash do parry your attacks.

  • Riposte: He open the umbrella in an attempt to block, counter attack with a closed umbrella stab that knock you down.
Moli Qing

The "warrior", he wield a magic sword that allow him to summon swords:
  • Summon sword: When far away he focus then cast 2 magical swords to strike on your position.

  • Sword swing: 2 sword swings that cover a nice range. He chains both swings so quickly you can dodge both with a well timed dodge. Can decide to only do one swing.

  • Thrust:Just a single sword thrust.

Tactic:

On their own they're all pretty basics, the combined attack and disrupting power makes it hard.
My general kill order recommend, thought it depend on your strenght/immunity you might want to change the kill order:
1. Mage
2. Tank
3. Warrior
4. Bard

The Bard is literally a jukebox, if you don't bother it, he won't bother you as he's busy to buff everyone, you included. If he's doing a nasty tune like slow movement, attack him once to interrupt then run away or else he''ll keep spamming his Stun move. I suggest to save him for last.

The Mage can dish out a lot of damage if you don't have immunity, and is always a constant threat thank to his slow projectiles. You should try to kill him first as it allow more breathing room when you run away.

The Tank has only the knockdown to annoy you, he's less disruptive than the Mage beside his Attraction move.

The warrior is extremely basic, he can't block and his sword swings are easy to dodge. Only his summon swords is a real threat when you're focused on another target.

The hardest thing is to keep aware of everyone. They all have moves to cover each other. Attack one? Get grabed by the mage you didn't pay attention, attack the mage? Get attracted and knockdown by the Tank and so on.

You have lot of freedom on who you want to tackle first, it's your choice and taste.
29. Crazed White Immortal
The Crazed White Immortal is our dear White Immortal that has flew into mount Skyedge to hone his skills by doping himself with a mysterious drug and rigorous training.


His first half is similar to the second phase of the White Immortal fight:
  • Buff up: "I need some excitement!" He is empowering himself and had the effect similar of stimulant item. More damage, movement speed and super armor. Once the effect wears off he's out of breath.

  • sword combo: 2 swings followed by a swirl. He has even greater "wind cut" effect, having a bigger range.

  • Sword slam: He slam the sword and the "cutting wind" effect go all the way like a projectile.

  • Riposte: Block with his sword, counter attack with a kick if it connect. It knockdown and push you back a lot.

  • Reaction attack: After taking some hits he'll answer with a swirl while moving a bit forward.
Once his hp reach 0, you cut his arm off. But he isn't giving up. He catches the "star core" that floats around him, shape it into an electric sword, and the second phase of the fight start:
  • Quick slashes: When very close, he does 2 swings while moving forward.

  • Thunder charge: He disappears, then with a warning of his intend, he appears and instantly charges while engulfed in electricity. The end of his charge has a bigger splash area. He can chain this move up to 3 time. Inflicts knockdown. After chaining 3 times he has a longer recovery before repeating.
For the first half of the fight, he has a peculiar blue "star core" that orbit around him. It does contact damage to you and block your attacks.

Also he has surprisingly low hp for a chapter 7 boss.

Tactic:
The first half is extremely similar to normal White Immortal fight, except that all his attacks have bigger range and it guard break, so you can't meme with a shield like the original fight.

Be very cautious while he's buffed up as he's very deadly in this shape, I suggest to even backtrack and wait for it to wear off.

Always keep an eye for the orb that protect him, abuse guard break attacks so you can't be trolled by this orb (and his riposte, so double win) and be careful to not be too close for the orb to hit you.

For the second phase he's abusing the Thunder charge, even if you're in front of his nose. Not hard to dodge unless you panic and drain all your stamina. Just calmy dodge and attack when he finished.

After he chain 3 charges, he recover much slowler so you can safely attack him. Bait him for doing the triple charged attack then counter attack.
30. The Witch of Kwenlun
The witch of Kwenlun is a mysterious demon that enjoy watching our challenges.
She can be found in the secret room of mount Skyedge.


She's simple yet very deadly, she only does 3 things:
  • Black hole: She summon a black hole on your position and attract you. It stay active for a good while.

  • Summon specters: She summon 4 "specters" monsters, they're shadow creature that are immune to all elemental effect and stun, they're fast. And they can do a bite or a diving bite. Their attacks also drain health.

    She can summon them back only if all 4 shadow monsters are dead.

  • Summon spirits: she summon 2 shadow spirits that chases you, they're quick and explode into you, instantly explode when being hit.

She also teleport instantly away when she's being hit, else she just summon and stare at your struggling.

Tactic:
You need big mobility, and even with this the shadows are still on your toes, ready to gang you. Try to stay back, wait for your stamina to be full, and when you have the opening, sprint to her, hit her, then keep running away.

Another strategy I recommend is to kill 3 shadows but never the last one. This way, she won't summon them back and you have only 1 shadow to outrun. Less deadlier and easier to manage.

Since she teleport away when hurt, no point to combo attack. Go land a single hit and run away every time. The fight WILL be long.
31. Meng Po
Meng Po is a thaumaturgist, she lost her love interest (brother Shi, maybe it's Master Shi) to her rival so she ended her own life with poison. Now she's serving "worry free" soups to ghost and mortals that want to enter/exit the netherworld. Helping them to forget their past lives.

The reason she's agressive to you is because you're "associated" with this rival, she still holds a grudge against the old crone (The old girl that allow you to buy new rooms).


Meng Po is constantly trying to make you taste her special soup:
  • Soup ball: throws a soup projectile in a straight line.

  • Soup splash: dive her ladle into her soup and splashs in front of her in an arc, short range.

  • Ladle push: When too close she tries to push you back with her ladle. Laughably easy to dodge.

  • Attraction: When far away she casts an attraction ring in front of her. She has an invincible shield around her while doing so.

When she reach 1/2 of her health, "entangled spirits" (the weird blue ghosts bubbles) periodically spawn in the arena, she refills the pot in the map and her moves are amplified:
  • Soup ball throws 3 balls instead of one. In a fan pattern.

  • Attraction knock you down.

  • Soup ray: A new attack, she puts her pot in front and a explosive line of soup appear. ALWAYS followed after her attraction move. Inflicts knockdown.
Everytime she's hurt she teleports away.

All her soup inflict a unique debuff "worry free" that massively reduce your movement speed, stamina regen and drains magic overtime. It last a minute.

In the arena there is a pot you can come and drink, the pot will remove that debuff she inflicts and restore 10 MP. You can only slurp it 3 times before it's empty.

Tactic:
Meng po is surprisingly easy, as long you avoid her soup she's not a threat. On the other hand once she catches you with the debuff, she becomes a huge pain to deal with.
With the debuff you're forced to make every dodges count. Get that sweet pot to remove it.

Anyway, by this time you reach her, you'll be experienced enough she's shouldn't be hard.
32. Nether Queen
The Nether Queen is a ghost empress of this netherworld, she grow magnificient silky hairs that have a thirst of bloods. She sit on a giant levitating skull.


All her attacks are done with her hair, and it inflicts bleeding:
  • Hair tendrils: She emerges some hairs from the ground under your position to impal you. The hair has a bit of range but it spread diagonally.

  • Hair grab: she extends her hair from the skull's eyes socket and tries to grab you, if grabed it brings you close and the queen personally claws you. The range is deceively huge, if she's on your screen, you're in range of this attack!

  • Hair stabs: When close/medium range, she does a chain of 4 stabs with her hair, it easily maxout the bleeding stacks on you.

  • Hair spin: When extremely close or under her, she spins around with her hair extended. It has a huge knockback. That may be me but I feel like she has faster recovery for her next attack.
When she reach 1/2 health she does these new attacks:
  • Mass hair tendrils: She does the same animation as Hair tendril except she says "Lady, don't run away!". Then it's just her hair that randomly rise a bit everywhere on the arena for a short time.

  • Pounce: when slighlty outside of her hair stabs range, she throws her hair forward, then catchs up. It hit you 2 times.

  • Hair impale: She retracts then extend her hair all around her. Massive damage.
All of her attacks have guards break and spirit crush (instantly remove your yellow armor bar).
Also like other netherworld bosses, she has super armor.

Tactic:
Her attacks are extremely quick, it's hard to react in time. Also she has good tracking so you can't outrun most of her attacks.

I personally focus more on seeing the guard break icon showing up than looking at her animations as I find it easier to react.

You should be staying close to her, and as soon as see the "guard break" icon show up, don't wait nor think, dodge! Then land some blows and repeat.

The nastiest move is her Hair stabs, not only being 4 stabs deal a lot of damages, but the following 4 stacks of bleeding will kill you quickly if you don't rest. Run away into a corner and stay still while dodging her hair tendrils.

If she's on you screen border, you aren't safe, be mentally prepared for any grab attempt.

Kind of bold move but I think the shield does shine. Go stand still literally in front of her, the shield just facing in front of the skull's mouth, and as soon as you see the attack icon, perfect block it, You'll always perfect block her hair stab or hair spin this way.
Be mindful that if you're too far away she tries the grab, you'll be grabed from behind if you try to perfect block that.
33. Rising Moon
Rising Moon, formely know as Hongde Xu, isthe father of Xilvaron and Ajiela's husband.
He's an infamous devil slayer, having experienced many battles, his story is shared among the new devil slayers.
After his tragic death, he's in the netherworld, having forgotten everything, he attacks everyone.
He's carrying a frost sword called "Frostrend". His sword also do spirit crush (remove all your spirit armor in one blow).


For all his attacks, he has PERFECT TRACKING! He's always facing toward you no matter what attack he's doing. The only exception is his charged attacks that for a split second before impact he stops tracking:
  • Frost ray: He charges then unleash a frost ray that do MASSIVE DAMAGE and slows you.

  • Frost wave: He charges then send a frost wave projectile.

  • Combo attack: 2 swings followed by vertical slash. He can interrupt his combo. His combo attack is so slow to chain, you can actually dodge his next strike if you been hit! The final slash inflicts slow.

    After reaching 1/2 health he changes his behavior and does dodges:

  • Combo attack become guard break attacks and does huge dives while doing it. So you can't outrun anymore. Can still dodge his follow up attack after being hit.

  • Riposte: Block and counter with a slash. Very preventive as even from a good distance he'll tries to Riposte if you attack.

  • Frost slash: He charges up then does a huge slash of frost energy, has huge range. He takes slightly longer to charge up this attack, you can sneak up behind him if you're close enough.


Tactic:

You hated the Yellow Immortal with his lunge attack? Now enjoy the same but dodging combos instead of single strike! His perfect tracking prevent you from circling around for dodging.

I hope you have enough stamina and regen to chain 3 dodges or else this boss will always get you, you're forced to dodges through his attacks except the charged ones. Without counting the frost effect that slows your stamina regen even more!

For his first half all his swings can be blocked like White Immortal, and also destabilize him, so bringing a shield for the first part isn't a bad idea.

Also he recovers so quickly between his attacks you rarely have the time to do a full combo. I even suggest to do half combo or big single strike between his attacks.

I strongly suggest to do a bit of training session against him just to learn to chain dodges for his combo, as his attacks hurt a lot. His frost ray is a meme, it's so deadly it usually 1 or 2 shots you.
34. Miss Mu
Miss Mu is a boss that can only be found in the secret room of the nether world chapter.
She is the master of the lantern keeper.


For the duration of the fight, her "barrel?" she was sitting on, will periodically release poison gas that does continuous damage + poison you or emit 4 lasers that circles and set you on fire. It has a huge cooldown.

The first half of the fight she goes easy on you:
  • Firecracker: She throws some firecracker in front of her in an arc. She can't be interrupt by your attacks. Inflicts blindess.

  • Spirit missile: She summons 2 spirits that homes onto you, They're quick but their lifespan is short.

  • Smoke: She smokes her pipe then blow out an huge smoke forward, the smoke will stun you.
Once you reduce her health to 0. She's pissed, tosses away her smoking pipe and changes her stance into martials art:
  • She still does her Firecracker attack.

  • 3 punches combo: She does 2 explosive palm punches followed by a bigger punch with bigger affected area, inflicts electric damage. If you've been hit you can still recover and dodge her final strike.

  • Roundhouse kick: Well, a roundhouse kick that inflicts knockdown.

  • Palm laser: When far away she focuses then casts an electric ray that spreads, it covers A LOT of the area you're pretty much forced to dodge through!

  • Reaction attack: after taking enough damage, she'll respond by a diving explosive palm attack.
Miss Mu has an unique mechanic, everytime she hurts you with her attacks, she generates a spirit that hovers around her, the spirit acts like a bone shield, fully negating a hit, no matter the strength.

Tactic:
Because of her own "bone shield" mechanic, you can't rush her. She gives lot of pressure it's very tempting to desesperately attack when she hit you but its almost useless if you aren't dodging her attacks.

Also for obvious reason, you should favor quick weapons like daggers, if she manage to get some spirit shields.

The first phase should'nt be too hard, wait for the barrel to stop attacking, and after she does her firecracker rush and stagger her with your attacks.

The second phase she hits harder and will generate much more spirit shield if she manage to hit you. She can still be staggered by your attack.
If she doesn't have any spirit shield you can bait her punches and use your weapon's range to catch and interrupt her, if she has shields, try to land some cheap shot like counters attack to strip it away.

She's kinda extreme, as long you manage to dodge she's quite feasible, but once she has shields it's way harder to remove it without being hit again.
Conclusion!
Thx for reading our guide. I hope it help you win a fight or understand a boss.

It's my first written guide, english isn't my native speaking language (tho my friend is helping me with it), so feel free to leave a comment to help make the guide better, together.

38 Comments
Shiroi Ren 18 Apr, 2023 @ 6:11am 
Today I was the one who scared Miss Mu with my relentless build for Tindra...
https://gtm.steamproxy.vip/sharedfiles/filedetails/?id=2964033947

P.S.
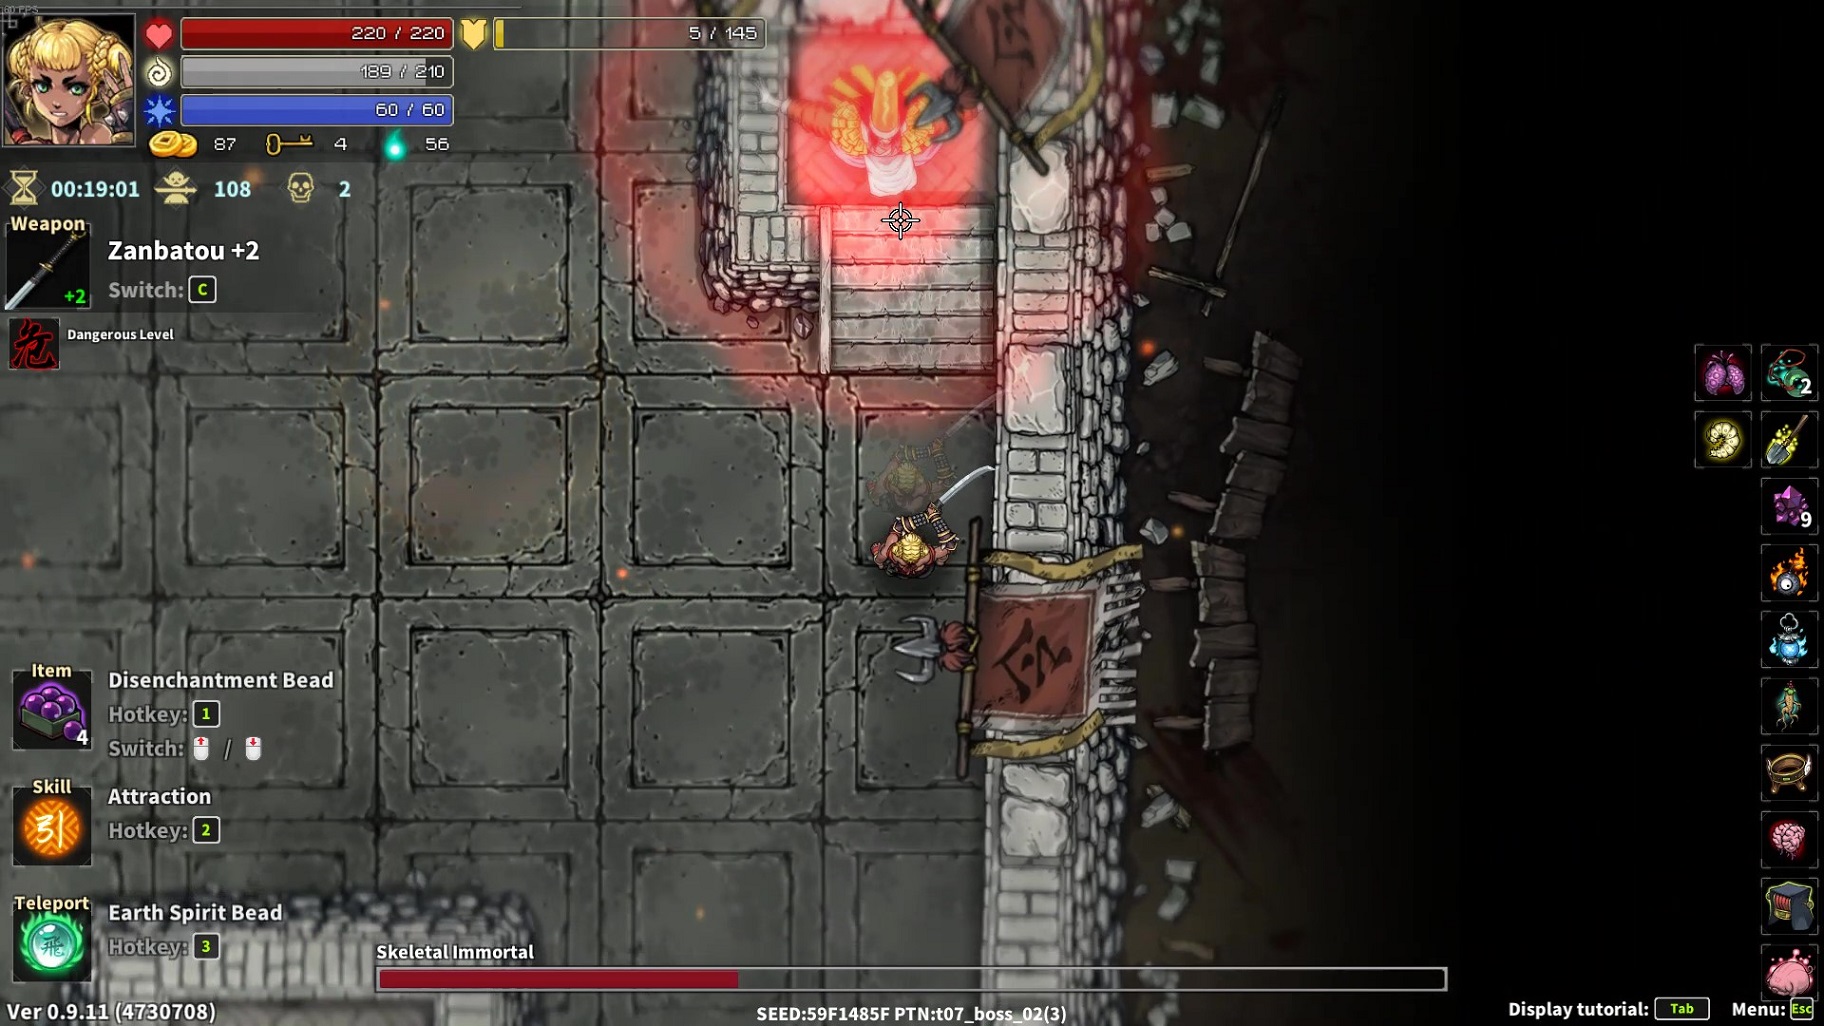
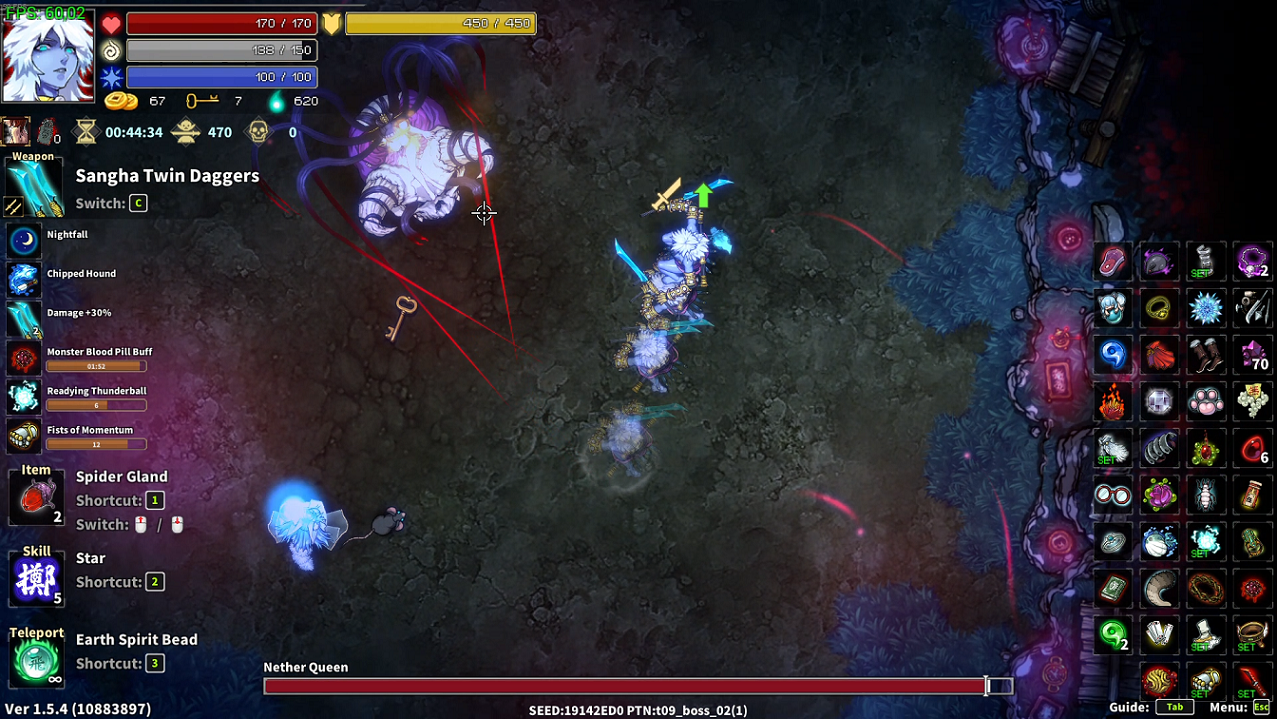
She is really will rely on 3-hit combo and Palm-counter if you get close and personal with her in second phase, which makes fight pretty easy.
Shiroi Ren 14 Apr, 2023 @ 3:48pm 
Miss Mu really likes to counter you after she lose half of her health. However, like with firecrackers, if you hug her, she will miss... The problem is that if you just slightly away from her, she will hit you.
happygiggi  [author] 11 Apr, 2023 @ 5:53am 
For some reason Jehoshaphat is the DLC character I struggle the most to play with.

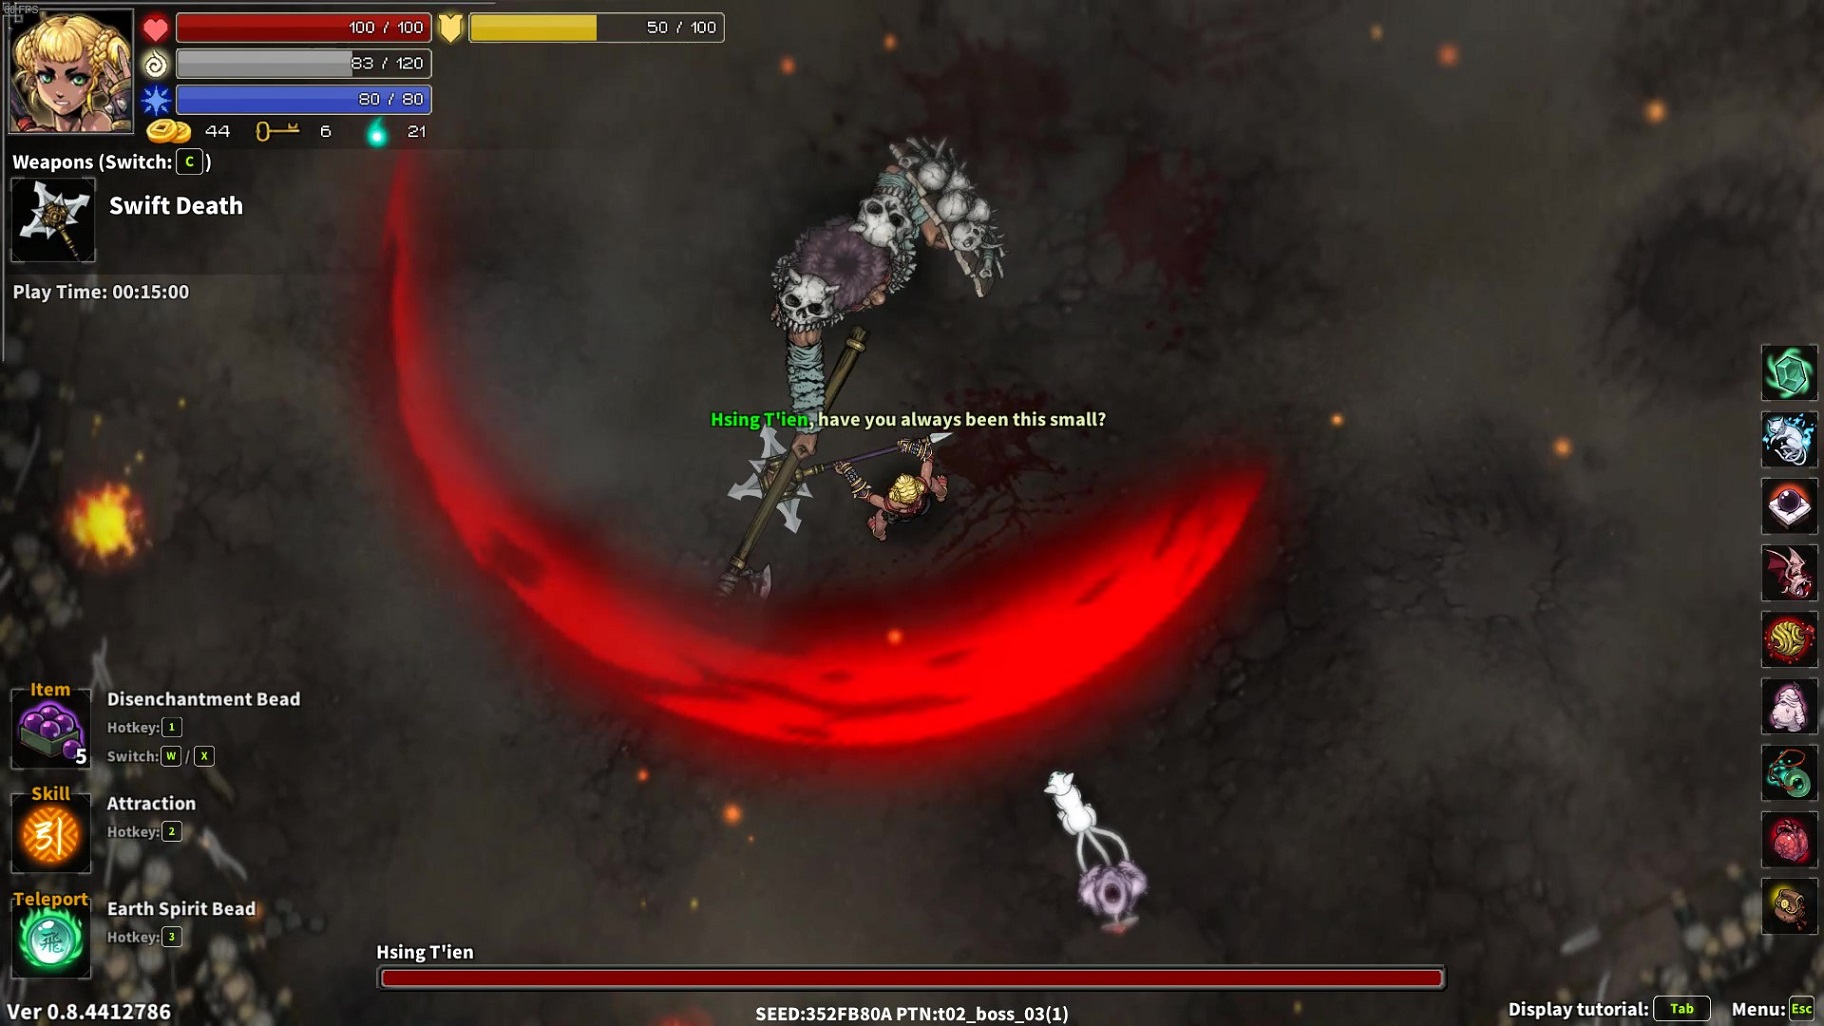
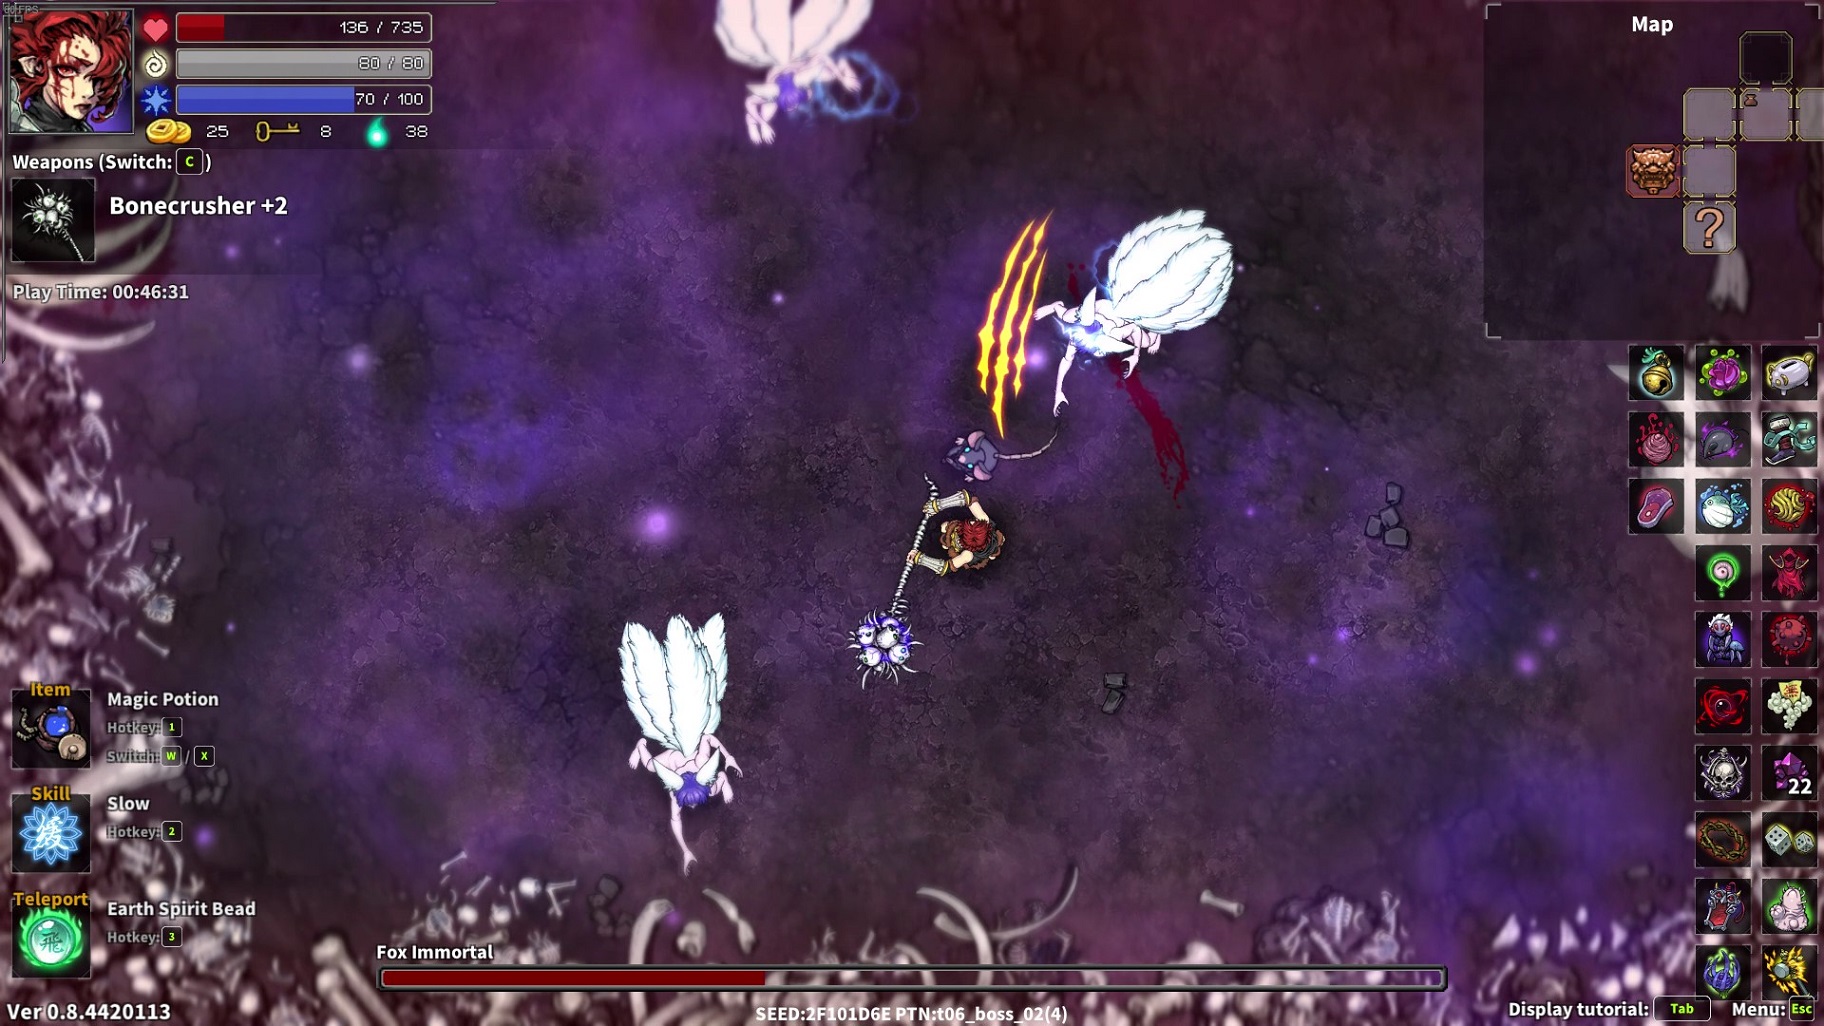
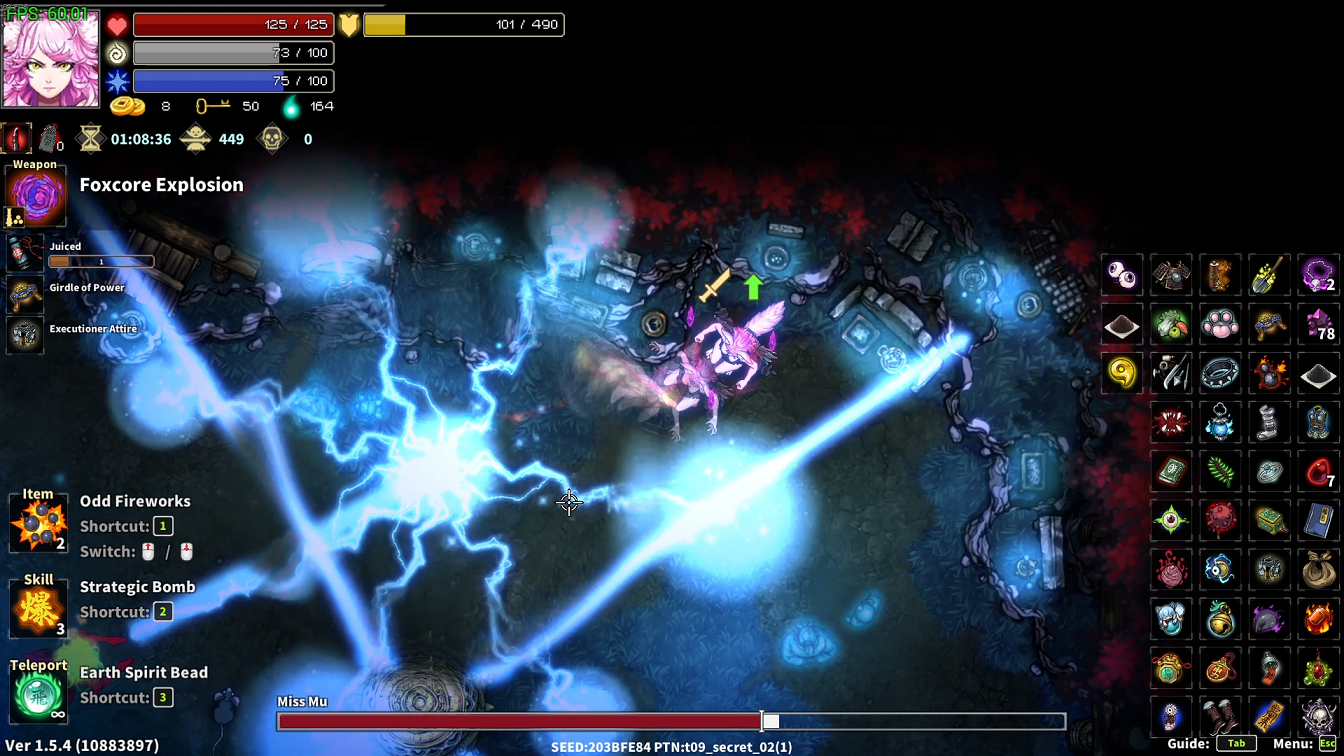
Miss Mu is really scary.
Shiroi Ren 11 Apr, 2023 @ 4:23am 
I fought Miss Mu with Jehoshaphat. Fight ended like in 66 seconds with me YOLO her. The second time I fight with Tindra... And put my own Cauldron... That became messy... =_=
happygiggi  [author] 11 Apr, 2023 @ 4:17am 
In all my run I aim to have 60 movement speed, I love it so much.

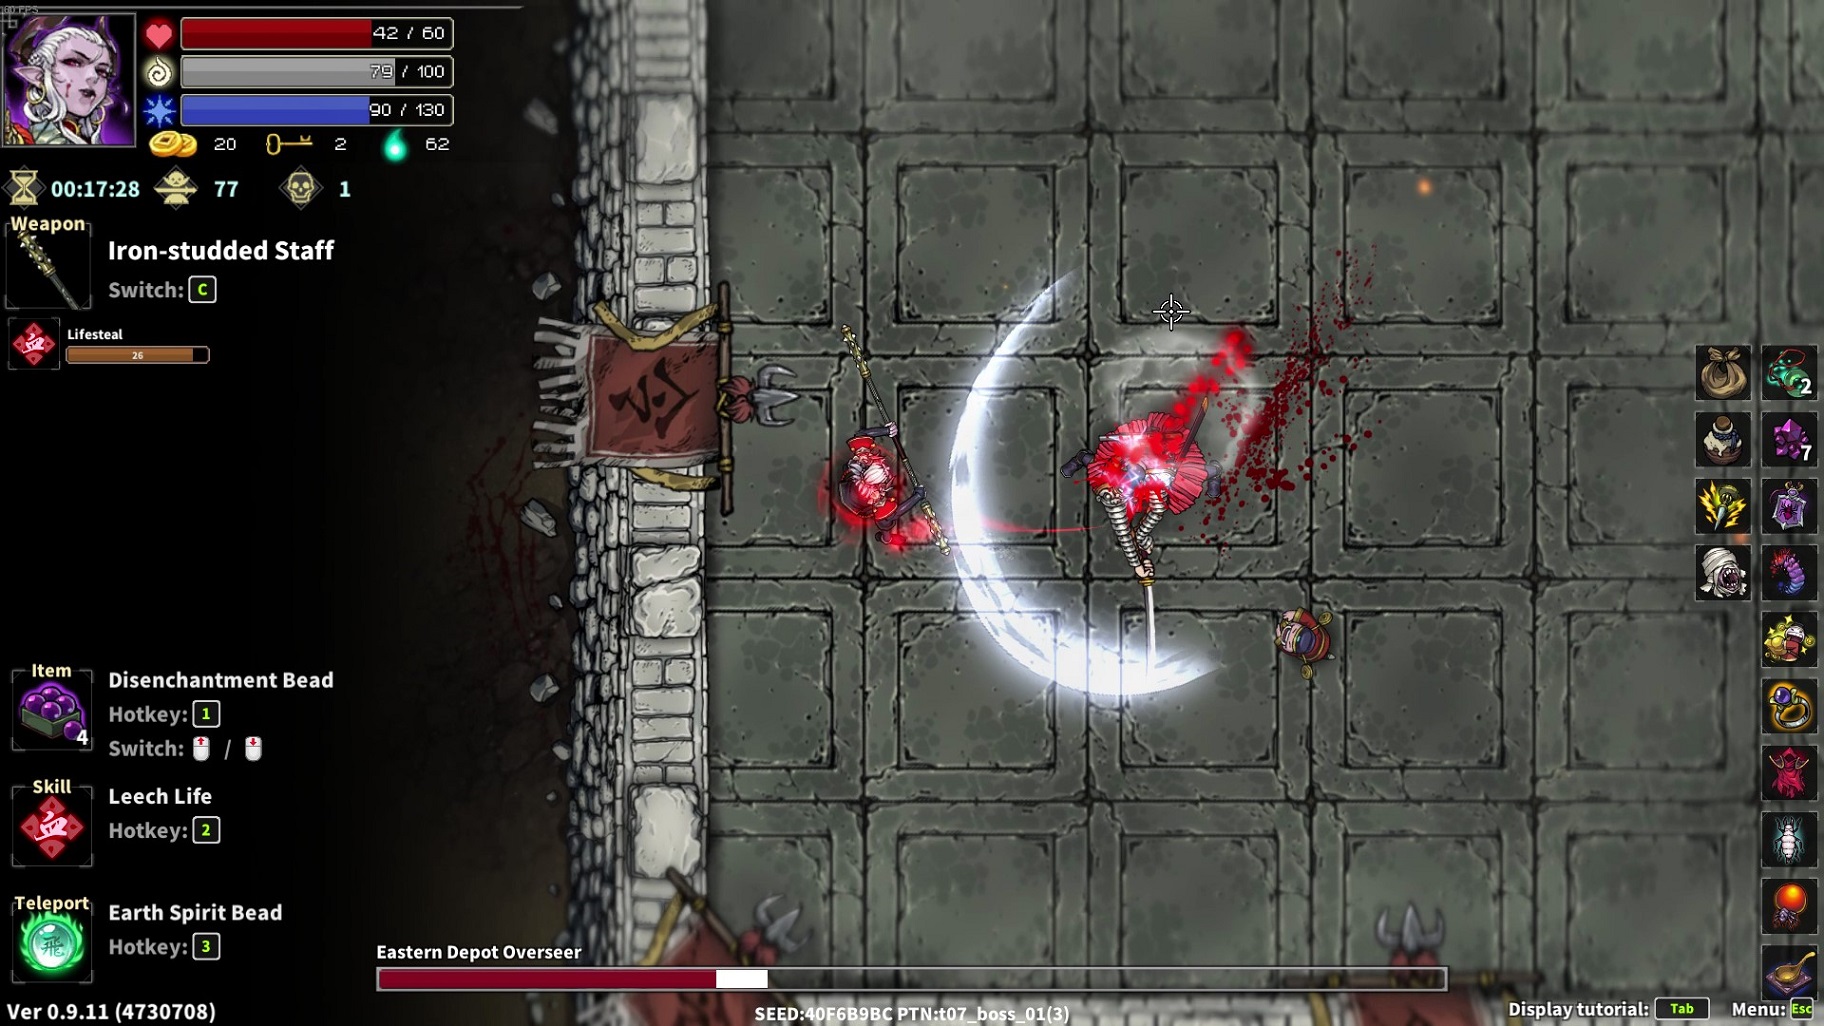
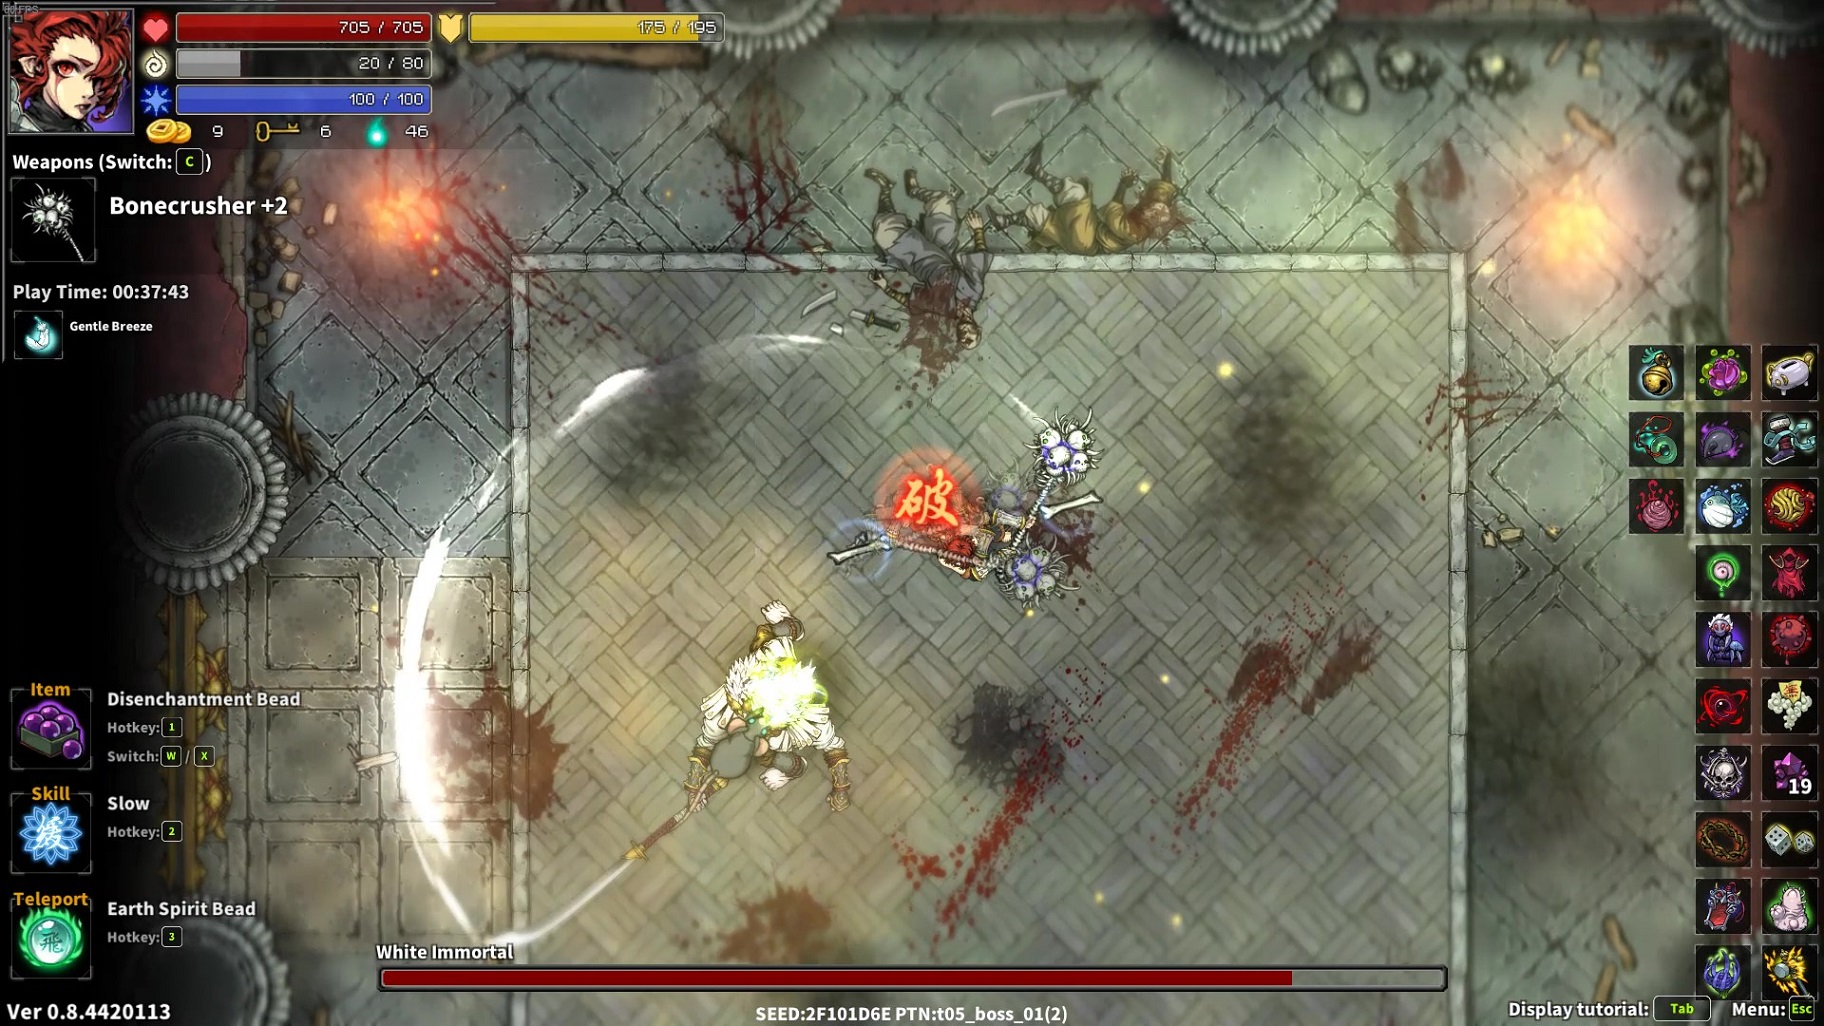
Crazed White Immortal second phase isn't that hard, his 2 swings is well telegraphed I always dodge throught the 2 strikes.

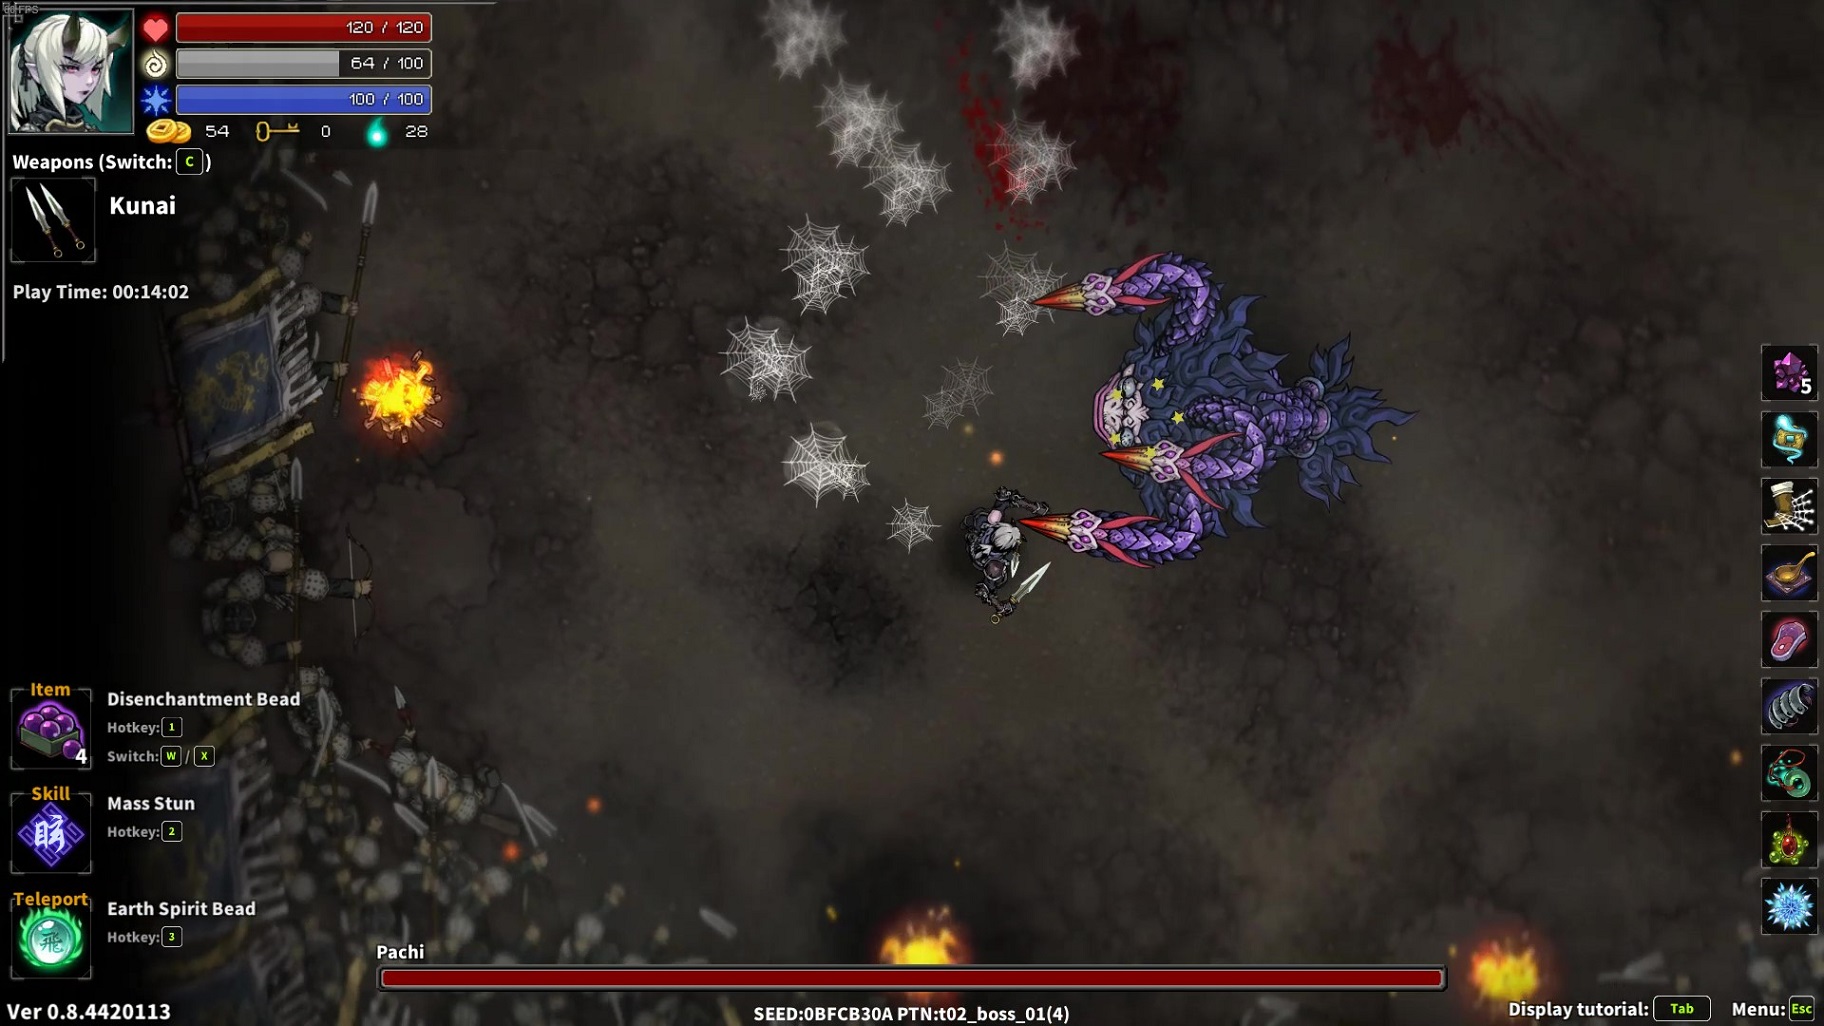
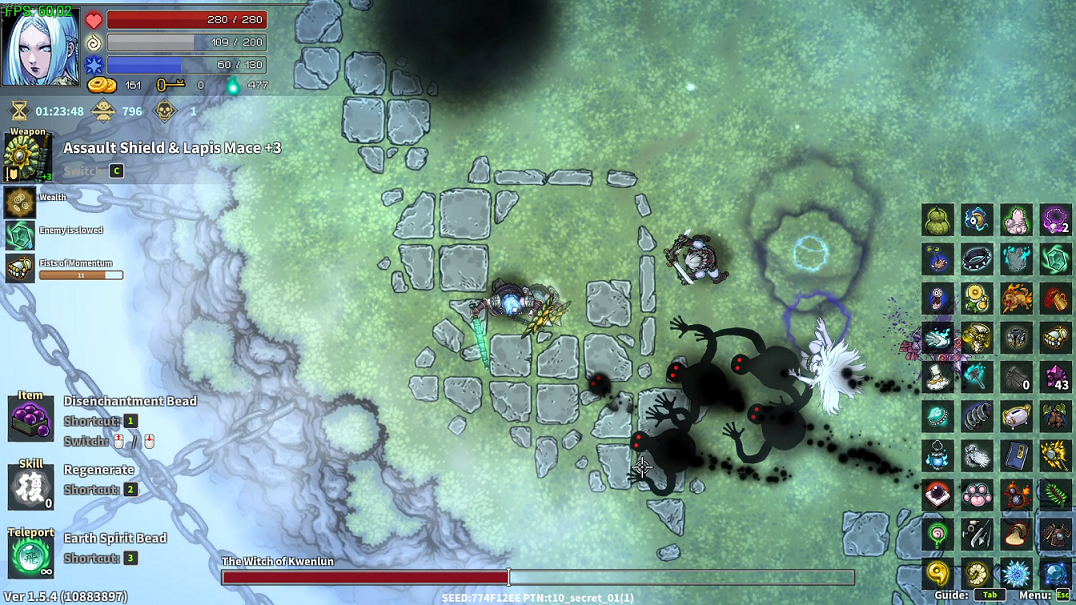
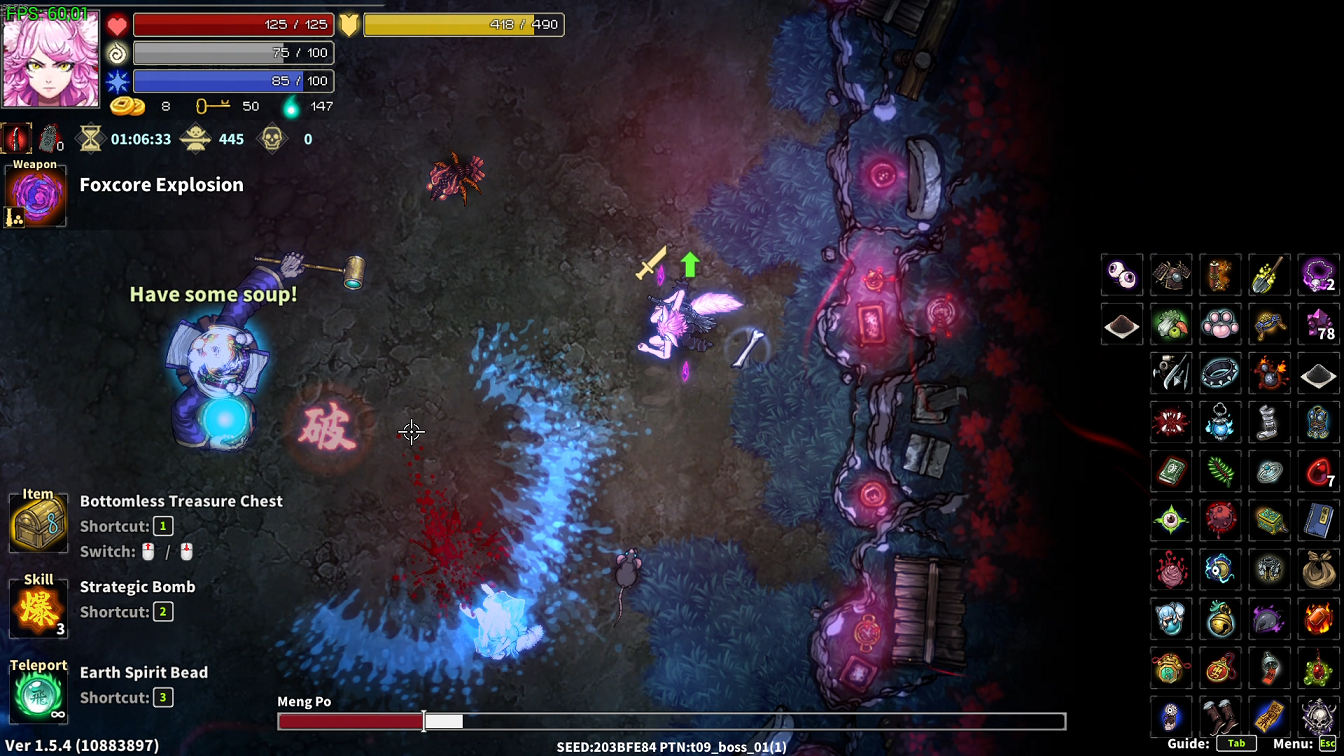
Meng po is insanely easy to deal imo. She doesn't have speed, coverage nor defensive ability like other bosses.

Miss mu enrage mechanic is her only way to get away from stunlock. (and reaction attack in second phase).
With the music box relic you notice how much the enrage help her staying alive a lot.

Also only her firecracker and reactive attack can't be interrupt with your attacks.
Shiroi Ren 11 Apr, 2023 @ 12:41am 
You can actually cheese Miss Mu with Curse of Slaughter and Soul Blade relic. If you time your attacks right you will be able to push her from one "enrage" animation to another without her doing much. Tried with Tindra and Jehoshaphat.

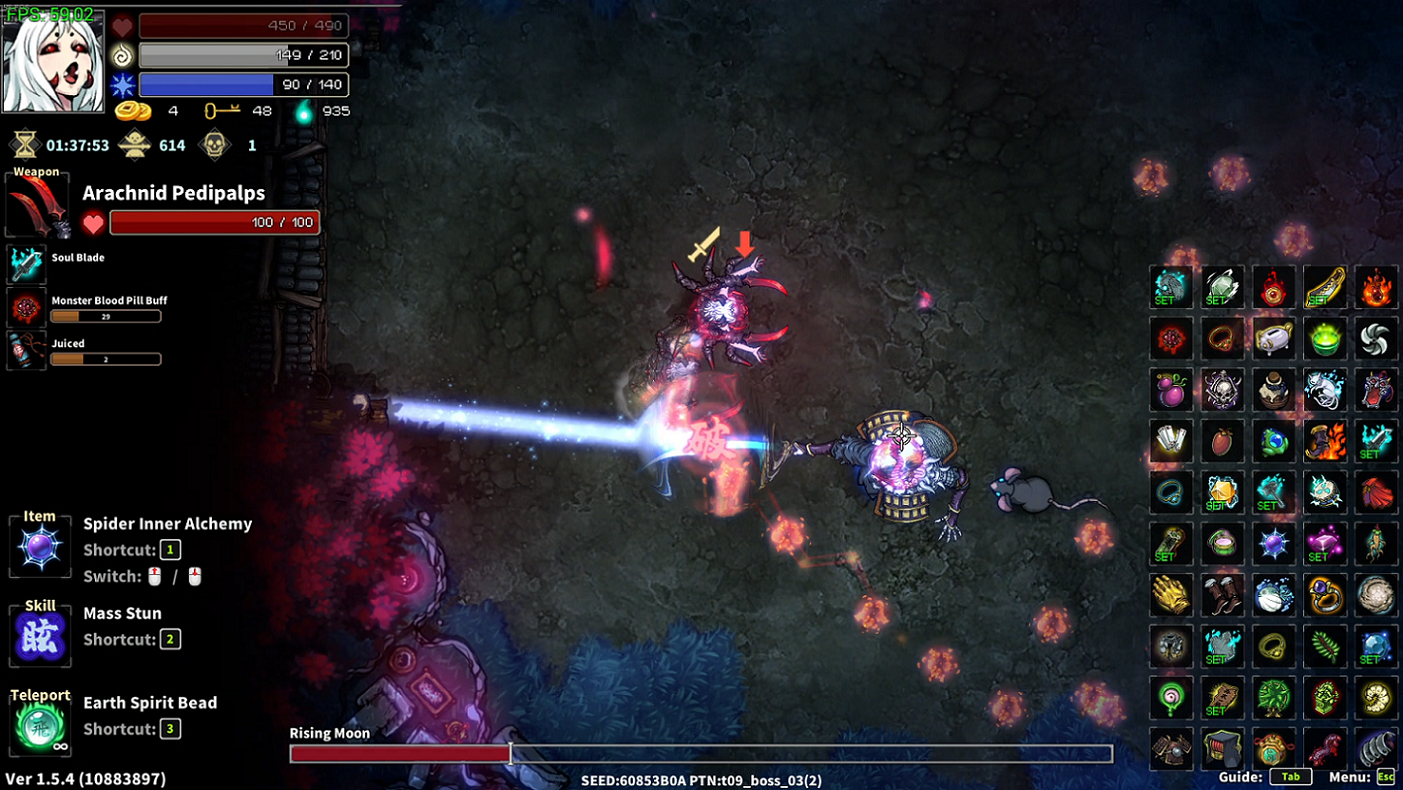
Well, she is actually pushover if you blitz her with status effects: she can burn, be poisoned, frozen, confused, wounded and charged (though she semms to be immune to stun). If you put everything on her she becomes sitting duck and somehow her shields doesn't help.

P.S.
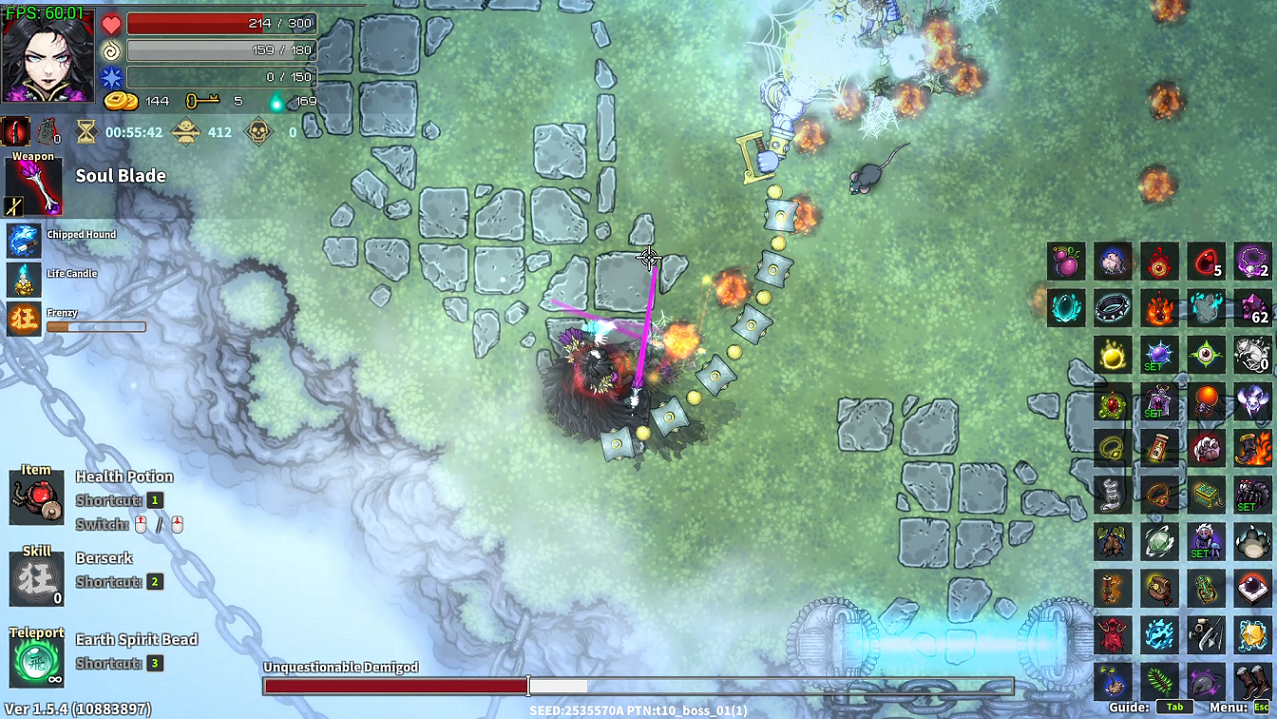
It looks like Palm Laser can be interrupted with your own attacks. With Tindra's Strategic Bomb and Jehoshaphat's Berserk I never saw this particular attack. I dodged several with Xilvaron though.
Shiroi Ren 10 Apr, 2023 @ 8:37pm 
How to cheese Meng Po on Normal (and partially on Hard). You need some mobility though and stamina.

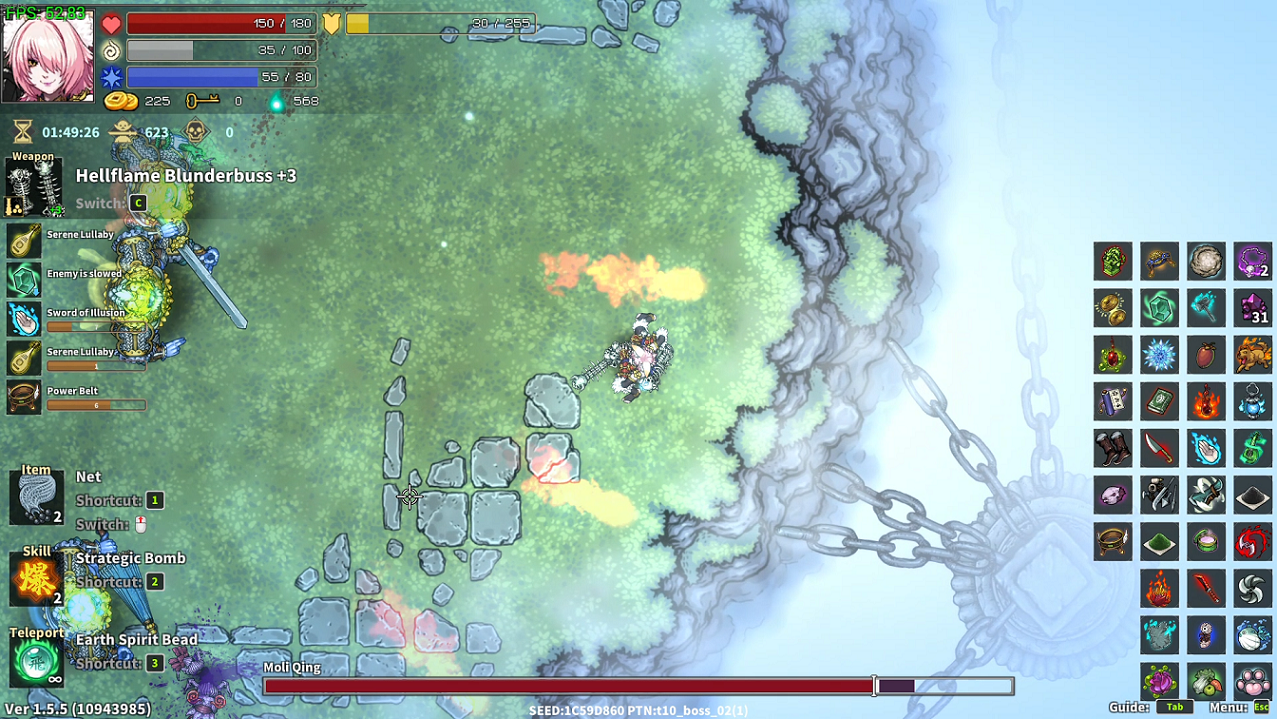
Easy way: Just put Fox Cauldron in the middle of Boss Arena when Boss HP drops to half. Its active time is usually enough to severly damage Meng Po while she would just Teleport.

Tricky way: Flame Boots relic can force her Teleport but not reliably. Any other relic that can deal damage will force her to Teleport.

While she is teleporting she doesn't do anything. Almost.
Shiroi Ren 10 Apr, 2023 @ 8:26pm 
I just found it after trying to find cheesy way of dealing with him. XD

https://youtu.be/XDZYjoNAb5U
On Normal you can sidestep from his charge attack with Mobility of 50+.
happygiggi  [author] 10 Apr, 2023 @ 5:50pm 
Interesting, I'll add it thanks!
Shiroi Ren 10 Apr, 2023 @ 3:41pm 
About crazed immortal. He does three charges in his second form. You can safely attack ONLY after three. Otherwise his recovery time will be faster and he will charge again. If he doesn't do three charges, just bait him for all three.