Terraria

Terraria

Not enough ratings
Terraria Boss Ideas 8
By Okami Tomato
Well, even though I only finished off Boss Ideas 7 a short time ago, I already had a few ideas in store for another one.

This one, much like #6, is also intended to be a standalone; so expect this to be its own thing unless something states otherwise (such as me contradicting myself again :P)

Disclaimer: Not a guide, same as ever really huh?

Anyways, without further ado, enjoy :)
   
Award
Favorite
Favorited
Unfavorite
The Story (So Far)
Thematically speaking it likely takes place at some point after Boss Ideas 4/5's overarching story, but before Boss Ideas 7. It has a few elements that suggest similar-ish continuity with a few bosses, so it isn't completely separate like #6.


The story itself seems simple enough at first. The main thing being a group of strange warriors travelling towards the player's world and, with that, unusual things begin to appear and the world overall seems to become more harsh. Therefore, the player goes out to find them and see what they're up to...
[Main Game]
All the bosses the player will encounter before entering the Post-Game, minus special bosses.

This includes Pre-Hardmode and Hardmode (obviously), as well as a few Post-Moon Lord bosses. This section ends once the 'final boss' has been defeated, which in this case isn't considered the Moon Lord due to the presence of many more important Post-Moon Lord bosses.
01 - Knights of Water and Fire
Appearance: The Knights of Water and Fire are two knights, similar in appearance, whose main differences are the colouration of their armour and scarves; the Knight of Water wears blue and the Knight of Fire wears red.

Summon: Use the Twin-Element Banner anywhere in the world. The boss only despawns if players get too far away or dies; like with a large amount of other bosses. Both spawn at the same time and both will despawn at the same time if the conditions for despawning are met so that the player cannot simply cheese half the fight by forcefully despawning only one of them.

Fought: Pre-Hardmode
Specifications: Post-Skeletron
Special?: No
Progression: Later Bosses

Stats:
Health: 4,500 (6,750)
Attack:
-38 (60) (Melee)
-30 (53) (Elemental Attack)
-20 (34) (Embers)
Defence: 10

Fight:
The two of them will take it in turns to attack, though they will still follow each other when it isn't their turn to attack. The knights will usually run to the player, attack, and then jump back and switch to the other knight, who then also attacks. Both have a melee attack and an elemental attack.
-Both have a similar melee where they approach the player and swing a sword coated in either water or fire, based on the knight. The swing covers a fairly wide area near the knight and is quite fast, but lacks any proper range due to being a melee attack.
-The Water Knight's magic attack has him launch 5-8 water bolt-esque projectiles at the player. They are slightly faster than the water bolt, but retain their ricocheting and piercing abilities.
-The Fire Knight's magic attack has him launch a large fireball that arcs through the air and lands where the player was when the fireball was originally launched. It also then explodes into embers which linger on the ground like the Molotov Cocktails'.
When one is defeated the other will 'enrage' and attack faster; also taking over the other knight's attacking period as well to keep the pressure up.

Defeat: Both are knocked down and left kneeling after being defeated, though once they are both defeated the one defeated first will be 'warped' next to the other, still kneeling. A figure, though only a white silhouette, appears in front of them and raises a sword before swinging it down towards them; with all 3 people disappearing into shiny white particles as the blade is swung downward at the Knights.

Drops:
Will always drop either the Flame Blade or Water Blade; the former creates explosions on hitting an enemy and the latter launches water bolt projectiles on swing. May also drop either the Red or Blue scarves; where one boosts the damage of 'fire' attacks and the other does the same for 'water' attacks.

Special Drop:
If defeated in a team in multiplayer it will also drop the Ally Spirit; which when equipped provides mild stat boosts to teammates (they do not stack if multiple are equipped).

Lore Tablet:
-Twins born into a royal household; both with special gifts. Each had mastery over an element; one water and the other fire. While they supposedly had an older sibling, they were drafted into the King's army long before the duo were born.

Hints:
-Dashes are very good for dealing with their fast melee attacks. However, simply continuing to move away from them if they draw their swords also allows the attack to be dodged fairly easily with some careful observation.
--A similar method can be used to dodge the fireball the Fire Knight launches
--Any fast vertical movement can also help dodge their melee swings.
-Fighting the boss in an open area can make the water projectiles a lot less threatening

Extra Info:
-The figure that appears once the boss is defeated, while not having been seen yet at this point in the story, appears to be wearing a crown due to the shape of the silhouette. Therefore, the likelihood is that this is a king, and that king will probably be a later boss.
[Added: 10/11/19]
02 - Obsidian Elemental
Appearance: A humanoid entity made mostly of obsidian. There are a few small cracks in her body, though the most important is probably the one above her right eye that has a thick steam cloud pouring from it. The steam cloud swirls around the Elemental's body a few times conveniently.

Summon: Use the Obsidian Locket anywhere underground. The boss can be taken anywhere, but needs to be summoned underground.

Fought: Hardmode
Specification: Pre-Mechanicals
Special?: Uncraftable & Rare Summon
Progression?: No

Stats:
Health: 13,750 (20,000)
Attack:
-45 (80) (Melee) (Inflicts On Fire! - 33 (50)%)
-35 (60) (Steam Geyser)
-40 (70) (Fiery Obsidian) (Inflicts On Fire! - 33 (50)%)
Defence: 20

Attacks:
Phase 1:
Floats after the player, not attempting to ram them but attempting instead to simply remain fairly close. Will distance itself if needed, or move if stationary for more than only a couple of seconds.
-She may raise a fire-covered hand to the sky, causing a series of flaming obsidian chunks to rain from the sky. They pass through blocks until at the same vertical height to the player or lower, where they will then explode on contact with blocks.
-She may raise a steam-cloaked hand to the sky, causing a total of 3 steam pillars to erupt from the ground. Each will appear as a harmless cloud under the player before bursting into the steam geysers after a short delay. Each is summoned with a slight delay and, once summoned, they cannot reposition themselves.
At half health the Elemental will become angry and gain a few additional attacks alongside their pre-existing ones.
Phase 2:
She moves faster and repositions herself more often, as well as gaining 2 new attacks to use.
-She may fling a cluster of obsidian chunks at the player that bounce and roll along the floor slightly, though due to weight lose a lot of height with each subsequent bounce. They explode after a few seconds.
-She may summon up to 4 steam geysers at once, all in random locations near the player. The geysers retain their delay, but unlike the phase 1 attack they aren't summoned underneath the player intentionally and are all summoned at the same time.

Defeat: Flinches, and then disappears in a large cloud of steam and some small embers.

Drops:
An obsidian sword that deals decent damage and launches fireballs, a steam cannon that releases powerful piercing steam bursts, and a fireball staff that rapidly launches fireballs. May also drop the Steam Stone rarely that gives the player a mini Obsidian Elemental pet that rides a cloud. In Expert Mode it drops the Obsidian Ward that makes the player immune to On Fire! and resistant to most other fire-like damage-over-time debuffs, as well as a slight damage increase.

Lore Tablet:
Born of the forbidden love between fire and water elementals decades ago, wandering through the caverns beneath the world ever since maturing. Has purposefully remained isolated from the surface to avoid their current problems.

Hints:
-Many of her attacks are vertically-moving or have tall hitboxes, so simply trying to fly above them usually doesn't work
-You can get the Rod of Discord at this point, so you might want to get that.

Extra Info:
-This was the first boss sprited for Boss Ideas 8, and was originally not made for it but due to it otherwise never being used it got a place as an early Hardmode boss.
-Despite also being related to fire and water elementals, it has no relation to the Knights of Water and Fire fought previously. It is also one of few bosses not related to the 'King' directly, despite mentioning him within the lore tablet.
[Added: 11/11/19]
03 - Royal Archer
Appearance: Wears a short brown hooded cloak draped partially over her shoulders. Most of her outfit is a mixture of brown and green, with green tassels near the knees that blow in the wind. Also has a yellow feather-like pin attached to her cloak. A few strands of green hair are visible from underneath her hood.

Summon: Use the Hunter's Mark anywhere in the world. There are no summoning conditions for the boss, though the boss will still be able to despawn if the player gets too far or dies, like with most bosses.

Fought: Hardmode
Specification: Post-Mechanicals
Special?: No
Progression: Later Bosses

Stats:
Health: 20,000 (28,750)
Attack:
-40 (75) (Melee)
-45 (82) (Arrow)
-54 (90) (Storm Arrow, Gold Fire Arrow)
Defence: 14

Attacks:
Moves swiftly, usually moving to a position and launching arrows at the player before relocating and repeating the cycle. She remains grounded most of the time, but can 'hang' in the air when attacking the player.
-She may launch up to 6 arrows at the player in rapid succession. They arc ever so slightly through the air as they travel, but otherwise don't have any special properties; just that their velocity makes them hard to dodge.
-She may launch numerous arrows upwards using a bow akin to the Daedalus Stormbow. After a short amount of time markers will appear on the ground that show where the arrows will land and, after about a second, they will all begin to rain down from the sky. The attack is only used below 80% (90%) health.
-She may put numerous arrows in the bow and pull it back, though does not release it once it is fully retracted. After a few seconds the tips of the arrows will glisten, at which point she will launch them all at once. They disappear after travelling around 15 blocks. However, they will begin to appear horizontal to the player one at a time, usually starting 10 blocks away, though can be summoned from either side of the player. 3-5 (4-6) are released at a time, and once the final one appears the attack is considered to have ended and thus the Archer will move again. The attack is only used below 50% (65%) health.

Defeat: The defeat is similar to that of the Knights of Fire and Water; with the Archer falling to her knees before a humanoid silhouette raises a sword above her; with both her and the silhouette disappearing once it goes to swing the blade downward.

Drops:
Will drop the Hunter's Bow which can be charged by holding down the attack button so that it may launch numerous arrows in rapid bursts, an accessory that reduces the chance to consume arrows, and the Gold Fire Quiver that sometimes transforms arrows into Gold Fire Arrows; which deal additional damage, gain a piercing effect, and can inflict On Fire!

Special Drop:
If defeated within a 30-second time limit she will drop the Hunter's Spirit; which boosts the player's damage if undamaged during a boss fight. Once the player takes damage the damage boost is gone throughout the rest of the boss fight, even if the player regains any health lost.

Lore Tablet:
Recently grafted into the King's army due to her above-average archery skills, she still seems inexperienced when it comes to battle. Despite this, the King doesn't seem to factor in her inexperience when it comes to her punishment for failure.

Hints:
-Moving vertically can make dodging both the regular arrow attacks and the gold fire arrow attacks easier to dodge.
-Staying close to the ground makes it easier to notice the markers for the Stormbow attacks, but also increases the risk of the Archer accidentally dealing melee damage to the player due to her fast movements.

Extra Info:
-The archer looks different from the original design, though this was mainly due to similarities between her design and a later boss (as well as misplacing one of the original designs)
[Added: 28/11/19]
04 - King's Seers
Appearance: The Seers' appearances are unusual, even compared to the majority of the King's other minions. The main thing to note is that their faces are covered my masks with eye-shaped markings on them. Red energy seems to be glowing beneath them from the ground they stand on.
Appearance: The Seers' 'Death Visions' are red wyrm-like entities who seem to be only partially-formed due to their mostly-transparent bodies. The Visions look like a boss encountered later...

Summon: Use the Forged Seal at night. The boss will despawn if it reaches daytime, or if the player dies or moves too far away from the boss. Two Seers are summoned during the boss fight, and both need to be defeated in order to 'defeat' the boss (so despawning only one of them by moving far enough away doesn't work).

Fought: Hardmode
Specification: Post-Golem
Special?: No
Progression: Later Bosses

Stats:
Health:
-28,500 (40,000) (Seers)
-4,500 (8,750) (Death Visions)
Attack:
-50 (80) (Seer Melee)
-58 (95) (Seer Magic, Vision Fireball)
-60 (98) (Vision Body)
-110 (180) (Vision Head)
Defence:
-20 (Seer)
-32 (Vision)

Attacks:
The Seers will usually begin the fight by trying to summon a Death Vision, regardless of the player's actions. The Seers act independently and the Death Visions do also.
The Seers can either simply float to reposition themselves or teleport in a flash of red light. They mainly attack with magic blasts.
-The Seers may launch 3 arcs of magic blasts towards the player. The arcs have 5, 4, and 3 projectiles respectively.
-The Seers may launch a total of 10 magic blasts at the player in rapid succession.
The Visions have similar attack patterns to Wyverns; flying through the air and attempting to melee the player and deal heavy damage.
-The Visions may also launch a barrage of red fireballs at the player. They explode on contact with solid objects.
-The Visions may release numerous fireballs that are affected by gravity; falling down to the ground as they are released. The Vision will not fly directly at the player when planning to do this; instead flying above the player so that it can rain down fireballs upon the player.
The Seers' attacks slowly increase in frequency as their health lowers. The attack speed also increases in Expert mode, and even further if one of the Seers is defeated.
The Seers will summon Visions later at certain total health percentages. Once at 75%, 50% or 25% health is left between both of them [e.g. If the seers are at 65% and 85% health, 25% health is missing and thus a Vision will be spawned]. A Vision is also spawned once one of the Seers is defeated, as well as if the player fails to deal damage to a Seer over an extended period.

Defeat: The Seers explode into red flames upon defeat, leaving behind gibs of their robes. The Visions disappear into red particles upon defeat and leave no gibs of their own.

Drops:
Mostly magic items; the majority of which tomes. Outside of these it may also drop an accessory that buffs summon and magic damage, and in Expert Mode drops a summoning staff that allows the player to summon a mini version of the Death Vision; acting like the Stardust Dragon staff in summon properties (though obviously weaker).

Special Drop:
If the player manages to defeat both of the Seers at the same time they will drop the Vision Spirit. The Vision Spirit may summon a small Death Vision minion for a short time to protect the player after they take damage.

Lore Tablet:
The official Seers of the King; frequently requested by him for prophesy. They claim to see him expand his kingdom into an empire, but also that his end will be caused by a red dragon; partially forseen in their 'Death Visions'.

Hints:
-Both aspects of the fight, the Seers and the Visions, have different weaknesses due to the Seers being agile and only having small hitboxes, whereas the Visions are worm bosses.
--The Seers are best dealt with using anything that either attacks fast or has fast-moving projectiles, making it more likely to hit the boss.
--The Visions, as with most worm bosses, are very weak to piercing and AoE attacks and can be defeated within seconds under the proper conditions.
-The Visions should be dealt with as soon as possible, otherwise they are very likely to get in the way of the player
-More than 1 Vision may be summoned at a time; most commonly seen when defeating one of the Seers at a the same time as triggering one of the damage thresholds (e.g. defeating one Seer after having avoided damaging the other).
-The Seers themselves aren't really too threatening, just the Visions. Despite this, taking time out to regenerate against them is a bad idea because of their other ability.

Extra Info:
-The Seers technically have a total of 75,000 total health in Normal Mode and 97,500 health in Expert in the best circumstances due to all of the individual aspects of the boss; health comparable to the Destroyer.
-None of the Seers do not have a confirmed gender, except for one seen far later on...
-The Death Visions look a lot like a boss seen back in Boss Ideas 7
[Added: 30/11/19]
05 - Dragon Tamer
Appearance: The Tamer has blonde hair and green eyes. She wears a red cape and a predominantly brown uniform with green, red and yellow patterns across it. She usually draws a spear to attack.
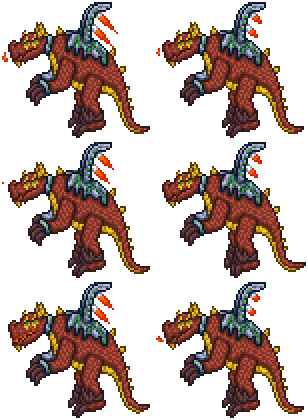
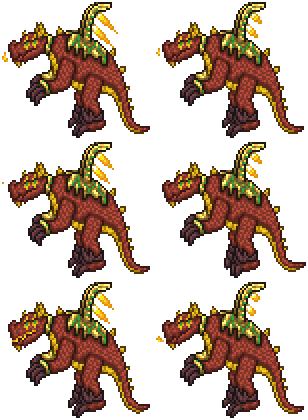
Appearance: A large, partially-mechanical dragon. It is coated in red scales and has yellow horns and spines as well as a yellow underbelly. Yellow markings, possibly paint, is seen around its green eyes. It has large brown claws and additional brown spikes 'cuffs' around its feet. Metal rings are hooked around its left arm and neck, and its right arm seems to be mostly mechanical. It has two mechanical wings attached to its back with two flame jets sprouting from each wing.

Summon: Use the Dragon Stone anywhere in the world. The time and place are unimportant, but the boss will still despawn if the player dies or gets too far away from it; like with most bosses. Both the Dragon and Tamer must be defeated in order to 'win', so having either despawn prematurely will make the fight relatively pointless. The fight begins with the dialogue "You think you need to face me to find the king?"

Fought: Hardmode
Specification: Post-Golem
Special?: No
Progression: Later Bosses

Stats:
Health:
-24,000 (46,000) (Tamer)
-50,000 (86,800) (Dragon)
Attack:
-70 (110) (Tamer Melee)
-60 (97) (Spear, Flame Pillar) (Inflicts On Fire! - 50 (100)%)
-85 (140) (Dragon Melee)
-58 (94) (Fireball) (Inflicts On Fire! - 50 (100)%)
-52 (82) (Embers) (Inflicts On Fire! - 100%)
Defence:
-40 (Dragon)
-60 (Tamer)
--10 (Tamer - Dragon Defeated)

Attacks:
There are two aspects to this fight; the Tamer and the Dragon. Both attack independently from each other from Phase 2 onward.
Phase 1:
The Tamer will ride the Dragon in this phase; only attacking with ranged spear projectiles in-between the Dragon's own attacks. The Dragon will usually charge at the player 4 times before attacking; with each charge progressively losing distance but also reducing the time between charges for each subsequent charge.
-The Dragon may fly over the player, dropping large amounts of embers that float down towards the ground. They cannot pass through blocks, lingering on them once they land, until they eventually despawn. They always inflict On Fire! and deal minor damage.
-The Dragon may fly in a loop, summoning fireballs continuously whilst looping. Once 1-3 loops have been completed it will fly to the centre and roar; causing the fireballs to disperse outwards. Up to 8 (10) fireballs can be summoned per loop.
-The Dragon may may remain stationary whilst launching fireballs from its mouth at the player. The angles vary slightly but they are all fired at the player's location.
-The Tamer, in the Dragon's downtime, will throw a fire spear at the player. Once it hits a solid block or the player it creates a flame pillar. The pillar isn't very tall at first but will split in 2 shortly after being summoned; with the top half floating upwards and the bottom half slowly descending until they despawn.
Once the Dragon is taken down to 75% health the Tamer will dismount the Dragon and begin attacking independently; gaining its own health bar.
Phase 2:
The Dragon and Tamer attack independently from now on, with both also being separate targets. The Dragon's movements remain the same, but the Tamer will move with a mixture of fast ground-based movement and teleports, often accompanied with a bright fire effect to give away her position.
The Dragon retains all its previous attacks, but also gains a single new attack alongside them
-The Dragon launches a fireball that becomes a large pillar of fire. Unlike the Tamer's Phase 1 pillars, however, it is very tall and lingers in-place for a while before fading away.
The Tamer retains her only Phase 1 attack, but also gains additional attacks.
-The Tamer may throw up to 4 fire spears at the player in succession, though they have no special abilities outside of their fast movement speed and their slight arc through the air due to being affected by gravity.
-The Tamer may summon a fire pillar like the Dragon's by throwing two spears into the ground near each other. The pillar is summoned in-between them.
If the Dragon is defeated prior to defeating the Tamer, her attack speed increases though her defence decreases drastically. The Dragon will attack faster if the Tamer is defeated first, though there is no defence reduction.
Throughout this point, their combined health total is used to work out when more dialogue is spoken:
At 75% health - "While I am among his ranks, all I do is care for my dragon"
At 65% health - "He believes this was the one foreseen in his vision"
At 50% health - "And thus he says he must have it monitored and tamed"
At 25% health - "Stop this!"
At 10% health - "...I mean I'm not even fond of the king myself..."

Defeat:
-The Tamer will fall to the ground but disappears into a burst of flames instead of the silhouette appearing as with most of the other human bosses.
-The Dragon falls to the ground, though doesn't explode into gibs. Instead it lies down, with flames around its base, before fading away like boss gibs otherwise would.

Drops:
-Drops a flamethrower, magic staff, sword, spear, and a summoning staff that summons a fire spear that dashes at enemies: All of these drops can inflict On Fire! frequently. Also drops Dragon Scales; materials used for making a few items, and in Expert Mode the Dragon Egg that summons a mini version of the Tamer's Dragon as a pet.

Special Drop:
-If the Dragon is defeated whilst the Tamer has taken minimal damage, and then the Tamer is defeated, they will additionally drop the Calamitous Magnet; either equipped to provide some mobility and magic buffs or used to upgrade the Magnet Sphere when combined with some Post-Moon Lord items.

Lore Tablet:
-Apparently not the first time she's been forced to deal with a tyrannical ruler. Her dragon, partially mechanised due to prior injuries by the King's right-hand man, was once believed to be the dragon forseen in the Seers' prophesies.

Hints:
-The Dragon is still the biggest threat of the duo due to its high speed, damage, and aggression. Focusing it throughout most of the fight is better than having it be the thing that gets the aggression boost if the Tamer is defeated first
--Plus, focusing the Dragon may make the Special Drop easier to obtain; especially useful for mages.
-The Dragon has a pattern comparable to Fishron, so similar tactics may work for both.
--However, the Anti-Gravity Hook method won't work because the Dragon cannot be enraged and thus will still summon its fire attacks, plus the Tamer is still active most of the time

Extra Info:
-Unlike the other bosses associated with the King up to this point, the Tamer isn't attacked by the silhouette for her failure to defeat the player
-Neither the Tamer nor the Dragon die in this fight; one of few instances where a draconic entity ultimately survives the encounter mostly unscathed.
-The Tamer first appeared in Boss Ideas 3; donning a similar appearance (though without the dragon)
--The Dragon's colour scheme is still reminiscent of the Yharonlings from Boss Ideas 3 (whose colours came from Yharon).
--The Tamer still has some references to Boss Ideas 3, and Calamity as a whole. The magnet's 'prefix' explicitly uses the word 'Calamity', and her Lore Tablet mentions a 'prior tyrant', likely Yharim, as Boss Ideas 4 and onwards are technically post-Calamity in terms of chronological order
---This has been the only major Calamity reference since the Reanimators in Boss Ideas 5.
[Added: 2/12/19]
06 - Indigo
Appearance: Similar to the Knights of Water and Fire from Pre-Hardmode in physical appearance, though their skin is slightly desaturated, their hair a darker brown, and their eyes glowing purple and only ever seen half-open. Their armour and scarf are also purple, and the silvery parts of the armour are a dark grey instead.

Summon: Use the Shade Banner. Like with a fair amount of previous summoners, time and position are not important during the summon. The boss despawns if the player is defeated or moves too far away, like with most bosses. "For... my... brothers" is the only dialogue in the fight, seen as the boss is summoned.

Fought: Post-Moon Lord
Specification: Post-Moon Lord
Special?: No
Progression: Later Bosses

Stats:
Health:
-142,000 (200,000) (Indigo)
-30,000 (55,000) (Images)
Attack:
-80 (150) (Melee)
-70 (134) (Shadowflame Bolt) (Inflicts Shadowflame - 50 (100)%)
-100 (195) (Shadowflame Pillar, Shadowflame Ring) (Inflicts Shadowflame - 100%)
-70 (134) (Fire Blast, Aqua Blade) (Inflicts On Fire - 50 (100)% / Frostburn - 50 (100)%)
Defence:
-45 (Indigo)
-30 (Images)

Attacks:
Indigo's movements are not the same as the Knights from Pre-Hardmode, though like other human bosses a few of his movements are ground-based such as running, but he has the ability to 'hang' in the air to attack and perform dashes through the air to reposition himself for a new attack or if the player is too far from the ground to risk despawning.
Indigo will always summon an Image, a monochrome version of Indigo, which attacks separately. It can only use either the Fire Blast and Aqua Blade attacks and doesn't have access to any of Indigo's other moves.
Indigo's own moves are as follows:
-He may launch an arc of 6 shadowflame bolts at the player, sometimes followed by an arc of 5 slightly faster-moving bolts.
-He may summon numerous shadowflame bolts that travel horizontally across the screen. However, the vertical spawning area is limited to only around 10 blocks from top to bottom, stopping it from simply becoming a 'bullet-hell' attack
-He may summon numerous pillars of shadowflame from the ground that deal high damage. Their positions are given by faint purple vertical lines, and after roughly a second pillars of shadowflame erupt from the lines' locations.
-He may summon up to 4 rings that orbit Indigo, but after 1 or 2 attacks are suddenly dispersed. Either they are dispersed directly outward from Indigo or may all be launched at the player
-He may summon a ring of fire around himself before launching a barrage of fireballs at the player. After a few seconds the fire ring will disperse by exploding
-He may summon a water bubble around himself before launching a barrage of water globules at the player that ricochet off walls. After a few seconds the bubble will burst.
As Indigo takes damage, his attacking speed will gradually increase. His movement speed will also increase slightly, but this is less noticeable. At 50% (66% and 33%) health he will summon another Image, regardless whether or not the previous one(s) were defeated.

Defeat: Indigo releases a burst of shadowflame, then collapses. He doesn't move afterwards, simply fading away like gibs normally would or despawning as soon as the player moves so that he goes off-screen.

Drops:
Drops a series of shadowflame weapons such as a spear, sword, bow, magic staff, and a tome. Has a rare chance to drop either the Flame Cloak or Water Cloak that buff fire and water moves respectively and can both be combined with some of the drops provided by the Knights in Pre-Hardmode. In Expert Mode it can drop the Shade Shield that provides a chance to dodge attacks and provides some defence buffs also.

Special Drop:
Defeating Indigo with a fire or water weapon will cause it to additionally drop the Lingering Memory, which when equipped as an accessory will sometimes trigger the 'faded memory' buff that majorly increases attack for a short time. This can only be procked by taking damage, though the amount taken and the player's current health are both taken into account before attempting to trigger the effect.

Lore Tablet:
-The eldest of the three knight bothers, and the one who joined the King's army first. His shadowflame powers seem to have been overused and thus has weakened his mind. If he doesn't stop soon, he may be consumed by it.

Hints:
-Defeating the Images he summons is recommended, as they may become annoying to deal with otherwise.
-Getting used to his attacks early on in the fight is suggested, as he doesn't actually gain any new attacks; instead just increasing his attack speed.
-Unlike some other fights where large 'pillar' projectiles are used, these are marked by 'tracers' instead of simple targets on the ground. Therefore the player doesn't need to stay near the ground to see where the shadowflame pillars will emerge from.

Extra Info:
-As stated in his Lore Tablet, Indigo is the third brother mentioned in the Knights of Fire and Water's description. It seems that being in the King's army has taken its toll...
-Since the Images are representing his brothers, they are only able to use water and fire attacks
--The fact they can be intermixed (one Image can use both water and fire) and their lack of colour can be 'read into' alongside his Lore Tablet to suggest he is beginning to lose memory of his brothers. Whilst not originally intentional, it got pointed out to me.
-Indigo's fate remains unknown. He doesn't move once defeated plus, though while he does fade at the end of the fight this may just be to stop his sprite never despawning. However, he may still be alive as most bosses that 'die' usually explode into gibs (or get the silhouette's 'execution' animation upon defeat)
[Added: 6/12/19]
07 - Dark Star Magus
Appearance: Blonde hair and a purple dress with a moving star-like pattern. Her appearance seems similar to another character seen previously...

Summon: Use the Dark Star Cell at night. The boss will not actually despawn during the day, though will still despawn if the player dies. If the player moves too far away she will teleport after the player as opposed to simply despawning like other bosses usually do. As with Indigo and the Tamer, the fight begins with some text saying "Were you the one I was sent to deal with?".

Fought: Post-Moon Lord
Specification: Post-Indigo
Special?: No
Progression: Later Bosses

Stats:
Health:
-55,000 (142,000) (Cell Shield)
-45,000 (70,000) (Magus)
-1,300 (2,150) (Flow Invader)
Attack:
-110 (188) (Melee)
-120 (204) (Cell Shield Melee)
-130 (220) (Stardust Bullet, Invader Melee)
-145 (250) (Invader Projectile, Stardust Wyrm)
Defence:
-65 (Cell)
-50 (Magus)
-85 (Invader)

Attacks:
Phase 1:
The Magus will usually only move by teleporting, usually teleporting after each attack to a location near to, but not too close to, the player. She will usually only use a single attack before teleporting, but may sometimes use two different attacks if attempting to summon minions.
She begins the fight in a Star Cell Shield that makes her immune to damage until it is broken.
-She may summon up to 3 purple Flow Invaders. They deal high damage and attack faster than regular Flow Invaders, but otherwise act similarly.
-She may launch 3 arcs of purple Stardust Bullets at the player. The first arc consists of 7, the second 8, and finally the third has 7 again.
Once the Star Shield is broken she will transition to her 2nd phase, becoming vulnerable. She gains two new attacks in this phase, and she is slightly more likely to summon minions than before.
Phase 2:
Her movements remain the same, though now instead of attacking a shield she can be attacked herself. Her attack frequency is slightly increased, also. 'You must have done something really bad to upset the King like that' is the text that appears at the beginning of this phase.
-She may summon a horizontal 'bullet-hell' of Stardust Bullets. They all move in the same direction and gradually accelerate as they move. After around 5 seconds the attack ends as she stops summoning new bullets.
-She may summon a vertical 'bullet-hell' of Stardust Bullets. Much like the horizontal attack the projectiles all move in the same direction and accelerate gradually, but they will always be summoned from above and fall downward as opposed to having the possibility of one direction or the other.
Once at 50% health she will regenerate her Star Cell Shield and enter her 3rd phase.
Phase 3:
Her attack frequency is slightly reduced again, much like in her 1st phase, but she once again becomes invulnerable until the shield is defeated again. She gains her final new attack in this phase. She'll say 'Huh!? I was sure that a few more attacks would be enough!' once the phase begins.
-She may summon a large projectile from off-screen. It is shaped something like the Stardust Dragon, though is purple as opposed to blue and is a projectile as opposed to a minion. The Wyrm deals high damage if it hits, and is immune to some projectile-destroying effects. Up to 4 can be summoned in succession from varying angles before the attack ends.
Once the Cell Shield is destroyed again she enters her 4th and final phase.
Phase 4:
Once the shield is broken again she'll heal back 20% of her health back and continue attacking. Her attack speed is increased during the final phase, though she doesn't gain any new attacks. She'll only say 'No Way!' once this phase begins.
She will almost always summon a Flow Invader after attacking just before she teleports.

Defeat: She'll attempt to re-summon the Star Cell Shield, though it will burst and launch her into the air and out of the fight. She drops her items as the shield breaks.

Drops:
Numerous tomes, though the majority of them are apparently unusable and are instead used as crafting materials in order to make a large amount of weapons. Three of the tomes can actually be used by the player; two as magic attacks and a summoner that summons a Flow Invader to assist the player. In Expert Mode she will also drop the Star Cloak that buffs magic attack and reduces mana consumption as well as sometimes providing a few minor buffs to summoners and mages upon dealing damage.

Special Drop:
If defeated using one of the Stardust weapons crafted from Stardust Fragments, she'll drop a Dark Star Tiara. If equipped the player will be transformed into a form similar to the Dark Star Magus', though provides no actual buffs to the player and thus is mostly pointless.

Lore Tablet:
-"Created using unusual Stardust Fragments that fell from the night sky. She seems rather oblivious as to what the King is doing, though serves him regardless"

Hints:
-Dealing with the Flow Invaders as they are spawned may be recommended due to their ability to easily get in the way of the player. They also deal massive damage with both their melee and projectile attacks.
-Homing attacks are recommended for her 2nd and 4th phases due to her small hitbox. However, due to her continuous summoning of Flow Invaders in the 4th phase, it may prove less useful in that phase.

Extra Info:
-Due to her Lore Tablet combined with her appearance, it is safe to assume that she's a clone of the Stardust Magus.
-She shares many similarities with the Stardust Magus even outside of just appearance. She can summon Stardust Pillar enemies and a variant of the Stardust Dragon, has a Star Cell as a shield, and is defeated by being launched flying through the air.
--The similarities span all of the Stardust Magus' 3 fights, as opposed to just her most up-to-date one
-Despite being one of the King's 'most trusted allies' the Dark Star Magus seems to be completely oblivious of his actions, despite his silhouette executions suggesting the King is far from subtle in his actions.
[Added: 6/12/19]
08 - Zazabaan
Appearance: A man with dark grey and black hair wearing a strange mask and red armour. The armour appears to be adamantite, due to its red and silver colour scheme. The mask has a partially-mechanical orange eye piece and only covers half of his face.
Appearance: Zazabaan's Wyrm is a large mechanical snake, coated in adamantite. Several explosives are built into its body that double as its numerous 'eyes'.

Summon: Use the Unbroken Aegis anywhere in the world. The boss despawns if the player dies or moves too far away, like with most bosses. At the beginning of the fight the text 'Our King does not have time to deal with the likes of you!' will appear.

Fought: Post-Moon Lord
Specification: Post-Dark Star Mage
Special?: No
Progression: Later Bosses

Stats:
Health:
-500,000 (885,000) (Zazabaan)
-4,500 (7,000) (Wyrm Segments)
Attack:
-180 (320) (Melee)
-220 (395) (Explosive Blast, Flame Blast)
-165 (294) (Fireball)
-200 (352) (Wyrm Body Melee)
-300 (500) (Wyrm Head Melee)
Defence:
-120 (Zazabaan)
--180 +45% Damage Resistance (Zazabaan, Wyrm still active)
-140 (Wyrm)
--140 +75% Damage Resistance (Wyrm, Piercing projectiles piercing numerous segments)

Attacks:
Zazabaan will actually use a set of detached mechanical wings to fly, repositioning himself via a series of rapid dashes. Zazabaan will summon a Wyrm at the beginning of the fight which also grants him damage reduction until it is defeated.
-Zazabaan may dash up to 4 times at the player in rapid succession. Each dash will either have increased vertical or horizontal movement based on the player's position compared to Zazabaan's
-He may launch a large arc of up to 17 red Fireballs at the player
-He may throw up to 5 'Explosives'. These hang in the air for a short time before exploding. The explosions are fairly small but deal a lot of damage, and each explosive will launch 3 fireballs in the cardinal directions upon detonating (and a 5th strand of 3 directly at the player as well in Expert Mode).
-The Wyrm simply chases the player slowly, not directly attacking the player with any projectiles unless provoked. Destroying a segment will cause the explosive placed within to explode, launching the '+' of fireballs based on the angle the segment was facing when it was destroyed. It doesn't break up like the EoW, but unlike the Destroyer only undefeated segments can be damaged. Destroying all of its segments will cause the Wyrm to explode into gibs.
Once down to 55 (65)% health he transitions into his 2nd phase.
Phase 2:
'Our King is beyond even your abilities! What makes you so confident you'd even make it to him?!'
Zazabaan will actually only appear for brief instances in this phase, usually attacking before disappearing again. Two Wyrms are summoned, regardless of whether or not the previous Wyrm has been defeated. Zazabaan retains his previous attacks, but also gains an additional one:
-He may summon a 'bullet-hell' that rains down fireballs diagonally from the top left or right. All the projectiles will move in the same direction and have the same speed.
Zazabaan cannot actually be taken down to below 50% health in this phase; becoming invulnerable if the player manages to get his health down low enough.
Defeating one of the two new Wyrms will cause Zazabaan to say 'Surely you understand that your endeavours will be fruitless'
Once both of these Wyrms have been destroyed, Zazabaan will re-enter the fight properly and enter his 3rd phase
Phase 3:
'Your... confidence is... misguided.'
His movements are like that of Phase 1, though he has gained new attacks to use alongside his previous ones.
-He may create a large fiery explosion around himself that slowly grows in size for a short time. During the attack Zazabaan is invulnerable until the explosion fades.
-He may create a ring of fireballs around himself and launch them at the player, remaining in ring formation as they travel. The attack is often used up to 3 times in succession before switching to a new attack.
Once down to 35%, 20% and 5% (45%, 30%, 15% and 5%) he will summon new Wyrms. His defence is still boosted whilst these Wyrms are active.
Once taken down to 10% health he will say 'My master is beyond y- ...he's... he's...'

Defeat: Zazabaan falls to the ground in a similar manner to the Knights and the Hunter did and all active Wyrms will despawn. However, despite falling down, no silhouette appears for him. He will speak again, usually saying something every few seconds:
'He's... in my head?'
'What... was that?'
'He's willing to manipulate even me, huh?'
'...I may just have to reconsider this 'friendship' of ours...'
After saying this he will disappear into a cloud of red particles, akin to that of using a Recall Potion (but in red).

Drops:
May drop a gun, rocket launcher, repeater, a magic staff, or a summoning staff. Always drops a large amount of Reinforced Adamantite that is used as a crafting material for a lot of late-game items. In Expert Mode he will additionally drop the Adamantite Wyrm; a flail that acts like the Solar Eruption though modelled after his Wyrms.

Special Drop:
If Zazabaan is defeated by a player wearing a set of Adamantite Armour (has to be the whole set) he will additionally drop the Adamantite Aegis; a shield-like accessory that essentially acts like a combination of numerous accessories like the Cross Necklace, Philosopher's Stone, and Ankh Shield. He also has a rare chance of dropping the Adamantite Charm, that when equipped gives the player a Wyrm minion whose damage is based on the first minion the player summons once equipped.

Lore Tablet:
-"In his youth a talented engineer, quickly coming to the attention of the King. The King befriended Zazabaan in an attempt to get ahold of his technology, though Zazabaan refused to show him. The King ordered his Seers to twist his mind so that he would trust the King and only the King, to which they obliged..."

Hints:
-Sadly, piercing weapons aren't as effective against his Wyrms as any piercing projectiles use a lot of power after piercing one of the Wyrm's segments. This is also applied per segment, so after piercing 1 or 2 segments even some of the strongest attacks will be reduced to 1 damage.
-It is recommended to destroy the Wyrms before progressing the fight due to the risk of them otherwise obstructing the player's movements, as well as their high damage output.
-The contact damage dealt by the Wyrms' heads deal massive damage, even in Normal Mode
-Zazabaan moves fast and deals high damage; a lot more than the previous bosses encountered. Proper preparation is key for fighting him

Extra Info:
-Zazabaan was one of the first bosses made for Boss Ideas 8; predating all of them minus the Knights of Fire and Water and the Obsidian Elemental.
-Zazabaan's name was a suggestion from a friend, since it 'sounds cool and doesn't translate to anything'
-Zazabaan is the final fight before the player must confront the King himself
-Zazabaan's final message about rethinking his friendship suggests that he has broken free of the Seers' manipulation, and combined with the fact that the King is the next fight, means that Zazabaan may be present during the fight at some point.
-Thanks to the specific naming of his robots, it means that Zazabaan also happens to have a serpentine red dragon; the unspecific entity said to ultimately slay the King.
-As each Wyrm consists of about 15 segments, and that 6 (7) Wyrms are summoned in total, the player must destroy a total of 90 (105) segments in all.
--As they have 4,500 (7,000) health each and that Zazabaan himself has 500,000 (885,000) health, the player in total must get through 905,000 (1,620,000) health in total during this boss fight.
[Added: 6/12/19]
09 - King
Appearance: The King has red hair and a red cape that seems to constantly be moving in the wind. He wears a set of shiny black and gold armour that covers his whole body apart from his head and hands. A scar is visible on his cheek. Also, despite being a king, he appears to not wear a crown (or, at least, has removed it during the fight).

Summon: Use the Spirit Flame anywhere in the world. Once used, it will appear to 'storm'; with rain beginning to fall at a 45-degree angle, and occasional lightning bolts falling in the background, though luckily these ones cannot hurt the player. Pillars of brilliant white energy will appear 100 blocks to the left and right of the player; acting as the fight's borders. The King will appear, though will speak before starting the fight. He is invulnerable during his speech:
"So, you alone were the one to cause all this trouble? To bring disarray upon my new kingdom?"
"I came to these lands to give you a ruler, and your violent protests to halt this..."
"...Have really got under my skin."
"This is the end of you!"
The King will despawn if the player dies or moves past the borders, though due to the horizontal restrictions doesn't despawn if the player moves too far away from him.

Fought: Post-Moon Lord
Specification: Post-Zazabaan
Special?: 'Finale' (Technically)
Progression: Post-Game

Stats:
Health:
-185,000 (300,000) (Phase 1)
-130,000 (195,000) (Phase 2)
-15,000 (24,000) x8 (12) (Phase 3 Seers)
-265,000 (400,000) (Phase 4)
-6,500 (10,000) x30 (45) (Phase 4 Wyrm Segments)
-650,000 (1,000,000) (Phase 5)
--1,545,000 (2,733,000) (Total)
Attacks:
-220 (395) (King Melee, Seer Melee)
-9,999 (9,999) (Light Pillar)
-285 (484) (Tornado, Wyrm Body Melee)
-200 (360) (Fireball, Seer Magic, Red Starstorm)
-240 (422) (Blizzard, Flame Ring, Typhoon)
-320 (530) (Wyrm Head Melee)
-0 (0) (Shade Hold)
Defence:
-175 +10% Damage Resistance (King)
-100 (Seer)
-155 (Wyrm)
--155 +70% Damage Resistance (Wyrm, More than 1 segment pierced)

Fight:
The King, much like Zazabaan, actually uses a set of wings to fly, despite the fact that - much like Zazabaan's - they are detached from his body. The wings the King uses are much larger and have red feathers and are coated partially in gold and black armour, like the King himself. The wings actually appear after he has finished his pre-fight monologue and, along with them, the King will bring out a sword that he uses for some of his attacks.
Phase 1:
The King is fairly aggressive in this phase, using a lot of charges and only a few magic-based attacks in-between. Luckily, unlike some other bosses that use melee weapons, his sword only deals his contact damage.
The King will usually charge at the player 3 times in succession, each charge being fast and covering a large amount of ground, before using a magic attack:
-He may launch 3 small swirling clouds that, at first, deal no damage: one chases the player, one falls downwards towards the ground, and one will orbit the King himself. Once they are triggered they will create swirling tornadoes, akin to Duke Fishron's sharknadoes, that deal heavy damage on contact, though lack the sharknadoes' projectiles. The one chasing the player is triggered by getting within 1 block of the player, the one that falls downward once it touches a solid block, and the one orbiting the King once the King receives damage or charges again; whichever happens first.
-He may swing his sword back, summoning a massive cluster of fireballs behind him, and then launch them all at the player. They are launched 2 at a time in rapid succession, and are only launched in the player's general direction as opposed to directly at the player.
-He may raise his sword upward, summoning small white clouds of mist to appear randomly nearby. After a short time these 'burst'; releasing numerous large clouds of icy wind around themselves that deal damage.
Upon taking him down to 0 health, he will end his first phase.
Phase 2:
"If only I had those two Knights to help me here... oh, right[[/i]"
"I don't need their help at all do I? I forgot I had their abilities at my disposal as soon as they signed up!"
The King will health 130,000 (195,000) health back and continue fighting. His movements remain the same, though he gains new attacks and his charges are different:
He will now charge a total of 6 times in succession, though doesn't cover anywhere near as much ground with each charge. Afterwards he will use either one of his Phase 1 magic abilities or one of his new ones:
-He may summon numerous 'Typhoons' nearby, signalled by water bubbles forming where their bases will be. The typhoons themselves are like his Tornadoes, though are blue instead of grey and are a lot thinner, though to compensate they are a lot taller than the tornadoes.
-He may summon 5 rings of fire around himself that orbit him for a short time before he disperses them outward. The rings ricochet off of blocks and off of the arena's light borders; moving at very high speed.
Once reduced to 0 health again, he will fall to the ground.
Phase 3:
"Tamer! Bring your dragon here and deal with them!"
The Tamer will appear near the King, and simply responds with a 'No.' Upon hearing this, however, the King will respond with "No!? I'll have you done for treason for this when I'm done!" before Tamer's image fades. He'll then say "Seers! Deal with them!" before numerous Seers begin to appear to assist him.
In this Phase the King will remain immobile and invulnerable on the ground, though still deals contact damage. Royal Seers, like the ones seen in their own boss fight earlier-on, will fight instead.
3 (4) Seers will be active at any given time, and their attacks are rather simple; launching red magic bolts to attack the player before teleporting. There are 3 types of magic they use, though they all deal the same damage.
-They may summon 3 arcs of 3 magic bolts, readjusting their aim between arcs if the player moves.
-They may summon 3 fast pseudo-homing bolts at the player that will only chase the player very slightly. They cannot pass through blocks.
-They may summon 2 homing bolts that follow the player very accurately and move at a decently fast pace. They despawn quicker than the others do, as well as lacking the ability to pass through blocks.
Once 9 (12) Seers are defeated they will all disappear and the King himself will get up again.
Phase 4:
"Indigo! Magus! Zazabaan! Come here!"
The images of the Dark Star Magus and Zazabaan will appear near the King, though not Indigo's. The Magus will move closer toward him, though is stopped by Zazabaan who just puts a hand on her shoulder. The King, seeing this, responds "Zazabaan! What is the meaning of thi-!?" before Zazabaan interrupts with "You blinded me and her to your actions, but now we know what you're up to you still think we'd help?". The images of both the Magus and Zazabaan fade and the King shows visible frustration before
The King gains a new health bar consisting of 265,000 (400,000) health and begins attacking again. He now charges at the player 4 times at high speeds, covering a lot of ground per charge, before using one of his magic attacks. As with Phase 2, he gains new magic attacks to use alongside his older ones:
-He may summon horizonal or vertical bullet-hells of red star projectiles. Unlike the Magus' version, his do not all need to appear from the same direction, so horizontally they appear from both the left and right and vertically from the top and bottom.
The main additions to this phase are 2 (3) of Zazabaan's Wyrms that chase the player. Destroying their segments cause them to launch the King's fireballs instead of the ones they use for Zazabaan, but otherwise they act the same.
Upon defeating the King he will fall to the ground again and become invulnerable and immobile, though still deals contact damage. Both the King and Wyrms must be defeated to continue.
09 - King (Continued)
Phase 5:
"Seers! Summon me a dragon to vanquish this pest!"
Numerous Seers will appear and form a ring around a summoning circle, like the Lunatic Cultist does with his clones. They cannot be attacked and do not attack the player, though they will remain present throughout the phase. The King gains a new health bar consisting of 650,000 (1,000,000) health and the sky will turn a slight red colour.
The King's charge pattern is like that of Phase 1's; charging 3 times before attacking. He uses all of his previous attacks, though now throughout the entire fight fireballs will continuously spawn from off-screen and rain down slowly diagonally from the sky. The frequency of the fireballs progressively increases as the King's health wanes.
Once the King has been taken down to 0 health again, the King will fall to the ground again and the Seers will launch a bolt of energy at the player.. This bolt is extremely fast and homes-in on the player. It will not despawn on its own and thus must hit the player. On hit the player is inflicted with a debuff that prevents movement and the use of items, so the player will simply drop to the ground. The bolt deals no damage, however.

Defeat:
The King and the Seers and their summoning circle will be teleported near the player [as well as any other players, who all get inflicted with the same debuff and are placed next to the player inflicted first]. The King will say "You're too late! The Seers have finished their summon!" and the Seers' circle will glow more brightly and a large red serpentine dragon will fly out and upward.
The images of the Tamer, the Magus, and Zazabaan will appear again near the player(s) while the King taunts. After a few seconds the king will turn back to see where the dragon they summoned has gone, only to look up with a look of surprise before the dragon charges at the King.
Upon making contact with the King the images of the Tamer, Magus and Zazabaan, as well as the King, nameless red dragon, and the Seers will all disappear simultaneously; ending the fight.

Drops:
Will always drop exactly 3 Spirit Wisps, regardless of difficulty. Will drop 2 of the following items: a spear, flail, bow, gun, 1 of 2 magic tomes, a summoning staff, or a sentry staff. He'll also drop the Royal Plating, used as a material in numerous recipes. In Expert Mode he also drops a medallion that provides numerous buffs, as well as a 3rd item from the weapon list and more Royal Plating.

Special Drop:
If defeated using either a sword or a dragon-themed item, he will additionally drop his own sword, the Kingsbrand; an extremely powerful weapon that holds up well throughout the post-game.

Lore Tablet:
-"The ruler of a distant land, travelling hundreds of miles to conquer Terraria. It seems that even his own people disliked him, so manipulation, threats and blackmail became frequently-used tools to construct his army."

Hints:
-Take a moment to recover and re-apply potions between the phase transitions. The King does a lot of monologuing and arguing in the transitions, so take the time to regenerate some health and make sure your buffs are correct.
-The King has a massive amount of health, more than any other boss, so prepare for a long fight
-Each phase adds magic attacks corresponding to a different boss. The magic attack additions are also roughly in order of how the bosses are fought, minus the Tamer, so it is a little easier to predict the new additions
-Don't go too near the borders. Making contact with them is almost certain death and somehow surviving and leaving the borders will cause the King to despawn, regardless of how much health he had left.

Extra Info:
-The King's foul nature and associations with worm enemies and dragons could be compared to another Terraria king from another mod I won't name because half of you can already guess quite easily
--Though, unlike the other king, this one doesn't have a reason given for his attitude problems
-The King's name is never mentioned by anyone, not even during his own boss fight; where he is merely referred to as 'King'.
-The cutscene at the end of the fight shows the King ultimately being slain by a red dragon... just as the Seers had forseen
--Ironically, it wasn't even one of the dragons the King had suspected (The Tamer's Dragon and Zazabaan's Wyrms).
-The only bosses to not make appearances as 'images' during the fight are ones not associated with the King directly (Obsidian Elemental), Special Bosses, and those whose defeat animations showed the King's silhouette (Knights and Hunter). Indigo also didn't appear due to his presumed death after his own fight.
-Technically, due to the fact he'd virtually overthrown Terraria by this point, he was an Emperor.
[Added: 7/12/19]
[Post-Game]
Bosses who can be fought only once the King has been defeated, excluding special bosses, who ultimately receive their own section later.

All of these bosses are Post-Moon Lord because the King himself is already a Post-Moon Lord boss, so anything fought after him must mean the Moon Lord has already been defeated.
Also, due to the absence of the Chaos Doppelganger, there is no Chaos Mode in this game, nor any sort of official parallel.
10 - Pyra
Appearance: Pyra appears to be a red-haired girl wearing only red and black clothing. Her specific shading of red, specifically the hair colour, is the same as the King's.

Summon: Use the Flame Stone anywhere in the world. A 130x100 arena is summoned around the player of unbreakable bricks and Pyra will appear, playing a short animation of her getting angry before the fight begins. Pyra, and the arena, will despawn if the player dies or somehow manages to escape the arena; e.g. due to a bad spawning location, glitches, hoiks or via teleportation.


Fought: Post-Game
Specification: Post-King
Special: Post-Game Boss
Progression: No*
*None for the main story, at least

Stats:
Health: 2,225,000 (4,000,000)
Attacks:
-300 (485) (Pyra Melee, Mirage Melee)
-285 (452) (Fireball)
-340 (543) (Flame Ball, Dragon Fire, Flame Serpent Melee, Flame Shield)
-355 (568) (Fire Pillar)
Defence:
-100 +25% Damage Resistance (Pyra)
--150 +60% Damage Resistance (Pyra, Flame Shield)

[All of Pyra's attacks inflict Royal Flame - dealing 15 damage per second until the debuff wears off]

Attacks:
Phase 1:
Pyra moves via chain-dashes, though is cloaked a Flame Shield during the dashes that deals additional damage and gives her additional resistance, plus increases her hitbox size. She'll usually relocate near, but not too close to, the player before attacking.
-She may summon a bullet-hell consisting of both horizontally and vertically-travelling fireballs. She will often give herself a Flame Shield if she takes too much damage during this attack as she remains immobile until she stops summoning new fireballs.
-She may release 5 'bursts' of fireballs in succession. Each burst consists of around 25-30 fireballs, all randomly distributed around her, that all travel outwards in straight lines when dispersed.
-She may create a large fireball, roughly 4 blocks wide, that she 'throws' at the player. The 'flame ball' bounces off of solid blocks, including the arena walls, and explode into a 'burst' of 20 fireballs after colliding with a total of 6 blocks. Attack is used up to 3 times in succession.
Once down to 65% health, she will let out a burst of flames and an angered shout, before transitioning to her 2nd phase; moving to the centre of the arena by 'teleporting' via a large fireball.
Phase 2:
Pyra's movements remain similar, but she now adds another element to the fight. She will summon two Flame Serpents; invulnerable 5-segment worm-like enemies that move along the walls of the arena like the Blazing Wheels from the dungeon. One is spawned above Pyra and the other below on the closest blocks and both move clockwise around the arena. If one accidentally despawns it will be respawned.
Pyra, obviously, gains new attacks in this phase:
-She may cloak herself in her Flame Shield and charge at the player up to 4 times; covering a lot of ground per charge.
-She may teleport via the same method as in the Phase 1 transition and then launch an arc of 6 fireballs at the player. She'll then teleport again, then launch another arc, and so on. In total she'll teleport and fire 6-8 times before ending the attack.
Once down to 35% health, she'll once again become angry and move to the centre of the arena to begin her 3rd phase.
Phase 3:
She'll create a fiery 'mirage' of herself at the start of this phase. This mirage will teleport to move, and usually copies Pyra's attacks, though to a scaled-down degree e.g. only creating one Flame Ball or burst of fireballs, or only charging once at the player. The 'mirages' cannot be hurt, but deal contact damage the same as Pyra's own.
Pyra gains a few new attacks to use as well:
-Pyra may charge up a concentrated fireball in her hand, and then launch up to 4 'Dragon Fire' fireballs at the player. These fireballs are shaped a bit like dragon heads, move extremely fast, and can pass through blocks. Her 'Mirages' can only launch 2, though this is still better than the expected '1'.
-Pyra may create numerous fire pillars around the arena, with their locations given away by thin red vertical lines that appear only around 1 second before the pillars 'erupt'. The 'Mirages' do not try to copy this attack.
-Pyra may teleport near the player before summoning a large pillar of fire around herself. Whilst encased in the pillar she receives her Flame Shield resistance until she leaves. This attack can be used up to 3 times in succession, though her 'Mirages' will never attempt to copy this attack.
Pyra will spawn additional Mirages at 20% and 10% (25%, 15%, and 7%) health.

Defeat: Pyra flinches, then after a second disappears into flames; the same as when she teleports, but with more flames. Her Mirages and Serpents despawn as soon as she runs out of health as opposed to waiting for her defeat animation to end. The arena disappears once Pyra herself does.

Drops:
Drops Flame Stone Fragments that can either be used to make a new Flame Stone or a few items. Can drop a sword, flail, magic staff, bow or summoner staff. Additionally drops Flame Fragments and Rare Fragments; both materials for Post-Game items. In Expert Mode she'll drop the Ruby Flamberge; a sword that launches fireballs but can also absorb a few weaker fire attacks that boost its damage on the next swing.

Rare Drop:
If defeated using a water or ice weapon she'll also drop the Rare Flame Fragment that summons a pet. The pet is, essentially, a mini version of Pyra, though unlike most pets she can actually attack; sometimes launching fireballs at nearby enemies - though for whatever reason she'll never attack slimes, nor Pyra if the player rematches her.

Lore Tablet:
-"Apparently the King's only known relative. Pyra has disassociated herself with the King after he had his rise to power, though followed him to Terraria when he set off on his conquest. Perhaps she could take over from the King?"

Hints:
-Attacking Pyra whilst she is in her Flame Shield is often rather pointless due to her damage resistance. Even 1,000 damage is reduced 445, less than half, so waiting for her to finish her dashes and charges is best for maximum damage
--However, as there is no penalty for attacking her in her shield, the player might as well still attack just to get a little additional damage off.
-There is no real downtime in this fight, as even during the phase transitions new enemies are being spawned and some projectiles from other attacks will probably still linger.
-Pyra's Flame Shield hitbox is a lot larger than she is, so don't stay too close to her or else you risk taking sudden damage when she puts the shield back up
-As the Serpents ignore semisolids platforms prove helpful when trying to find safe ground
--Certain gaps in the arena walls created with semisolids can massively reduce the threat the serpents are capable of.

Extra Info:
-Pyra, strangely, seems to have more health and damage reduction than both the King and Zazabaan, despite not wearing armour.
-The Flamberge she drops in Expert Mode, plus her appearance, suggest she's a reference to the Kirby character of the same name (at least to an extent)
-Pyra is the only enemy, other than the King himself, capable of inflicting the Royal Flame debuff
-Pyra uses the most invulnerable minions of any boss (in Boss Ideas 8) at a maximum of 5
-Pyra's special drop is overall the most useless of the special drops, though is arguably the best pet due to it having an actual benefit to the player.
[Added: 7/12/19]
11 - Ikari Doragon
Appearance: Doragon is a red, serpentine dragon. It has 6 limbs spaced across its long body, all ending on clawed hands. Its eyes are black with red pupils, and has an orange mane and whiskers on its head. Doragon appears to be the dragon that attacked the King at the end of his boss fight.

Summon: Use the Rage Crystal anywhere in the world. The sky will turn red and Doragon will spawn, saying only "My power... is absolute!". Doragon will only despawn if the player dies, performing something akin to teleportation to pursue players attempting to escape.

Fought: Post-Game
Specification: Post-King
Special: Post-Game Boss
Progression: No*

Stats:
Health:
-1,500,000 (2,645,000) (Phase 1)
-8,850,000 (14,000,000) (Phase 2)
Attack:
-420 (700) (Head Melee)
-340 (543) (Body Melee)
-285 (452) (Fireball, Flame Breath)
-320 (518) (Meteors, Scythes)
-240 (400) (Embers)
Defence:
-200 +25% Damage Resistance (Doragon Head)
-200 +95% Damage Resistance (Doragon Body)
-300 +65% Damage Resistance (Phase 2 Doragon)

Attacks:
Phase 1:
Doragon has three attack types he switches between in his 1st phase: Aggressive, passive, and neutral. Aggressive has Doragon act as a Wyvern; chasing the player via flight at high speed. Passive has Doragon act like a Crawltipede; only attacking the player if they become airborne. Finally, neutral has Doragon fly near the player, but will try to ram the player like a Wyvern if the player gets too close. The types transition roughly every 15-20 seconds.
Regardless of attacking type, his attacks remain the same:
-He may spew flame breath from his mouth with roughly the range of the Elf Melter. It can be angled slightly as opposed to just being released directly in front of Doragon's head.
-He may summon numerous meteors to fall from the sky at high speed. They all fall at angles as opposed to straight downward, though the angles are random. The meteors explode on contact with solid blocks.
-He may launch a flurry of fireballs at the player from his mouth. These fireballs are launched directly at the player and are fired continuously for a few seconds.
-He may summon scythes from his claws on his arms that act like the Demon Sickle projectiles; spinning around whilst slowly accelerating at the player.
-He may summon a wall of fireballs that travels horizontally. There are a few gaps where fireballs are missing (less in Expert) the player can pass through. This attack can be used up to 4 times in succession before switching to a different attack.
Upon reducing Doragon to 0 health, he will seemingly explode into gibs.
After a few seconds, Doragon will return with a more skeletal appearance for the 2nd phase.
Phase 2:
"You think death can hold me!?"
Doragon, in this phase, ditches his 'passive' attacking type and his damage resistance across his head and body changes. He retains all of his previous attacks, but also gains two new ones:
-If Doragon's body segments receive damage small embers will begin to slowly fall from the damaged segment. These embers deal contact damage.
-Doragon may summon a horizontal 'bullet-hell' of fast-moving fireballs. Sometimes, this attack can be used in conjunction with one of his other attacks, making it even more dangerous.

Defeat: Doragon will explode into gibs again, as well as having all of its skeletal body segments explode into fire. Damaging embers will drop from the gibs also, though aren't too threatening.

Drops:
A sword, spear, a tome, magic staff, gun, bow, and summoning staff. Also drops two accessories that either provide critical hit boosts if damaged or by avoiding taking damage. Fury Fragments and Rare Fragments are dropped upon his defeat also and are the only confirmed drops in normal mode. In Expert he drops the Royal Egg; an accessory that provides a baby dragon minion.

Special Drop:
-If defeated using one of the King's weapon drops he will additionally drop the King's Cloak, which provides defensive buffs such as regeneration and damage resistance when equipped. Taking damage whilst it is worn will also temporarily increase the player's health regeneration temporarily.

Lore Tablet:
-"An ancient dragon with the power to cheat death. The King and Seers' rushed summoning awoke him from his slumber, and has since filled him with unbridled rage."

Hints:
-The Rod of Discord is recommended due to Doragon's high speed and many fast-moving attacks. It is especially best for dodging his aggressive phase, due to his high speed and long body being hard to maneuver around
--It is also helpful for the walls of fireballs if there is no opening nearby or if Doragon's in his passive mode in order to avoid triggering his response.
-Attacking Doragon's head is recommended in both phases. In Phase 1 due to its reduced damage reduction, and in Phase 2 in order to avoid Doragon spawning embers.
-Avoid remaining under Doragon in his 2nd phase, as the embers may prove hard to dodge if too many are spawned at once
-Take a moment to heal during the phase transitions, as the player roughly has 5 seconds before Doragon returns; enough time to re-apply buff potions and heal.

Extra Info:
-Doragon, at this point, lacks the 'Empire Usurper' title present in Boss Ideas 7.
--Due to some info on the King provided in his section, the Emperor may have actually been the King here if Boss Ideas 8 is presumed to take place prior.
-Despite the appearance, Doragon wasn't based off of Akuma from Ancients Awakened, as his design was taken from the Mythical Dragons that went unused in vanilla Terraria.
--Though, an Akuma was used in his re-design; that of Street Fighter's: the change in eye colour, as well as the opening quote are because of him
---The quote was, mainly, because of a small inside joke with some friends more than any other reason
-Doragon's damage output is extremely high, even compared to the bosses he can be fought alongside, like Pyra.
[Added: 7/12/19]
12 - Dragon Tamer Demi
Appearance: The Tamer looks the same as in her main-game design in the rematch, though her cape and part of her uniform are now golden.
Appearance: Her dragon, on the other hand, has a different appearance in this rematch. Its original metal plating has been changed to gold, and the flames jetting from its wings and mouth are a more golden colour also.

Summon: Use the Golden Dragon anywhere in the world. The boss will spawn, though a 160x140 arena of unbreakable blocks will also spawn with the player at the centre. The boss and arena despawn if the player leaves the arena or dies, though due to the area restrictions the boss doesn't despawn if the player moves too far away.

Fought: Post-Game
Specification: Post-King
Special: Post-Game Boss
Progression: No*

Stats:
Health:
-2,400,000 (4,600,000) (Tamer)
-5,000,000 (8,680,000) (Dragon)
Attack:
-300 (485) (Tamer Melee)
-285 (455) (Spear, Flame Pillar, Fireball) (Inflicts On Fire! - 100%)
-340 (543) (Dragon Melee)
-274 (429) (Embers, Flame Breath) (Inflicts On Fire! - 100%)
Defence:
-200 +25% Damage Resistance (Dragon)
-260 +50% Damage Resistance (Tamer)
--130 +25% Damage Resistance (Tamer - Dragon Defeated)

Attacks:
Phase 1:
"Think of this as a... sparring match... but with actual weapons..."
Like with the original Dragon Tamer fight, the Tamer will simply ride the Dragon in this phase, and cannot be harmed. The Tamer, however, will still attack the player when the Dragon has finished its charges.
The Dragon will charge at the player 5 times before attacking. As with a lot of other late-game bosses, these charges are very fast and cover a lot of ground very quickly. The Dragon's attacks are essentially buffed versions of its original attacks:
-The 'ember' attack is faster, and fireballs will also be mixed in with the embers. The embers also fall slower than before.
-The 'loop' attack, where the dragon does somersaults whilst summoning fireballs, acts the same. However, 15-20 fireballs are summoned per loop and each loops' fireballs are dispersed as soon as that specific loop finished, as opposed to building up as with the original fight
-The Dragon will now chase the player whilst launching fireballs at them. The fireballs are more numerous, but less accurate
-The Tamer's only attack in this phase, the spear throw, has been slightly buffed. The spear moves faster and is now affected by gravity. Two flame pillars are spawned now; one where the spear lands, and one directly underneath the Dragon also.
Once the Dragon is down to 65% health the Tamer dismounts and the two attack independently. The Tamer is now vulnerable and, as in the original fight, has a separate health bar.
Phase 2:
"Now we're getting serious!"
The Dragon now only charges 3 times before using one of its attacks, and retains all of its previous attacks plus a few additional ones. The Tamer moves via teleports, with each being accompanied by a bright fiery effect as with the original fight.
-The Dragon may launch an arc of 5 fireballs at the player, as well as 1 that travels directly downward. The centre fireball of the arc, as well as the one launched downward, will create fire pillars on contact with a solid block.
-The Dragon may fly upward, seemingly disappearing for a few seconds, before flying downward. It flies downward from above the player, trying to deal contact damage. (Fireballs are also released as it falls that are, unlike the other fireballs the Dragon uses, affected by gravity). The pillars linger for an extended time before disappearing.
-The Tamer may throw 8 fire spears at the player in rapid succession. They move fast and explode on contact with blocks. (The 8th spear also summons a fire pillar.)
-The Tamer may perform a fast-moving horizontal dash whilst holding a spear. The spear deals the Tamer's melee damage as opposed to the regular spear damage, however.
-The Tamer may throw 3 spears at the player. All 3, upon contact with a solid object, explode into bursts of 8 fireballs each.
As with the original fight, the Tamer has increased defence and damage reduction whilst the Dragon is active. The Dragon, however, receives no additional buffs whilst the Tamer is still active.

Defeat:
-The Tamer still disappears into a burst of flames, though they are now gold and the spectacle is more 'grand' due to more flames being released. She'll usually say something along the lines of "I'll win next time!" before disappearing.
-The Dragon will crash into the ground, creating a large explosion. The Dragon will disappear during the explosion, so that once the animation ends the Dragon is absent. Unlike the Tamer, the explosion deals damage equal to the Dragon's contact damage.

Drops:
Buffed versions of their original drops, like the flamethrower, sword, spear, magic staff, and summoning staff. Golden Dragon Scales and Golden Fabric, as well as Dragon Fragments and Rare Fragments, are also dropped. In Expert Mode she'll additionally drop the Golden Dragon Egg that, despite the name, actually summons a mini-Tamer pet that provides light via a small golden torch.

Special Drop:
-As with the original fight, if the Tamer takes minimal damage before defeating the Dragon, she'll additionally drop the King's Insignia; an item that provides a massive range of very powerful buffs, as well as boosting the power of dragon-themed weapons such as her regular drops.

Lore Tablet:
-"No longer under the rule of a tyrannical ruler. Her dragon, upgraded as a kind gesture from the King's former right-hand man, and the Tamer herself are currently trying to become stronger before returning to the King's original kingdom."

Hints:
-As with before, the Dragon is easily the biggest threat of the two due to its broader attack pool, higher damage, speed, and health. Focusing on it is probably for the best since it it's recommended to remove it from the fight as quickly as possible.
--Plus, the special drop has the same conditions as before, so focusing on the Dragon makes the special drop easier to obtain
-If the player is capable of aligning the arena's floor with semisolid platforms, the player can make the arena's floor semisolid. As long as the player remembers not to pass through it, this can be extremely helpful for dealing with the fire pillar-summoning projectiles as most of them pass through semisolids.

Extra Info:
-Though the fight is very similar to the original fight, the increased attack pool, attack changes, and obviously the stat buffs both the Dragon and Tamer receive mean that this fight isn't just a carbon copy of the original; different strategies may need to be employed
--Also, there's now an arena the player has to remain inside, so no more running away
-The Lore Tablet is structured similarly to the original lore tablet for the first Dragon Tamer fight: It talks about a tyrannical ruler, then about the dragon's upgrades thanks to Zazabaan, and ending on a final note (Though the final note is different from the original in terms of theming).
-The Tamer's name, seen either by hovering over her sprite or from the title, is apparently Demi
--The Dragon's name is not mentioned in either boss fight.
[Added: 8/12/19]
[Special Bosses]
There are also 3 special bosses, separate from the others, that are not listed normally. They are fought throughout the game as opposed to all being locked in the Post-Game, though they are not divided evenly: 2 in Hardmode, 1 in the Post-Game.

Most of the time these bosses' summoning methods or items are locked behind rare drops of specific spawning conditions.
13 - Chaotic Wraith
Appearance: A vaguely humanoid creature with no legs and two long arms ending on clawed fingers. Its entire body is matt black, outside of its eyes, mouth, and 6 lines across its body. It seems to have some sort of mark on its eye.

Summon: Remain inside the Strange Dungeon for an extended amount of time. The dungeon spawns underground at the opposite side of the world to the vanilla Dungeon. The longer the player stays in there, the more messages they will see:
"A quiet wind whispers through the hallways" after 60 seconds
"You feel like you're being watched" after 150 seconds
"Your fight or flight response has been triggered" after 240 seconds
"You're being watched." after 300 seconds
Once the final message appears, the player has 60 seconds to leave the Strange Dungeon before the boss will spawn. Leaving resets the timer. Once 360 seconds have passed, the Chaotic Wraith will spawn near the player. If the world is in Pre-Hardmode, he will be invulnerable regardless of circumstances. Despawns if the player leaves the Strange Dungeon.

Fought: Hardmode (Can be encountered Pre-Hardmode, but is invulnerable)
Specification: Pre-Mechanicals (Loses invulnerability)
Special: Secret Boss, No Summoning Item, Only Fought Once
Progression: No

Stats:
Health: 5,000 (8,000)
Attack:
-100 (255) (Melee)
-5 (8) (Clouds) (No invulnerability frames)
Defence: 9,999 +99% Damage Resistance

Attacks:
Slowly chases the player through the Dungeon, speeding up as it takes damage and if the player moves too far away from it.
As it moves it creates lingering black clouds that rapidly deal damage to the player on contact. They linger for an extremely long time before fading away.

Defeat: Explodes into black clouds similar to the ones it creates as it moves.

Drops:
Will drop 10 Vile Essence; materials used only to make a few accessories appear different. It technically has no Expert-exclusive drops, strangely, despite the stat buffs.

Special Drop:
-If defeated the first time the player causes it to appear it'll additionally drop the Fragmented Keystone Piece A. This, when combined with the other 2 pieces, makes the final boss summoner.

Lore Tablet:
-"It roams the dungeon endlessly, attacking anyone who dares enter for more than just a brief moment. It seems only partially-formed; with its body constantly dripping away."

Hints:
-Don't move too far away from it, as this will cause it to speed up its pursuit. Moving further away will cause it to speed up even more.
-Fast-firing weapons are best for dealing with it as it will only ever take 1 damage from almost any attack thrown at it.
--Crystal bullets' extra effect is also useful for even more chip damage

Extra Info:
-As the boss can only be fought once per world without cheats, it is recommended the player prepares in advance for the fight so that they are in a position to beat it first time around.
--This is especially important if the player wants to fight the final secret boss, who can only be faced by reconstructing the Keystone from the pieces the player collects
-Originally, it was going to be significantly larger, however due to its ability to easily corner players due to the Strange Dungeon's layout, it was made a bit smaller.
[Added: 8/12/19]
14 - ???
Appearance: A shadowy creature in a predominantly red cloak. Its colour scheme and physical appearance are somewhat similar to a boss seen in a previous Boss Ideas.

Summon: Found at night whilst it is raining in Hardmode. It will originally appear as '?' which has 2,000 health and remains immobile whilst the player attacks it. Once the '?' is defeated ??? will take its place and become hostile. If '?' is despawned by the player moving too far away ??? will not spawn. ??? itself despawns if the player moves too far away or dies, though isn't affected by time or weather once it is spawned.

Fought: Hardmode
Specification: Post-Plantera
Special: Secret Boss, No Summoning Item
Progression: No*

Stats:
Health: 33,250 (50,000)
Attack:
-48 (70) (Melee, Sword Slashes)
-50 (74) (Shadow Ball, Red Crescent)
-? (?) (Deflect)
Defence: 10 +20% Damage Resistance

Attacks:
Moves quickly, usually just running along the ground to reposition itself for attacks. Can also jump quite high if the player is too high to reach or if there are platforms nearby to use. Many of its attacks are fast and some of them, mainly the sword swings, will also exit into other attacks.
-He may jump at the player and then dash at them, swinging a small sword.
-He may disappear, then re-appear at the player's level before dashing at them horizontally.
-He may jump through the air, spinning the sword around him. This attack can also deflect projectiles, with the projectiles dealing their original damage if the player is hit by them.
-He may launch shadow balls at the player in rapid succession. ??? is immobile throughout the attack, even hanging in the air if airborne when beginning the attack.
-He may swing his sword, summoning an arc of 6 crescent-shaped projectiles. These act like the Demon Scythe projectiles; accelerating as they travel.
As ???'s health wanes, his attack speed will gradually increase. Also, the lower his health, the more likely attacks will exit into other attacks; essentially creating attack 'chains' when at lower health.

Defeat: ??? is knocked down, then stands back up and disappears in a similar manner to his horizontal dash attack.

Drops:
-Drops Chaotic Shards and a single Rare Fragment upon defeat, as well as a chance of dropping either its sword or a magic staff. In Expert Mode it can also drop the Red Cloak, which provides a dodge chance and increases invulnerability frames.

Special Drop:
-If defeated again in the Post-Game it will additionally drop the Chaotic Tome; an item that is supposed to be used as a material because attempting to use it as a weapon just causes the player to explode.

Lore Tablet:
-"I have no idea what this is, but something tells me there's more to this than meets the eye..."

Hints:
-Dashes and teleports are useful, since it is extremely fast in comparison to most other Hardmode bosses with both movement and attacking speed.
-Circling the boss during its shadow ball spam is a good idea as it means the player doesn't have to double-back and risk getting hit
-Spend a bit of time getting used to its attacks before damaging it too much. It doesn't gain any new attacks, so learning the attacks before they speed up may be useful for dodging.

Extra Info:
-Despite not being given a name, this is likely a smaller version of Terminus; an important boss from Boss Ideas 7
--As this is likely a prior version of Terminus, Boss Ideas 8 likely happens prior to 7 (If looking for some sort of timeline
-??? is the only boss capable of dropping Rare Fragments outside of the Post-Game bosses
--However, due to lacking a viable crafting station, they still remain useless until the King is defeated and the Post-Game has been activated.
[Added: 9/12/19]
15 - Kingsoul
Appearance: A spectral version of the King; with a colour scheme changed from reds and golds to different shades of blue. His cloak is torn and, as it moves, releases wisps of energy. A massive crack is seen in his chestplate, and within this are small blue 'sparkles' that continuously 'fall' inside.

Summon: The player has to complete the King Statue; made using Rare Fragments and Stone crafted at a Post-Game crafting station. Once all 5 fragments are combined, specifically with the head being placed last, the statue will begin to glow and it will transform into the Kingsoul. It will teleport if players move too far away, but will despawn if the player dies; like most bosses. Two light pillars, spawned roughly 100 blocks left and right of the player, act as the arena boundaries - if the player leaves the boss becomes enraged: becoming invulnerable and instantly killing the player on hit.

Fought: Post-Game
Specification: Post-King* (Need Rare Fragments from either Post-Game or Secret Bosses)
Special: Secret Boss, Uncraftable Summon
Progression: No*

Stats:
Health:
-1,000,000 (1,575,500) (Phase 1)
-870,000 (1,300,000) (Phase 2)
-1,450,000 (2,645,000) (Phase 3)
-4,000,000 (6,750,000) (Phase 4)
--7,320,000 (12,270,500) (Total)
Attacks:
-340 (543) (Melee)
-99,999 (99,999) (Light Pillar, Enraged Attacks)
-365 (592) (Tornado)
-300 (488) (Soul Fireball, Blue Starstorm)
-320 (516) (Blizzard, Soul Flame Ring, Typhoon)
Defence: 400 +25% Damage Resistance

Attacks:
No longer uses the detached wings, instead just using its spectral powers to fly. Can teleport now as well, usually leaving a blue glow where he teleported from, and creating one where he teleported to.
Phase 1:
Retains all of his original Phase 1 attacks from his original King fight, though enhanced and often given a blue colouration, such as blue flames.
He will charge 4 times at the player in rapid succession before attacking. Each charge covers a lot of ground and are extremely fast:
-4 swirling clouds are now summoned during the Tornado attack. The first 3 act as expected; one chasing the player, 1 falls down, and the third orbits the Kingsoul. However, the 4th will fly to a random location and explode there. All 4 create tornadoes; virtually the same as in the original fight, though with increased damage.
-The Fireball attack will have the Kingsoul still launch fireballs at the player, though 3 are launched at a time, the attack lasts longer, and additional fireballs will fly in from off-screen being launched in the same direction as the fireball cluster they were summoned alongside.
-The Blizzard attack has more mist clouds. The mist clouds also explode quicker than they did originally.
Once reduced to 0 health, the Kingsoul will become slightly transparent for a moment. After only around a second, however, he will reform and enter his 2nd phase.
Phase 2:
Heals back to 870,000 (1,300,000) health and continues his assault. Charges 3 times before attacking this time, and gains the King's Phase 2 attacks atop his Phase 1 attacks:
-The Typhoon attack is mostly the same, though more typhoons are summoned at a time, and they will form faster and linger slightly longer.
-8 Rings of Fire are summoned around the Kingsoul for the Flame Ring attack instead of just 5. They are dispersed in the same way as the original attack; orbiting the Kingsoul for a short time before being dispersed outward, and they still ricochet off of solid blocks and the arena borders, though they will also now ricochet off of both friendly and non-friendly NPCs, such as the Kingsoul itself.
Once reduced to 0 health again, the Kingsoul will once again begin to fade. After 2 seconds, he reforms, and now transitions to his 3rd phase.
Phase 3:
Gains a new health bar; consisting of more health than either his phase 1 or 2 health bars, and also gains a new attack from what was once the King's 4th phase, as well as a new attack exclusive to the Kingsoul:
He will charge 5 times before using a magic attack:
-The horizontal 'bullet-hell' is made of numerous blue star projectiles now. These projectiles are quite fast and lots of them are spawned during the attack
-The vertical 'bullet-hell' has the projectiles accelerate as they travel; something the horizontal projectiles didn't do. However, there are less projectiles during the vertical bullet-hell
-The Kingsoul may create 4 'clones' of himself that all dash at the player one-by-one, disappearing at the end of their dashes. The clones cannot be harmed.
Once reduced to 0 health again, he will once again appear to start fading out. After around 4 seconds, he will regain his form and enter his 4th and final phase
Phase 4:
Gains even more health, and also increases his attack frequency in this phase. While he doesn't gain any new attacks, there are still changes compared to the 3rd phase:
He will only charge 3 times before attacking the player with magic
Fireballs will constantly spawn from off-screen that are launched towards the player. The frequency of these projectiles spawning increases the lower the Kingsoul's remaining health.

Defeat: The Kingsoul will stop for a moment before beginning to disappear. As he disappears he slowly sinks downward, slowly becoming more and more transparent before disappearing completely.

Drops:
'Soul' versions of all the King's weapon drops, all of which are essentially stronger versions of his own weapons. Also drops Royal Fragments, Soul Fragments, and Rare Fragments. In Expert Mode it additionally drops the King's Heart; an item that is used to combine a massive amount of accessories into one 'super-accessory'.

Special Drop:
If defeated using the Kingsbrand, he will drop an additional item referred to as the King's Soul; used to upgrade the Kingsbrand into an even stronger variant of the item called the True Kingsbrand.

Lore Tablet:
-"The etherial remnant of the King, still lingering in the world after his physical body was destroyed in a previous encounter. It seems that, as he hasn't passed on, he still believes he has unfinished business."

Hints:
-Getting used to the King fight is recommended, as Rare Fragments aren't easy to come by and thus wasting them on continuous rematches isn't recommended.
-While the phase transition times are very short, they can still be used to re-apply buff potions in a brief moment of calm
-Teleportation and dashes are recommended...

Extra Info:
-This fight was designed to replace the original Kingsoul fight, which was scrapped due to having a bad sprite and being far less fun and/or forgiving (I mean, the fight still isn't Forgiving, but it's better).
-The naming of the Kingsbrand's upgrade, the True Kingsbrand, is a reference to the Nights Edge and Excalibur's naming trend when they are upgraded.
-The Kingsoul's colouration is the same as Ectoplasm, which is fitting as the Kingsoul is indeed a ghost.
-The Kingsoul shares its name with an item seen in Boss Ideas 4, 5 and 7, despite not being related to it in any way.
-The re-done Kingsoul sprite was the final sprite to be sprited for Boss Ideas 8
[Added: 9/12/19]
16 - Maelstrom
Appearance: A large serpentine creature with a matt black body. It has 6 limbs that, like with Doragon, are spaced across its long body. It has spines travelling down its body, ending on 2 crescent-shaped blades on its tail. It has a smiling, glowing white face at the front that continuously seems to melt; with globules melting away from his mouth constantly.

Summon: Use the Chaos Eye anywhere in the world; an item made using the Post-Game Boss' special fragment drops. The sky will darken when the item is used and a 160x120 arena of unbreakable blocks will be summoned around the player. Maelstrom will despawn only if the player dies; following the player across the map if needed. Maelstrom also becomes invulnerable to damage if the player leaves the arena, though becomes vulnerable again once the player re-enters.

Fought: Post-Moon Lord
Specification: Post-Kingsoul
Special: Secret Boss, Hard-To-Craft Summoner, Finale
Progression: No: The Finale.

Stats:
Health:
-12,000,000 (20,500,000) (Maelstrom)
-850,000 (1,550,000) (Clones)
Attack:
-500 (800) (Head Melee)
-380 (600) (Body Melee, Shade Drop, Shade Tendrils)
-400 (633) (Tail Melee, Shade Pillar, Spiked Body Melee)
-350 (556) (Shade Sphere, Homing Shade, Shade Breath)
-450 (700) (Shade Maw, Shade Vortex)
Defence:
-200 +25% Damage Resistance (Phase 1, 3, 6)
-200 +90% Damage Resistance (Phase 2)
-250 +35% Damage Resistance (Phase 4, 5)

[All of Maelstrom's attacks inflict Shadowflame - 100%]

Attacks:
Phase 1:
Maelstrom will usually fly near, but not too close to, the player. He will frequently attempt to ram into the player, dealing high contact damage. Occasionally, he will change to a more Wyvern-like AI, attempting to continuously ram into the player, though this only lasts a few seconds before returning to its regular pattern. It has a large amount of attacks to use in this phase:
-He may summon a 'bullet-hell' of both horizontally and vertically-moving projectiles called 'Shade Spheres'
-He may summon large black globules that fall from the sky. Once at the same height as, or below, the player they will be affected by blocks and will bounce once hitting a block, eventually bursting after hitting blocks a total of 5 times.
-He may summon small portals near the player. After a few seconds spiked tendrils will jut out of the portals toward the player. A few seconds later they will fade away.
-Maelstrom may disappear through a portal, then a few seconds later summon a portal near the player and emerge; attempting to ram the player.
-He may breathe Shade Breath at the player in a long, continuous stream for a few seconds.
Once down to 80% health Maelstrom will switch to its 2nd phase, with its face shifting to a different form.

Phase 2:
Maelstrom will continuously attempt to ram into the player in this phase, like a Wyvern. It only uses two different magic attacks in this phase; one new one and one from his first phase:
-He retains the 'bullet-hell' attack from Phase 1
-He may create transparent images of its head that are launched at the player, called Shade Maws. They start out motionless, then will charge at the player a total of 3 times each before despawning. Up to 4 are summoned at a time.
Once taken down to 72% health Maelstrom will transition to its 3rd phase.

Phase 3:
Maelstrom goes back to its movement patterns from Phase 1, as well as getting back all of its Phase 1 attacks as well, plus its new Phase 2 attack that it retains. Alongside all of its previous attacks, it also gains a few more that it can use:
-It may summon numerous 'Shade Pillars' throughout the arena that linger for a fairly lengthy time before disappearing. Their positions are given in advance by small swirls that begin to form where the pillars will spawn, then a second or two later the pillars will spawn.
-It may summon numerous portals near the player that drop 'Shade Vortex' lightning. They act much like the Vortex Pillar's lightning attacks, but are faster and more numerous, not to mention completely white.
-It may create large complex patterns of Shade Sphere projectiles summoned from its head that often disperse outwards in large, eccentric, almost flower-like patterns.
-It may summon a total of 5 bursts of projectiles from both its head and tail. The bursts from its head often consist of 8 randomly-spaced projectiles, and 6 from its tail; also randomly-spaced.
Once taken down to 55% health he will transition to his 4th phase

Phase 4:
Maelstrom will either slowly chase the player or circle around them in this phase. He only uses three different attacks; two new ones and one old one:
-He will still use his Phase 1 'bullet-hell' attack
-He will summon Homing Shade globules from its face that chase the player at a reasonably high speed. They disappear eventually, but cannot be destroyed by the player and can also pass through blocks.
-It may cause spikes to protrude from its body segments, increasing the size of its hitbox and contact damage. (He also becomes immune to damage in Expert Mode whilst the spikes are active).
Once reduced to 40% Maelstrom will switch to its 5th phase
16 - Maelstrom (Continued)

Phase 5:
Maelstrom re-gains all of its previous attacks from all of its previous phases, but also gains its final few new attacks in this phase. Many also involve summoning clones, though only 2 (3) can be alive at one given time.
Maelstrom may also summon 'clones' of itself to distract the player. These just act like slower Wyverns, but their contact damage is still as high as Maelstrom's, so despite lacking its magic attacks they are still a massive threat.
-It may disappear for a brief moment before re-appearing somewhere near the player. It will often spawn a clone that also re-emerges near the player as well.
-It may slow down, roar, and summon a clone at its current location.
-It may replace itself with a clone; only made obvious by attacking 'Maelstrom', which when attacked will shift its colours to that of the clone. Once the clone is revealed, Maelstrom itself will re-emerge somewhere.
Once taken down to 20% health he will shift into its final form

Phase 6:
Uses all of its previous attacks and goes back to its Phase 1 movement pattern. However, it cannot summon clones anymore, with the attacks changing like so:
-It doesn't spawn a clone after re-appearing, but can still temporarily disappear
-No longer roars to summon a clone, but instead the roar will create a burst of 30 projectiles from its mouth
-The 'Fake Maelstrom' attack will simply have the fake disappear once attacked, with Maelstrom appearing elsewhere. No clone is summoned.

Defeat: Lets out a loud shriek before slowing down. Eventually, it will slow down to a point where it becomes immobile. At this point its claws and face will also turn black and its whole body will then explode into large globules of sludge; ending the fight.

Drops:
-3 weapons from a list of a sword, spear, gun, rocket launcher, tome, magic staff, summoner staff, and sentry staff. Also drops Chaotic Essence; used to upgrade numerous other weapons and accessories to their most powerful forms. In Expert Mode it will additionally drop an item called the Chaos Claw that provides a massive amount of damage-oriented buffs. It may also rarely drop the Chaos Egg in Expert Mode that summons a mini version of ??? as a pet.

Special Drops:
Has 4 special drops in total. If defeated using melee it will drop the Flailstrom; a flail that works like the Solar Eruption, with ranged weapons it drops the Flailstorm; a bow that acts like the Daedulus Stormbow, with magic it drops the Malevolent Tome; which launches transparent Maelstrom heads as projectiles, and with summons it drops the Maelstaff; which summons a mini Maelstrom that acts like the Stardust Dragon.

Lore Tablet:
-"..."

Hints:
-Prepare for the fight as best as possible. Much like with the King compared to the other Main-Game bosses, there is a major jump in difficulty for this boss in comparison to even the other Post-Game bosses.
-Teleportation, as ever, is extremely useful; great for dodging attacks that may otherwise be nearly impossible to have dodged otherwise.
-There is next to no proper downtime in this fight, so enable autopause if you want a break
-Don't get overconfident, especially later in the fight, as dying near the end will probably prove infuriating
-A lot of its attacks are used in the first phase, so most of the time there's a decent amount of time to get used to each attack.

Extra Info:
-Maelstrom, due to his appearance, is also likely a Chaotic Being like Terminus (???) and the Chaotic Wraith. However, unlike the others, Maelstrom's face is very similar to the Doppelganger's
--Despite this, they are apparently different characters
-Maelstrom is the final boss of Boss Ideas 8. At this point there are no more later bosses to face, nor even an arena or boss rush
-Maelstrom has never made an appearance in any other Boss Ideas, despite being a fairly powerful entity due to his 'final secret boss' status.
--If the 'timeline' is taken into account, Maelstrom only appeared after the Doppelganger's presumed death in Boss Ideas 5, but was gone again by Boss Ideas 7 (8 is inbetween the two in terms of time).
---Therefore, it is possible that unlike the Doppelganger and the other recurring bosses, Maelstrom was actually properly killed at the end of his boss fight as opposed to surviving and returning later, like the Doppelganger itself did.
[Added: 9/12/19]
[Scrapped Bosses]
Bosses that ultimately went unused for one reason or another. Not all of them are sprited, though any that do have sprites are here:

A: Zazabaan (Rematch)
Appearance:

Notes: Would have been fought in the Post-Game similar to the Dragon Tamer's rematch. His fight would have been similar to his one before the King; utilising his explosives and Wyrms to defeat the player.

Scrapped: It was ultimately scrapped due to the fact that Zazabaan's original fight was the one just before the King himself, so the fight would have roughly been the same as Zazabaan's own stats were already high, so the buffs would have been minor and attack changes minor.

[No Sprite] B: 'Core'
Appearance: Originally a large rocky construction that would house either a large gemstone or some other form of power source, fought just before the King or within his boss fight.

Notes: The player would have had to destroy chains that harboured it to the earth, and once this was done the player would have to then destroy the core itself whilst it attacked the player with projectiles and numerous minions spawned throughout the fight.

Scrapped: Essentially a glorified version of the lunar pillars, but arguably even less fun. Its stats were superior to the King's, which make the King's large stat jump less imposing. Plus, the boss was stationary, so the fight would have been a lot easier by default. Plus minion spam is annoying.

C: Kingsoul (Original)
Appearance: A spectral version of the King, fought in the Post-Game as a secret boss. His eyes and cloak were pure white and his armour was damaged. His lower body was faded partially as well.

Notes: Would have essentially been a faster and stronger version of the king that dealt massive damage. It also lacked the 'cool-down periods' from the phase transitions of the original, so it was even more punishing for the player.
Would have also faded out more as its health waned and the phases progressed.

Scrapped: A cross between Zazabaan's reason (too close to the original fight to be too different) as well as having a bad sprite. The faded parts of the sprite were also still part of his hitbox, which due to his fast movements would have been very hard to track where his legs should've been, leading to sudden damage for seemingly no reason.
[Final Notes]
Thanks again for coming and having a look at another Boss Ideas. A bit like 6, this one was a lot less community-based and a lot smaller-scaled, so it'll likely be less popular than Boss Ideas 4, 5 and 7 overall :P

Uni's going decent, but it has caused production on these things to slow down a bit for the time being. Not sure when Boss Ideas 9 will be made, but I might actually take a break this time (Probably not lol :P)

Also, on an extra note, I have no idea why most of the bosses here turned out to be human bosses. Seriously it wasn't intentional or anything but virtually everything here is just a human boss or a worm boss. Whoops.

Discord:
https://discord.gg/URhX8GU
The Discord has a few people on it now, so feel free to join and say 'Hi' :)

As usual, feel free to post ideas in the comments below or over on the Discord server. Both are viable but the Discord means you're likely to see my comments quicker and may even see some glimpses into the boss' creation.

Anyways, see ya next time! :)
30 Comments
grauling2 5 Jan, 2020 @ 7:08pm 
I would add a devourer of dimension's.
Lil Worcestershire 5 Jan, 2020 @ 2:25am 
Obsidian Elemental is irrelevant due to the big tiddy boss that is the Brimstone Elemental
blizzyblazer 4 Jan, 2020 @ 6:43pm 
T NICE
SnuffKitten ΘΔ 3 Jan, 2020 @ 7:43am 
Honestly It just seems like there are to many humanoid bosses. Not really a problem with more of them but there where only like 3-4 bosses on this list that drew away from the same humanoid design for something else. most of these other bosses looked like reskins of other enemys too.
Both the Ikari Doragon and the maelstrom both look like they are reskined versions of the wyvrns that spawn naturally. still cool graphics although not alot of variety.
Okami Tomato  [author] 1 Jan, 2020 @ 12:50pm 
That's intentional, because while he technically doesn't have anything specifically found after him, there's either things afterward that are just stronger but don't need to be faced after (like Fishron in vanilla Terraria who can be fought whenever in Hardmode but is intended for Post-Golem), or just a secret boss or something :P
Private Tubs 1 Jan, 2020 @ 12:04pm 
VVV Also I noticed something is this a mistake (For the ??? boss)

Progression: No* <<< there is a * after no.
Private Tubs 1 Jan, 2020 @ 12:00pm 
Please make all of these (if possible) I would fight them all and probably die but ya know, I have friends to use as shields! :steamhappy:
Etho 29 Dec, 2019 @ 2:32am 
Bosses that look like humans are kinda weird, maybe one would have to be a huge tank that doesn't move around much and is the same size as the character. But i would love to fight a wyvern boss.
Minimum Pleasure 28 Dec, 2019 @ 10:55pm 
MAKE THESE INTO A MOD I WOULD LOVE TO FIGHT THEM!!!:steamhappy:
amcg64 28 Dec, 2019 @ 9:52am 
i kind of find it weird how you have bosses that look like a human