Cube World

Cube World

277 ratings
Cube World: How to Actually Do Things and Not Die
By freEd
A guide for cube world that clears up some of the areas people are confused about and helps with getting started in your area/with your class.
2
7
2
2
   
Award
Favorite
Favorited
Unfavorite
Introduction
So, you've gotten Cube World and have no clue what exactly you should be doing. So you wander off somewhere trying to do what the game seemingly wants you to do and explore, just to die repeatedly. Is the game punishing you for trying to explore? It feels that way, but really you're just going about it the wrong way. A lot of people seem to be confused on what they're supposed to be doing, and I hope I can clear it up a bit with this guide.
The Objective of Cube World
Getting down to it, what are you actually supposed to do here? The main goal is to get geared up and find relics. Relics are items that increase some of your miscellaneous stats like swim speed, gliding speed, riding speed, etc. Getting relics will increase your character's level, the levels being sort of a "relic counter" in this game. Neither levels nor any relics increase a character's base combat stats.

So how do you get gear? You get gear by doing quests. The quests in this game are color coded to represent a certain difficulty level. In order, this goes:

White
Green
Blue
Purple
Gold

You'll need gear that matches the color of those quests in order to do them without dying repeatedly. I'll go more in depth with these in the Dungeons & Craftings section.

In any case, the most important objective is to explore and have fun. The world is packed full of things to explore, so take a chance and go nuts with it.
How to Properly Explore
Making Waypoints

Now that we know what we're actually supposed to be doing, how exactly do we do it? First, open the map. It's time to star some of the important looking locations. Zoom in all the way (Or just one step before max zoom) and start panning around.

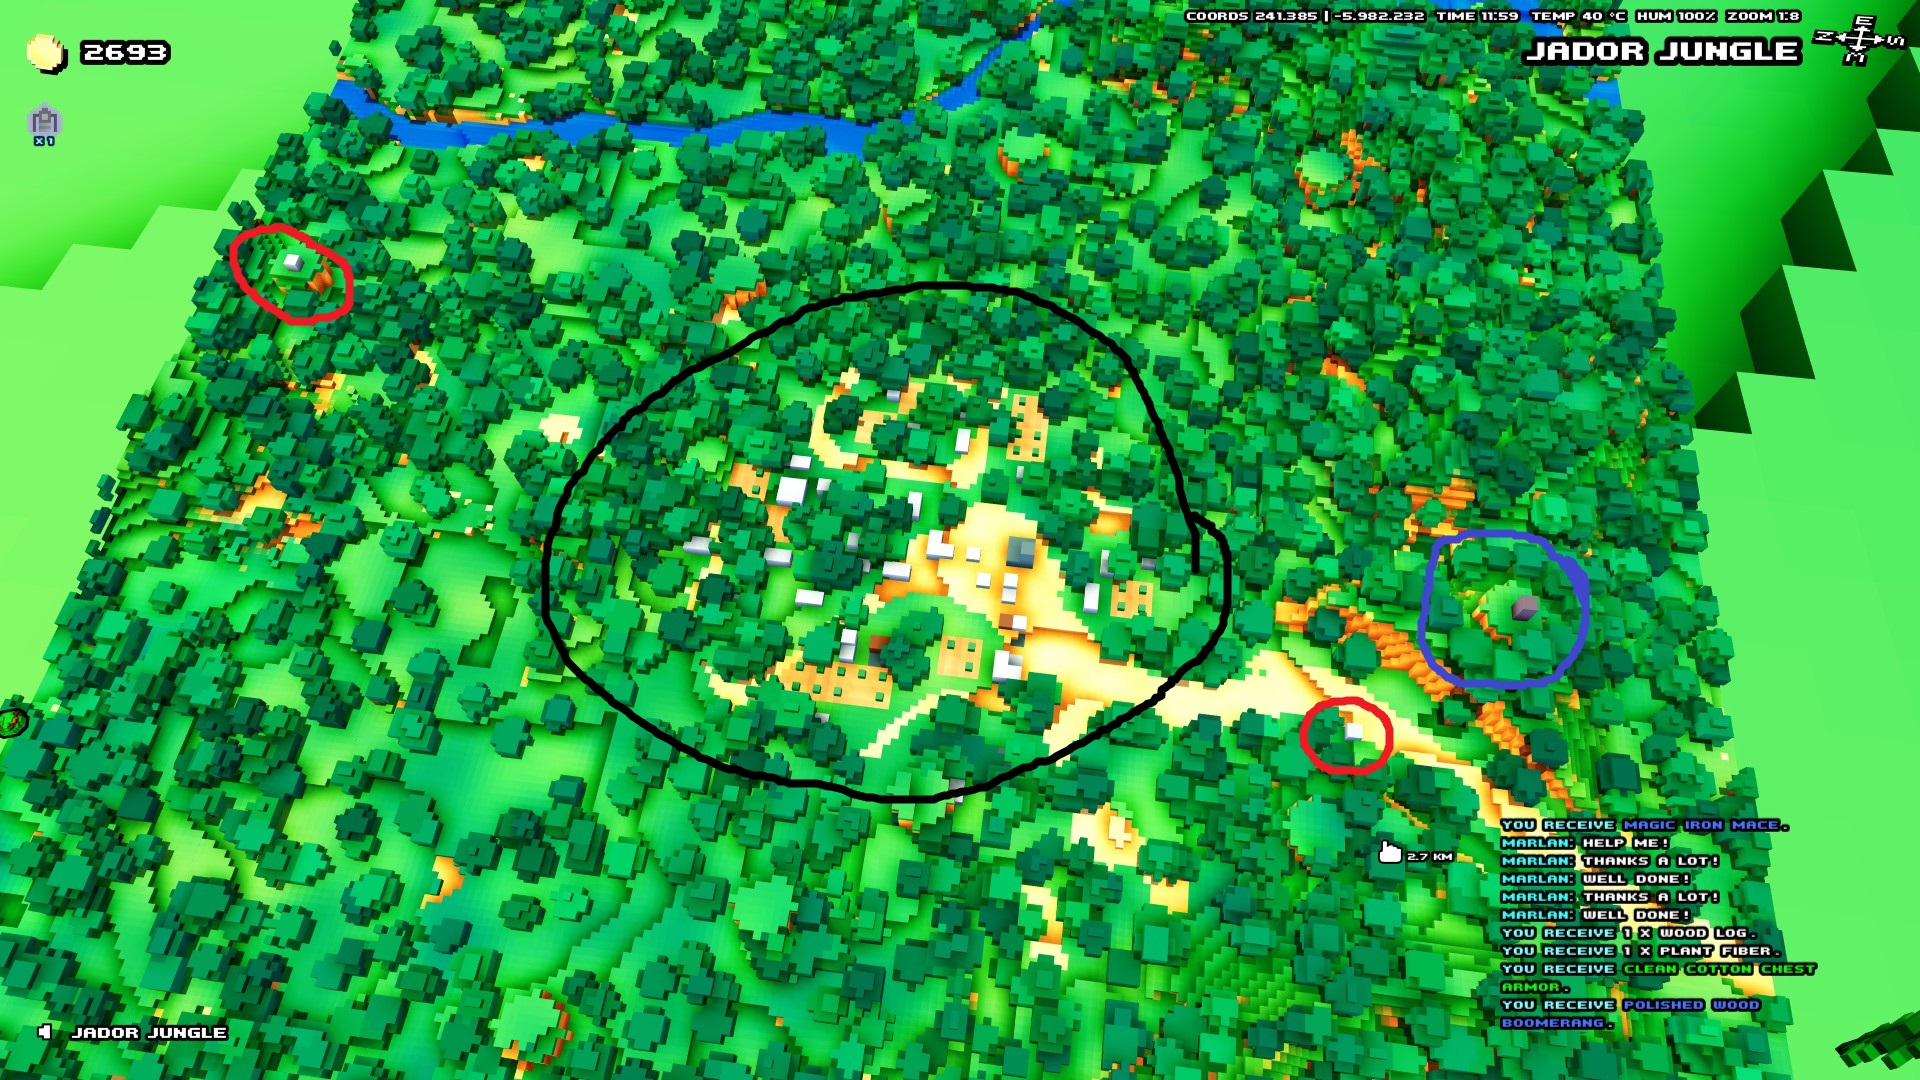
Do you see any structures or areas that stand out? When you locate one, star it with M3 (Middle Click). In particular, there are 4 things your looking for: Villages, Shrines of Life, Quests, and lore locations.

The map is one step before max zoom in this image. The black is what a villiage looks like. The red are probably Shrines of Life. I say probably because some lore locations have the exact same graphic as a Shrine of Life on the map. As it turns out, the leftmost one was a lore location and the rightmost was a Shrine of Life. You'll want to get these shrines because they double as fast travel areas. The blue is an interesting location. A quest, perhaps? Maybe a treasure location?


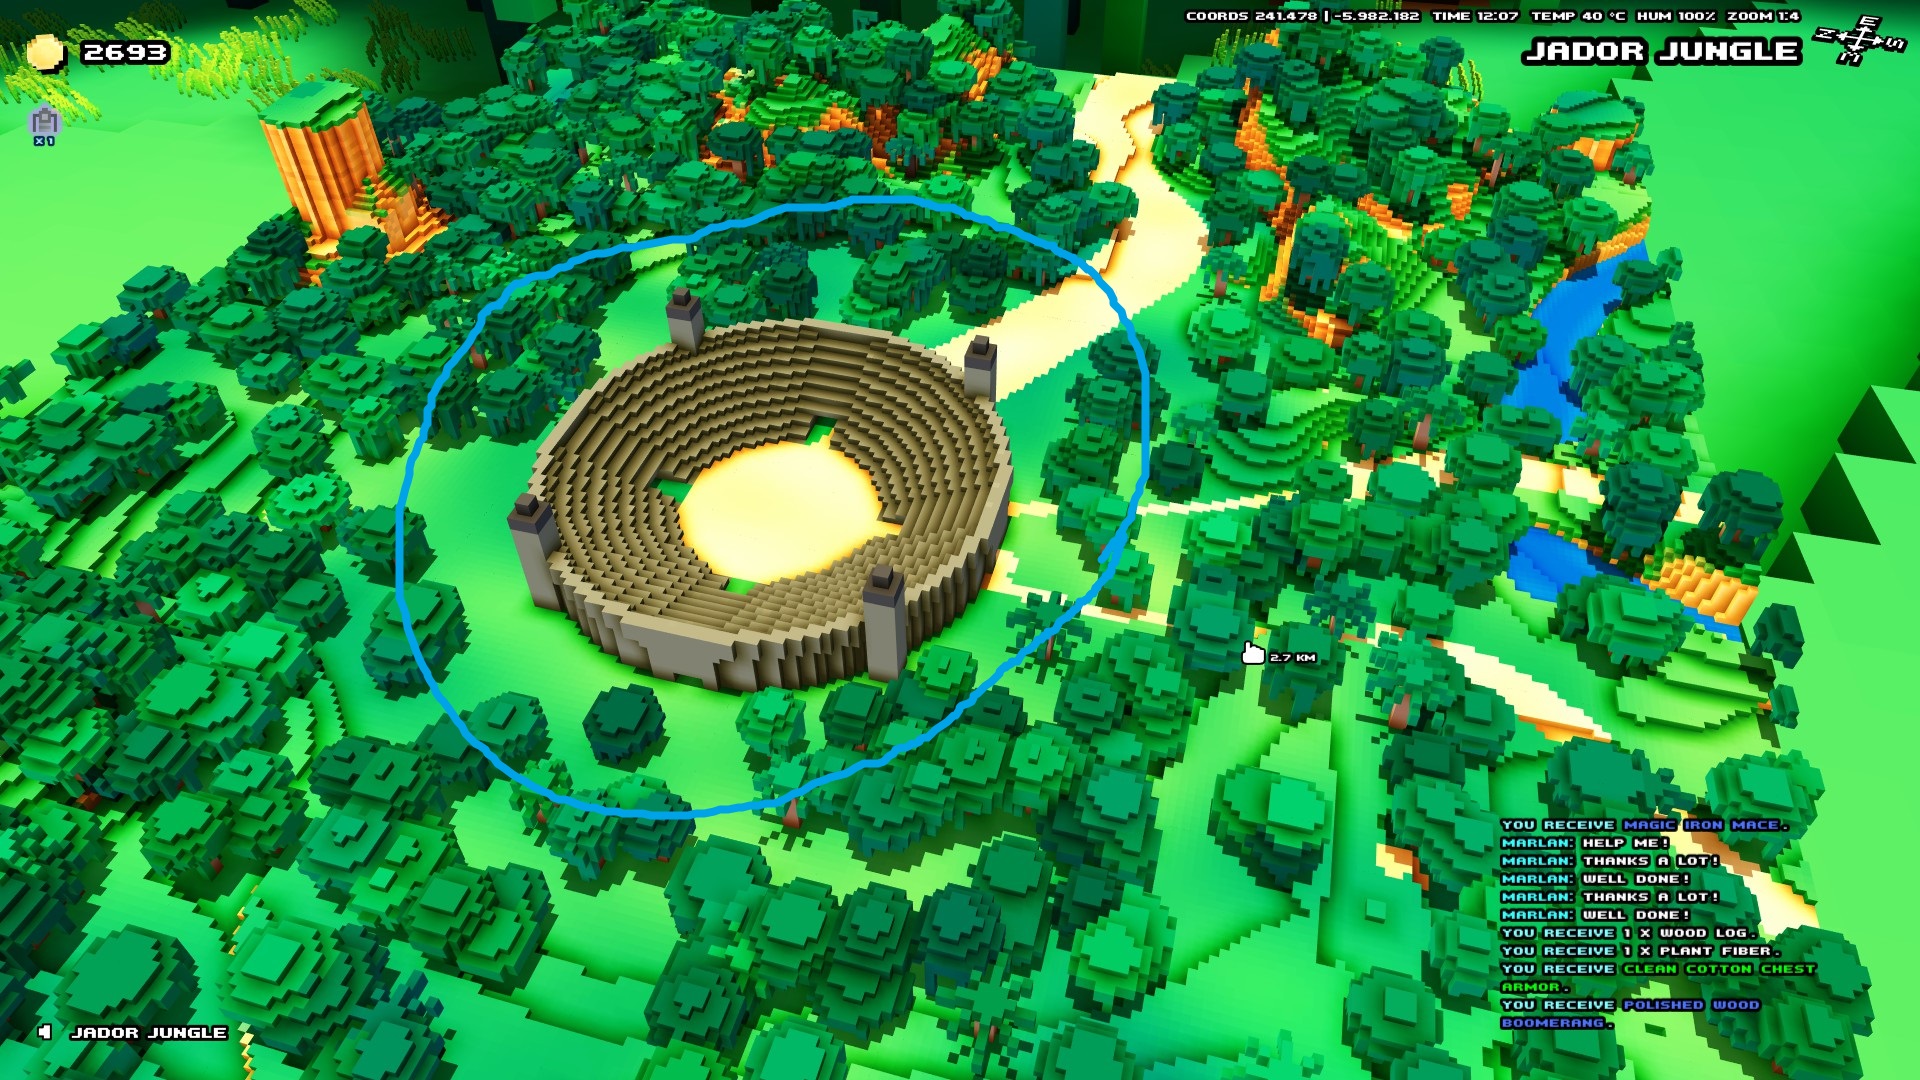
This is obviously out of place and should be marked. This is actually an arena, a place where you can farm for good weapons and armor later in your adventure.


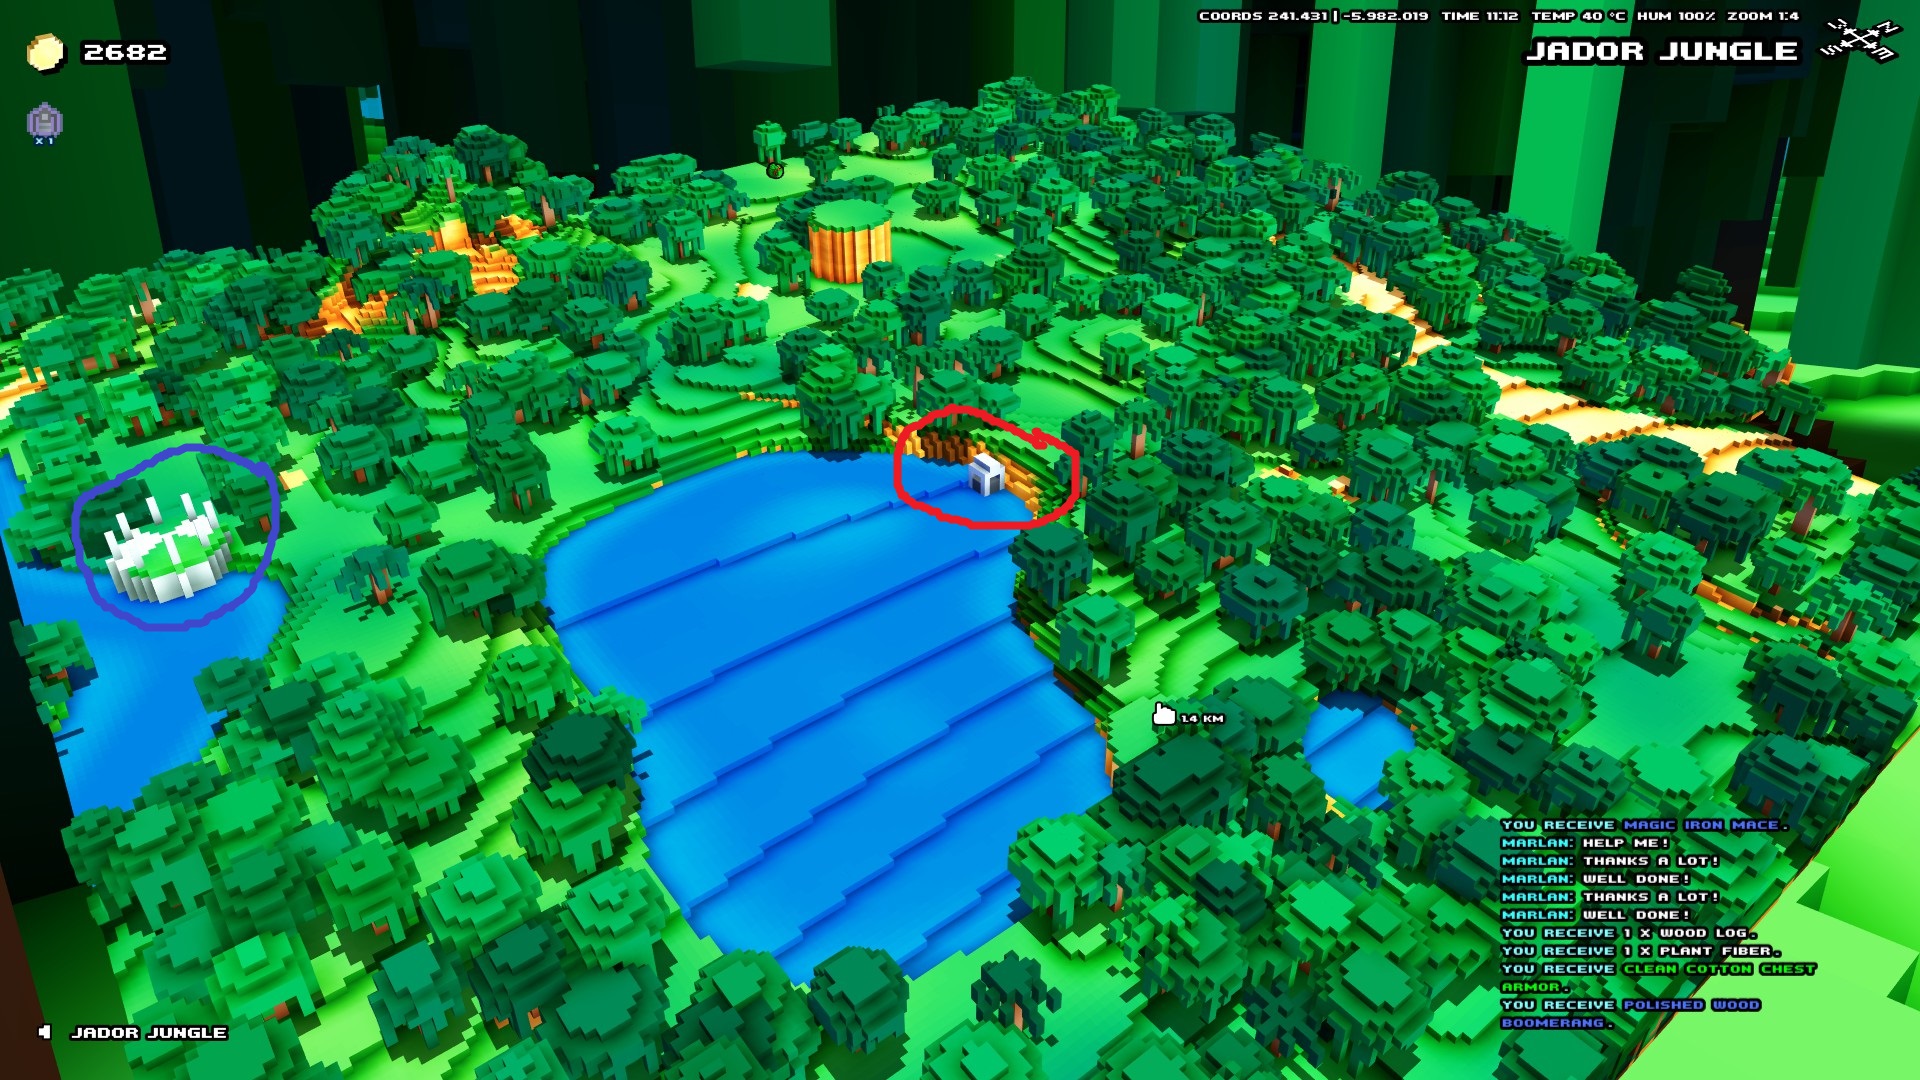
A SoL and an interesting location.


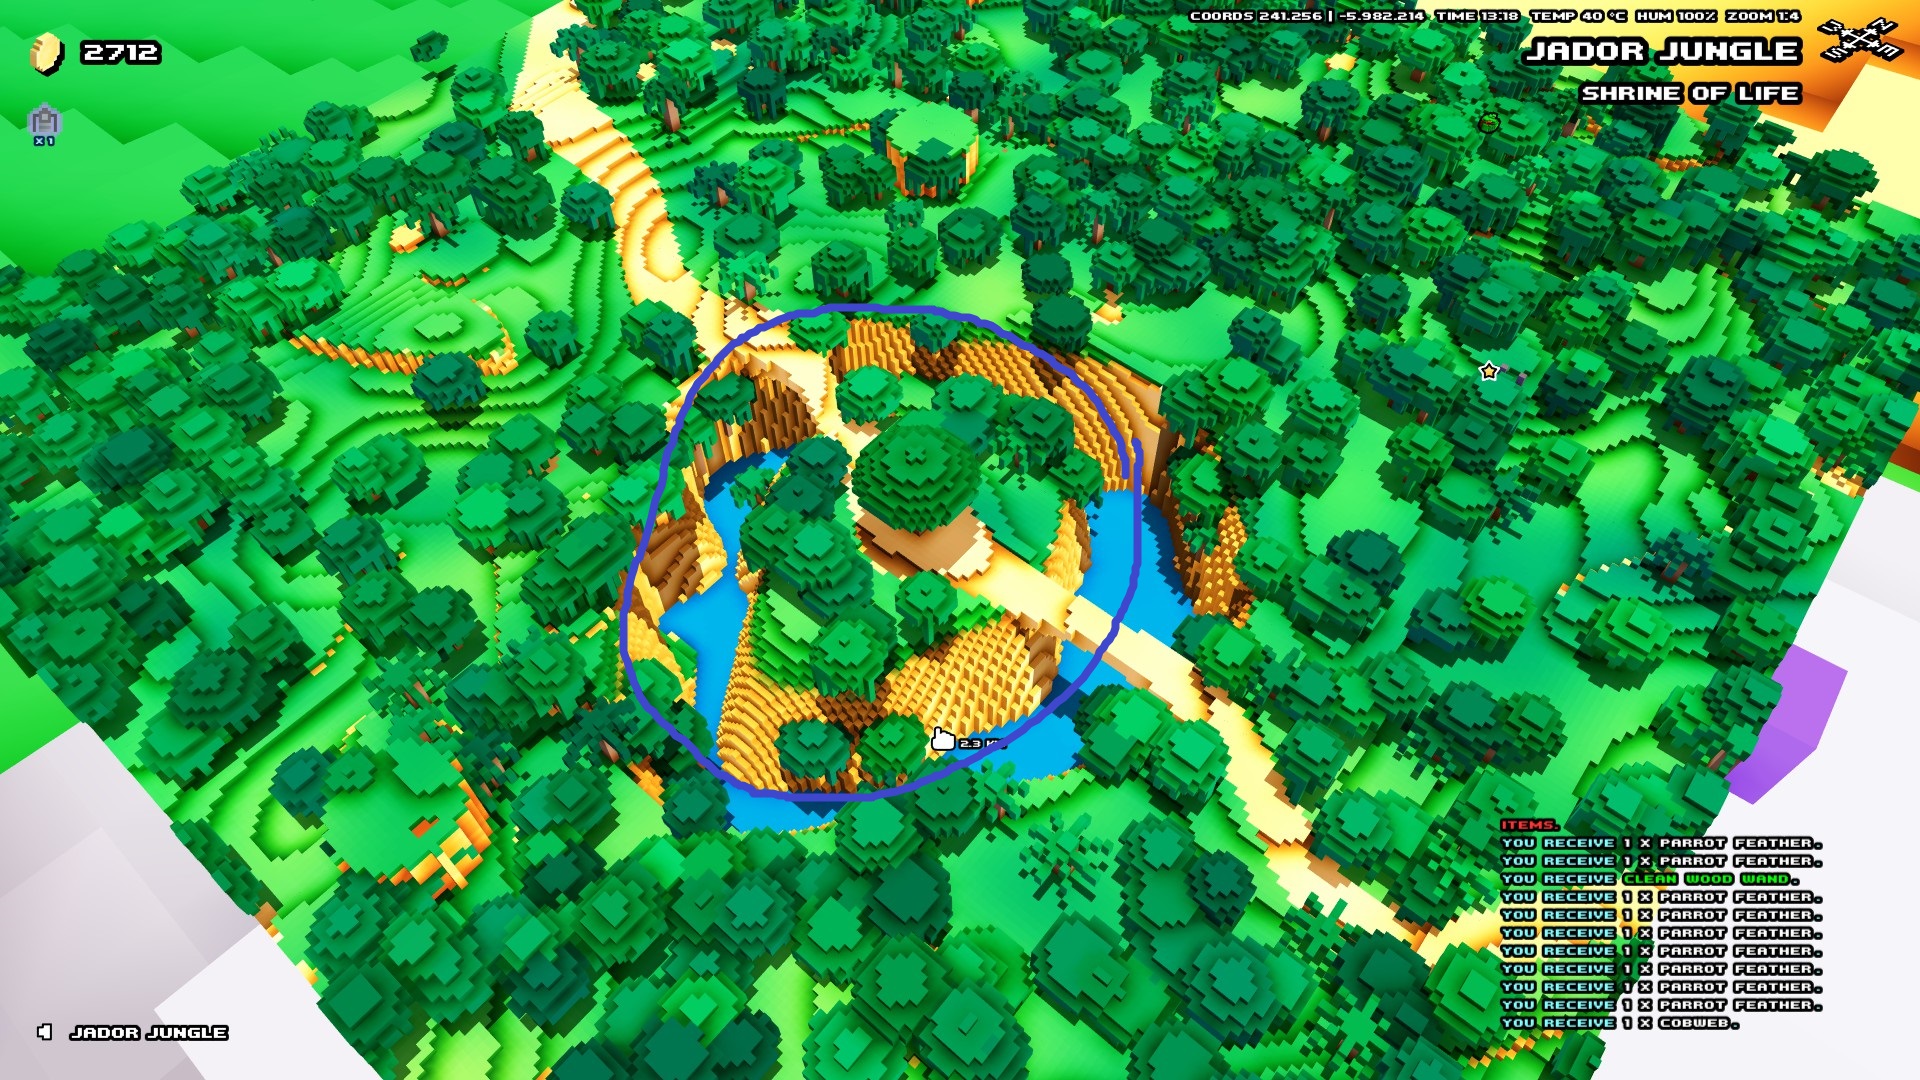
Another example of an interesting location.


And once your map is all starred up, you're ready to start exploring!

Exploreflow

So now that we know exactly what points to hit, it's time to go venture to them! But wait, there are steps you need to follow if you want to explore new territories effectively. First thing to remember is collect everything you find and talk to all NPCs. This is always true, so think of it as sort of a step 0. Anyways, the rest are:

  1. Get to a village, collect any SoLs you find on the way. Collect SoLs by going up to the statue and pressing E.
  2. Collect the rest of the SoLs, visit the nearby interesting locations so that the graphic for it pops up on your map
  3. Complete the white quests (prioritize the gnome ones)
  4. Get both gear stars to the next level (remember the order, if you're white then green is the next level. Press B to check, you'll see the stars on the left)
  5. Repeat steps 3 and 4 for each respective color quests after you've finished the others

And 6 is steamroll through any of the quests you were too lazy to (or couldn't) do, because now you've got a full set of 5 star gear, ready to take on the world! Well, at least until you get to the next area...

Areas and You

If you open your map, you can see a flashing white border on the little section of the map you're in. Being in that border means being in that area. When you change areas, all of the gear and key items that you've gained in the previous area are gone. Until you've completed the area you're in and have gotten at least some + armor that you can equip, it's best to stay in that area. You get + armor by either crafting or obtaining them from quests.

Wall Scaling

This is more of a little trick you can make use of while you don't have the climbing spikes. While climbing, you can do a flip that gives you a little height. Usually, this takes most of your stamina and you can't climb too much afterward, but we can take advantage of the fact that it even allows you to climb afterward anyways.

Go up to a wall and hang on to it with E. Then, press Space to do a flip. After the flip, hold W and press E again as soon as it pops up on the bottom of your screen, then quickly press Space again afterward. Rinse and repeat until you get to the top of your wall/cliff.

This trick is incredibly handy since the spikes aren't global, so make good use of it before it inevitably gets patched out.
Dungeons & Craftings
What's in a Quest?

A quest by any other name might still be a quest, but a quest with any other graphic on the map will be completely different. So what do the graphics on the quests mean?

  • Hammer: The quest reward will be a book of crafting.
  • Gnome: A trader will bring higher quality items to the village shops.
  • Sword: These quests are repeatable every in game day (1 day from 7:00 - 18:00 is about an hour real time. You can fast forward time by sleeping in either beds or sleeping rolls near camps)
  • Purple Gem Thing: Completing all of these will lower the magic barrier around your area. The magic barrier is a blueish wall.
  • Skull: An arena. Can be repeated every in game day.
  • Orange Circle: An artifact.
  • Red Portal: An altar. Destroying these will prevent the NPCs of the area you're in from being possessed.
  • Cauldron with Fire: Circle of Power. This allows you to become slightly stronger in the region you're in.
  • Random Item/Cute Slime: Search for and obtain the item in the graphic.
  • Strange Clipboard/Battery Thing: A mana pump. You can see if there's one in the region by looking at the mana debuff on the left hand side of your screen. It has the same graphic as the quest.
  • No Graphic: This is a quest you haven't seen the objective to yet. Walk around this area and explore a bit. If the graphic hasn't changed and you can't find anything, it's likely an item quest (or you just didn't find the boss or dungeon entrance, there's no way to be 100% sure until you talk to the NPCs and have them reveal it or do the quest yourself.)

As said before, due to the fact that the gnome quests give the shops in the area upgraded gear, you should knock those out asap. If by the time you've completed all a color's quests and you haven't gotten to the next gear level, you can do the sword quests until you've either gotten enough gold to buy some armor from the shop or actually get good armor from the quest itself.

In doing these quests, sometimes you might encounter a dungeon.

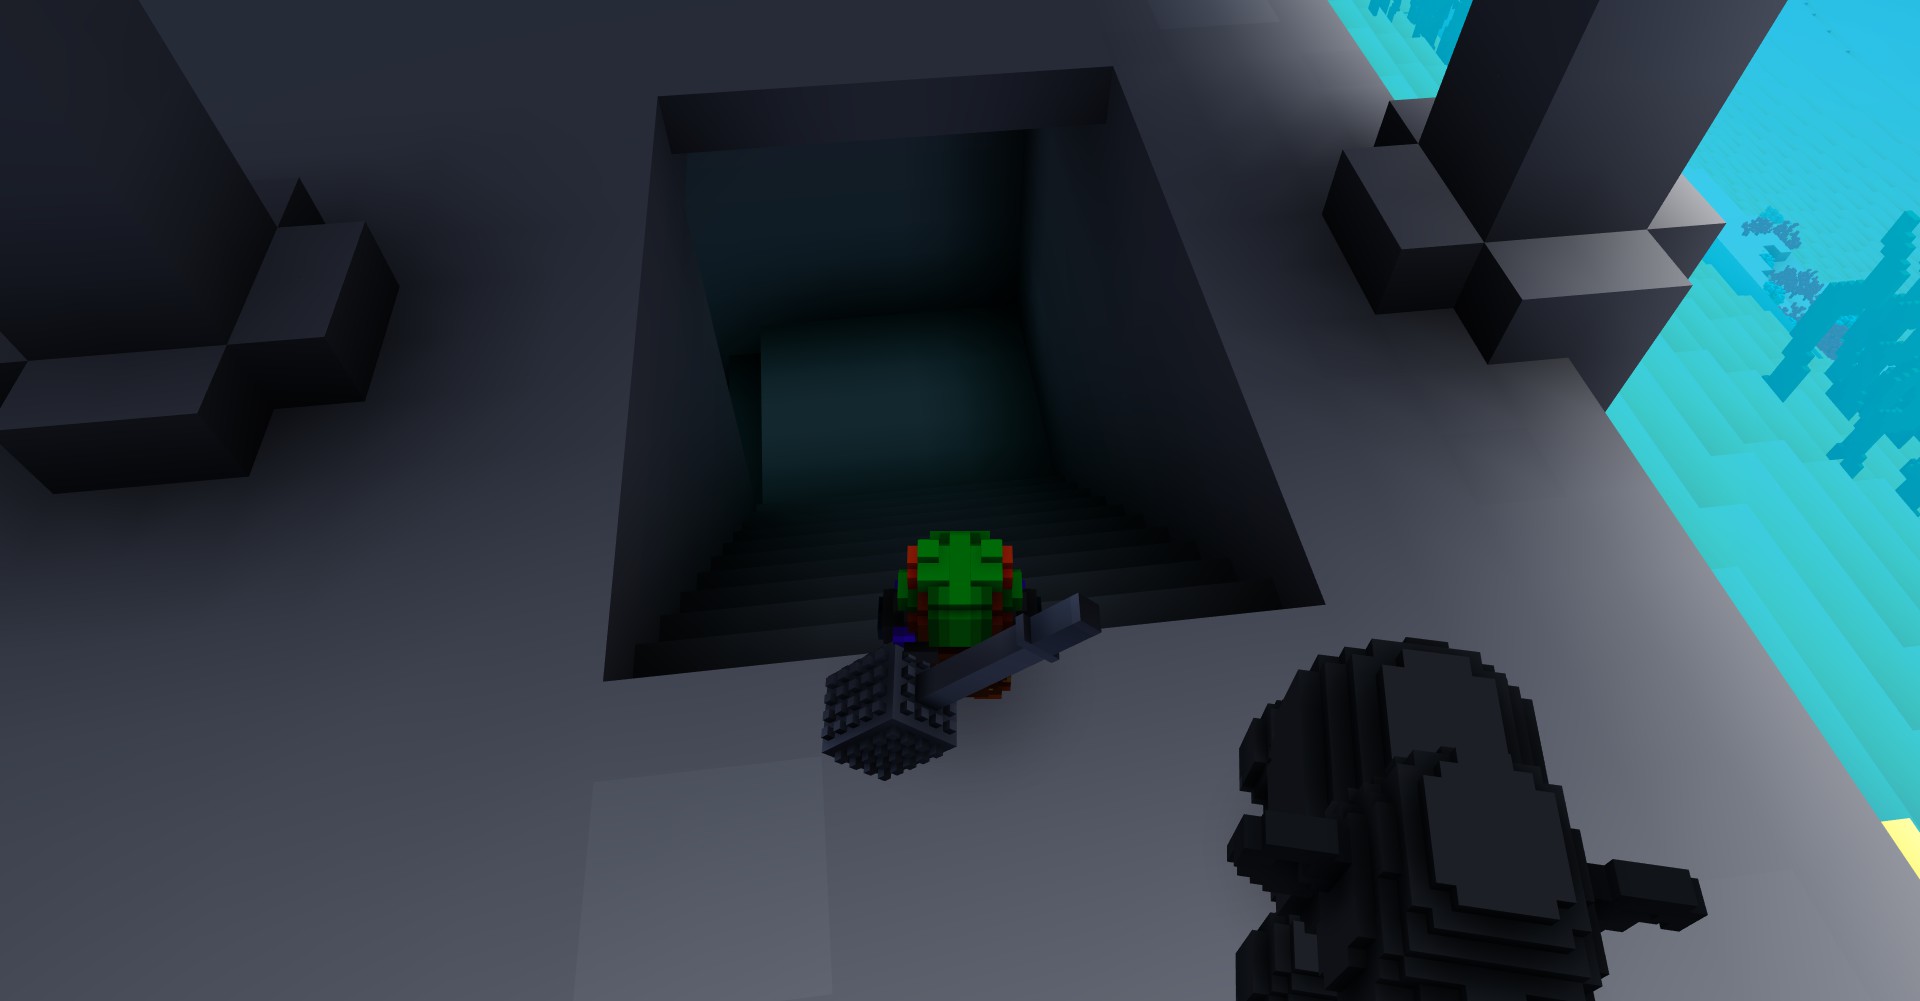
The entrance to a dungeon.

If you encounter one of these it's best to save this for when you have 4 or 5 star gear. Enemies may be possible at first, but they get stronger and stronger the deeper you go in. If you complete it, you'll get an artifact. Make sure you take plenty of potions though, dungeon enemies can feel like they're cheating at times. Speaking of potions...

Crafting Useful Items

Throughout the map, there are a variety of items you can gather. As said before, just pick them all up. You don't have any set inventory space and the items stack, so you might as well collect everything you come across. In particular, if you can find them, you really want to prioritize these items:
  • Heartflowers (cacti in the desert, iceflowers in the tundra)
  • Flasks
  • Iron, Gold, Silver, Plant Fibers, Webs, Cotton, and Wood
  • Ruby, Emerald, Sapphire, and Diamond

Heartflowers and flasks are important because they are needed to create potions. When you first start out, you can only get 5 potions; due to the amount of damage you'll be taking they most certainly will be exhausted quickly. When you have these items, find a water source and open up the crafting menu with C. Look for Water Flasks in the menu and start crafting those. Now you can craft all sorts of potions! The effects of the different types of potions are shown in game, so I won't cover them here. You can find materials you need for the other ones in the overworld, so make sure you pick up everything you find. Flasks can also be brought from npcs as well, so make sure to check the shops and buy as much as you can.

Iceflowers and cacti sort of work like the heartflowers of the tundra and desert respectively. The process to make cactus potions is the exact same as making a regular potion, but in order to make a potion in the tundra you'll need a campfire to thaw out the heartflower in the iceflower. Find one and open the crafting menu near it and you should be able to craft a heartflower.

Iron, Gold, Silver, Webs, Plant Fibers, Cotton, and Wood are needed to craft certain weapons and armor. With the exception of Iron and Wood, all of these can be broken down into their crafting counterparts at the spinning wheel. Iron, Gold, and Silver need a furnace (anvil graphic on the map) and Wood needs a saw (saw graphic on the map). The classes that need what particular materials and where to get them are as follows:

Class
Materials
Dropped From
Archer
Linen, Wood
Bushes
Warrior
Iron
Iron Deposits
Mage
Silk, Wood
Scrubs, Bushes
Rogue
Cotton, Iron
Cotton Plants, Iron Deposits

Gold and Silver are used for every class and are used to create certain amulets and weapons (depending on the class).

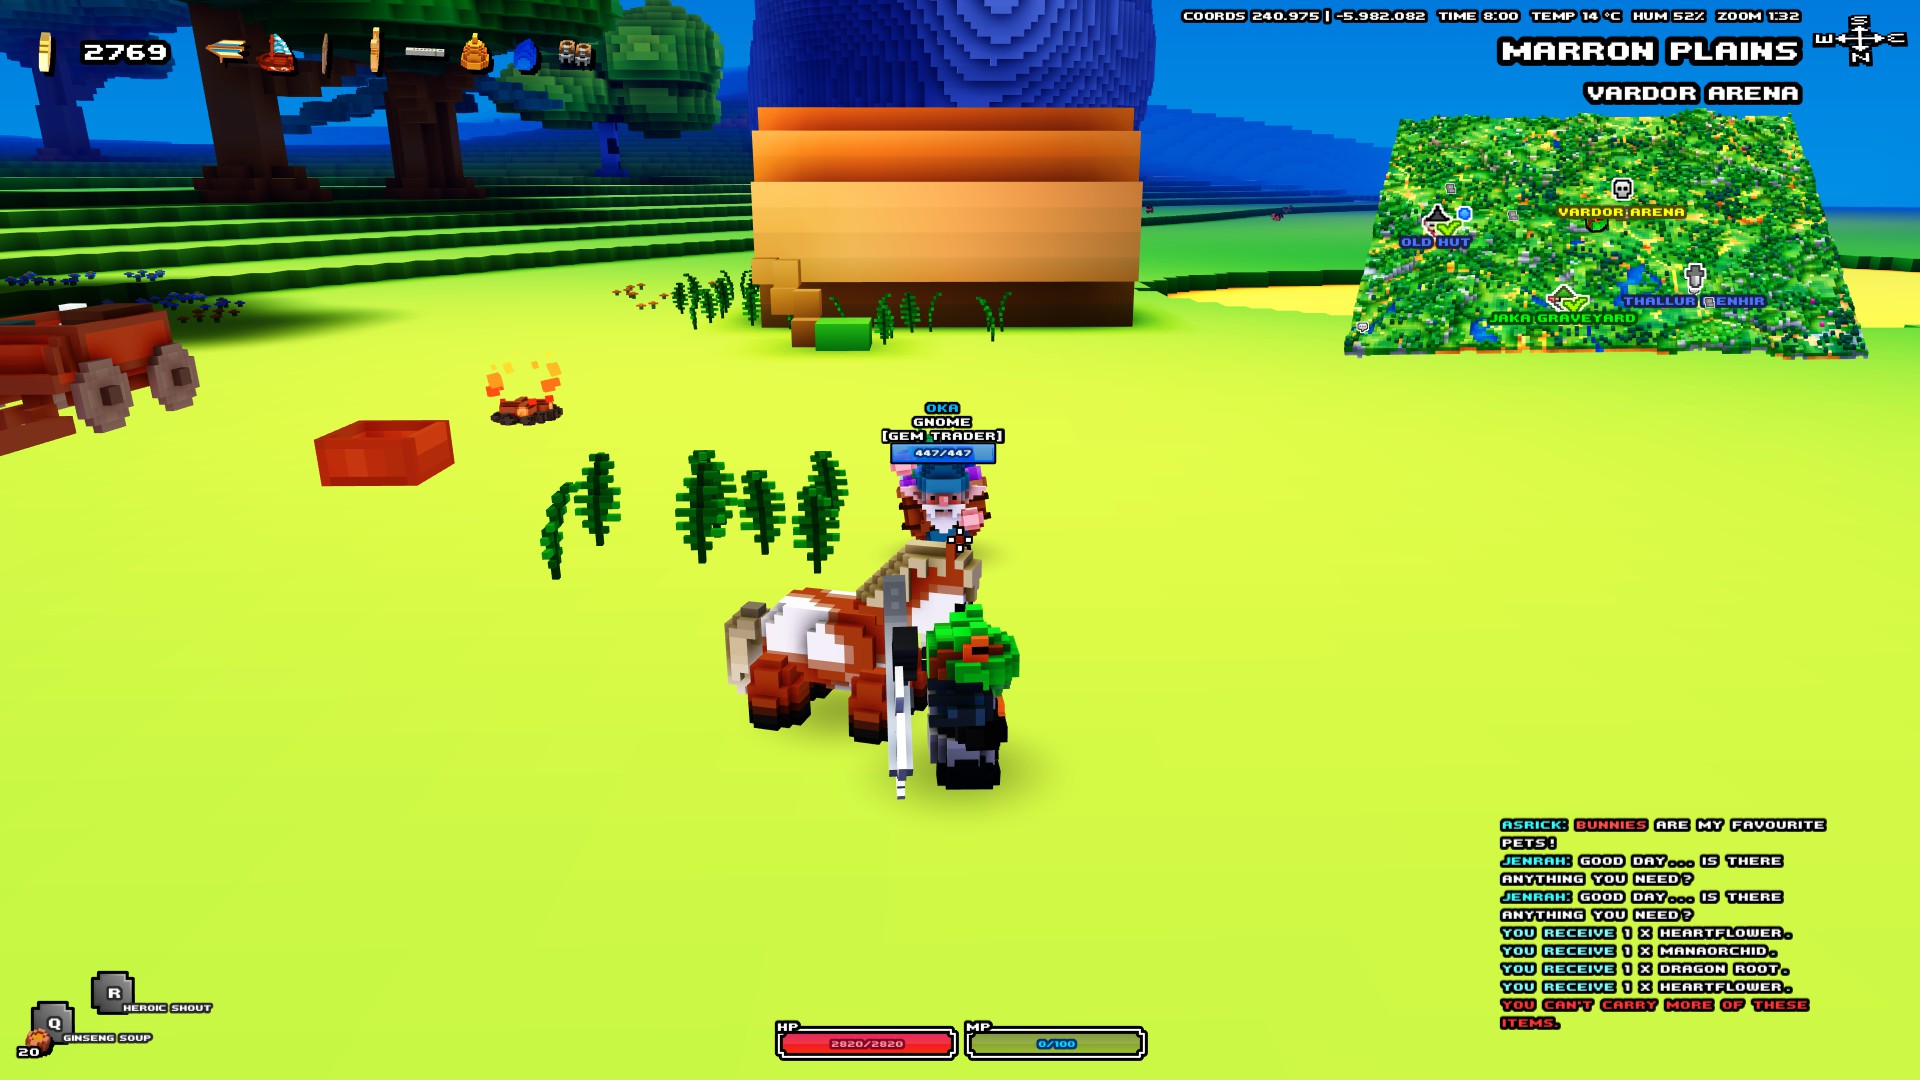
In addition to raw materials, you'll also need certain gems to craft items of a particular rarity. Rubies, Emeralds, Saphires, and Diamond pieces can either be found in caves as ore deposits, as drops for a dungeon, or traded with a gem trader.

A gem trader.

With these gems, you can craft 2 star gear (emeralds), 3 star gear (rubies), 4 star gear (sapphires), and 5 star gear (diamonds).

So, we've now got a good idea of what to do and can start exploring! ...But we're still losing to white dungeons.

How exactly do you fight in cubeworld without getting stunlocked and dying? Well, there's a variety of ways depending on the class, but first, you want to start dodging. Press M3 while moving to dodge. This is by far the most important thing to get a hold of early on. Careful though! Dodging takes stamina and if you do it too much you won't be able to do certain class specific things or roll when you need too. Just keep calm and try and time it right before the enemy is about to attack.

If you want more information on your class, Press F1 for a movelist. I'll be going over that and other strategies you can use with certain classes in the next sections of this guide.
The Warrior Class
The standard "in your face" tank class. You have a few choices in weapons, and if your specialization is berserker, then the weapons really have a varied playstyle. You can change your specialization by going to a class changer. They have a crown on the map. They're found only in towns.

Berserker Controls
  • Passive: Rage - While attacking, this has a chance to activate. Heals for 50% of damage dealt. lasts for 8 seconds.

  • R: Rock Fist - Big damage with a high stun chance; Can be canceled with M2 or dodge, can be used for mobility.

  • M1 (1h/dual): Attack - An attack that swaps between the weapons equipped. Spin on the 3rd hit.

  • M2 (1h/dual): Swirl - An attack that does big damage and has a chance to knockback and stun an enemy. Holding will use more MP. The more MP used, the more damage and the greater the chance to stun.

  • M1 (1h&shield): Attack - An attack that swaps between the weapons equipped

  • M2 (1h&shield): Block - Blocks an incoming attack. If an attack is blocked, MP is gained. Releasing the button will result in a spin attack that has a chance to stun. Holding will use more MP. The more MP used, the more damage and the greater the chance to stun.

  • M1 (2h): Attack - An attack that has a chance to stun on the 3rd hit.

  • M2 (2h): Crush - Does massive damage With a chance to stun. Holding will use more MP. The more MP used, the more damage and the greater the chance to stun.

  • M3: Smash - Does massive damage with a high chance to stun. Takes 100% of stamina.

  • Lshift: Cyclone - Spin in a circle that deals damage and blocks all attacks while the block meter still has energy. Also drastically increases the speed at which block is regenerated.

  • Lshift + Jump: Jumping Cyclone - Jump extremely high while spinning. Useful for reaching high locations.

If you're going to use berserker, I'd recommend equipping either dual or 1h& shield( Use M1 to equip a weapon into the right slot, and M2 to equip a weapon into the left slot). This is because 2h is extremely slow and has much less of a chance to activate Rage, as well as the fact that the M2 leaves you wide open to damage. 1h & shield is good because it has decent speed and block is a pretty powerful option, and dual is good because of the attack speed, damage, and M2.

A tactic I like to use is to try and stunlock the enemy. While using 1h&shield, You can Use R (Or use middle click if it didn't stun or you don't have it up), attack them for a bit while their stamina comes back, use shift until the stars above their head disappear (you can't stun them again if they have this) use a max MP M2 and repeat. This process allows for some easy wins.

You can also use your R to travel. At the end of it, dodge to cancel out that terrible end lag. In combat, when you've hit your enemy, use M2 to cancel out of the rest of the animation so you don't go flying too far.

Guardian Controls
  • Passive: Rage - While attacking, this has a chance to activate. Heals for 50% of damage dealt. lasts for 8 seconds.

  • R: Heroic Shout - Heal HP over 10 seconds.

  • M1 (1h/dual): Attack - An attack that swaps between the weapons equipped. Spin on the 3rd hit.

  • M1 (1h&shield): Attack - An attack that swaps between the weapons equipped.

  • M1 (2h): Attack - An attack that has a chance to stun on the 3rd hit.

  • M2 Block - Blocks an incoming attack. If an attack is blocked, MP is gained. Releasing the button will result in a spin attack that has a chance to stun. Holding will use more MP. The more MP used, the more damage and the greater the chance to stun.

  • M3: Smash - Does massive damage with a high chance to stun. Takes 100% of stamina.

  • Lshift: Cyclone - Spin in a circle that deals damage and blocks all attacks while the block meter still has energy. Also drastically increases the speed at which block is regenerated.

  • Lshift + Jump: Jumping Cyclone - Jump extremely high while spinning. Useful for reaching high locations.

This specialization has a small boost in HP as compared to the Berserker. As far as combat goes with this specialization, you should probably use either dual or 2h, since both of their main weaknesses in leaving you wide open when you use M2 are covered with the universal block. 1h&shield offers nothing unique with this specialization, so it's best to just leave it alone.

You can use the same stunlock strategy from above now with any weapon if you're a guardian. It works best with 2h since it has more opportunities to stun than the other weapons.

Overall though, as far as which specialization is better, I'd say it depends. When I'm exploring a new territory I go berserker for rock fist traveling, but when I need to do harder dungeons/quests I go guardian for 2h stunlock cheese.

The Mage Class
This is probably the best class for beginners. Mages are busted for a myriad of reasons, and they're by far the most fun class to play.

Fire Mage Controls
  • Passive: Fire Control - Has a chance to activate while attacking. Boosts damage.

  • R: Flame Comets - Does massive damage to a specified area.

  • M1 (Staff): Flame Swirl - Creates a vortex at a specified area that does damage to enemies standing in it.

  • M2 (Staff) Flame Vortex - Creates a vortex in a specified area that does damage to the enemies standing in it and has a chance to stun.

  • M1 (Bracelets): Firebolt - Does damage to an enemy. As the combo counter increases, attack speed also increases.

  • M2 (Bracelets): Fireball - Does damage and has a chance to stun.

  • M1 (Wand): Fire Beam - Does damage in a line. As the combo counter increases, attack speed also increases.

  • M2 (Wand): Fire Ray - Does damage in a line and has a chance to stun.

  • M3: Teleport - Teleports you to a small distance in front of you. Takes all stamina.

  • Shift + M1: Flame Explosion - Knock enemies back and stun them.

  • Shift(hold): Float

  • Shift + Space (at the same time) (hold) Super Float

If you're going fire mage, stick with the bracelets or the staff. The wand isn't as good in my opinion because you have to land all the hits of your M2 to stun reliably (Which can be hard if enemies get too close). But that can be remedied with Flame Explosion, so it's not too bad.

Using the bracelets, a good idea would be to use your M2 to stun, then continue to build up attack speed with your M1. When an enemy gets too close, use Flame explosion to knock them back. Using flame explosion to keep an enemy back is pretty much universal with all fire mage weapons, so keep that in mind. Also keep in mind that you can't stun an enemy with stars over their head. If you want to equip both of the bracelets, use M2 for the left weapon, M1 for the right.

Water Mage Controls
  • R: Water Bubbles: Creates a trail of bubbles behind the character that does damage to enemies and range and creates healing aoes when hit with an attack.

  • M1 (Staff): Water Swirl - Creates a swirl of water to a specified area that does damage to enemies and heals any ally standing in it

  • m2 (Staff): Water Vortex - Creates a vortex of water at a specified area that does damage to enemies standing in it, heals allies standing in it, and has a chance to stun

  • M1 (Bracelets): Waterbolt - Does damage and heals allies in the shining blue aoes it creates. As the combo counter increases, attack speed also increases.

  • M2 (Bracelets): Waterball - Does damage and stuns, as well as heals allies in the aoe it creates.

  • M1 (Wand): Water Beam - Does damage and heals allies in the shining blue aoe it creates. As the combo counter increases, attack speed also increases.

  • M2 (Wand): Water Ray - Does damage and heals allies in the shining blue aoe it creates. it has a chance to stun.

  • M3: Teleport - Teleports you to a small distance in front of you. Takes all stamina.

  • Shift + M1 Healing Stream (Static) - creates a vortex around the character that heals, but does no damage.

  • Shift + M2 Healing Stream (Dynamic) - Creats a vortex in a specified location that heals, but does no damage.

Water mage is completely busted. You basically don't die. For this specialization, the staff and the bracelets are still my preferred weapons, but the staff is much for this class than it is for fire mage because of the healing aoes.

If you need to heal yourself while attacking, you can use the static version of healing stream. Be careful though, because this will take about half of your MP bar. If you use the staff and the enemy is nearby, just place the vortex on yourself and watch as your enemy struggles to deal any sort of damage. If you use the bracelets, you'll heal if the enemy is close (since the aoe is right on top of you) and the faster you attack, the more you heal, because the aoes stack on top of each other. The same technique is used for the wand. This specialization is busted and is probably the best in the game.

Not only is the mage good for combat, but also exploration. Float allows you to no longer take fall damage, and super float allows you to basically fly to other places and get to certain items much faster than other characters. You can also spam Shift in the air in order to stay in the air longer and cover more distance.
The Rogue Class
This class is pretty fun. Depending on the weapons you equip and the specialization you get, the damage this class can do and the punishment it can take changes drastically.

Assassin Controls
  • R: Camouflage Grants max stealth for 20 seconds.

  • M1 (dual knives): Attack - Does damage.

  • M2 (Dual Knives): Ambush - Does damage and stuns, as well as adding a poison effect to the enemy. The higher the mp, the higher the stun chance and damage.

  • M1 (Longsword): Attack - Does damage.

  • M2 (Longsword): Perforate - Does damage and has a chance to stun. The higher the MP, the higher the stun chance and damage.

  • M1(Fists): Attack - Does damage.

  • M2(Fists): Kick - Does damage and has a chance to stun. The higher the MP, the higher the stun chance and damage.

  • M3: Poison Vial - Throws a vial of poison that creates a green aoe at a specified location. any enemy standing in this will be poisoned.

  • M3 (Moving): Dodge - Executes a dodge and generates a little stealth.

  • Shift: Sneak - Allows you to build stealth. Builds stealth faster if standing still. Holding shift while moving will allow you to move while building stealth. You will retain stealth if you let go of shift while standing still, but if you move it'll go away.

Camo allows you to some massive damage. Using this with daggers means that enemies are poisoned as well, so if you happen to die and get the poison kill the quest or whatever you're doing will still end up being complete. I love this skill. You can lead off with vial from a distance, Camo, Ambush, attack for a bit for the extra mp, run or attack some more until the stars are off the enemies head when they get up, ambush again, and repeat. Or if you don't want to stun, just spam ambush when you're max MP.

If you're going to use this specialization, I'd recommend dual daggers. Use M1 to equip a right dagger, and M2 to equip a left one. Really though, all weapons work well for this class, so you should use whichever weapon you like best.

Ninja Controls
  • Passive: Shadow Force - Dodging an attack will give you 25 MP and guarantee a critical on your next M2.

  • Passive 2: Shadow Strike - Using your M2 will negate damage as a dodge effect. The first passive can be reactivated with this.

  • R: Ninjutsu - Changes M1 to Suriken and M2 to Incercept. Also negates the stamina cost for these skills.

  • Shuriken - Throw a suriken.

  • Intercept - Exactly the same as the M2 skill of the weapon you have equipped, but it moves you to the opponent if you're at a distance.

  • M1 (dual knives): Attack - Does damage.

  • M2 (Dual Knives): Ambush - Does damage and stuns, as well as adding a poison effect to the enemy. The higher the mp, the higher the stun chance and damage.

  • M1 (Longsword): Attack - Does damage.

  • M2 (Longsword): Perforate - Does damage and has a chance to stun. The higher the MP, the higher the stun chance and damage.

  • M1(Fists): Attack - Does damage.

  • M2(Fists): Kick - Does damage and has a chance to stun. The higher the MP, the higher the stun chance and damage.

  • Shift: Ninjutsu - Changes M1 to Suriken and M2 to intercept. Also activates a sprint when moving, and a super jump when you jump.

Ninja is pretty decent because of the passives. During dungeons when you have to fight like 3+ enemy mages, the M2 passive spam can be a really useful tool. Using Intercept can help close the gap and give you some much needed damage and stuns, and Suriken can help with damage from long distances. The stamina cost of Suriken and Intercept outside of the Ninjutsu state can be a little costly, but with a bit of experience, you'll get a little better about deciding when it's a good idea to use them.

If you want to use Ninja though, I'd still say go for daggers. The poison is useful. But as said before, all the weapons this class has to offer all have about the same effectiveness.
The Archer Class
Archer is a pretty fun class. Well, if you're playing Scout that is. This class has the biggest gap between the viability of specializations in the game. If you're playing this class, find a village as soon as possible.

Sniper Controls
  • Passive: Confirmed Target - Attack speed is increased as attacks are successfully landed.

  • R: Shadow Shooter - Creates a clone that does everything that you do.

  • M1 (Bow): Attack - Shoots an arrow.

  • M2 (Bow): Salvo - Charges stealth, which in turn charges MP. Shoots 5 arrows on release. Has a chance to stun. The more MP used, the higher the damage and the higher the stun chance.

  • M1 (Crossbow): Attack - Shoots a bolt.

  • M2 (Crossbow): Charged shot - Charges stealth, which in turn charges MP. Shoots a singular, strong bolt on release. Has a chance to stun. The more MP used, the higher the damage and the stun chance.

  • M1 (Boomerang): Attack - Shoots a boomerang. Moving the camera will move the boomerang while it's out.

  • M2 (Boomerang): Charged Boome - Charges stealth, which in turn charges MP. Shoots 2 boomerangs on release. Has a chance to stun. The more Mp used, the higher the damage and chance to stun.

  • M3: Retreat - Does a backflip and grants max stealth.

  • M3 (Moving): Dodge - Executes a dodge and builds a bit of stealth.

  • Shift: Sneak - Allows you to build stealth. Builds stealth faster if standing still. Holding shift while moving will allow you to move while building stealth. You will retain stealth if you let go of shift while standing still, but if you move it'll go away.
Stealth on this class is pointless. Especially in solo. Shadow shooter is cool, but that can only take you so far. A group of enemies will have you beat, and mages... Well... Good luck with that one. If only this class had lifesteal...

If you're playing this though, I'd recommend a bow or a crosssbow. The boomerang seems cool at first, but the lack of damage isn't worth the camera gimmick. It'll just make you aggro more enemies, not allow you to dps all of them, and you'll die as a result.

Scout Controls
  • Passive: Rough Ranger - Attacking enemies gives you a chance to get a buff that allows you to use mp skills instantly.

  • R: Quicksand Trap - Enemies are slowed if they walk in this aoe.

  • M1 (Bow): Attack - Shoots an arrow.

  • M2 (Bow): Salvo - Shoots 5 arrows on release. Has a chance to stun. The more MP used, the higher the damage and the higher the stun chance.

  • M1 (Crossbow): Attack - Shoots a bolt.

  • M2 (Crossbow): Charged Shot - Shoots a singular, strong bolt on release. Has a chance to stun. The more MP used, the higher the damage and the stun chance.

  • M1 (Boomerang): Attack - Shoots a boomerang. Moving the camera will move the boomerang while it's out.

  • M2 (Boomerang): Charged Boome - Shoots 2 boomerangs on release. Has a chance to stun. The more Mp used, the higher the damage and chance to stun. Moving the camera will move the boomerang while it's out.

  • M3: Kick - Knocks back an enemy and stuns them.

  • Shift: Sprint

  • Shift + Jump: High Jump
As I said before, this is the only archer class actually worth playing. The sprint and the jump are useful for exploration, and quicksand trap is sooo good for melee enemies. All you really have to do is shoot, stun when you have the MP, and run back a bit and keep shooting. Or let them get close and use M3. If they get too close and you can't stun, use quicksand trap. Or use quicksand trap first and spam stuns when rough ranger activates. Rough ranger really flows with this class's kit and gameplay style, which is always a plus.

For this specialization I'd recommend the bow and the crossbow again. Between the two, I prefer the crossbow because it only shoots one projectile instead of multiple. Play for yourself and see which you prefer.
Conclusion
And that's it! With that much info, hopefully you can now actually do things and not die!

I'll be updating this guide over time and making it a bit more pretty. This is my first time making a guide, so sorry if it was a little ugly. I'll add anything I missed too, so if there was anything I looked over, let me know in the comments. Thanks for reading!

31 Comments
Lunala666 26 Nov, 2022 @ 2:45am 
Finally someone ELSE who enjoys Beta.
Frostbite 30 Apr, 2022 @ 11:54pm 
what is an sol?
Philrd 7 Apr, 2021 @ 8:00pm 
Herp derp Wollay bad, break my feelings :((((
36 11 Jan, 2020 @ 7:06pm 
step 1: Uninstall

step 2: Install alpha and have a blast

step 3: Go on Twitter and Find that Swaggersouls is still making the CW review and will be out within the week

step 4: PROFIT
Blu 26 Dec, 2019 @ 7:07pm 
how can i ride pets?
I saw T but nothing happen
Retroficient 9 Oct, 2019 @ 2:38pm 
In case it wasn't added yet, warriors heal also heal allies
peproS 6 Oct, 2019 @ 4:35am 
Well written guide, thanks.
PapaKaesar 4 Oct, 2019 @ 11:00am 
do people really need a tutorial for not dying? BRUH JUST DON'T GAME END!
freEd  [author] 4 Oct, 2019 @ 10:59am 
If you're referring to gold or silver, you'll need a furnace for those. The gems, being emeralds, rubies, sapphires, and diamonds, are already in their proper counterparts, so you don't need to do anything with them. Also, if you mean you're trying to upgrade armor you already have on, you don't upgrade any one piece of gear with them. When I say upgrade, I mean crafting wholly new armor.
Nichts GeThan 4 Oct, 2019 @ 8:58am 
I don't understand how to use the gems.. I can't turn them into their proper counterparts or something else. How can I upgrade my gear with them?!