Beat Hazard 2

Beat Hazard 2

51 ratings
Elite 100+ and You: A Guide to Large as Heck Scores
By matrixDoppelgänger
Do you have trouble getting past Elite 10-50? Are you trying your best to get a large score and find yourself severely outclassed? Learn to rack in massive points within this handy guide, straight from a "Top 50 players" player!
   
Award
Favorite
Favorited
Unfavorite
Introduction
"What the Heck is this even About, Anyways?"
So you saw the icon, and given that you wanna score big, came to this guide for advice.
Well, you came to the right place! Within this guide, I'll be teaching you the tips and tricks I, and some of the community uses to make sure they're able to walk away with 30+ million points per (most) song(s), and climb up those leaderboards like nobody's business!

I can seem rather daunting at first, especially if you're more familiar with the first game, given that there's a whole new system to learn here. Why, even the tiniest change of detail can completely change how a game can play! But don't worry, this guide will hopefully teach you the ways of Beat Hazard 2, and the ways to score big!

Things You'll be Taught About
  • Song Selection and Open Mic
  • The Ship to Pick
  • Money Mangement
  • Perk Weapons
  • Enemy Strats
  • Modules and Generated Ships
  • And More
Proper Preparations to Prime a Pilot!
To Stream... or to Download?
In case the title didn't tip you off, Beat Hazard 2 is primarily a music game. If you're seasoned with the first game, you should be good to go, though it'll never hurt to retrieve a few more! After all, having a massive music library is one of the key goals to getting you to that fabled top 1000-100s!

"But I don't own many songs,I stream them." you might say, and let's just say there's a reason Open Mic was one of the most request additions to BH2! Amazon Music, Spotify, Pandora, IHeartRadio, your own music livestreams, if it can be streamed, you can ride it to the very end and amass your points!

However, those those of you wanting to amass a big library of songs, and don't want to hassle with streaming services, there are alternatives available... but the one that won't land me in hot water (maybe) is buying the albums directly from the artist.

What to Find in a Download
Although your top priority is picking the songs you like and going from there, look for songs that are more than 3 minutes long, has a deep bass, and doesn't have too many silent or low-activity sections of songs, much like techo, dubstep, or house music would have, which works best with BH2.

The Hangar: Your Friend!
If you're sticking to the Standard Ship, skip this part.

The ship hangar has definitely seen some new... well, ships arrive, each one carrying their own playstyle and feel. This list below will cover all of the vanilla ships, and what my recommendation would be for them.


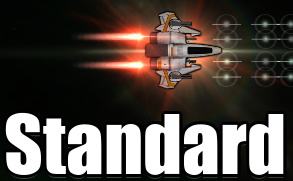
"Tried and tested."

This is the stock ship you start with when you begin BH2. It's pretty much the jack of all stats, not excelling at anything, you don't have to really chew up your special weapons for anything, either.


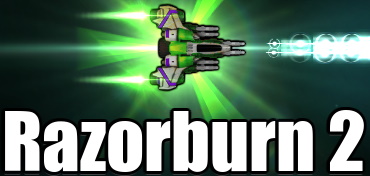
"A ship where all the firepower is focused in a single tight beam."

As the name implies, this ship fires only one beam, but what a beam it is! This ship is essentially perfect for dealing with large ships and giant ship bosses. You will have to learn how to accurately aim when you're dealing with a large crowd of small ships and when you're getting a snake boss, though.


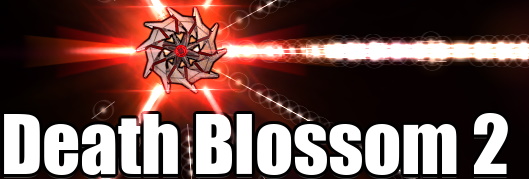
"Hazards come in all directions, so this ship fires in all directions.

Crowd Control: The Ship. Considering how hectic Zen gets, and how much the game likes to sic those ring-formation enemies at you, if you don't mind being a bit weaker than normal for bosses that require sustained firepower, this ship works wonders!


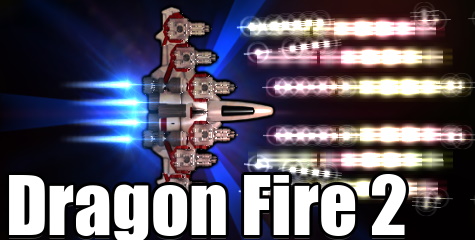
"A slow and difficult ship to handle with monstrous firepower."

For some, mobility isn't all that important for dealing with the massive amounts of enemies you'll be facing when out and about the battlefield. That being said, if you don't mind having a massive and slow hitbox in exchange for six beams of pure destruction and boss-killing, this will be one you'll wanna stick to.


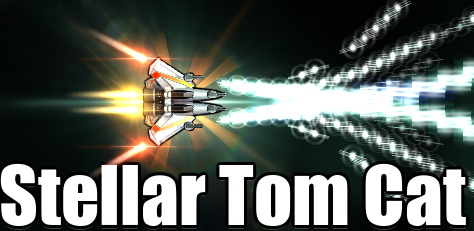
"Stellar Tom Cat"

This is a ship that sweeps the beams (they turn independently in a set pattern while you fire or not), turning it's beams into a cone of destruction. It's... not very impressive, and unless you're going for all the Shaow Ops missions, this is a ship that doesn't bring all too much too the table.

Perks to Focus On
Refer to this section when you've got enough money, which will be discussed in another section

First off, if you haven't already, unlock the COLOR and POW perks and upgrade them fully, since much like it's predecessor, you'll seriously need to be at your most powerful if you wanna get past Zen, something you'll need to unlock after that, after Suicidal and Apocalyptic. You'll also wanna focus on upgrading as much of your score perks as you can, one multiplier can make or break a high score, even the seemingly useless x1 multipliers.

You'll also need perk weapons unless you're going for a challenge run. While there's noting stopping you from picking any 'ol perk weapon and making the most out of them, my personal favorite is the Reflect Shield, one that although doesn't add extra ass-kicking, renders you entirely invincible to any kind of attack for a few seconds, a few seconds being all it takes for a ship to get overwhelmed and explode.
Know your Enemies
The Small and the Agile
Space Junk

These hunks of scrap metal from destroyed ships and rocks fly from one side of the screen to the other, and don't pose any real threat, unless in huge numbers. Break as many of these seemingly useless piles as you can, they have a much higher chance for a really good bonus than normal enemies do.

The Scout

This is the least threatening ship you'll have to deal with. When they're brought out on the field, the only way they can really harm you is if you run into them. They also have decent amount of numbers, but they won't really be much of a problem after the intro to a song is over.

The Fighter

These guys, much like Scouts, look like they don't do much but float around, but these guys are equipped with photon blasters (the slow red dots that fly in a straight line), which can put you in quite in a pickle if enough of them are fired. Since photons cannot be shot at, deal with these guys first if they ever show up.

The Bomber
Although they're not anymore tougher than their Fighter and Scout cousins, these guys carry homing missiles that fire ever-so periodically, and if your ship isn't prepared to deal with huge amounts of them, these guys could ruin a perfectly good run. Deal with them after taking out higher-priority enemies before they start plopping out missiles.

The Swarm
[Place image here later]
Appearing every so often, these guys telegraph their appearance and form a ring around the playfield that can be shot out of. While these guys by themselves aren't dangerous, they do a real nasty number when paired with a more dangerous enemy, like a Rapier Beam Cuiser or a Cobra Attack Ship.

Supporting the Line
The Stalker
[Place image here later]
A near-twin cousin to the Pulsar, these guys show up in groups every so often to pull your ship towards itself, as to restrict your movement and allow the other ships to get a clean target, potentially spelling your end. They have decent armor, but you'll probably wanna deal with the bigger guys first before they take your chance to take the Stalker(s) down.

The Pulsar
[Place image here later]
A near-twin cousin to the Stalker, these guys show up in groups every so often to push your ship away from itself, often into other hazards like a big group of small-tier ships, a stray Space Junk, or right next to a bigger ship that can easily blow you away if you're next to it. They have decent armor, but you'll probably wanna deal with the bigger guys first before they take your chance to take the Pulsar(s) down.

The Miner
[Place image here later]
What's supposed to be blowing up asteroids is now waltzing over to your playfield, showing up in telegraphed groups and dropping mines that although don't kill, disable the ability to fire your beams for a few seconds if one single mine gets to your ship. Like other support ships, they really can't do much by themselves, especially considering their projectiles are harmless (but annoying), but with other bigger, more dangerous ships, they can really screw you over if left unchecked.

The ECM Corvette
[Place image here later]
A functional cousin to the Miner, these guys carry a long-ranged ECM beam that can disable your beams and weapons for a surprisingly long duration. Make sure you keep your distance when dealing with this one, using a ship with low firepower spread if possible, otherwise you'll be finding yourself without an attack when the big guys (or a huge amount of the little guys) come knocking on the hull.

The Reaper
[Place image here later]
Like Scouts, they don't do much but float around and get in your way with a much bigger hitbox. What sets them apart, however, is that when they die, they launch out a number of homing missiles around itself as an attempt of taking you down with them, spawning up to 16-20 if you're on Zen! Deal with these guys carefully, and with plenty of perk weapons to help you if possible.

Heavy, Armed, and Dangerous
The Bulldog
[Place image here later]
Tough and uncaring, these bulky brawnies form up in lines, firing a triplet of photons every so often. They also arrive in telegraphed groups. much like the Puslars/Stalkers, Miners, EMC Corvettes, and The Swarm. Hopefully you've got good firepower or a perk weapon dedicated to dealing with them if they ever show up.

The Heavy Barrage Cruiser
[Place image here later]
These big guys, forming in telegraphed groups, are much bigger and tougher to destroy than the Bulldogs. They can't really move and can barely aim at you, but they make up for with an impressive barrage of 4-pack rockets. These persistent predators need quite a bit of firepower in order to take them out, but having a wide spread of firepower defangs the rocket when dealing with them as well, so make that of what you will.

The Cobra Attack Ship
Don't let their unimpressive size and weak form fool you, these tricky troublemakers bear a missile turret that fires a direct upgrade to the homing missile: a Cobra missile that takes an indirect, wiggly path right over to you and is much tougher to destroy than their zergling cousins. Destroy these guys as fast as possible before their firepower ruins your run.
[WIP]

The Rapier Beam Cruiser
[Place image here later]
The absolute worst of the bunch. The destroyer of many a run. The only threat that can carry a beam and aim it right at you. The Rapier Beam Cruiser. These nasty fellows form at then center of the screen in packs up to five, and have a shield you need to whittle down before you can have at them. Have a perk weapon ready if you ever have to deal with them.

Who's the Boss(es)?

Giant Enemy Ship
"INCOMING MASS: [number] KILOTONS"
[Place image here later]
[WIP]

Giant Serpent
"INCOMING MASS: UNIDENTIFIED OBJECT"
[Place image here later]
[WIP]
Modules, Generated Ships, and the Workshop
if you're sticking to the Standard Ship, feel free to skip this part.

Generated Ships and You!
Once you've got enough money to buy all the perks, most of what you'll be spending your money on will be Generated Ships, discovered after you finish a long-enough song. The companies that sell you these sorts of ships run as thus:
  • General Industries (Affordable Destruction!): These are probably the first ships you'll buy, going for about $10K-$15K than the usual $20-$50K. These ships don't deviate all that much from the Standard Ship, having stats that don't stray all to far from 1, making them the "jack-of-all-stats", if you will.
  • Blazer Labs (You Can't Dodge Light Speed!): These eggheads (like the author of this guide) specialize in ships that fire extremely fast, ensuring that if you'll always hit your target whenever you aim at something. Blazer ships don't tend to be the fastest, aren't heavy hitters, and sometimes handle like poop, but as long as you're able to aim well enough, those shouldn't be much of a problem.
  • War Bringer Cartel (Annihilation!): With extremely powerful and decently fast bullets, these guys allow to to scorch enemies and bosses alike without having to see them for more than a few seconds. Of course, firepower like this comes at a price, mostly with handling and pickup repulsion, but such is life when you've got crazy-good guns.
  • Brute Inc (Why Bring A Gun When You Can Have A Nuke?): With 4-6 beams of pure firepower and decently strong bullets, the ships this company produces will outfire even the absolute worst of the bunch, including the bosses. They're pretty big and slow, and sometimes has poor deceleration, but as long as you've got the firepower, you've got it in the can!
  • Mosquito Systems (Fast, Small, Agile): If you don't mind sacrificing some your firepower and handling in exchange for a tiny ship that can easily weave through even the thickest of projectile storms, these guys have you covered. Mosquito ships aren't really all that well-aquainted dealing with anything that needs any amount of sustained fire, such as large bosses or the Rapier Beams, but as long as you're good at dodging stuff, you'll pull though.
  • Cra$y Thief Hackers (Greed Is Good!): At first glance, you might pass these guys off, as their stats are usually inferior to General Industries, and even if they don't, they still kinda suck at firepower in general. But the one big saving grace for the reverse-engineers is that Thief ships have an insane pickup magnetism, making it easy to grab perk weapons, score multipliers, and cash! ...You still might wanna grab a few modules for these ships, though.
  • Scorched Earth (Indiscriminate Carnage!): Most of Scorched Earth produces are ships with fast bullets, decently well-rounded other stats, and a really, really wide range of fire. It will grow annoying having to get close to bosses to really do anything to them, but at least you don't have to aim all that much when dealing with anything else.

Modules: Making Stuff Better!
[WIP]

Shadow Op Missions
[WIP]
Miscellaneous Advice and Tidbits
  • Don't be afraid to get close to the enemy, even if they have the dreaded Cobra Missiles.
  • If you have Shields, don't be afraid to get a little reckless when they're in use, any refected projectile can be put to your use!
  • It's always a good idea to hold out for a couple of Shadow Op missions if there's a generated/Workshop ship that has a Rare or Legendary module.
  • Pickup attraction is a must if you're going for really high multipliers and scores, likewise any pickup repellants are more trouble than what they're worth should be rectified with Pickup Force modules if you have them, especially if you're getting a Legendary module.
  • Even if you lack the skill, the best advice of all is to simply have fun with what you like, leaderboards are just that, boards that tell you who got the most points in sequential order.

[This guide is still under much needed progress as I need to gather screenshots and more information about the game, and the game's also actively updating as I go along, so please stay patient with me while this hopefully comes together!]
15 Comments
Silent Fart Drifter 20 Aug, 2023 @ 11:46pm 
U kan du it :typeI::typeII: :BH2:
PapaFred 30 Jan, 2022 @ 1:22am 
In my experience, the best weapon to reliably take out the Rapier is the EMP. Popping a fully upgraded EMP in the center of the screen as they're coming in will knock off their shields and disable the ships that tend to come out at the same time as them. As an added bonus, it's one of the three weapons that will give you temporary invincibility, so it's the best weapon to get you out of a jam.
†† 25 Nov, 2020 @ 3:02am 
It's very much appreciated, Helmic! This guide is a solid base but your comments definitely add to it to make it even better.
Helmic 16 Aug, 2020 @ 6:42pm 
Sorry for the comment spam, wanted to contribute a bit to the guide and the comment character limit is annoying.
Helmic 16 Aug, 2020 @ 6:42pm 
Don't worry about getting the #1 score on lightning or daily challenges until you've grinded up enough cash to nearly max out your scoring perks.

What makes the difference between second and first place is who best exploits Dare Devil, especially early on in a song as multiplicative scoring snowballs. The longer you can go without shooting, and the faster you can clear the screen so you can go back to not shooting, the more multipliers you can pull out of "thin air" without consuming the finite supply of enemies, and the higher your bonus will be when you do finally start shooting them, resulting in an overall higher score. This is what happens when that one person way back in 4th or 5th place suddenly rockets past you, they were building up multiplier with Dare Devil while you were busy shooting stuff and now have a far greater multiplier.
Helmic 16 Aug, 2020 @ 6:34pm 
Obviously, you have to turn on EVERYTHING to get the high scores, including boosting visual intensity to 300%. Yes, I hate it too, it hurts my eyes, you can't see enemy bullets reliably especially if your'e colorblind, it's terrible in terms of accessibility, but it's not as bad as in Beat Hazard 1. And you do need Pay Day!, because you get points for grabbing cash pickups (and I assume they're impacted by multipliers like everything else). You're only going to have one perk left over for weapons. Don't bother with extra lives, if you're dying you're not getting the most out of your Survival bonus.

This changes if you're going for Boss Rush or Survival because you can then no longer just assume you won't die, you WILL die in those and so you need to rearrange your setup to stretch your time as long as possible. Visual intensity can be set to 50% to make it easier to see what the fuck is going on, which is real handy past the 40 minute mark.
Helmic 16 Aug, 2020 @ 6:30pm 
Reflect Shields are really the big go-to module, though some songs may need something different like an EMP if your bullets are too weak to shred through shield spam. You can use them offensively to run right up into enemies faces to focus down the big threats, defensively to use them as extra lives that you can refill through random drops, or to safely capture +10's that are otherwise unsafe to catch. Sure, some other modules can help better with killing, but you should already be able to kill and when you're spraying six beams of 3+ damage you're getting serious diminishing returns. Reflect Shields are a bit unique in that they can enable you to catch pickups you would oltherwise have to write off as a loss, which is fantastic when there's a +10 or a cluster that's chilling in a wall of enemy bullets.
Helmic 16 Aug, 2020 @ 6:30pm 
I'd say that the importance of stats for getting high scores on individual tracks goes Bullet Damage > Pickup Force > Pickup Life (it has to stay on the field for you go pick it up!) > Deceleration. If your ship is properly tuned to murder enemies and suck in their powerups, you don't need to move particularly fast, but you DO need to avoid slip and sliding into enemy bullets that you can't just shoot your way out of.
CobaltNinja 5 Aug, 2020 @ 3:13pm 
a list of notable modules from ships:
BTS Pressure
Intergalactic - Hello Nasty (Remastered Edition) - Beastie Boys
Bullet Damage +0.20
Pickup Life -0.30

Spectral Pulsar
Chanson d'Automne... - Chris Christodoulou
Pickup Life +1.50
Deceleration +0.02

Critical Thunder Mk. 2
It's Been A Long Time - Felix Da Housecat
Pickup Force +0.40
Top Speed -0.60

Convex Blizzard
Potential For Anything - Souleye
Pickup Force +0.20
Bullet Damage -0.08

Pluto Principle
Can't You See - Skylar Spence
Auto-Aim
Deceleration +0.06

Zen Collapse
Thunder - The Prodigy
Bullet Damage +0.20
Top Speed -0.60
CobaltNinja 5 Aug, 2020 @ 3:13pm 
some notes about zen: it's a HUGE leap in difficulty from apocalyptic. it never stops chucking ships at you, and when it does they're usually medium-sized. most bosses that spawn are also duos, so have a quantum echo on hand

quantum echo is really just the best weapon in my opinion. it doubles your firepower and lets you cover the entire damn screen in a storm of bullets, really handy for shredding boss shields and bosses in general.

most modules are fine to use if they don't hurt your bullets too much. as lord shaxx says, your enemy can't kill if they're dead, so put as much firepower as you can into your ship, along with a little pickup force. deceleration should not be an issue at all even if it's at high values, IMO the least important stat in the game. i'd only use auto-aim on ships with a wide cone of fire since the targeting is real fucky on some bosses, and asteroid deflect is good if you don't have a lot of pickup force