Crash Bandicoot™ N. Sane Trilogy

Crash Bandicoot™ N. Sane Trilogy

700 ratings
100% Achievements: A Comprehensive Guide
By ErickaUnlimited
An accurate, detailed and complete guide on how to unlock every achievement in Crash Bandicoot™ N. Sane Trilogy: Crash Bandicoot 1.
26
3
2
2
   
Award
Favorite
Favorited
Unfavorite
⠀⠀⠀⠀⠀⠀⠀⠀⠀⠀⠀⠀⠀⠀⠀⠀⠀⠀⠀⠀⠀⠀⠀⠀⠀⠀
Here's a detailed list of every achievement in the game and the method(s) I went to obtaining them. The game has no missable achievements since every level can be replayed as many times as you want, but it does require a bit of backtracking between levels to obtain all the gem collectibles.
Simply hit Ctrl+F and type in the achievement name for a quick look at how to get that particular achievement. If you have any further questions or need additional help, feel free to post in the comments below and I'll address them the best that I can.

Happy hunting!

General Achievements
"C1 | I Meant To Do That!"
Spin away an Extra Life.
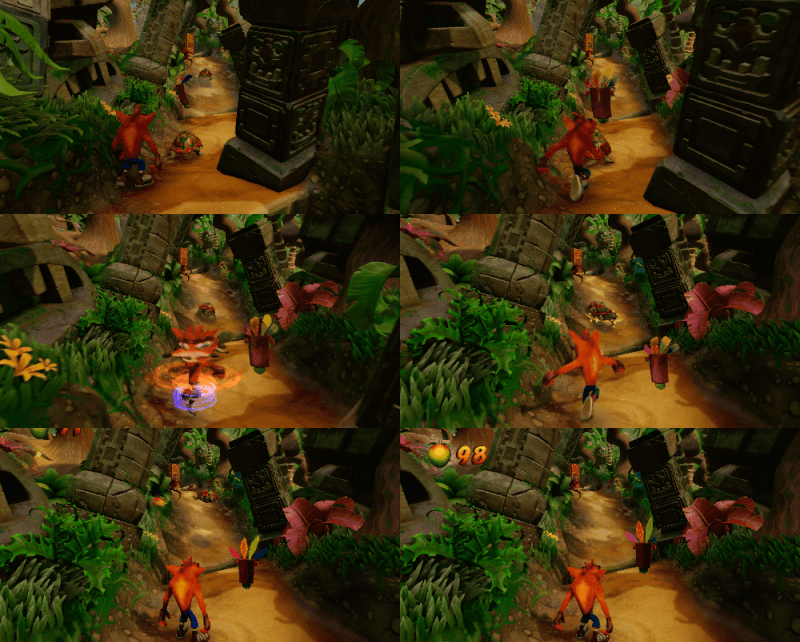
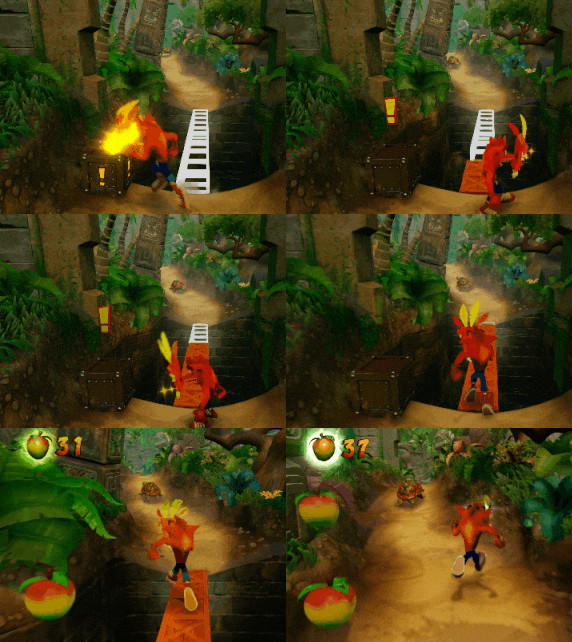
You can earn this achievement right in the beginning of stage one since one of the crates contains an extra life. Just spin to break the box, then spin when you run into it to fling it away, unlocking this achievement.


"C1 | Spin Doctor"
In a single level, spin an enemy into another enemy twice.
You can earn this achievement in the very first level on both the crabs in the very beginning and the turtles a little further down the line.

Just line them up before you spin and you should hit them both without much difficulty.


"C1 | Feeeed Meeeee!"
Die.
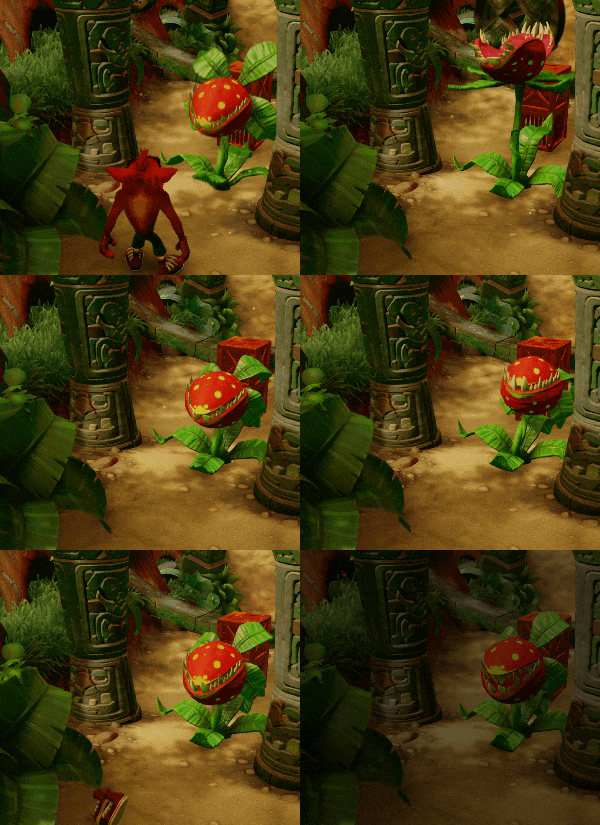
One of the more ambigious achievements, you'll need to die to the killer plants seen on "Jungle Rollers" or any subsequent level afterwards.

Let one eat you to unlock this achievement. Note, the killer plants as seen in "Upstream" do not count towards this achievement.

Letting one eat you will just kill you. :(


"C1 | That's What Those Do!"
Enter a Bonus Round after collecting 3 Character Tokens.
Obtainable once you reach level two, "Jungle Rollers". Simply collect the three tokens as you progress and enter the portal. You'll unlock this achievement once you enter the portal.


"C1 | The Box That Broke the Bandicoot's Back"
Miss a lot of boxes.
Play any level and miss 30 or more boxes and when you complete the level, you'll be shown the screen telling you how many boxes you missed. Once the 30th box hits Crash, he'll collapse and this achievement will unlock.


"C1 | No Holds Barred"
Defeat 5 enemies with Coco's Spin.
Switch to Coco once you unlock her on the first island and play any level. Spin attack any five enemies and you'll unlock this achievement. Easy, no?


"C1 | Cortex's Crazed Contest"
Earn the Key in Sunset Vista.
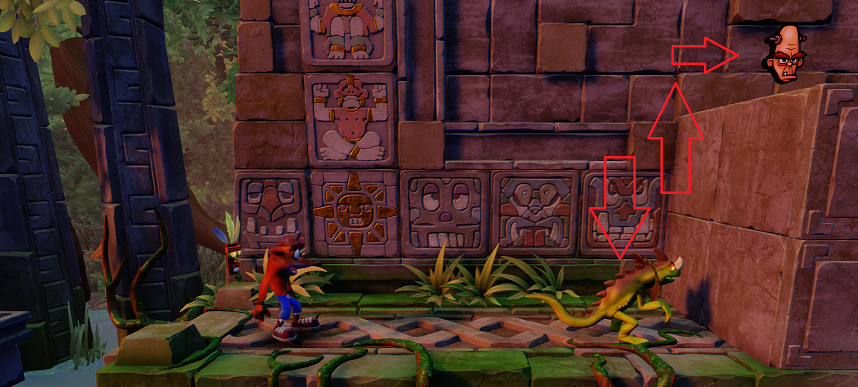
You'll need to locate and collect all three Cortex tokens to unlock the secret area that holds the key. They can be fond in the following locations: at the first and only red jumping lizard. Bring it back to the platform and jump on top of it to hit the trigger crate, spawning the other crates in the back of the level as shown.

The second is on top of the moving pillars just after the first one and the third and final Cortex token is in the background of the level right by the warp zone to the secret area.


"C1 | Koala Konked"
Defeat Koala Kong.
Complete the level, "Koala Kong", on island two to unlock this achievement. This achievement is unmissable as you progress the game.


"C1 | I See London, I See France"
Die as Crash.
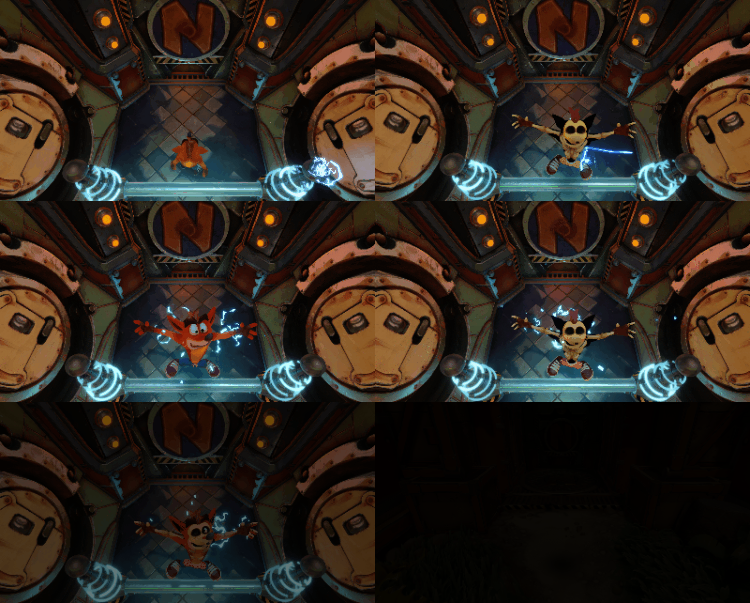
When you reach the third island, head over to the level "Cortex Power" as Crash. Simply get zapped by the electricity that flows between any of the coils and die. You'll unlock this achievement and lose one life in the process.


"C1 | Cortex's Terrifying Trial"
You'll need to obtain the second key from "Jaws of Darkness", which requires you to collect all three N. Cortex tokens, enter the secret area and destroy all the boxes in that secret area. For a more detailed description of this requirement, head down to the synopsis of the level further down in this guide.


"C1 | On Cloud 99"
Earn 99 Lives.
This achievement is not cumulative, which means you need to have 99 lives in total, at once, in order for this achievement to trigger. You'll more than likely earn this while progressing through the game and collecting all the gems/relics, so there isn't really a need to farm them.

If you have the green gem, head over to the level "Castle Machinery" and enter the gem path to pick up an a large cache of extra lives.
Boss Achievements
"C1 | Papu Popped"
Defeat Papu-Papu.
Complete the level, "Papu Papu", on island one to unlock this achievement. This achievement is unmissable as you progress the game.


"C1 | Ripper Ruined"
Defeat Ripper Roo.
Complete the level, "Ripper Roo", on island two to unlock this achievement. This achievement is unmissable as you progress the game.


"C1 | Pinstripe Patooey"
Defeat Pinstripe Potoroo.
Complete the level, "Pinstripe Potoroo", on island three to unlock this achievement. This achievement is unmissable as you progress the game.


"C1 | Nitrus Broken"
Defeat N. Brio.
Complete the level, "Dr. Nitrus Brio", on island two to unlock this achievement. This achievement is unmissable as you progress the game.


"C1 | Cortex N. Capacitated"
Complete the level, "Dr. Neo Cortex", on island two to unlock this achievement. This achievement is unmissable as you progress the game.
Gem & Relic Achievements
Gems & Relics
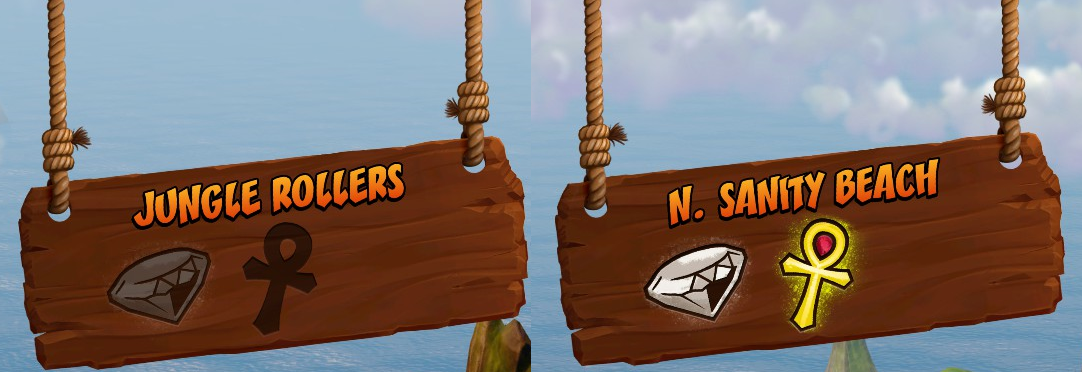
Before entering certain levels, you'll be prompted with a display sign that will tell you if you have collected the gem and relic from the level. If not, the sign will be blank, but if you've already collected one, the other or both, the spaces will be filled in with the respective display, like so:
Relics are earned by first completing the level once, which unlocks a time trial mode. You'll need to achieve at least a gold ranking in 26 levels to unlock all subsequent achievements. Before entering each level, you can check to see what the minimum requirements are to obtain gold. Platinum is not necessary for any achievement.

Gems are obtained from destroying all the boxes on any one single level. Sometimes you can do it without accessing any secret areas, but the majority of the levels will require you to collect special colored gems to reach secret areas. Below is a list of every level, what you'll need and some helpful tips to finding those secret areas or completing the task(s) of destroying all the boxes. Levels with special colored gems require you to destroy every box without dying once during the entire run in order to earn it. That being said, "dying" in the bonus areas does not take a life and therefore does not count towards the dying requirement.

■■■■■■■■■■■■■■■
■■■■■■■■■■■■■■■
■■■■■■■■■■■■■■■
■■■■■■■■■■■■■■■
■■■■■■■■■■■■■■■
Island Number
Stage Name⠀⠀⠀
Gem Color Required
Gem Unlocked⠀⠀
Box Total
1
N. Sanity Beach
N/A
White
49
1
Jungle Rollers
Green
White
43
1
The Great Gate
Yellow
White
38
1
Boulders
N/A
White
16
1
Upstream
Orange
White
36
1
Rolling Stones
Blue
White
87
1
Hog Wild
N/A
White
24
1
Native Fortress
Red
White
48
Island Number
Stage Name⠀⠀⠀⠀⠀
Gem Color Required
Gem Unlocked
Box Total
2
Up The Creek
N/A
White
48
2
The Lost City
N/A
Green
82
2
Temple Ruins
N/A
White
67
2
Road To Nowhere
Red
White
42
2
Boulder Dash
Purple
White
35
2
Whole Hog
N/A
White
24
2
Sunset Vista
N/A
White/Key 1
90
Island Number
Stage Name
Gem Color Required
Gem Unlocked
Box Total
3
Heavy Machinery
N/A
White
86
3
Cortex Power
Blue
White
42
3
Generator Room
N/A
Orange
52
3
Toxic Waste
N/A
Blue
39
3
The High Road
N/A
White
45
3
Slippery Climb
N/A
Red
51
3
Lights Out
Yellow
Purple
15
3
Fumbling In The Dark
N/A
White
18
3
Jaws of Darkness
Blue
White/Key 2
112
3
Castle Machinery
N/A
White
27
3
The Lab
N/A
Yellow
36
3
The Great Hall
N/A
N/A
N/A


Gem & Relic Achievements
"C1 | A Hidden Gem"
Once you earn any colored gem, head to a level that requires it for completion and enter the secret gem area. Once you do, this achievement will unlock. If you're wondering what level needs what gem, please refer to my table below for a list of where to find the gems and what level they correspond with.


"C1 | Catch Me If You Can!"
Earn 5 Relics.
Complete and earn any five relics to unlock this achievement. You earn relics once you complete a time trial on any particular level, which is unlocked after completing a level for the first time. They can be sapphire, gold or platinum level.


"C1 | Could Go... All... The... Way!"
Earn 10 Relics.
Collect any number of relics (gold or better) from any 10 levels to unlock this achievement.


"C1 | More Gems Are Better Than None"
Earn 13 Gems.
Collect any number of gems (colored gems count too) from any 13 levels to unlock this achievement.


"C1 | The Ultimate Gem Path"
Earn 26 Gems.
Collect any number of gems (colored gems count too) from any 26 levels to unlock this achievement.


"C1 | Practice Makes Perfect!"
Earn 26 Relics (gold or better).
Collect any number of relics (gold or better) from any 26 levels to unlock this achievement.


"C1 | An Ancient Antiquity"
Do hard time.
Earn a gold or platinum relic on the bonus level, "Stormy Ascent" to unlock this achievement. This is handedly the most difficult achievement and will take a ton of practice, patience and skill to master the level. A text guide would be near impossible to follow correctly, so I'd recommend checking out some videos and practice, practice, practice! Good luck!


"C1 | The Crown Jewel"
Seek and destroy.
Complete the 28th level, "Stormy Ascent and earn the clear gem by destorying all 56 boxes. You can die on this level and still earn the clear gem and this achievement.
Gem & Relic Achievements
Level 1 - N. Sanity Beach
The gems will be tied to destroying all the boxes on each level. In level one, destroy all 49 boxes to unlock the gem.

Since it's level one, it's pretty straight forward, but you'll want to have your invincibility up and trigger the box bridge on the right side of the fork in the road. Running over the bridge while invincible will destroy them, netting you the gem at the end.

Level 2 - Jungle Rollers
To earn the gem by destroying all the boxes, you'll first need to collect the green gem from the level "The Lost City" on the second island. Once you've done that, return to this level and break all 43 boxes. Both the gem's secret area and the three Tawna tokens are all in plain sight, so you shouldn't have any troubles. It is only the second level after all...

Level 3 - The Great Gate
You'll need to collect the yellow gem in "The Lab" from island two before you can complete this level and destroy all the boxes, as there is a second section just left of the level's end warp. There is also a secret area that requires you to collect all three Tawna tokens to enter.

Level 4 - Boulder
There are no secret areas in this level and the gem can be obtained by simply smashing all the boxes on the way to the end. Assuming you can out run the boulder of course...

Level 5 - Upstream
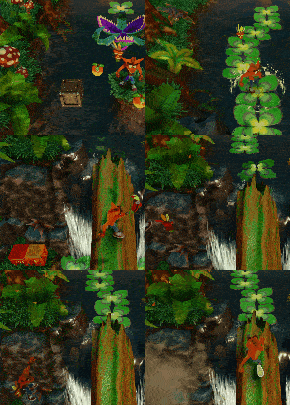
You'll need to collect the orange gem from "Generator Room" from island two before you can complete this level and destroy all the boxes, as there are two secret areas in this level. The first secret area is on the slippery log by the waterfall. You can access it on the left side of the log. The second area is at the end of the level, which allows you to go further upstream, leading to an alternate level end and the completion gem.


Boss - Papu Papu
Boss level - there are no obtainable gems, relics, or keys.

Level 6 - Rolling Stones
You'll need to collect the blue gem from "Toxic Waste" on island three before you can complete this level and destroy all the boxes. Once you've done that, you'll need to collect all six character tokens and unlock both secret areas in order to collect all the boxes. You can find all the tokens relatively easy. The Tawna tokens are located in the "?" boxes all on the main path, while the three N. Brio tokens are hidden. Two are in a crate off screen above the fruit boxes as shown on the right (one per area, two areas total). One above each crate of course, and the other is in the box by the cluster of TNT as shown below.


Level 7 - Hog Wild
There are no gem requirements for this level, nor any secret areas; simply destroy all 24 boxes to unlock the completion gem. A little practice and memorization and you should complete this level with no problems.

Level 8 - Native Fortress
You'll need to collect the red gem from "Slippery Climb" on island three before you can complete this level and destroy all the 48 boxes. There is one secret area that you can access when you collect three Tawna tokens in the level.


Level 9 - Up The Creek
There are no gem requirements for this level and only one secret area; simply destory all 48 boxes to unlock the completion gem. The three Tawna tokens you need for the secret area are all along your direct path and are easy to collect. There are two hidden boxes you'll have to spawn with the "!" box when you come across it, as shown in the example to the side.

Level 10 - The Lost City
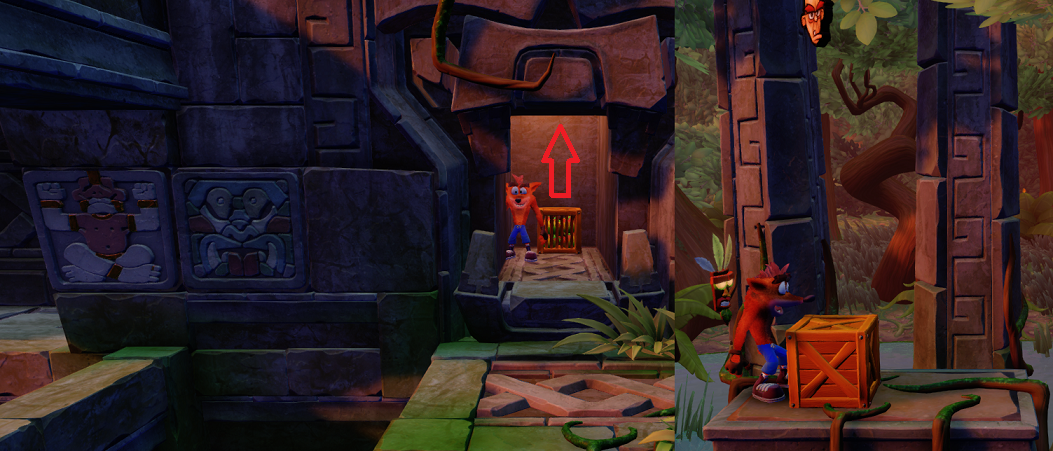
You'll need to to beat this level without dying and destroy all 82 boxes to earn the green gem on this level. This can be one of the most difficult levels in the game, so here's some tricks to make it a bit more managable. Remember, you need to collect all six tokens in order to advance to the two secret areas (three for each area). The Tawna tokens are easy to find and can be located in the "?" boxes as always.The first one is located in the second foreground area when you encounter the bats. It'll be clearly visable. The first N. Brio token requires you to hit a hidden switch; when doing so it will make an audible noise. Jump on the box below to trigger the hidden box to spawn, as shown below:
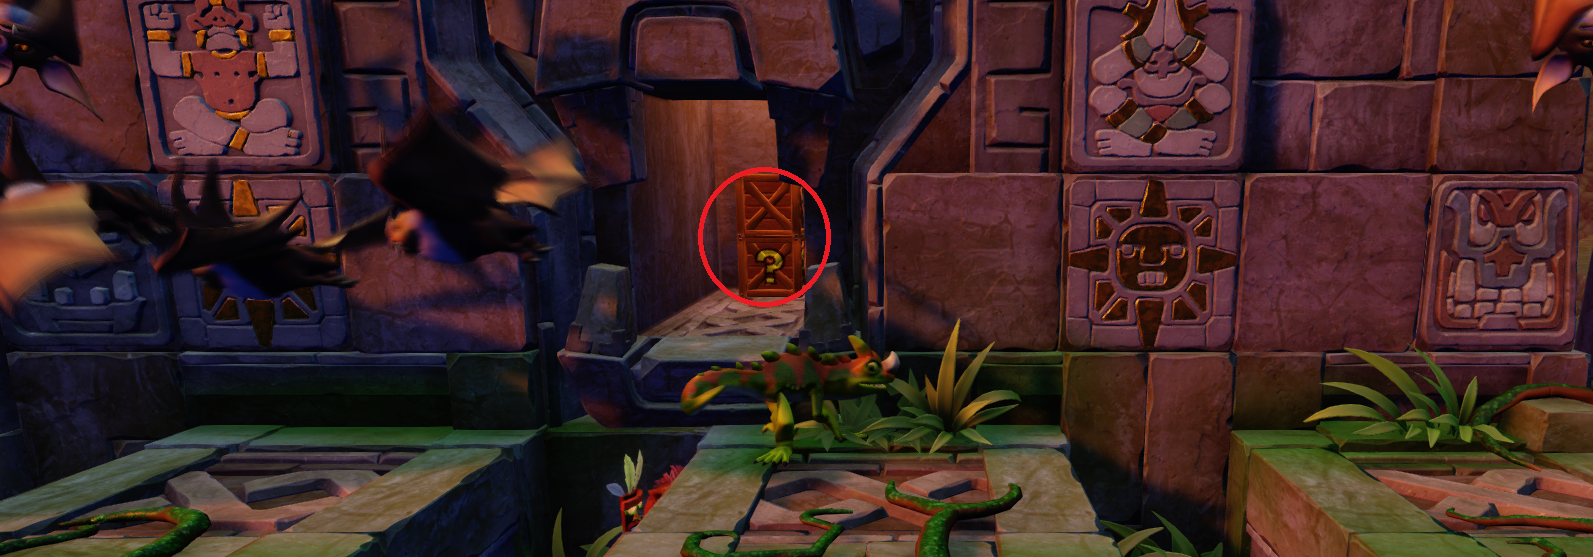
The second Tawna token is just past the first N. Brio token in the box shown below. Wait for the bats to go by before jumping into the alcove.
The second N. Brio token will be clearly seen when you first encounter a jumping lizard. Use it to jump onto the moving slabs and snag the token.
When you get to the end of the bottom floor, climb upward and you'll see a "!" box that you'll need to jump on. Be careful though, as the fire below will kill you if you miss the jump!
At the top you'll see the N. Brio portal, but you'll notice you only have 2/3 tokens. No worries! The third and final token is behind the background fencing. Just head left a bit and into the background and back around and smash the boxes. Now collect your token and enter the portal! It's important to remmeber that if you "die" in the bonus level, it will not count towards your death count, meaning that you can fail as much as you want and still secure the green gem. Once you clear that portal, keep heading left and you'll find the third and final Tawna token right by her portal. Complete that, trigger the final metal box (clearly visable) and collect your gem!
Level 11 - Temple Ruins


Level 12 - Road to Nowhere
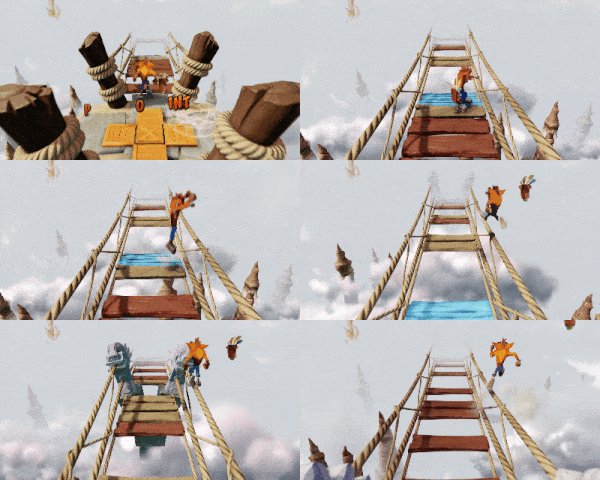
You'll need the red gem to complete this level and destroy all 42 boxes in it. This level can be difficult due to the plethora of gaps, narrow walkways and tricky timing on some jumps. If you're careful enough though, you can bypass much of the level by "rope walking" your way to the end, only getting off when you need to destroy some boxes.

Level 13 - Boulder Dash
This level requires you to collect the purple gem from "Lights Out" in order to destory all 52 boxes in the level. This is the second level where you need to outrun

Level 14 - Sunset Vista
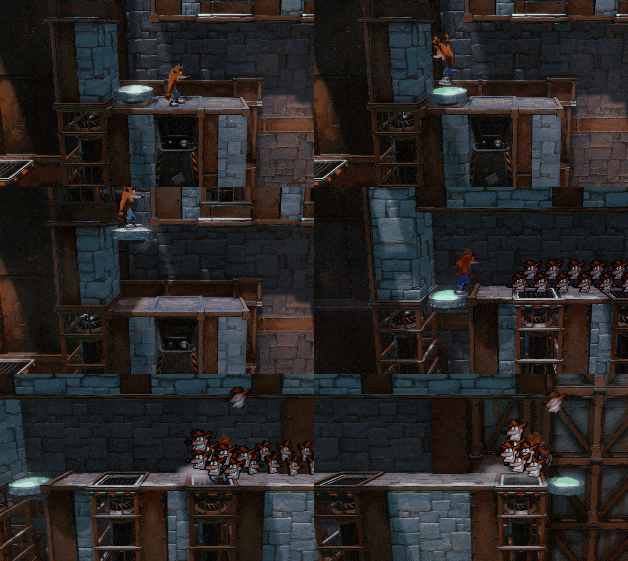
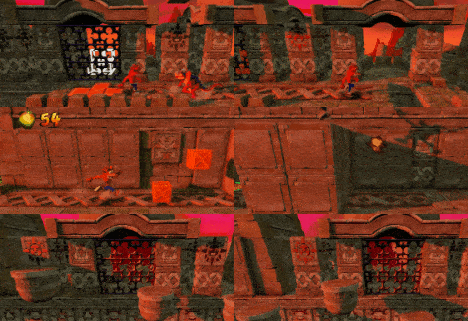
There are no gem requirements for this level, but you will need to collect all three N. Cortex tokens to unlock his bonus area and obtain the key from this level. You can find them in the following locations as shown in the gif.

The first one is located in the background where the red, jumping lizard comes into view. Use him to jump up and trigger the crate. Head around the back and destory the boxes to earn your first token. The second token requires you to use the two boxes between the sliding slabs to launch yourself up top to collect the token. The third and final one is just in the background of N. Cortex's warp zone. Use the three rotating platforms to reach it, head left and break the boxes behind the pillar.
Gem & Relic Achievements
Boss - Koala Kong
Boss level - there are no obtainable gems, relics, or keys.

Level 15 - Heavy Machinery
There are no gem requirements for this level, but there are two secret areas that require you to collect three Tawna tokens and three N. Brio tokens to access them.

Level 16 - Cortex Power
There are no gem requirements for this level, nor any secret areas. Destroying all 42 boxes will earn you a clear gem for this stage. You will need the blue gem from the "Toxic Waste" stage in order to complete the level.

Level 17 - Generator Room
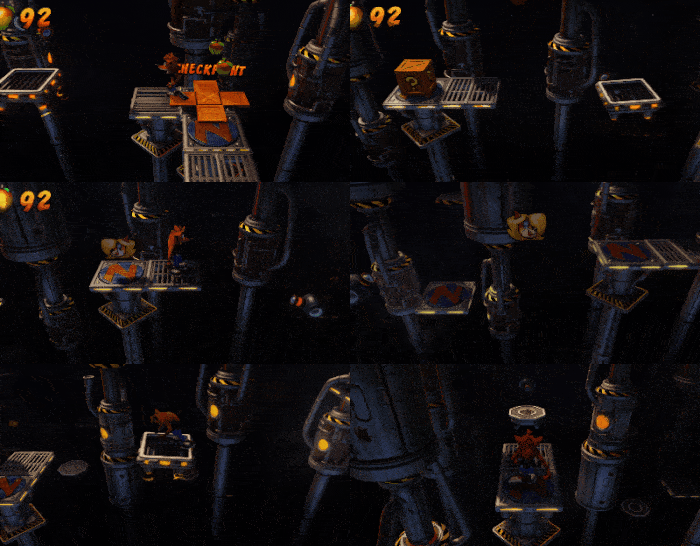
You'll need to destroy all 52 boxes without dying to obtain the orange gem from this level. There is one secret area that you'll have to earn three Tawna tokens to enter. However, all three tokens are on the main (and only) path of this level due to the tight platforming and huge gaps between tiny platforms. You shouldn't have any issue finding them. Just be on the lookout for the one "!" metal box in the beginning of the level:
This trigger will fill in the metal bridge with boxes that you'll see to the right of the level shortly after triggering the box. It's important to note that the big platofrm on the other end of the bridge will collapse after a while, so grab the boxes and get off to avoid falling.
The most difficult part of the level is probably just after the metal bridge when you start moving to the left. The gaps are stretched wide and requires very precise jumping. What you're going to want to do to is time your jumps just right. When Crash runs to the edge of a platform, he'll actually step off the platform, but won't fall. That's when you want to jump.


Level 18 - Toxic Waste
There are gem requirements for this level, nor any secret areas. Destroying all 39 boxes without dying will earn you the blue gem and unlock all secret areas that require it.

The level itself is very straight forward (literally) and all the boxes are directly in front of you or on the immediate side of the course.

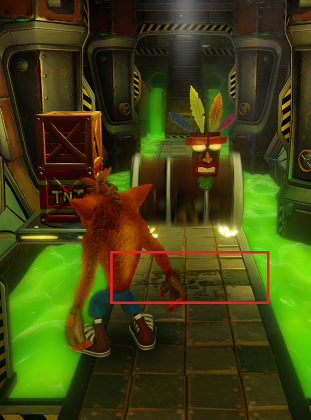
The only tricky part of the level is dodging the barrels that bounce instead of roll, but if you pay attention to the ground, you'll notice faint dirt marks where they always land.

Use the marks (as shown here) to your advantage.


Level 19 - The High Road
There are no gem requirements for this level; simply destroying all 45 boxes will earn you the gem for this level.

Level 20 - Slippery Climb
There are gem requirements for this level; destroying all 51 boxes without dying will earn you the red gem and unlock all secret areas that require it.

Level 21 - Lights Out
Lights out has one secret area that requires the use of the yellow gem, obtainable in "The Lab' on level 24.You'll need this gem first before you can earn the purple gem from this level. Remember, you must break all 15 crates and not die in order to earn the purple gem.

Do your best to avoid the rats and always keep your mask available, as that is your light source through this level. Without it, you'll be jumping in near pitch dark, making the level extremely difficult.

Level 22 - Jaws of Darkness
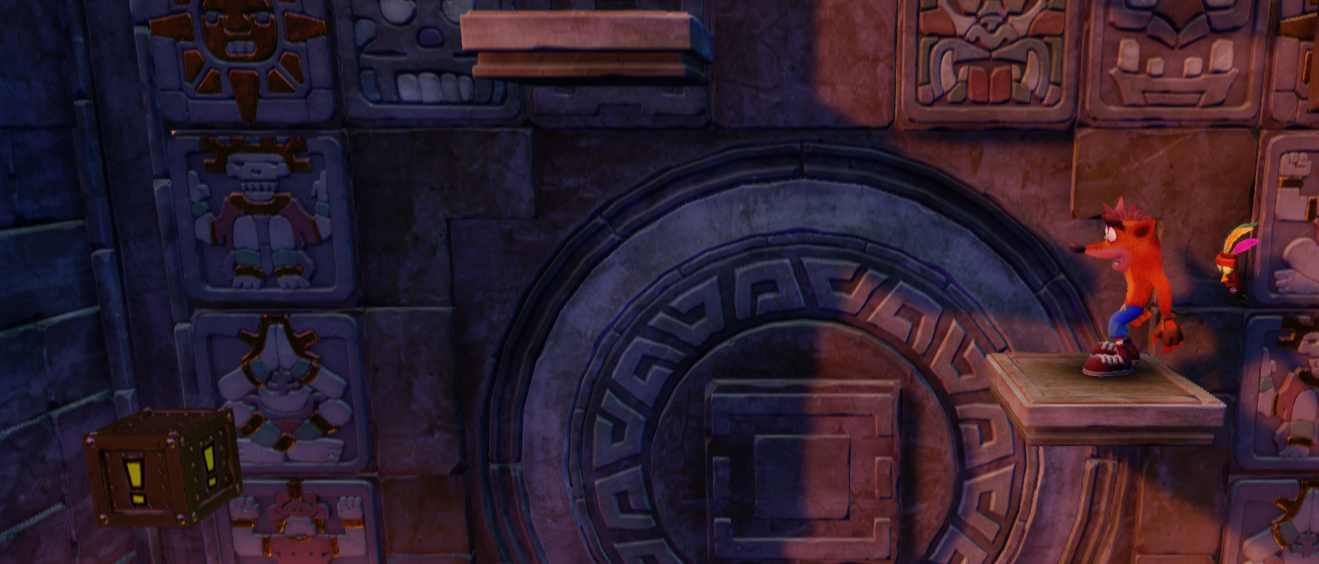
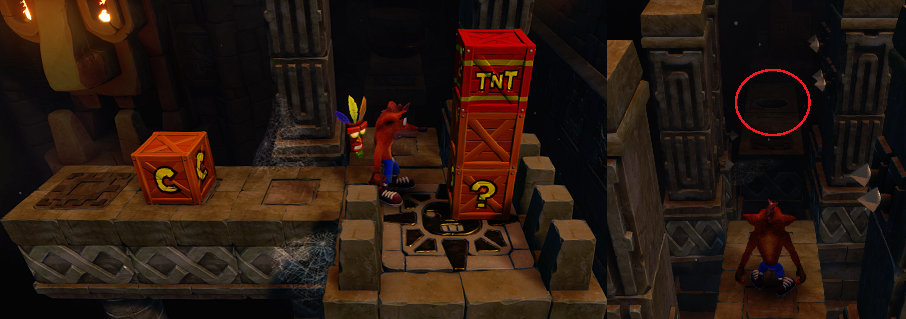
Completing the N. Cortex bonus area will net you a key and destroying all 112 boxes, the most in any level, will net you the clear gem. The N. Cortex tokens can be a tad tricky. The first one is located in the photo to the left and easy to snag, but the second is on the photo to the right. You'll see a snake pit here, but do not spin attack it. Instead, jump on its head. If you spin attack it, the snake will go flying into the boxes in the background, triggering the TNT and flinging the N. Cortex token away in the process.
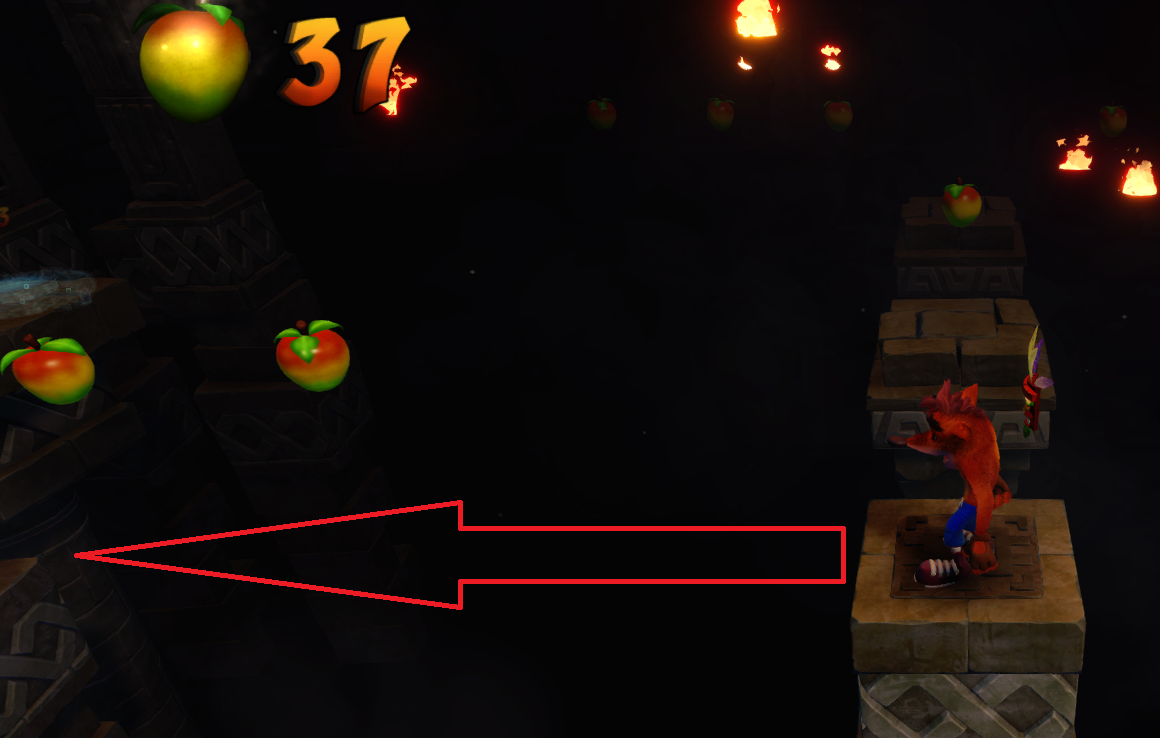
The third and final token is located to the left of this invisible pathway. Run left from the point shown and the platforms will show up, but be quick, as they fall just as swiftly as they appear. The third token will be right next to the N. Cortex warp zone.


Level 23 - Castle Machinery
There are no gem requirements for this level and, while there is a secret gem path if you have the green gem from "Lost City", you can head up to it to collect numerous extra lives.

However, there are no boxes up there so it's not needed to destroy all 27 boxes and earn the clear gem.


Boss - Dr. Nitrus Brio
Boss level - there are no obtainable gems, relics, or keys.

Level 24 - The Lab
Complete the level without dying to earn the yellow gem. There is also a secret area that requires the collection of three Tawna tokens to unlock.

For the most part, the level is pretty straight forward. You'll need to practice your timing for the collapsing floors, electrified rods and steel doors. There exists only a handful of enemies and it's all but best to avoid them all. You can easily run around the slimes and it's recommended you just run past or jump over the scientists rather than try and spin attack them. Remember to utilize the ledges on the side of the level; these can save you from untimely jumps on the trap door areas.


Level 25 - The Great Hall
There are no gem requirements, nor any gems available to collect in this level. Return here when you have collected every other clear gem.

Boss - Dr. Neo Cortex
Boss level - there are no obtainable gems, relics, or keys.

Level 26 - Whole Hog
This level is actually located on Wumpa Island, though is still classed as level 26. It is only accessible by collecting the key #1 on level 14, "Sunset Vista", which is achievable by collecting all three Cortex tokens in the level and completing the secret area within.

Please see the "Cortex's Crazed Contest" achievement for instructions on how to obtain those necessary tokens.

Level 27 - Fumbling in the Dark
This level is located on Cortex Island and classed as level 27. It is only accessible by collecting key #2 on level 22, "Jaws of Darkness", which is achievable by collecting all three Cortex tokens in the level and completing the secret area within.

Level 28 - Stormy Ascent
Good luck!
⠀⠀⠀⠀⠀⠀⠀⠀⠀⠀⠀⠀⠀⠀⠀⠀⠀⠀⠀⠀⠀⠀⠀⠀⠀⠀
14 Comments
GoodGuy7 25 Feb, 2024 @ 9:43am 
@Kapax

Yep! 25 if you're playing the Xbox or PlayStation versions. (This extra 25th award is unlocked for unlocking all the other achievements; it's the Platinum Trophy on PS4, yet somehow found its way onto Xbox One as well.)
Kapax 🌟 30 Apr, 2023 @ 2:59am 
Crash bandicoot 1 only has 24 achievements?
Gora 27 Aug, 2022 @ 11:06pm 
Excellent work mate ! How many time for 100%
Vacroc 7 Jul, 2020 @ 12:43pm 
Very uselful
ThePizzaGuy 20 Jun, 2020 @ 7:11am 
epic:steamhappy:
ShqrKK 6 Apr, 2020 @ 3:27am 
:scorepoint: Thanks for this, can you create for the C2 and C3 ?
Ricky Bobby 11 Nov, 2019 @ 2:34pm 
Great guide! Thanks
Lima Larke 26 Oct, 2019 @ 6:59am 
Cortex Power: "There are no gem requirements for this level. But you will need the blue gem 2 levels from now."
Dreaderz 15 Oct, 2019 @ 11:11pm 
I can firmly believe that. I did one guide ever and the time it took was a sick amount of time; much more than I had initially anticipated, so I understand completely; and the amount of effort going into your guides are insane. Take it easy and one thing at a time :Aste_Roy:
ErickaUnlimited  [author] 15 Oct, 2019 @ 4:53pm 
I'd like to. I burned myself out making so many so quickly, but I'll get to the other two games in separate guides eventually.