Realms of Magic

Realms of Magic

46 ratings
Realms of Magic Overhaul!
By 76561198313822946
A guide that brings main key features of the game together, and how they work coherently. This will help you understand how to start leveling up easier, deciding on how to get levels, and how to choose perks in proper order so it's most benificial in battles, and endurance. As well as help you choose where to start with some helpful tips I've gathered up from personal experience. Most of this guide is from personal experience so you don't have to follow this guide exactly how it is, as you may have a different way of doing things.
I hope this helps!
   
Award
Favorite
Favorited
Unfavorite
A Few Notes
  • This guide was made over time, so updates to the game itself may have changed, thus containing some inconsistent data, but I will edit everything in due time.
  • This is my first guide and I have worked on it on and off over the years.
  • Realms of Magic is an early access game, so therefore their might be huge changes to the game itself in the future, so you may want to come back here to check what has changed.
  • Thank you for reading this guide, please let me know if I made any errors. Thank you.
Character Stats
Leveling up your character takes a lot of work, and can deplete your Character's Stats

Your main character stats are:

-Health
-Mana
-Stamina

Your secondary stats are:

-Hunger
-Thirst

You can find these stats in you stats bar.


The other secondary stat is a stat you can't see, and that is Sleep (cannot confirm if it's an actual stat). What happens is when you don't sleep for a long time, you get a debuff called Tired. This decreases Stamina and Mana regeneration by 10%.
To keep all these stats up, sleep when it turns into night, avoid too high leveled parts of the map, as well try to avoid getting hit in combat. Make sure you spend your Stamina wisely, because if you deplete all your Stamina whilst in combat, it may be harder to avoid attacks. You can get perks for these stats, thus having a better chance of survival.


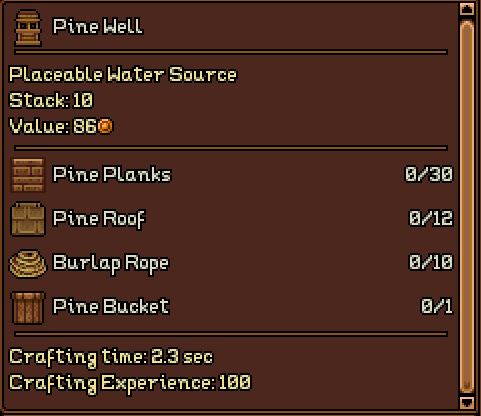
To keep Hunger and Thrist up, make a farm for food, and settle your base near the water fountains that naturally spawn in the world. If you can't find one, you can make a Well once you unlock it in the Workbench.


Another thing to think about is your Spawn Point. This will help you when you die and don't want to lose your place.

Your spawn point can be set with a Sleeping Bag or a Bed. Another thing that acts like a spawn point is the Sign Post, mentioned later on in the guide.

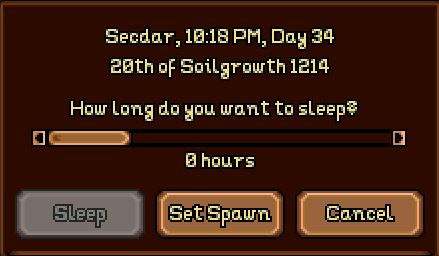
Sleeping Bags and Beds don't only set your spawn but can also let you sleep, as mentioned before. They can let you choose a certain amount of hours to sleep depending how much you've slept already.


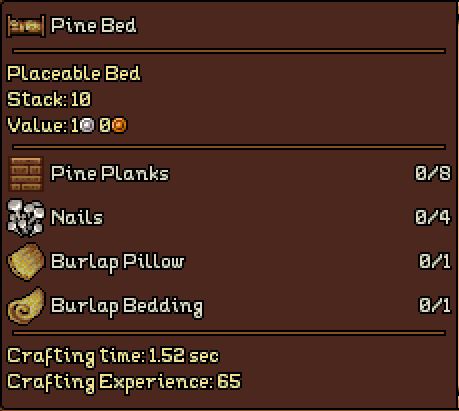
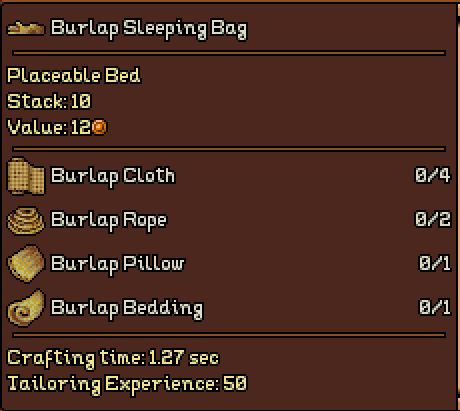
Here are their receipes:


The Bed is made in the Workbench


The Sleeping Bag is made in the Tailoring Station
Backpacks & Storage
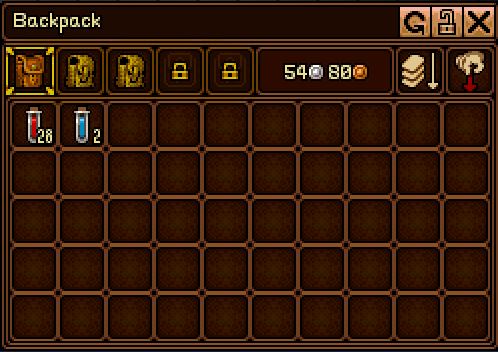
One of my personal problems in any sandbox or voxel game is Storage. When you grind certian parts of the game, you're bound to run out of storage. In Realms of Magic, they add a Backpack mechanic. This lets you purchase or make Backpacks. You'll be limited to one extra slot when you first start without any Talent Points being spent in it's Perk Tree. This system is deemed very useful as it allows you to not only hoard more crap, but also it's possible to organize each bag for when you're doing bigger projects, Gathering, and even Trading with Merchants.


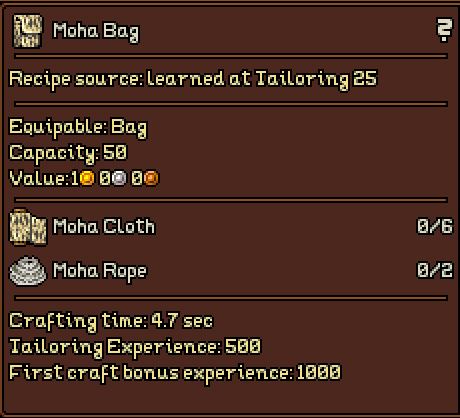
There are different tiered Backpacks, from Leather, to Moha, the best being Moha, which holds a capacity of 50! However, you need to level up Tailoring quite a bit to unlock this beast.
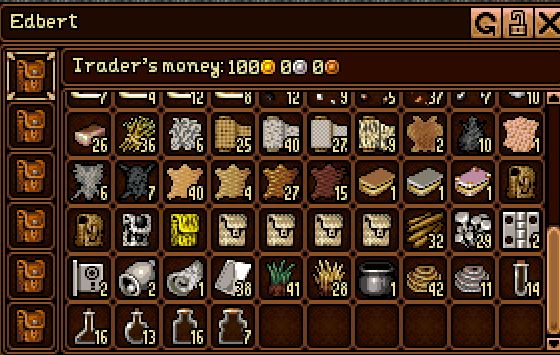
You can craft it or you can buy it from the Merchant.


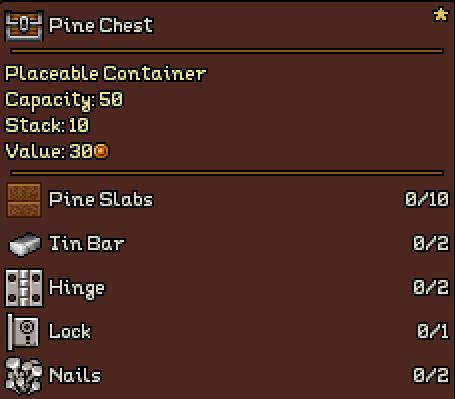
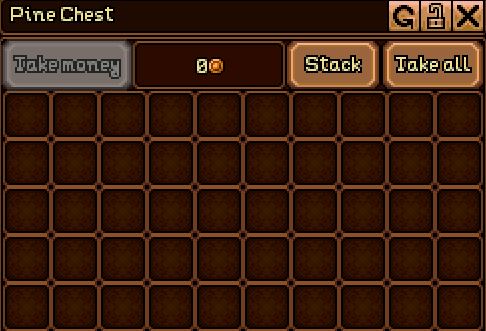
As of other means of storage, you can make Crates, Cupboards, Dressers, Barrels, and Chests. However, stacking crates on top of each other is very limited, as you can only stack Small Crates. They store very little but it's very good if you're low on materials. But another con is that it can take up alot of room since it stores very little. The best storage you can get is Chests. These store the same amount as your main Backpack. You can't stack them, but they will take up less room since they can store way more. They aren't too hard to make either.


Combat & Potions
Combat is something we all have to do at some point to progress. When travelling, there will be many instances of combat. At first, combat can be really difficult, especially when you don't know enemies attack patterns. Attack Paterns and Animations are enemies moves that they decide to make. Keeping an eye on these will help you predict when you should dodge, jump, or even roll out of harms way. Practice this until most attacks they make will miss you mostly or entirely. Avoiding combat is very hard because enemies will follow you until the end of the Square of land. Either kill them or make 2 block deep holes that are big enough for the creature to get in, but not out. This is most likely different for other races/NPC's that happen to be enemies.

When you kill an enemy, you get Average Profession Level experience. This, along with selling items to merchants, are the easiest ways to level up (depending on equipment and gear when it comes to combat). Try your best to upgrade your Smelting and Blacksmithing Professions to make better armors and weapons. It can be easy to find ores in the world whether they were found from Mining, or Trading, but in this game, you can't smelt these ores right away. I suggest starting a money farm to buy ores that you can smelt already, and make them into weapons and armor to sell back to the Merchant. Not only does this increase your Smelting and Blacksmithing Professions, but this also increases your Trading Profession as well as your Average Level. At this point, you should be able to make better gear for your adventures into the wild.

Combat can be improved by not only upgrading your gear, but also making Potions.
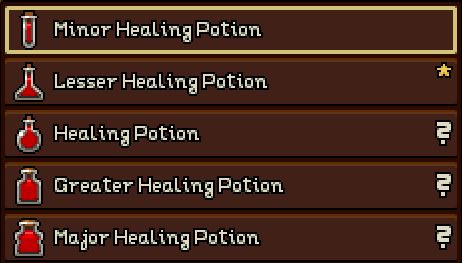
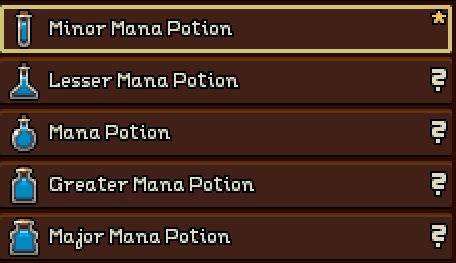
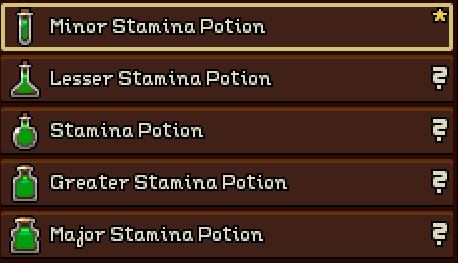
Mainly, the potions you want to make are the Health, Mana, and Stamina potions.


There are a couple of Tiers or Levels of which you can make these potions, the highest tier being the best to make.

They may be the best to make, however, they are the hardest to make if you cannot find the right materials. Most of these materials, from personal experince, cannot be found on lower tiered areas of the map. Not only will there be harder enemies on higher tiered areas of the map, but there will be better loot, and materials regarding to alchemy ingrediants.

When you first start, the best thing to do is make an alchemy ingrediant farm which mainly consists of Flowers, as well as digging around for some Sand to make Glass, and Potion Bottles.

To be able to get around the map a little easier at first, just go with the Minor Potions and not be an absolute noob when it comes to Combat.

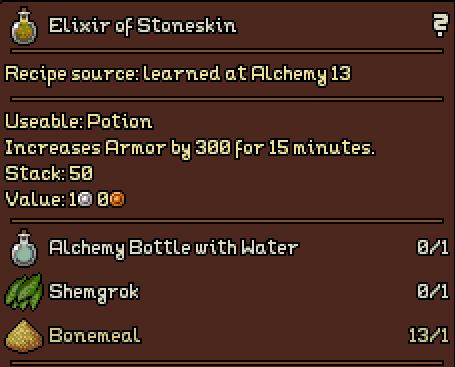
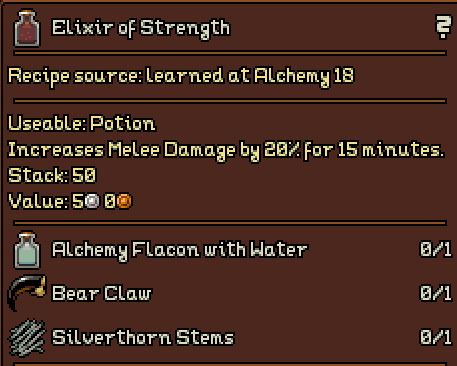
When you can and have the right materials, only farm for the better tiered potions, as the rest would be pointless, especially if you have a high leveled character. Also, you may want to make certain Elixers to increase Strength, and Armor Points. However you need high tiered ingrediants to make these. You can find some ingrediants from the Merchant NPC's or even from exploring villages or base camps.


Feel free to experiment with different loadouts, gear, and even Perks to help improve your gameplay.
When Traveling
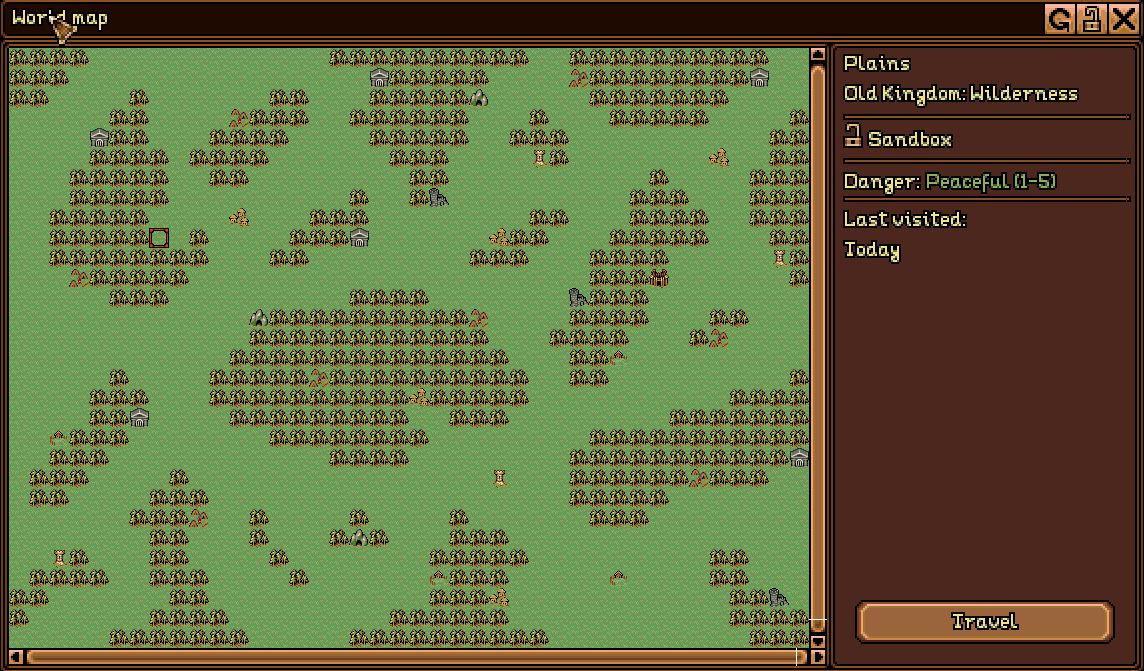
Traveling is the main key to getting new resources for you adventure, though at first, traveling may be a little restricted due to Danger Levels. Danger Levels are suggested Average Profession Levels to be in order to explore this square of land. Most land you can explore when you first start are the ones with levels 1-5 on them.


Most biomes will have a certain trend of Danger Levels. For exapmle, most if not all Plains biomes are Peaceful, levels 1-5.

Here's a list of Biomes you can come across:

-Plains (Wilderness) Danger: Peaceful, 1-5
-Forest (Wilderness) Danger: Dangerous, 20-35
-Villages
-Settlements
-Camps
-Caves
-Dungeons
-Tower
-Ruins

Some caves, Dungeons, Towers, and anything besides Plains, and Forests, have different level suggestions depending on if they belong to a questline (It's my best guess as to why their levels are different, haven't gotten that far yet). The max. level suggestion an area can get up to is 50+. These places would be deemed as Fatal levels.

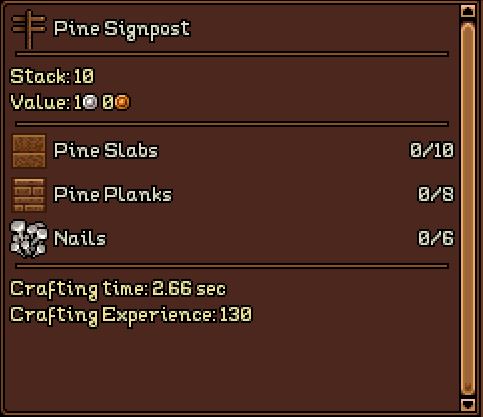
Some main reasons to travel depend on what you want to do with yourself. One would be to gather Quests from Settlements or Villages. Sometimes you'll come across these places ransacked, where either a creature or another person has killed everyone and everything such as Animals. All these places you'll soon find something called a Sign Post. This makes traveling easier, and it can help you avoid combat with people, and creatures if placed in the right spot. I suggest you make a good amount of these as it will quicken your outings. The map is 40x30. So that's 1200 squares, however a good handful have sign posts already, so make a a few stacks at a time for exploration. Don't forget to press E to interact with the sign posts, otherwise they won't be activated and you can't spawn at that location.


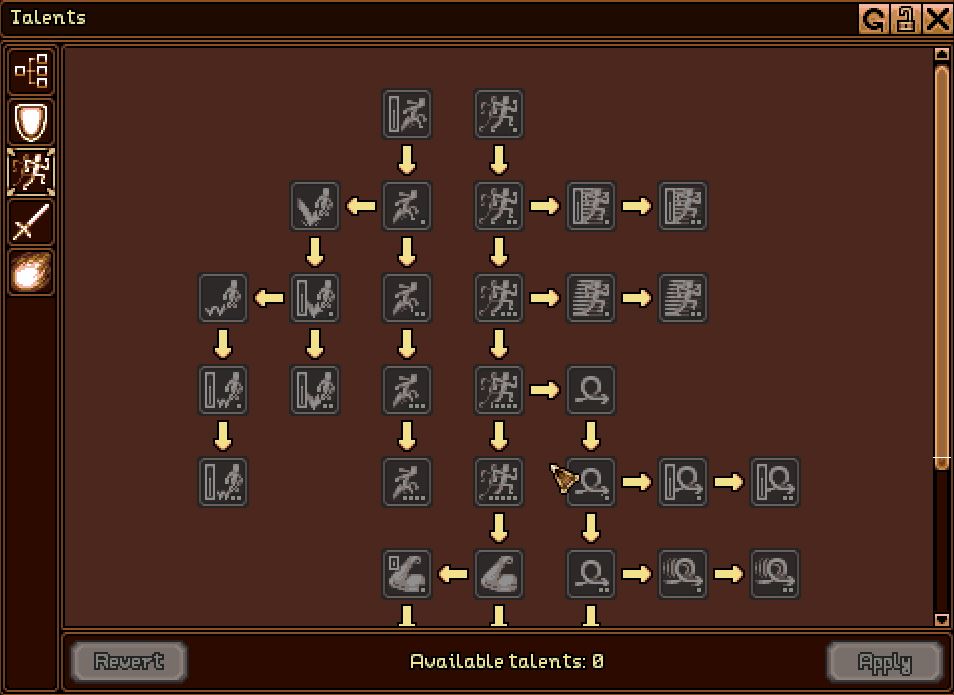
Mobility is important. Especially when it comes to Jumping. It's important because there may be Dungeons or certain villages that may involve some parkour in order to get out of a certain place, or even a hole. These places will most likely have a protection command over it. As in, you can't place or break blocks. Jumping is most important because, if under leveled, and you don't have the right perks, you can fall in a hole and never be able to get back out. If you find yourself in this situation, check to make sure you have any talent points so you can get the jumping height upgrades, if not, check to make sure if you have anything on you. Wait until you die of starvation, making sure that you have a spawn point set somewhere other then the hole you got stuck in. Don't worry about your body until you have the perks you need to get back out of that hole in order to get your stuff back.
Crafting Tips
Here's a section to understand the interface for any crafting recipe in the game, that way you can use it to your advantage later on.

This is the interface to help you look for certain recipes.


Show Unlearned is helpful when you want to work towards to unlocking a certain item.

Have Materials is helpful when your not sure what you can make from the materials you have.

The Search Bar is helpful for searching for a specific recipe you want to make.

Now the next Interface is for when you select a recipe.

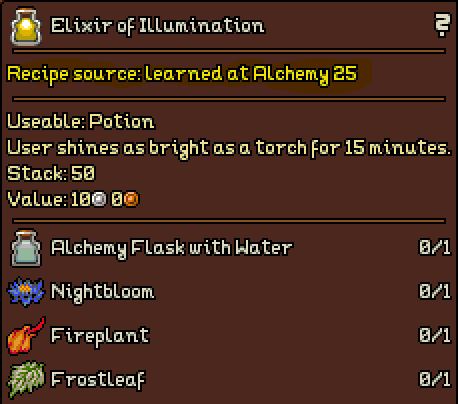
Let's start with the most obvious, the Recipe Source


The Recipe Source tells you what level you need to unlock this recipe. This only shows up when you have the Show Unlearned box checked off.

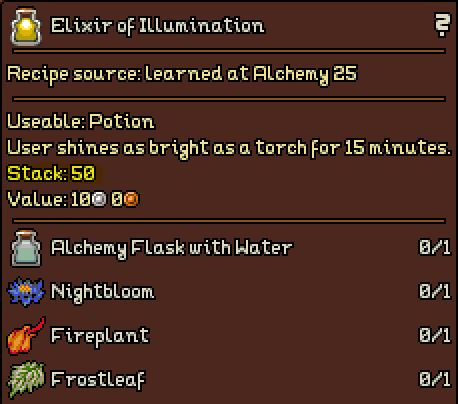
Next is Stack Capacity


This tells you the maximum of this item can stack to. This item is an Elixer of Illumination, and it can stack to 50, which is pretty nice when your stuck in the dark.

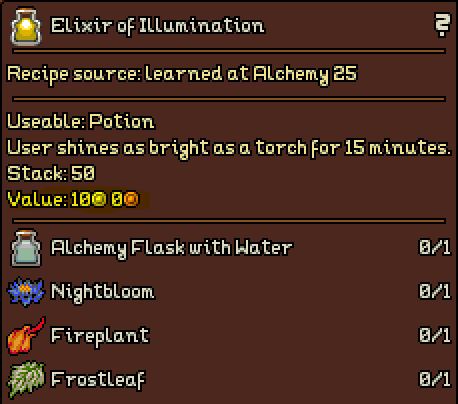
Another thing to keep note of is the Value of the item.


The value is very imporant especially when it comes to Money Farming. However, for it's value, it doesn't sell for the same amount to a Merchant NPC. However, this will increase when your Trading Profession increases. So it would be better to sell in quanties of this item until you find better things to sell.


This shows the experince you can get from crafting it and it also gives you a first time crafting experince bonus. This is very helpful for finding a good way to grind and level up your Professions.

Sorting is also helpful. This puts certain items into categories in terms of their purpose and use.

Unlock All Recipes Reference Sheet
The other main reason to level up your Professions is to unlock crafting recipes. Here's a list of the max levels that you'll need to unlock all of the recipes.

  • Smelting - Lvl. 50
  • Tanning - Lvl. 22
  • Weaving - Lvl. 26
  • Milling - Lvl. 19
  • Crafting - Lvl. 50
  • Blacksmithing - Lvl. 55
  • Letherworking - Lvl. 25
  • Tailoring - Lvl. 25
  • Cooking - Lvl. 100
  • Alchemy - Lvl. 25

From this list, you can tell which Professions are going to take more effort in order to actually get where you want to be in your gameplay.
Perk Tree
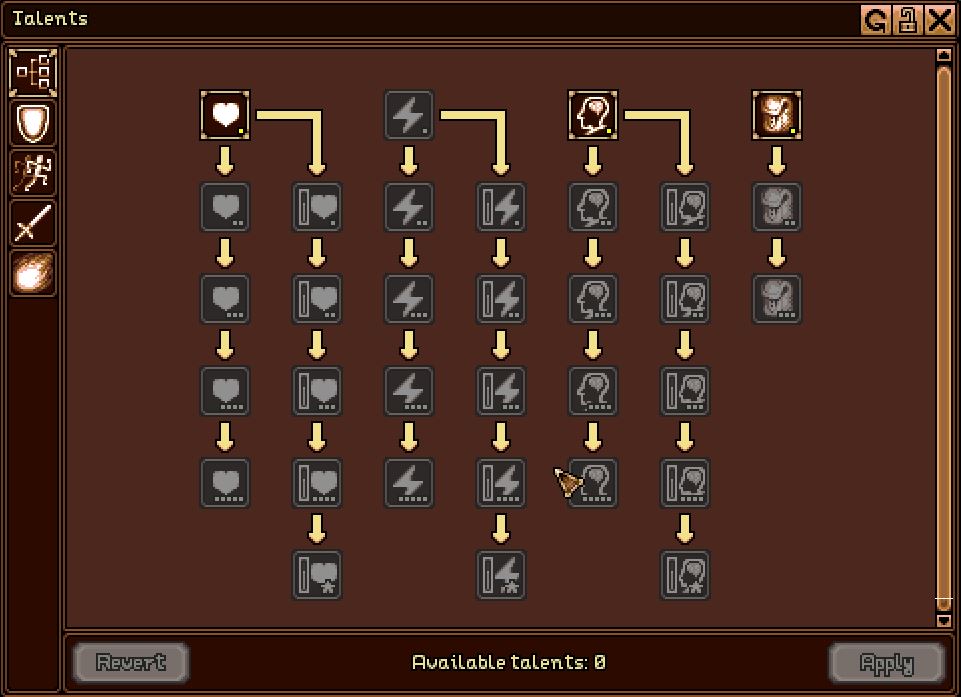
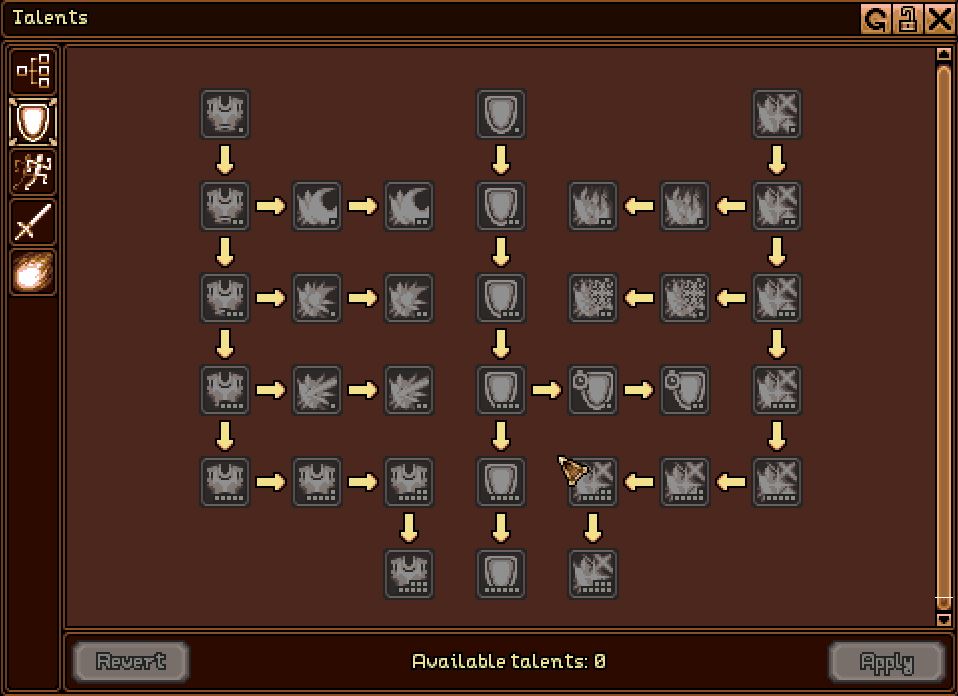
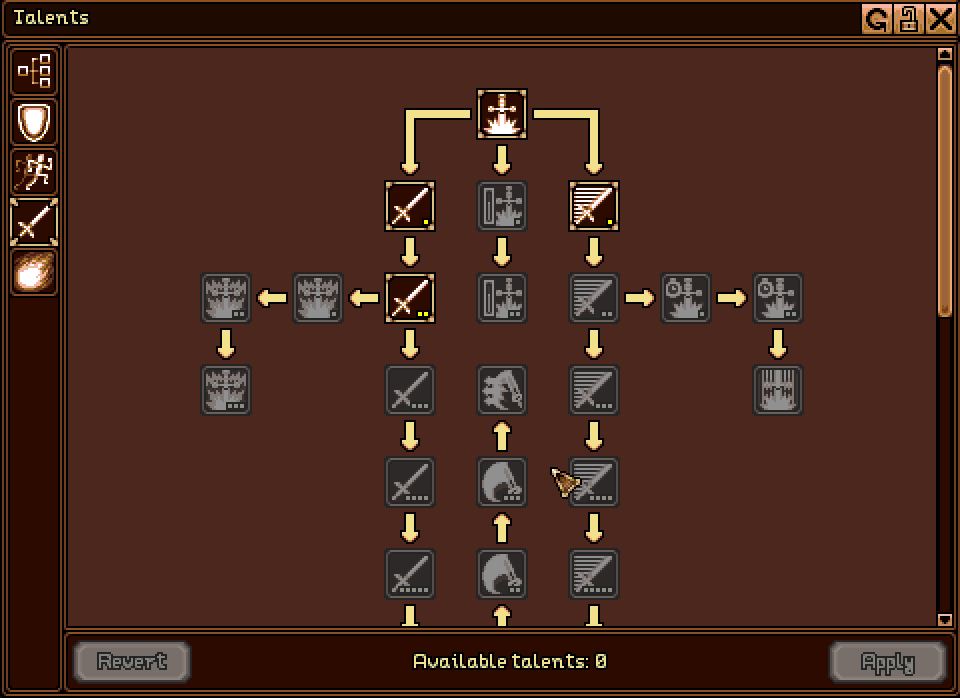
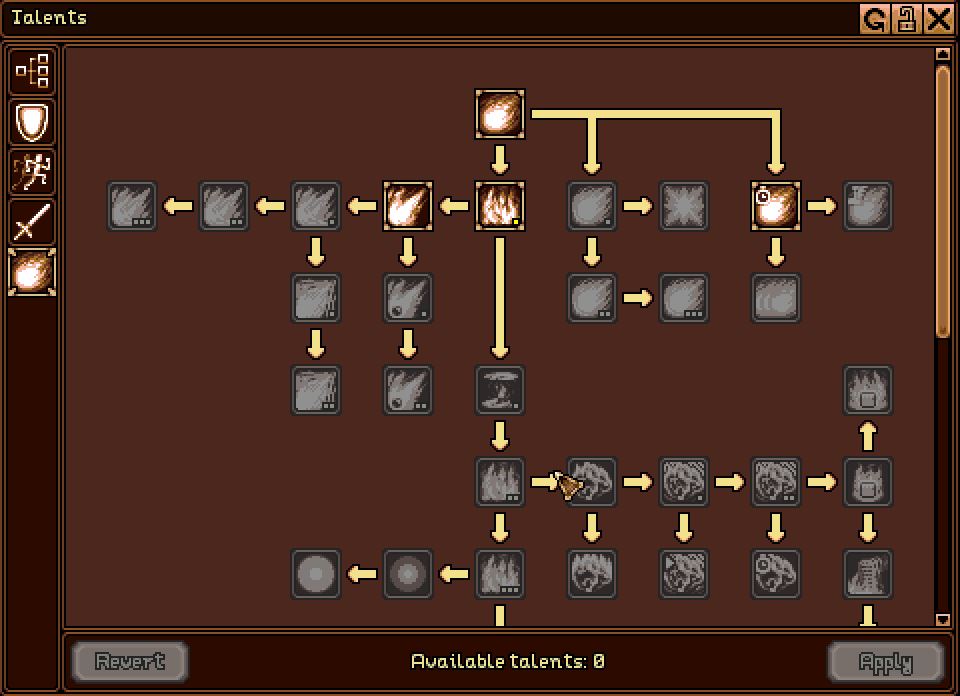
Everything you see below is the five categories of Perks or Talents. There may be more added in the future, so this section may get updated.


If you plan on getting anywhere around the map, you're gonna want to save perk points and put them into the One-Handed Tree. This is where you do better damage to more common creatures as you get to higher leveled parts of the map. You can put points into the Fire Magic Tree, however, since you don't have a combination of both a physical weapon and perks, you would have to put more points into this tree to do better damage. From personal experience, I did better damge with only a couple of perks in the One-Handed Tree and the use of a decent sword such as a Bronze Sword. However you want to play is your choice though. I just suggest the way I went with it because early combat in the game is pretty difficult.

Other perks that have been previously mentioned are the Backpack Upgrades. It would be worth it to save up the 3 points to gain additional slots if you decide to Hoard a bunch of items to sell, craft, or mine and cut down trees. So on and so forth. A basic need for the daily grind.

If you decided to go down the One-Handed Route, you will need another perk from the General Perk Tree, and that is the Health Perks. This includes increased Health Point Perks and Increased Regeneration Perks. I suggest saving points for all the perks in the Health Tree.

The next best perks to save up for is anything in the Defense Perk Tree. These will help you Endure damage a little bit better, regardless of what tier of Armor you wear. Getting these perks will increase your chances of survival on higher leveled parts of the Map.
Professions!
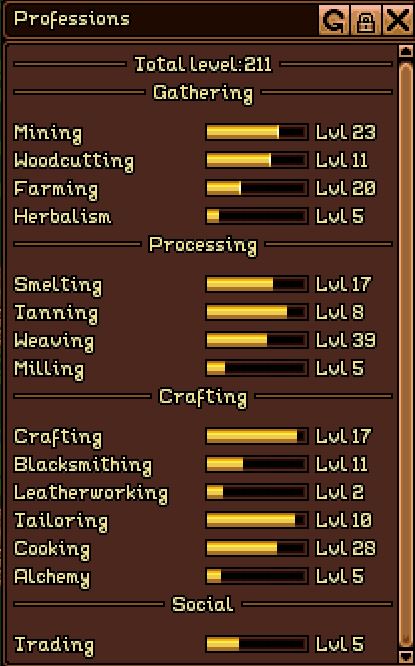
Professions play a huge part in Realms of Magic. Professions are what help level up your Average Level.

As you can see, there are four main categories of Professions you can level up in.
  • Gathering
  • Processing
  • Crafting
  • Social

Each "Sub-Profession" has their own individual level next to their Progress Bar. Using their level number as reference, you can get an idea of how hard it is to level up certain "Sub-Professions" so you can prepare for those professions to level up a little easier.
For example, it's harder to level up Leatherworking than it is Tanning The current update doesn't respawn enemies as of the making of this guide. So even if you were highly leveled and traveled all over the map killing enemies, you would still have a low level in Leatherworking, you would have to take the Trading route in order to level up this "Sub-Profession" properly.

Here's a list of all Sub Professions to reference from:

Gathering
  • Mining
  • Woodcutting
  • Farming
  • Herbalism

Processing
  • Smelting
  • Tanning
  • Weaving
  • Milling

Crafting
  • Crafting
  • Blacksmithing
  • Leatherworking
  • Tailoring
  • Cooking
  • Alchemy

Social
  • Trade

As I've stated before, some Professions may be harder than others, so I will give some advice of what Professions to start working with before working on something that you can't quite get to yet. As a note, once you start one Profession, other Professions may become easier to level up over time.
Gathering Professions
This may be the easiest, however may be slowest for when you just start the game, way to start leveling up your Average Level for your character. As you can tell from the previous section, the most easiest Sub-Professions are Mining, Woodcutting, and Farming. Herbalism may take awhile at first since you may not be leveled enough to explore the better parts of the map.

For the reason it's the slowest at first is because of the lack of speed in your starting Tools. Therefore it may be the hardest or at least the slowest to start with Mining because in order to get to better ores, you have to go down quite a bit into the ground. My suggestion is to start with Woodcutting. When you're out exploring, you can find two kinds of trees as of the making of this guide, and they are Pine Trees and Oak Trees. When you find a Villager Merchant, you can buy Woodcutting Elixers which will increase Woodcutting Damage by 50%. The same goes for Mining Elixers. Once you've gotten a Herb farm going, you can also craft these Elixers at Alchemy levels 8 and 9. There are also other Elixers that you can look into that will give decent buffs such as Speed and Agility, good for Combat.


The next Profession to start with is Farming, as this does not only help you survive, but with a big enough farm, you can sell your crops to Merchants. Cooked foods sell a bit better however, as well as Ropes and Cloths when you gather Jute, Wool, Linen, and Mohai. Higher tiered Cloths sell better as well.

Once you've gotten enough money from Trading, you can buy the Tools that you need. The least you need is a high tiered Pickaxe, as they are fastest to work with. It's better to buy one than to make one because you need a certain Blacksmithing and Smelting levels in order to craft Bars and certain Tools, Weapons, and Armor. Once you have a decent Pickaxe, I suggest you start with your Mining Profession at this point.

Once you've gotten better armor and weapons, explore low-leveled parts of the map, including low-leveled camps in order to find most herbs for Herbalism. Make a farm out of these Herbs in order to level up its profession. I say this at the end because in order to progress further, you'll need Potions. You may get stopped early on because of Armor, Weapons and Level limitations, so it's best to wait until you have proper Gear, Level, and Perks. Unless you're already in need of Potions, you can also buy them from Merchants.

Processing Professions
There are 4 sub professions under the Processing tab;

  • Smelting
  • Tanning
  • Weaving
  • Milling

In order to level up Smelting, you can smelt Ores, Glass, and Clay. If you have a decent money farm, I recommend buying the ores, not the bars, instead of digging for them first. This way, you can start unlocking higher tiered ores and making the best gear for less effort. Remember, for anything that you don't need, such as making anything for Blacksmithing to level up that Profession, don't forget to sell it to maximize profits.

Tanning is one of the hardest Professions to level up do to the fact that animals do not respawn in the current update as of the writing of this guide. But earlier on in game, even when you have a lot of unexplored areas of the map, it is still hard to kill such animals. However, not all animals are aggressive, and of course you can buy animal pelts and hides for very cheap, assuming you have made a proper money farm.


All that's left to do is to tan them and the Tanning Rack. Tanned Leathers are good for making Armors in the Leatherworking Station. Again, sell anything you make that you do not plan to use.

Weaving is one of the easiest things in-game to level up. All you need is a Jute Farm, and a spinning wheel. You can also weave out of other materials, however, they be harder to find at first. But you can level up quickly with just the Jute. Especially if you have a big farm.

Milling, the last sub-profession under the processing tab, is another easy one, as long as you have a good Wheat farm going, you should be leveling up in no time. Don't forget to mill any salt you find whenever you go caving or exploring. Salt is good for Cooking, and is needed for some of the better foods to eat and or sell.

Crafting Professions
There are 6 sub-professions under the Crafting tab.

  • Crafting
  • Blacksmithing
  • Leatherworking
  • Tailoring
  • Cooking
  • Alchemy

These are the professions that will take some time to level up, but can be done easily with proper Money Farming and Trading with Merchants.

Crafting to put it simply, will be the easiest to level up as you will craft items throughout the game using both your Handcrafting Menu and the Workbench.

Blacksmithing is leveled up by making Armor, Weapons and Tools in the Anvil. Please note that this does not include smelting ores in the furnace.

Leatherworking is one of the harder ones to level up as you'll have to kill a lot of animals to get leather, but of course can be bypassed by the use of Merchants. You can make the different types of leather in the Tanning Rack and then you will be able to craft Leather armor and bags in the Leatherworking Table

Tailoring is leveled up by making fabric related items in the Tailoring Table.

Cooking is leveled up by cooking food in the Cooking Pot. With the right farm, this can be leveled up quite quickly.

Alchemy is the hardest one to level up completely as you will have to farm certain plants that are found on harder leveled parts of the map. The best way to bypass this early on is to play as a Wild Elf, as one of its perks makes it so wild animals won't attack you unless you attack them, making it easier to find the plants you need. However, do remember that it only works with wild animals. Try avoiding bandits, and save often.
Social Profession & Money Farming
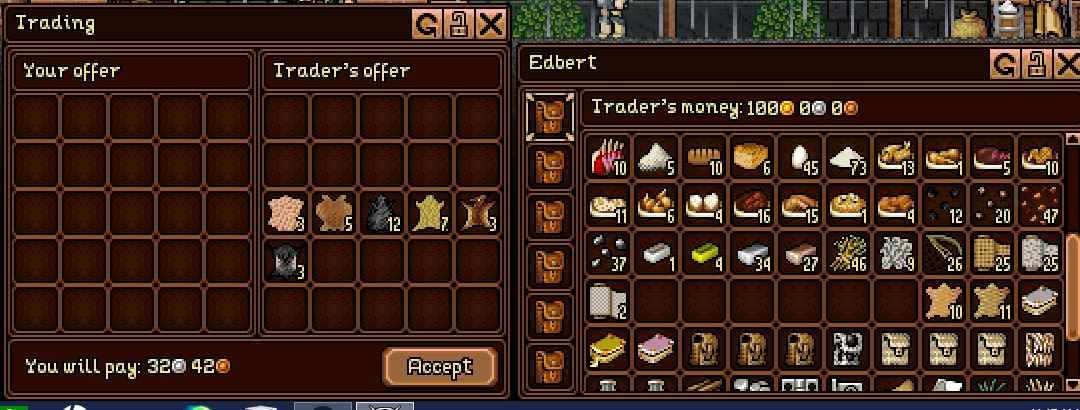
There is only one Sub-Profession under this category, and it's Trading. Trading in Realms of Magic really helps to cut in some corners and tight spots to make leveling up other professions easier. When you trade, your Trading Level and Average Character Level will both go up. It helps you to get an income going, as well as get hard to find materials.

As for when you want to start a money farm, or grind to make/find items and sell them to Merchants, I suggest you do it as soon as possible. The easiest thing to farm is Food. Grow crops and cook them into really high selling meals.

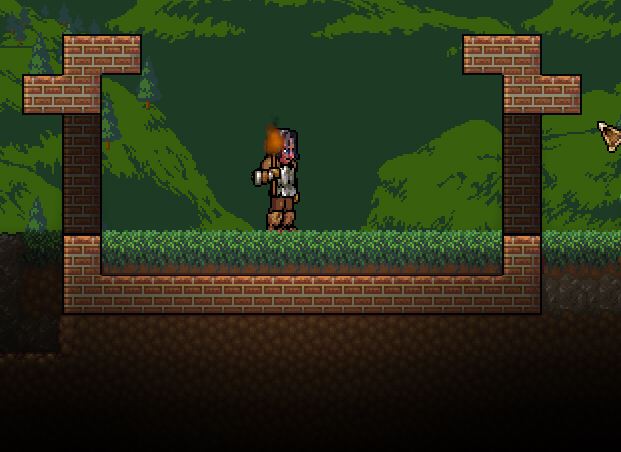
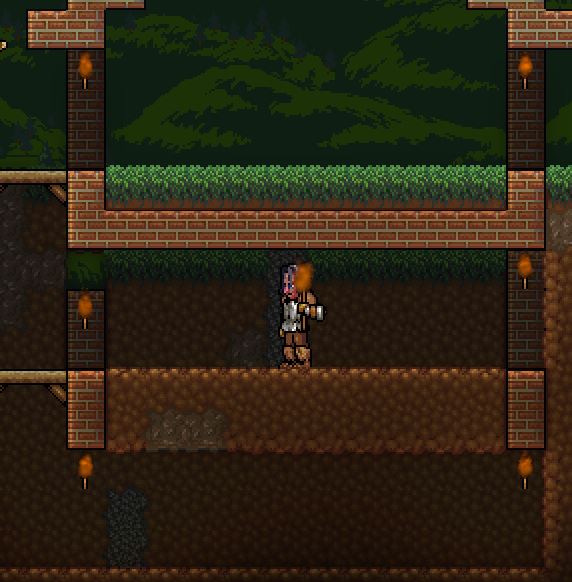
Now the next pictures that I will show you are just an example of a compact farm. I suggest doing 10 block wide farm plots, as well as to stack them to max out your produce and profit. This is also a good way to start a mine shaft as you expand your farm.


If you're feeling the grind, try and dig all the way down to the bottom. See what your profits will give you.

If you do this, don't worry about decorating until your major goals have been met, have really fast tools, lots of platforms, torches, and especially patience.

Feel free to also organize these as columns, and have a specific crop for each one. Feel free to add a room and a chest at the very top if you don't plan to sell or craft your goods right away. And don't forget, if you run out of room to build in your main square of land, feel free to build or even dedicate a square of land or two for just your farming needs. I wish I thought of that before I started doing it on my main land :(

Also know that this can be done for growing Alchemic ingrediants.
6 Comments
babymaizy666 20 May, 2021 @ 4:39pm 
Hey everyone, I'm the original creator of this guide above. My original account got hacked in a very weird way, and I no longer have access to it. I will do my best to remake, and update this guide since I was finally able to grab another copy of RoM.
morin7897 2 Jan, 2021 @ 7:33pm 
Perk Tree is obviously out of date, but is otherwise a very good beginner / starter guide.
NightLexic 17 Dec, 2020 @ 12:59am 
So you should probably update the Guide due to Beta 0.15.0 changing huge swaths of the game
Grand Master Darth Maul 12 Oct, 2020 @ 7:53am 
white sugar.... what is that under?
76561198313822946  [author] 1 Mar, 2020 @ 2:58pm 
@Luftwaffles Thank you very much! I never even thought of farming the mohair bags, I was only prioritizing what a beginner could do XD I'll definitely do some testing with your tips and add onto the guide!
Chomsky 1 Mar, 2020 @ 3:50am 
very good guide, i had thought of writing one myself.
just one point id like to add:

for farming money i would suggest to focus on moha bags as they can give you a nice amount of coin when selling. the downpoint is that you will either have to have a little gold already to keep buying moha from the merchant or leveled up to the point where you can build a goat farm.

what i do until that point is to grow a large amount of flax on another tile and make them into linen bags. once you unlocked the goat pen build 2 of them and have them fully occupied...just make sure you have a decent tomato farm to make them into goat feed.