DARK SOULS™: Prepare To Die Edition

DARK SOULS™: Prepare To Die Edition

1,309 ratings
Prepare to Die (Less): A Beginner's Guide to Dark Souls
By ahaha.wav
Dark Souls can be intimidating to new players, the game's tutorial is brief and not very helpful. With any luck this guide will help in the opening hours of the game, and make for a better player experience.
9
2
   
Award
Favorite
Favorited
Unfavorite
Prepare to Die

"Everyone starts somewhere."

Dark Souls is big, complex and intimidating - especially to players new to the series. With so much going on, it can be easy to get overwhelmed in the opening hours of the game. Although much of the satisfaction in playing comes from learning through experience to overcome each challenge, there are important gameplay elements that the developers flat out neglected to explain. My aim in creating this guide is to make for a better experience during your first playthrough(s) of Dark Souls.

In this guide, I will cover:
  • The various starting classes and the differences between them.
  • What each starting "gift" does, and my recommendations for which one to choose.
  • Humanity and its various uses.
  • Bonfires and their functions.
  • The stat system and how to level up efficiently.
  • The basics of choosing and maintaining equipment.
  • The basics of co-operative and player versus player online modes.
  • The Covenant system, how to join each covenant and the advantages of doing so.
A Matter of Class
Dark Souls is an action role-playing game, so naturally you'll start the game by creating a character. The character creation system is fairly comprehensive and allows for customisation of a character's gender, facial features and body type. At the end of the day, character creation comes down to personal preference and is purely cosmetic. There are however a few important things to bear in mind when choosing a class.

Your character's starting class will determine the equipment they start the game with as well as their base Soul Level (SL) and statistics. However, it is worth remembering that any class can effectively use any equipment provided you put some points into the required stats when levelling - more on that later.

When creating your character you will be given a choice of ten different classes, please note that the comments for each class refer to their starting equipment only and that any class can be easily customised ingame by finding and equipping new weapons and armour.

  • Warrior - SL4
    Versatile starting class, medium weight armour and good all round statistics. Decent weapon stats mean that less levelling is required to meet the base requirements for more advanced weapons.
  • Knight - SL5
    Heavily armoured with high HP, can take a beating but is slower moving than lighter armoured classes.
  • Wanderer - SL3
    Highly mobile with fast attack speed and good base dexterity, but light armour and low vitality make dodging essential.
  • Thief - SL5
    Light armour class with high resistance to negative status effects such as bleed and poison, weapon has negligible damage output but causes bleed status on enemies and has very high backstab and riposte damage.
  • Bandit - SL4
    Light armour class with high strength, equipped with a battle axe with some of the highest base damage for a starting class. My personal recommendation for a first time melee playthrough.
  • Hunter - SL4
    Light armour class, equipped with a bow useful for dealing ranged damage, but not very powerful in close quarters.
  • Sorcerer - SL3
    Offensive magic-based class with very light armour and high mobility, equipped with a catalyst for dealing ranged magic damage, but very weak in melee.
  • Pyromancer - SL1
    Light armour with powerful ranged magic and decent melee capabilities, probably the easiest starting class to play as provided you make decent use of the pyromancy flame. Also the only class to start at Soul Level one.
  • Cleric - SL2
    Light armour and a high faith stat, able to use miracles for self healing during combat.
  • Deprived - SL6
    One for the masochists: starts the game with no armour, a basic club weapon and a very weak wooden shield. Highest base Soul Level and equal stats across the board.
A Gift From the Gods?
So you've created your character and picked a starting class. But what's this? The game's asking if you want a gift to take along with you on your journey? How 'bout that.

Dark Souls won't often just straight up give you something, so choosing a gift that's going to be useful to the type of character you want to play, while not essential, can be useful. When creating your character you'll be presented with a choice of one of 9 different starting gifts:

  • Nothing
    You ungrateful b*stard.
  • Binoculars
    This one is relatively self explanatory. You'll start the game with a set of binoculars which can be used to survey the area ahead, admire the scenery or even fine tune your aim with throwing weapons in a pinch.
  • Black Firebomb
    You will start the game equipped with a stock of ten high powered explosive black firebombs. Think of them as medieval grenades. This one's useful early on if you're having trouble with the first couple of bosses (and can be used to kill the Asylum Demon on your first encounter if you want the Demon's Great Hammer), but you only get ten and you can't buy more until a bit later in the game. I personally prefer to choose something a bit more permanent.
  • Divine Blessing
    3 single use items that fully restore your hit points and cure all status ailments. That's just it though: single use. You have a stock of healing items that replenish every time you hit one of the game's bonfire-based checkpoints anyway, so choosing this seems pretty pointless. But hey, maybe you have a special plan for it? Hell if I know.
  • Master Key
    This one's really useful and essentially does what it says on the can. It will open any basic lock in the game, which allows for much easier exploration if you want to access higher level areas early on or even skip areas altogether. I really like the Master Key but it can break the flow of the game a bit on your first playthrough, so I'd save it for later playthroughs if you plan on using it at all. Be sure to choose something else if you chose the "Thief" starting class though, as they have the Master Key by default regardless of what gift you choose.
  • Old Witch's Ring
    This one's interesting if a bit limited. It allows conversation with a specific NPC in the game who you otherwise cannot directly communicate with. A good one for lore-buffs.
  • Pendant
    One of the most enigmatic and notorious items in Dark Souls, the Pendant is either the most important or least important item in the game depending on your outlook. Don't expect it to do much though...
  • Tiny Being's Ring
    The description on this is a little deceptive, it reads that "HP recovers slowly while equipped", which I can only assume was either a mistranslation or a last minute change to the item's functionality. The ring does not regenerate HP, but instead grants a 5% boost to your total HP based on your current maximum. Useful in certain situations, but the boost is barely noticable for the most part.
  • Twin Humanities
    Another single use consumable item, a lot more useful than the Divine Blessing but still inadvisable as a starting gift unless you expect yourself to be low on Humanity.

Oh, and on the subject of Humanity...
Oh, the Humanity!
Humanity is unqiue in that it is the only character stat in Dark Souls which can be freely manipulated without levelling your character. It's also pretty important and isn't really explained adequately in-game. Having humanity provides various benefits to your character, as well as being essential for the online components of the game.

Let's start with the basics:

There are two flavours of Humanity: "hard" and "soft". "Hard" Humanity appears in your character's inventory as a usable item. When used, the Humanity item will be consumed, your HP will be fully restored and one point of Humanity will be added to your character's stock at the top left of the screen - this is your "soft" Humanity. If you use a "Twin Humanities" item, it will add two points of Humanity to your stock.

Having Humanity in your stock serves various purposes:

  • Increased Item Discovery
    This increases how frequently enemies will drop useful items like weapons, armour and upgrade materials.
  • Increased Defense
    Pretty self explanatory, this directly influences statistics related to damage resistance, both physical and elemental.
  • Increased Curse Resistance
    I'll cover this more in the "statistics" section of the guide, but it's a very important stat to have.
  • Increased damage output with specific weapon types
    Again, I will cover this later in the guide.
  • Reversing Hollowing and Kindling Bonfires
    Yeah, here's another I'll cover later.

Of course, to have Humanity in your stock, you'll first have to aquire it. Luckily it's not exactly scarce. Hard Humanity can be found everywhere: as treasure on static corpses in the game world, loot from killing giant rats, as a reward for killing bosses... It can even be bought from specific vendor NPCs. It will also occasionally be added directly to your stock when killing specific types of enemies provided the area boss is still alive.

It is worth noting however that the bonuses provided by soft Humanity should be considered transient at best, as any Humanity in your counter will be lost alongside your souls upon death. Failure to retrieve your subsequent bloodstain will result in a permanent loss.
Sweet Sanctuary
You can't really describe anywhere in a game like Dark Souls as safe, but Bonfires are the closest approximation. These rest points can be found throughout the game world and serve as checkpoints as well as having a few other useful properties.

Resting at a bonfire will cause all enemies in the area to respawn, but also restores your HP to maximum, as well as filling the charges on your Estus Flask and any magic you have equipped.

When resting at a bonfire, you will be presented with a few options:

  • Leave
    Do nothing and leave the bonfire.
  • Level Up
    Spend accumulated souls on improving your character's statistics.
  • Reinforce Weapon
    Allows for upgrading of your weapons, but only once you have purchased the Weapon Smithbox from the Blacksmith in the Undead Parish
  • Reinforce Armor
    The same as above, but for armour. Requires Armor Smithbox, bought from the Blacksmith in the Undead Parish.
  • Repair Equipment
    Allows you to repair weapons and armour, requires a Repairbox, bought from the Blacksmith in the Undead Parish and the merchant in the Undead Burg.
  • Attune Magic
    Allows you to memorise any spell for which you have found the scroll, requires at least one attunement slot as well as the intelligence or faith requirement for the spell itself.
  • Access Bottomless Box
    Allows inventory management and storage of unneeded items, requires that you first purchase the Bottomless Box from one of the game's Merchants.
  • Warp
    Allows for teleportation between bonfires once you have aquired a key item in the story progression.
  • Kindle
    Before leaving the game's tutorial area you will be presented with an "Estus Flask" by a mysterious knight on his deathbed, this emerald flask is filled with liquid whenever resting at a bonfire and serves as a renewable healing item. This option kindles the bonfire at the cost of humanity, increasing the number of Estus charges you will gain from resting there by 5. The initial limit for kindling is 10, but you will aquire an item later in the game that allows you to boost bonfires to 20.
  • Reverse Hollowing
    Consumes one point of soft humanity in order to restore you to human status. This allows you to Kindle the bonfire as described above and activates online mode, letting you summon other players to help you at the expense of a risk of being invaded by hostile players. This status is reversed after death.
Statistically Speaking
So you've cleared the tutorial and you hopefully have a feel for the controls by now, but what the hell do all of these stats mean? There are so many of them, and the descriptions range from a little vague to downright confusing...

Essentially, the stats screen is split into three sections:


"What the hell *ss balls?"

The left column shows your character's soul level and your stat points:

  • Level
    Your character's soul level, this goes up by one every time you spend souls to increase a stat.
  • Souls
    The number of souls you are currently holding. Souls act as both a currency and experience points, and are gained by killing enemies and consuming soul items found on corpses.
  • Vitality
    This stat determines your character's hit points: the more Vitality you have, the harder you are to kill.
  • Attunement
    Determines how many attunement slots you have. Attunement slots are required to equip all magic and a higher value allows for more spells to be memorised simultaneously.
  • Endurance
    This stat increases your Stamina, maximum Equip Load and resistance to the Bleed status effect.
  • Strength
    This stat determines your character's strength, a higher strength stat is required to wield heavier weapons and shields and effects your damage output with these weapons.
  • Dexterity
    Dexterity determines your ability to wield weapons that rely on skill rather than brute force and increases the damage dealt with these weapons. Also increases the casting speed of most spells.
  • Resistance
    This stat increases your physical and fire defense rating and your resistance to the Poison status effect. As a general rule it is ill advised to invest many points in this stat as its advantages are situational and can be simulated by wearing armour with a high poison resistance stat.
  • Intelligence
    Intelligence is required to cast offensive spells and directly effects the amount of damage you will deal with magic as well as certain Intelligence-based weapon types.
  • Faith
    Faith is required to cast defensive and healing miracles and determines how effective they will be when cast.

The middle column shows your Hit Points, Stamina, Equip Load, damage output and defenses:

  • HP
    Your character's hit points, represented by the red bar at the top of the screen. These deplete when you take damage, if they run out, you will be returned to the last Bonfire you rested at and lose all of your Souls and Humanity. If you return to your point of death without dying en-route, you can retrieve your bloodstain and regain what you lost.
  • Stamina
    Your character's stamina, represented by the green bar below your character's Hit points. Performing actions like rolling, attacking and sprinting depletes your stamina bar, but it regenerates automatically.
  • Equip Load
    This determines how heavy your equipped weapons and armour can be before you are over-encumbered and unable to move freely. The percentage of your maximum that is currently equipped determines how fast you can roll and move as well as the amount of invincibility frames on your dodge. 25% or below allows for the fastest roll speed, between 25% and 50% you will roll at a medium speed, above 50% your roll speed is almost uselessly slow and above 100% you will be unable to dodge at all.
  • R Weapon 1
    The damage output of the weapon equipped in slot 1 of your right hand.
  • R Weapon 2
    The damage output of the weapon equipped in slot 2 of your right hand.
  • L Weapon 1
    The damage output of the weapon equipped in slot 1 of your left hand.
  • L Weapon 2
    The damage output of the flarble garble bored of typing this now
  • Physical Def.
    Your resistance to physical damage, split into four categories: your total physical defense to non specific attack damage (with the number in brackets displaying your base defense minus equipped armour), as well blunt force from strike weapons, slash damage from bladed weapons like katanas and thrust damage from piercing weapons.
  • Magic DEF
    Your resistance to magic damage from spells and certain weapon types.
  • Flame DEF
    Your resistance to fire damage from certain weapon types and well... fire.
  • Lightning DEF
    Your resistance to lightning damage.

The right column shows your resistances, item discovery and attunement slots.

  • Poise
    Poise determines your ability to "take attacks without breaking form." If you take a hit from anything when you have 0 poise, your character will stagger for a second or so, and be unable to react. In certain situations this can lead to heavy damage being received because of your character being "stun-locked". However, if you have some poise, it is possible for you to take attacks without being staggered. Every weapon has a different poise "break-point", or an amount of poise it will have to break through before causing a stagger. Heavier weapons tend to have higher poise break-points, but heavier armour types provide more poise.
  • Bleed Resist
    Your resistance to the Bleed status effect. This status is inflicted by certain weapons, and causes a meter to build up in the middle of your screen as you take hits. Once the meter maxes out, you will take damage based on a percentage of your maximum HP, which can be anything from 30 to 50% depending on the weapon that deals the damage. The higher your Bleed resistance, the longer the meter takes to fill up.
  • Poison Resist
    Your resistance to the Poison and Toxic status effects. These status effects fill up a meter on your screen similar to the bleed effect but instead cause a steady drain of HP when the meter fills up, with the Toxic status being significantly more damaging than Poison.
  • Curse Resist
    Curse is a status inflicted by a very small percentage of enemies which causes instant death when the meter fills to maximum. To add insult to injury the curse status halves your maximum HP when you respawn, this effect persists until you cure your curse by talking to a specific NPC in the New Londo Ruins, or buying a healing item from certain Vendors.

As for levelling up...

On your first playthrough, your stats are going to be all over the place. This is normal, so try not to worry about it too much. If you are struggling with deciding what to level though, Vitality and Endurance are always a good bet because they are consistently useful. Otherwise you should be trying to hit the minimum statistics for the weapon that you want to use, and then increasing the stat(s) with which it has the best scaling (e.g. Strength or Dexterity, more on weapon scaling later.) You'll get a feel for the stats as you progress through the game and once you have familiarised yourself with them you can focus on crafting a character that suits your preferred playstyle. The great thing about Dark Souls is that almost anything is viable though, so go crazy.
Gearing Up
So you're armed with a basic understanding of the game's mechanics. Now it's time to get armed and armoured. There are many different weapon and armour types in the game, and it's honestly down to player preference what you should ultimately choose. As I said before almost anything is viable, so play around with different weapons that you find until you come across something you enjoy using. Once you've chosen something though, you're going to want to upgrade it.

This is something a lot of new players forget to do, and it's amazing how much it can effect the game's difficulty. Armour upgrades are relatively linear, with all armour requiring one of two forms of the game's standard upgrade material: "Titanite". Weapons are a little more complex, with many having branching paths of upgrades that cause different types of damage, require different weapon "Embers" and have different scaling.

Scaling determines how dramatically a weapon's damage output is effected by your stats. Each weapon has a scaling rating for Strength, Dexterity, Intelligence and Faith - with "E" being the lowest, "S" being the highest and a dash indicating no scaling.

On top of a weapon's scaling, each weapon has a rating for Bleed, Poison, Occult and Divine damage, represented by numbers instead of alphabetical ratings. The higher the number the greater the effect.

Weapon "Embers" are special flames found throughout the game world and used by blacksmiths to ascend weapons to their next state of upgrade. Upgrades can be performed by the player with a Weapon Smithbox once they have been ascended by a blacksmith with the correct ember.

Weapon upgrades go as follows, with different types and grades of upgrade material:

  • Standard - Increased damage output and scaling based on weapon's base stats.
    Unupgraded weapon
    9 Titanite Shards to +5
    Large Ember - Given to Andre of Astora in the Undead Parish.
    9 Large Titanite Shards to +10
    Very Large Ember - Given to Andre of Astora in the Undead Parish.
    9 Titanite Chunks to +14
    1 Titanite Slab to +15

  • Raw - Increased damage output, scaling reduced from base stats.
    Standard weapon +5
    Large Ember - Given to Andre of Astora in the Undead Parish.
    10 Large Titanite Shards to +5
  • Lightning - Adds lightning elemental damage, removes all scaling.
    Standard weapon +10
    9 Titanite Chunks to +4
    1 Titanite Slab to +5

  • Crystal - Increased base stats and scaling, but weapon becomes irreparable.
    Standard weapon +10
    Crystal Ember - Given to the Giant Blacksmith in Anor Londo.
    9 Titanite Chunks to +4
    1 Titanite Slab to +5

  • Divine - Reduced damage and scaling, added magic damage with scaling from faith stat.
    Standard weapon +5
    Divine Ember - Given to Andre of Astora in the Undead Parish.
    10 Green Titanite Shards to +5
    Large Divine Ember - Given to Andre of Astora in the Undead Parish.
    9 White Titanite Chunks to +9
    1 White Titanite Slab to +10

  • Occult - Reduced standard scaling, even greater scaling from faith stat.
    Divine weapon +5
    Dark Ember - Given to Andre of Astora in the Undead Parish.
    8 White Titanite Chunks to +4
    1 White Titanite Slab to +5

  • Magic - Reduced damage and scaling, added magic damage with scaling from int stat.
    Standard weapon +5
    10 Green Titanite Shards to +5
    Large Magic Ember - Given to Rickert of Vinheim in the New Londo Ruins.
    9 Blue Titanite Chunks to +9
    1 Blue Titanite Slab to +10

  • Enchanted - Reduced standard scaling, even greater scaling from int stat.
    Magic weapon +5
    Enchanted Ember - Given to Rickert of Vinheim in the New Londo Ruins.
    8 Blue Titanite Chunks to +4
    1 Blue Titanite Slab to +5

  • Fire - Adds fire elemental damage, removes all scaling.
    Standard weapon +5
    11 Green Titanite Shards to +5
    Large Flame Ember - Given to Vamos the Skeleton Blacksmith in the Catacombs.
    9 Red Titanite Chunks to +9
    1 Red Titanite Slab to +10

  • Chaos - Adds fire elemental damage which scales with Humanity.
    Fire weapon +5
    Chaos Flame Ember - Given to Vamos the Skeleton Blacksmith in the Catacombs.
    8 Red Titanite Chunks to +4
    1 Red Titanite Slab to +5

  • Dragon - Unique weapons cut from the tail of boss enemies, scaling varies.
    10 Dragon Scales to +5
  • Unique - Weapons not reinforced by any other means.
    10 Twinkling Titanite to +5
  • Boss - Special weapons crafted from the souls of bosses with specific weapon types.
    Standard weapon +10
    Boss Soul - Given to the Giant Blacksmith in Anor Londo.
    10 Demon Titanite to +5

Armour works identically and can be upgraded at any blacksmith or by the player once they acquire the Armour Smithbox. However, armour will only ever require either standard or twinkling titanite with zero ascension and is thus much easier to upgrade. It can be tempting to wear a full set of the same armour for the sake of aesthetics, but it's worth noting that different armour sets have different strengths and weaknesses so it might be worth mixing and matching in order to strike a balance between resistances.

Oddly enough, shields are classed as weapons and have just as many upgrade paths, which while cool has limited usefulness as it does not alter their stats considerably. The main stat to look for when choosing a shield though, aside from the percentage of each type of damage they block (a shield that blocks 100% of physical damage is preferable to one that only blocks 75%) is stability. Shield stability determines how much of a hit your shield will absorb before your guard is broken and you take damage. This relies partially on your stamina stat, but shields with higher stability can take harder hits.

*Remember to always keep weapons and armour in good repair by buying a Repairbox or visiting a blacksmith, broken equipment's effectiveness is greatly reduced.*

On the subject of upgrades, there is one final type of upgrade in the game, and it's an important one. Estus Flasks can be reinforced using Fire Keeper Souls. Should you stumble across one in your travels, take it to one of the Fire Keepers scattered around the game world and select the "Reinforce Estus Flask" dialogue option. Estus Flasks can be reinforced to a maximum of +7, with higher values giving more HP restoration when used.

*Never directly consume a Fire Keeper Soul, doing so will provide 5 Humanity and fully restore your HP, but the soul will be permanently lost and you will be unable to use it to upgrade your Estus Flask.*
Jolly Co-Operation and Unwanted Guests
So what about that online mode you've heard so much about?

The Souls series has an innovative and - to the best of my knowledge - entirely unique online system. Remember earlier when I talked about Humanity and reversing hollowing?

There are two states for your character: human and hollow. When your character is hollow you appear as a walking corpse - a hollow shell of a human being. However, by offering up a single point of humanity to reverse hollowing at a bonfire, you can return to life. This has the advantage of allowing you to kindle bonfires using humanity, as well as activating the game's online mode. Whilst human, you can see summon signs left by other players and summon help for the game's many bosses. The downside is that whilst in this state you are vulnerable to "invasions" from hostile players, who will attempt to kill you and steal your humanity. If you survive one of these invasions however, you will gain a substantial chunk of souls from their corpse as well as one point of soft humanity.

So how can you get in on this? You'll meet an NPC early on in the game called Solaire of Astora. Solaire is the sole NPC member of the Warrior of Sunlight covenant, and gives you a "White Sign Soapstone", which allows you to engrave your signature in any area with a boss. Your sign will then appear to other players in the area who are human, allowing you to be summoned by them at any point whilst you are still in the area. Once summoned, help defeat the area boss to gain a single point of humanity and half of the souls for the kill. Some Covenants allow for easier co-operative matchmaking or provide extra benefits. More on Covenants in the next section.

So what about if you want to invade other people? There are a couple of ways to go about this, the simplest being to use a consumable called a "Cracked Red Eye Orb", which allows non Darkwraith Covenanters to imitate the invasion ability normally restricted to members of the Covenant. My personal favourite way to go about this is to use the "Red Sign Soapstone", though. The Red Sign functions similarly to the White Sign in that it allows other players to summon you to their world, the main difference being that when summoned through a red sign you appear as a hostile red phantom and duel the master of the world for the same rewards as a standard invasion. This is great because it takes out the random aspect of invasions, and you're less likely to run into someone who isn't looking for a fight. Again this is down to personal preference though, some people just like being d*cks in online games and that's totally ok too. Have a look at the covenants section for more on invasion methods!

There are a couple of other online elements which do not involve direct interaction between players. When a player kindles a bonfire in their world, all other players in that area of the game will receive a single extra Estus Flask, and miracles cast in other worlds leave "Miracle Synergy Circles", which boost the power of miracles cast nearby.

The final aspect of online play takes the form of messages left by other players. For a measly 100 souls, you can purchase the "Orange Guidance Soapstone" from the merchant in the Undead Burg. This allows you to leave messages to help, or indeed hinder, other players by either warning them of danger or luring them into a trap. You can even use it to point out treasure, secret areas and the like. Just refrain from leaving the "Amazing chest ahead" message outside of Gwynevere's chambers. It's been done already.
Covenants: Where, Why and How?
It's possible to go through the entire game without even knowing about Dark Souls' Covenant system. There are 9 covenants in total, each with its own unique goals and many offering substantial advantages to players who join them.

Way of White

Way of White members receive higher priority co-operative online matchmaking with other Way of White, Princess Guard and Warrior of Sunlight members as well as early access to purchase basic healing miracles from Petrus of Thorolund at Firelink Shrine. Way of White is the default covenant for the Cleric and Knight classes.

You can join this covenant by talking to Petrus of Thorolund at Firelink Shrine from the very beginning of the game.


Princess Guard

Princess Guard members receive higher priority co-operative online matchmaking with other Princess Guard, Way of White and Warrior of Sunlight members as well as a selection of high level healing miracles.

You can join this covenant by talking to Gwynevere, Queen of Sunlight in the lost city of Anor Londo.


Blade of the Darkmoon

Members of the Blade of the Darkmoon covenant can invade the worlds of other players who have sinned by breaking their covenant or killing innocents. Upon joining the Darkmoon Blades you will receive a Blue Eye Orb which when used, searches for the world of a player who has been marked as guilty of sin. If you succeed in killing this player you will take a souveneir of reprisal from their corpse, these can be used to rank up in the covenant and gain access to powerful weapon buff miracles.

You can join this covenant by talking to Dark Sun Gwyndolin in the Darkmoon Tomb beneath Anor Londo

Warrior of Sunlight

Members of the Warrior of Sunlight covenant seek to help other players by placing a gold sign which allows them to be summoned into another player's world. If they aid the summoner in defeating the area boss, they will receive a sunlight medal. These are used to rank up in the Warrior of Sunlight covenanant and gain access to powerful lightning-based offensive miracles.

You can join this covenant by praying at the Altar of Sunlight in the Undead Parish, a minimum of 25 faith is required to join, but this requirement is reduced by 5 faith each time you aid another player in defeating the area boss by placing a white sign.

Forest Hunter

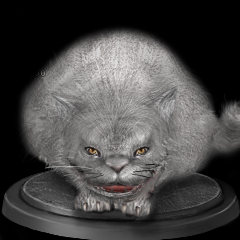
Members of the Forest Hunter covenant seek to protect the Darkroot Forest from would-be trespassers and grave-robbers. Upon joining the Forest Hunter covenant, you are given the Cat Covenant Ring, which so long as you wear it allows you to be summoned to Darkroot Forest at any time to invade the world of an intruding player. There is no level limit on these invasions, which makes the Forest Hunter covenant a great choice for the hardcore PVP crowd.

You can join this covenant by speaking to Alvina, the cat in the Darkroot Forest.

Chaos Servant

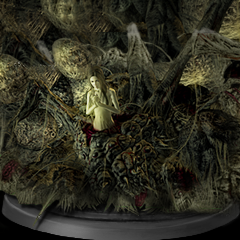
Members of the Chaos Servant covenant seek to gather Humanity at any cost and offer it to cure the ailments of the Fair Lady at the entrance to the Demon Ruins. Those who offer substantial amounts of Humanity are rewarded with powerful pyromancy.

You can join this covenant by speaking to the Fair Lady in Quelaag's Domain, behind a hidden wall below the second Bell of Awakening.


Gravelord Servant

Members of the Gravelord Servant covenant seek to spread misery to other players' worlds on behalf of Gravelord Nito, first of the dead. The Gravelord curse takes the form of extremely powerful Red Phantom Mobs in other players' worlds, with the tradeoff that the Gravelord Servant themselves can be invaded by up to 3 infected players at once via a Gravelord Sign which appears in their world. Repelling these invaders will result in an Eye of Death, which can be used to rank up in the covenant and gain the use of powerful offensive area of effect miracles as well as the Gravelord Sword.

You can join this covenant by nestling in a coffin near the Titanite Demon in the Catacombs with at least one Eye of Death in your inventory.

Path of the Dragon

Members of the Path of the Dragon covenant serve a surviving Ancient Dragon in the mysterious Ash Lake at the base of The Great Hollow. They seek to become dragons themselves by offering Dragon Scales as tribute, and invade other players' worlds by leaving Dragon Remnant Signs which initiate a voluntary duel with the holder of a Dragon Scale. This covenant is really cool because if you offer enough dragon scales, you can basically turn into a motherf*cking dragon.

You can join this covenant by talking to the Stone Dragon on Ash Lake, accessible through a hidden entrance to The Great Hollow at the base of Blighttown.

Darkwraith

Members of the Darkwraith covenant serve the Primordial Serpent, Darkstalker Kaathe. They invade the worlds of unsuspecting players in an effort to steal their humanity and offer it up to Kaathe in the inky Abyss beneath New Londo. Offering Humanity has its own rewards, allowing players to rank up in the covenant and gain access to the Darkwraith armour and sword as well as the coveted Red Eye Orb, which allows for unlimited invasions on other players within their level range.

You can Join this Covenant by talking to Darkstalker Kaathe in the Abyss, but only if certain requirements are met. This is among the easiest covenants in the game to miss, because Kaathe will never appear if you side with the other Primordial Serpent...
Go Forth and Die
I think that about wraps things up, thanks for taking the time to read this and hopefully it'll help someone along the way. Please feel free to leave a comment with any feedback or suggestions for future guides!

I should mention that Dark Souls is a huge game, and I've almost certainly missed something important along the way. If in doubt, there are two comprehensive wikis for the game as well as numerous fantastic guides on Youtube and the like, and with a game this big there's no shame in seeking help from time to time.

Take it easy.
135 Comments
𝖃zt𝖗𝖒x 11 May @ 2:04pm 
praise the sun
Cactus_Brandon 24 Sep, 2021 @ 1:39pm 
thank you for this guide! i'm very late to this game, but at least that means there's lots of knowledge like this floating around on the net. very helpful!
Matéo 18 Feb, 2021 @ 8:30am 
I just completed my first playthrough wearing havels armour and swinging smoughs hammer :) I don't want to start the newgame+ with my current build though :( So I think I'll just make a new save to play again lol.
clarkeveritas 21 Oct, 2020 @ 3:06pm 
Good guide. I bounced off it my first few times before finally getting extremely hooked and playing through the whole thing. Wonderful series. I've personally found pyromancy to be the way to go as a beginner but that's just me. I typically build All-Around Builds.... no Crazy Giant Hammers/Swords, no World-Ending Super-Magic, just someone who is pretty good at everything and leans on fire-magic with a smattering of other magic schools.
People think of it as "That Really Difficult Game", but once I got into it I realized that it's a super-deep RPG with lots of freedom in a super-neat world and awesome lore.
ahaha.wav  [author] 7 Jan, 2020 @ 6:33pm 
Dark Souls is an immensely rewarding game once you get into it, but it can definitely be intimidating at first. The first time I started the game on PS3 I actually gave up for months after getting to Sen's Fortress, but the game really got under my skin and I ended up loving it when I eventually revisited it. I'm glad I could help you get to the point where you could enjoy it.
Omnises 7 Jan, 2020 @ 6:09pm 
Thank you for making this guide. I've completed the game multiple times now, but when I first played DS1 years ago it was a very tenuous and difficult relationship. Dark Souls is just hard to get and start having fun, and this guide really helped me stay on my feet so I could start progressing and problem solving on my own.
So thank you :8bitheart:
Lews Therin Telamon 3 Jan, 2020 @ 1:46pm 
Ok, I'll keep that in mind. Thanks again.
ahaha.wav  [author] 3 Jan, 2020 @ 1:25pm 
It really depends on what weapon you're using, some are better than others for avoiding bounces, weapons with thrusting attacks typically aren't at risk of it, for example. There aren't many situations where you have no choice but to fight in a cramped area though, usually you can pull back to a more open area and whatever you're fighting will follow.
Lews Therin Telamon 3 Jan, 2020 @ 1:15pm 
Thanks. I'll have to read your guide probably a couple more times, too. One question though: How should I handle tight corridors? Sometimes my weapon clangs off a wall instead of the face of my enemy, and then I get pounded into dust.
ahaha.wav  [author] 3 Jan, 2020 @ 1:05pm 
Parry timing is something that you really have to practice to get a feel for, but one thing that can help a little is basing your timing on the position of an enemy's hand rather than their weapon. Parrying the burg black knight is a reliable way to take him down early in the game if you can get the timing, but the sword and shield hollows in the burg would probably make for safer practice. Good luck with the rest of the game!