Thy Sword

Thy Sword

Not enough ratings
Tips and tricks
By Lemo 'nade and 1 collaborators
Seeing the lack of a wiki or guides for this game I decided to make a simple guide to record what I've learned, I'll update it as I find out more stuff and get more accurate information by playing the game.
Feel free to drop or correct information and I'll add you as a contributor.


Award
Favorite
Favorited
Unfavorite
Intro
This guide is WIP. I'll later add pictures and more info when I find out more by playing.
Feel free to contribute to the guide, I'll give you credit for your contributions.

Also, devs, I hope I'm not breaking any rules here, I want to help new players and kind of make a database, if you feel like some info is better to keep behind a "spoilers" wall, just let me know and I'll take it down.
Combat Strategies
-You can hit enemies from beneath to force them to drop down
Approach the enemy from underneath and jump, then attack. If the enemy is at a higher level at the moment you hit it, it will drop down from where it is as trying to follow you. You can use this to split up groups of enemies that would otherwise be hard to fight in limited space.

-Attack enemies while they're in the air. They can't block in the air, you can land an extra hit.

-You may change directions while blocking

-Blocking will stop arrows.

-Using the special attack to decapitate enemies will award you more gold, do it as much as you can since doing this seems to have a high chance to drop an extra item, be it a single coin, gems or a potion, with all the enemies you'll be killing, this will sum up to be a significant amount.

-You may start the special attack animation while in the air, you can either drop down from a platform and start it or jump and start it.

-If you're sure you'll be attacked, but unsure on which direction to parry, just jump away or drop down from the platform.
Earning Gold
Gold can be earned in mutiple ways:

-Killing enemies
Each enemy you kill will drop one or two items (coins, gems or a potion)
If you killed the enemy with the special attack, decapitating it, there's a high chance it'll drop an extra item. Some enemies (like rats, bats, skeletons and golems) cannot be decapitated and thus will not drop extra items.

-Hitting corpses
After you killed an enemy, continue swinging at it's corpse, there is a chance to drop an item for every time you swing, therefore you may get up to four extra items out of its corpse (although, I've never found a corpse that dropped a potion, seems to be just coins and gems)
The corpse will move forward and you can follow it to keep hitting it, if you stop for a short period it will stop being hittable, after some swings this will happen either way but those swings may award you some extra coins

-Breaking crates
Some crates may drop coins or gems. Does not apply for explosive ones. Be careful as some crates have rats or spiders inside of them.

-Hitting the crow
In some levels you'll find a treasure chest. The only way to open it is to hit the crow that's flying around with it's key and grab the key before it flies away
The crow will only attempt fleeing after detecting you, this will be marked with an exclamation mark and a loud crow sound, if you hide from the crow you may clear enemies from a path to make easier the task of hitting it.
The crow has a sight radius but also a line of sight, if there's a platform between you and the crow, the crow will not be alerted, so you may sneak up on it and as it's not really quick you can easily jump and catch it, every extra time you hit it, it has a chance to drop an item (coin or gem).
You may use arrows to hit it but keep in mind that if the arrow graces it, it will be alerted and try to quickly fly away, making it really hard to hit it in time with either an arrow or your sword.

My personal preference is (when possible) to clear a path that leads to a high place, waiting for the crow to be in the opposite side to advance, then wait for it at the top, so no matter if it's alerted, I just have to leap down and catch it.

-Saving the Witch
To save the Witch you need to kill every enemy in the level as fast as you can to avoid her from being burned, she will then fly away, dropping coins and gems as the treasure chest does although it seems like a smaller amount of them. This will also award you an achievement
You may find her at random on one of the Whispering Woods' levels.

-Killing a boss
After a boss dies, it will drop a big amount of coins and gems.

-Playing 21 horsemen after completing a level
After completing a level you will spawn in a village, there are three men sitting around a cart, The Gamblers, talk to them to play 21 horsemen, betting gold.
The game is essentially 21 blackjack, hit = give me another card, stand = leave my score as it is. Goal is to sum as close to 21 as you can with all your cards, you lose if you get a higher number, when you stand it's the dealer's turn, if he gets closer to 21 than you, he wins, if you're closer to 21 or the dealer gets a number higher than 21, you win, if both have the same number, it's a draw
After winning a few times, you will not be able to play any more until you finish the next level.
Characters
-The Barbarian
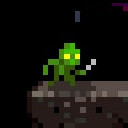
    6 total healthpointsStarts with Broadsword (damage +1, aka: kills green goblins in two sings)

-The Valkyrie
4 total healthpoints
Base all-round class
Initial equipment:
  • Shortsword (kills green goblins in three swings)
  • Longbow and 10 arrows

-The Rogue
Unlocking: You'll randomly see a green hooded figure running from left to right at the bottom floor of the level, touch it and it'll talk to you, unlocking it for your next playthrough (careful not to confuse it with a blue one, those steal gold and attack)
4 total healthpoints
Initial Equipment:
  • Bow of Rigor (easier to aim, same damage)
  • Lightfeet boots (spike traps deal no damage so you can ignore them)
  • 10 arrows


-The Viking
Unlocking: After completing Moon Forest, it will show up standing in front of the bonfire at the village and will request 250 gold to join your cause, pay up and you'll have unlocked the Viking class.
5 total healthpoints
Initial Equipment:
  • Shortsword (kills green goblins in three swings)
  • 200 gold

-The Paladin
Unlocking: On Nid-Gap you may find a shining cage with a violet figure inside, touch it and you'll release the Paladin, unlocking it for play.
6 total healthpoints
Shortsword
Ring of Protection
Items
You can only use one type of item at a time and you can't store the previous item anywhere

Boots
  • Lightfeet boots. 100G. Spike traps deal no damage.
  • Boots of Speed. 150G. Increase movement and attack speed.
  • Boots of Flight. 150G. Allow double jump.

Swords
  • Broadsword. 150G. +1 damage
  • Sword of Lightning. 250G. +1 damage, damage and enemy nearby
  • Flaming Sword. 300G. +2 damage.

Bow Related
  • Arrows (10). 50G. Always available. Just bow ammo.
  • Longbow. 150G. Basic bow.
  • Bow of Rigor. 200G. Same damage, aiming assistance
  • Bow of Strenght. 300G. Fire piercing arrows +1 damage
  • Bow of Fire: 400G. Explosive arrows +1 damage.
  • Master Quiver. 150G. Allows storage of up to 20 arrows (comes with 20 arrows).

Cleric stuff
  • Potion of Healing. 30G. Regain 2 healthpoints and cure poison.
  • Talisman of Light. 50G. Extra visibility on night levels. (you can only buy one)
  • Spell of Resurrection. 150G. Grants an extra credit.
  • Ring of Protection. 150G. Inmunity to poison.
  • Amulet of Life. 200G. Grants an extra health point.
  • Potion of Regeneration. 300G. Regenerate once when health reaches 0.

Tips
  • The sword of lightning can be counterproductive, as decapitating enemies awards more gold and it can damage enemies close-by, killing them without awarding the extra gold

  • Arrows are rarely worth buying since you'll be decapitating most of you enemies for profit, save the ones you have for attacking the crow on emergency situations or the Spider Queen, since having the maximum number of arrows you can carry will award you 1G for every arrow you find.

  • Buy potions just in emergency cases, like being poisoned and having 1-2 health, since most of the time you'll find potions after killing enemies, seems like the lower your health, the higher the chance of finding one.

  • The Ring of Protection is a great buy, poison is always a major nuissance throughout the game

  • Personal preference: the Boots of Flight are a must buy, the extra mobility saved my life several times, it makes everything easier and you can even skip certain parts of a map by jumping from one floor to the other without using any ladders

  • The Amulet of Life lets you take advantage of a glitch in which if you save and quit, when you come back in you'll have healed 1 point. (only tested in camp)

Thanks Drunder for the info on the Bow of Fire and the glitch with the Amulet of Life
Enemies
I'm assuming the Shortsword deals 1 point of damage to calculate the health of each monster.

Mouse
HP: 1

Spider
HP: 1


HP: 1


HP: 3


HP: 4


HP: 4


HP: 4


HP: 5


HP: ???


Achievements
I'll skip achievements that are self explanatory, like "beat the game" "beat the game with x character" and such, straight to the interesting ones.

For info on unlocking characters, the "Characters" section has it covered. The Witch is not a playable character.
For info on how to beat bosses or where to find them, refer to their respective sections.

Treasure!
Get the key to the treasure. For this you'll need to hit a crow carrying a key, it will drop the key and fly away, grab the key and you'll get gold and this achievement. For more help refer to "Catching the Crow" under the "Earning Gold" section.

The Witch
Save the Witch from being burned, you can find her at random in one of the Whispering Wood's levels. To save her, you need to kill every enemy on screen before she gets burned.

Bullseye
Catch your own arrow. Pro tip: aim upwards and don't move. Warning: it hurts.

No Luck
Gamble away all your money in 21 Horsemen. You can play this after beating any level, by talking to The Gamblers at the village.

Jackpot!
Win with a 21 after betting 100G in 21 Horsemen. You can play 21 Horsemen after beating any level, by talking to The Gamblers at the village. This one just depends on luck, the only advise I can give is to always play by betting 100 gold, to at least have a chance of getting this achievement. Getting 21 isn't that rare after all. Remember: Hit = "Give me another card" Stand = "I'm done raising my score".

Bad Friend
"accidentally" decapitate your friend while playing multiplayer, on Quest mode.

Loot!
Jump off the cliff at the center of the screen, in Day 5 at Dura-Las level.

Marksman
Kill a flying enemy with an arrow

Smithereens
Die by an exploding barrel

Thanks to Drunder for the info on the Marksman and Smithereens achievements

Found Glitches
  • The Amulet of Life lets you heal by saving and quitting, then loading back into the game. You'll regain 1 health point for every time you do this (only tested in camp)
Boss Strategies
Below are listed the bosses and attack patterns and strategies. (they didn't fit in the same section lol)

Remember that you can only own one item of the same kind. Ex: you can't have both the Lightfeet Boots and the Boots of Flight, they will swap eachother when you buy the other.
Spider Queen
Recommended items:
  • Any bow (really important)
  • Protection ring
  • In case of not having a bow, buy the Boots of Flight or this is going to be a real pain in the butt
Attack patterns:
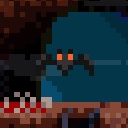
  • The spider will just move around the ceiling, dropping small spiders.
  • When damaged, it will charge towards the player, hitting the ground and getting stuck on it.
Suggested strategy:
  • Aim your bow upwards and wait for the spider to walk above you, shoot it, then just run until it hits the floor and pound it with your sword.
  • In case of not having a bow, you'll have to climb the cobwebs and hit the spider with your sword, then drop down to the ground to escape from its attack and hit it while it's stuck, this is why the Boots of Flight are useful, since you'll have a wither range to hit the spider and to escape from it's attack.
Dragon Lord
Location: Fiery Mountain
Recommended items:
  • None. This one's ez
Attack patterns:
  • It will lean backwards and shoot a big flame towards the player twice in a row before changing attack patterns (if not avoided, it will hit the player two times as it's a sustained attack). After finishing the second flame burst, it will fly upwards, choosing one of the following attacks
  • Sometimes it will fly upwards, wait at the middle and then fly forwards, shooting fire at the ground, that will also ignite, after that it will follow up with another but in the opposite direction, before flying back to original position, landing and go back to the first attack pattern.
  • Sometimes it will fly upwards without stopping at the middle, in this cases a fire rain will start and the player must avoid the fireballs raining from above, after a while they will stop and the dragon will land back in it's original position, going back to the first attack pattern.
  • If the player gets too close (say they touch the dragon's nose with their body, instead of with their sword), the dragon will lean backwards and hit the player with it's tail
Suggested strategy:
  • If you see the dragon leaning backwards, run away to the highest platform you can get, wait for the fire to stop, then jump towards the dragon and hit it. Only the highest will do, the lower one is too low to avoid the fire.
  • If you see the dragon starting to fly, always go towards it, since you'll get cover if it's the fire from above attack and won't matter if it's the fire rain attack.
  • To avoid being hit by the fire from above follow-up attack, follow the dragon's path of fire as it extinguishes
Lurking Horror
Location: Borg
Recommended items:
  • Boots of flight (will give you an edge on dodging some attacks)(not really needed though)
Attack patters:
  • The tentacles will move at a circular manner shooting projectiles out of their... uhmmm mouths? they shoot stuff sometimes, that's important
  • Tentacles will change the direction they move (clock wise to counterclockwise for example) when hit
  • When a tentacle is beaten, the monster will come forward and try to hit the player with a laser that goes from side to side
  • When every tentacle is down, the monster will go forward and keep trying to hit the player with its lasers until killed
Suggested strategy:
  • Wait on the ground facing the direction the tentacle will come from and hit it, since it changes directions it won't hit you if you hit it first
  • When the monster comes forward, ignore the laser beams and jump the point where both lasers meet on the ground
  • When you've beaten all tentacles, keep the previous strategy but stay in the middle to dodge the lasers, hit the monster's head eveytime you jump
Sorcerer of Thorn
Location: Thorn

Suggested items:
  • Boots of Flight will allow you to traverse the place faster and give an easier time dodging the projectiles he throws, although they're not needed.

Attack patterns:
  • He will attack twice before teleporting away, creating copies of itself (although the solid one will flash on white when created)
  • One of the two attacks is to throw three waves of projectiles, spawned in a circular manner, away from himself. This can be differentiated for the glowing colors of his staff when he raises it.
  • The other is to spawn a few bats. This can be differentiated for not making it's staff glow when raised, but rather making a little smoke cloud.
  • He can either spawn the bats twice, do it's projectile attack twice or combine one and one, before teleporting again
  • After teleporting, He will rest for a few seconds, despawn the false copies, rest some more and then choose an attack

Suggested strategy:
  • Don't forget you can use ladders to aid yourself avoiding the projectiles
  • Kill the bats as soon as you can, if they're still too close to eachother, you may kill them all in one swoop
  • If it's about to spawn bats, keep hitting it, you can hit all the bats at the same time as you hit the Sorcerer of Thorn, landing a few extra hits
  • If you see his staff glowing, run as far away as you can, projectiles will be further away from eachother, so they're easier to dodge
  • Don't forget the solid clone will flash on white when teleported, attacking the others will do nothing
Lich King and Queen
Location: Ancient Ruins
Suggested items:
  • Boots of Flight. For extra mobility on following/attacking the Lich King, makes the fight significantly easier
Attack patterns:
  • The Lich King will constantly swing his flaming-skull flail around him in a circular manner while bouncing around the screen (only the flaming-skull will damage you, touching him or the chain will not)
  • The Lich Queen will follow the player from above, shooting lightining downwards as the player passes beneath her
Suggested strategy:
  • Just follow the Lich King around, staying inside the flail's circle so you can both damage him and avoid it's attacks at the same time
  • Be wary of the Lich Queen, since sometimes following the King around constantly can lead into her lightning attack
  • When they die the crystal will be at the middle of the screen, right above the spikes, along with probably some gold dropped from them. Approach the spikes from the side and they won't damage you, so you can gather all the gold and the crystal without losing any health.

Thanks Drunder for the tip regarding the spikes at the middle of the screen.
The Dark Overlord
Location: The Dark Tower (you need the 5 crystals to unlock this location)
Recommended items:
  • Boots of Flight. Not needed but a great help on dodging it's attacks by jumping above him
Phase 1
Attack patterns:
  • A three-hit sword combo while walking towards the player
  • A high jump followed up with a sword blow from above while falling
  • A charged attack differentiated by the Dark Overlord raising pointing it's sword upwards, being struck by lightning and pinning it to the ground, it sends a shockwave through the ground, followed by a charged attack that spawns rotating swords in a circular manner and shoots them away from the Dark Overlord
  • A charged attack that can be differentiated by the Dark Overlord flying upwards, it spawns swords on the ceiling, pointing downwards, that will fall to the ground when he does. He may follow up by healing himself (indicated by a red glow), hit him to stop him
Suggested strategy:
  • When idle, he will just follow you around, triggering either the three-hit sword combo or the high jump sword blow from above, just get accustomed to their range and move to the edge of it, using the special attack to get close before he starts another attack
  • When you see him standing looking to the camera, run to a platform and wait up until the grounded attack gets to you, then use the platforms to dodge it, keep away as he'll follow up with that rotating sword attack and it's easier to dodge the further away you are
  • Only his attacks will damage you, touching him will not, use this to your favour so you don't get cornered
  • When you see him flying upwards, jump and give him a few slashes, up to about three should be safe, careful to be in between the swords that will fall from the ceiling before que falls back to the ground, when he falls down he will damage you, so try not to touch him then. Staying close to him will also make it easier to stop his healing power
Phase 2
Attack patterns:
  • He will spawn star-like projectiles that will bounce all around the screen while he flies from one side to the other
Suggested trategy:
  • Just wait around the platforms avoiding the stars and climb up when he gets close, hitting him.
9 Comments
Strider_9000 29 Jun, 2022 @ 5:00pm 
Observation that I didn't read in the guide: If you save and quit while at camp, it will refresh the merchants inventory. Helpful if you're looking for a certain item. Thanks for the guide :broflex:
Del_Duio 20 Dec, 2019 @ 10:07pm 
I just bought this today and so far it's pretty fun (playing offline). Good job on this guide!
Shaggy Jak  [author] 10 Jul, 2018 @ 1:24pm 
Sorry, I ignored the friend request because I didn't know who it was... So, I recent it now... It would be great to be listed as a contributor. Thanks for the add! Great guide btw.
Lemo 'nade  [author] 10 Jul, 2018 @ 11:53am 
There, I added what you suggested, it won't let me add you to contributors unless we're friends on Steam though, so I credited you in case you don't wish to add random people lol
If you do wish, I'll add you as a contributor :wololo:
Thanks for the info!
Shaggy Jak  [author] 10 Jul, 2018 @ 10:38am 
Missing item: Bow of Fire: Explosive arrows +1
Cost: 400GP

Also, edit on the items... The amulet of life lets you take advantage of a glitch. If you purchase this item for 200GP you get basically free heals. If you have this item and you are at the camp, just save and quit. When you continue you will have 1 extra HP than you had before. You can do this over and over till full heal. It probably works on the levels too.

Another edit: on the lich king/queen fight. You don't have to jump onto the spikes to get the crystal. Just walk from the side of them and you won't take damage. So no need to bother with the spike boots, just get the double jump ones because they are wayyy more useful.
Shaggy Jak  [author] 10 Jul, 2018 @ 8:58am 
Marksman Achievement: You have to kill a flying enemy with an arrow.
Smithereens Achievement: Die by an exploding barrel
Lemo 'nade  [author] 26 Mar, 2018 @ 12:06am 
No problem! I'm glad it helped
Bahototh 26 Mar, 2018 @ 12:02am 
Awesome! Thank You.
Thultex 24 Mar, 2018 @ 1:59pm 
Nice Guide! Thanks!