Resident Evil 5

Resident Evil 5

240 ratings
The Mercenaries
By Ctrl 27
Guide of The Mercenaries, here you’ll find the location of the time bonuses, ranges, tips to unlock maps and characters, with a video of each scenario.
9
   
Award
Favorite
Favorited
Unfavorite
The Mercenaries

The goal is to get the most points by eliminating as many enemies as you can within a time limit, you’ll have to get all the time and combo bonuses so you can improve your score.
You can play alone or with another player, the unlimited ammunition will be deactivated.
The game will end when you have finished with 150 enemies or when you run out of time; If you finish with all enemies, the remaining time will be converted into points, 1,000 points for every second remaining.

Time Bonus
There are three types of time bonuses, of 30, 60 and 90 seconds more, getting all the time bonuses will help you get better scores.

Combos
You will get extra points if you chain several deaths in a combo, after eliminating an enemie you will have 10 seconds to get another death and increase the combo; the counter will blink before it restarts and it will become blue to indicate the multiples of 10.
If you get combo bonuses you will have 30 seconds during which each death will earn you 1,000 bonus points. You'll find these hourglass-shaped objects in the chests.

Ranges

This is an excellent way to earn exchange points and unlock additional material of the game. The difficulty level will not be for change, when playing in Solo Mode the game will be with level 6 of difficulty (normal mode) and in Duo Mode, the level of difficulty will be 8 (Veteran).

Tips:
  • Learn the location of the time bonuses in each scenario, it is advisable to get them before you start fighting, do not kill the enemies yet unless they block you and don’t let you pass, only in the ancient ruins and the missile area scenarios you can eliminate the Majini because the map is very wide and some areas will be left without enemies if you stay in them for much time; I have made the illustration of the maps indicating only the time bonuses.
  • Arrange your weapons so you can have an easy access to them with the keyboard (quick keys).
  • If you have already gotten the time bonuses and you have several enemies chasing you, get the combo bonuses and start fighting so you can get a higher score.
  • Reload fast using the inventory (I still don’t master this, but it is very efficient).
  • Doing weaponless attacks get you +05 seconds, you save ammunition and you can use this time to make a quick reload, but it is important to calculate the time right so you don’t make mistakes that will make you lose the combo.
  • Kill the chickens, you get 2000 points per each chicken, there is one in each scenario, only in The Mines there are two chickens.
  • The blinding grenades are effective in defeating Majini mutations such as Cephalo, Bui Kichwa, Kipepeo and Duvalia.
  • The hand grenades are advisable for killing a group of enemies and also for stunning the heads of each map.
  • Try to be always in movement in an open field or locate yourself in a position in which no enemy can surprise you from behind.
  • If you are playing in Duo Mode, coordinate with your partner so that one can get the time bonuses and the other one eliminates the enemies trying not to lose the combo and the combo bonus.


Characters
You will have two characters unlocked and you can unlock 8 additional characters getting “A” range or Superior in each scenario. There is no restriction that keeps you from using the same character as your partner when you are playing in Duo Mode.

Chris (bsaa)
This initial character has a simple configuration. If you want to get the highest advantage when using him, you will have to use the shotgun and the grenades very well. The M92F shots vary depending on the target, you can choose lethal head shots or stun them to continue with a body-to-body attack. When bringing down an enemy, you should stand next to the victim’s head facing toward his feet, this position guarantees that you will kill him instantly, however, he can recover from a stomp on his torso.

Sheva (bsaa)
This initial character is weak when you are playing in Solo Mode, but very effective when using it as a support character in Duo Mode. She is equipped with an excellent quantity of ammunition so you can focus in getting the time bonuses.
The Dragunov SVD can be used to eliminate the bosses or to kill distant enemies and create combos, but try to put yourself in cover while you are using it. If you need a powerful weapon to stop the approaching enemies, use the rifle’s drilling force to kill several Majini at once.

Jill (bsaa)
To unlock her get a range “A” or Superior in Public Assembly.
The Jill’s exclusive Px4 revolver has an astonishing 87.5% critic. Its headshots cause an instant death almost every time.
If you face stronger enemies or large groups of them, the MP5 has been improved to the maximum to damage the hordes with its drilling power. Plus, it comes with blinding grenades that will kill instantly the mutans of the plagues and will give you the chance to perform body-to-body attacks with the others.

Wesker (midnight)
To unlock him get an “A” range or Superior in The Mines.
Wesker is, probably, the strongest character of the bonus stages of RE5 and has secret movements that will allow him to move quickly around the map if they are used properly and with moderation.
The move Run (Shift+x) will subtract a small amount of health.
The H&K PB is a piercing weapon that works well to kill with a shot several Majini grouped or aligned, but you will have to change to the amazing S&W M500 to kill the chiefs and B. O. W. The enemies will release the magnum ammunition when dead.
Wesker’s fastest and most effective body-to-body attack is the explosive Cobra’s Fang with his hand palm, which you can perform after a headshot or a blinding grenade. Just like Chris’s stomp, the final Achilles Heel attack works best from the side of the head.

Chris (safari)
To unlock him get an “A” range or superior in Village.
The rocket launchers are obviously the most powerful weapon against the chiefs, but if they are also surrounded by hordes of enemies your score will thank you. In many situations the M3 will end with horde of Majini and you can try to get several deaths with every shot. The only advantage of the SIG P226 is its great power.
Both weapons have low capacity, so you will have to recharge them frequently. Use the tricks indicated above to avoid losing too much time.

Sheva (party)
To unlock her get an “A” range or superior in Ancient Ruins
The Jail Breaker will be your main weapon, use the improved shotgun range to break through or stun enemies and then give the final body-to-body strike.
Although this Sheva can be perfectly used in the Solo Mode games, the great power of her improved S75 also makes her a very valuable character in some scenarios when playing in the Duo Mode.

Chris (S. T. A. R. S.)
To unlock him get an “A” range or Superior in Experimentation Complex.
When reserving the S&W M29 for the toughest enemies you will change weapons very frequently. When facing only one enemy with the machine gun you will be able to cause significant damage if you have enough time.
Try using the grenade launcher the electric charges it has will eliminate the mutants and you can finish the stunned enemies with the SIG 556 or with body-to-body attacks. Some enemies may release various charges for the grenade launcher, do not let nitrogen ones escape.

Sheva (Tribal)
To unlock him get an “A” range or Superior in Missile Area.
If you handle well the English bow you can quickly kill many normal Majini with just one shot. Besides, its plenty number of arrows will allow you to shot for longer timer and get bigger combos without fearing running out of ammunition.
The well-used Nitrogen loads will also be very helpful. If you finish a large group of paralyzed enemies with weaponless movements (if it’s possible, with a circular kick), you will get a longer combo and more time (between 15 and 20 seconds for every 3 or 4 enemies), therefore, the initial charger of Sheeva can equal a couple of time bonuses if you use them properly.

Jill (Combat Suit)
To unlock him get an “A” range or Superior in Boat Deck.
Consider this the perfect version of Jill for Duo Mode games. Using a semiautomatic sniper rifle would be a suicide in most cases, but from a protected platform you can shoot quickly or cover yourself with grenades. The VZ61 is also designed for head shots with critical % and with it you will get opportunities for you or your partner to execute a body-to-body attack.

Wesker (S. T. A. R. S.)
To unlock him get an “A” range or Superior in Prison.
Wesker S. T. A. R. S. has all the secret abilities of the Midnight model and even better weapons. His Samurai Edge is the most powerful revolver of the game; use it to create opportunities to execute a Cobra Fang after one or two shots. The L. Hank is great to end with the bosses from a safe distant.
When facing groups of enemies, is best to use the Hydra and its improved range. Its mid-range efficiency compensates for the frequency with which you will have to recharge it.
Maps and Videos
Public Assembly

At this level you can learn the easiest route to get the time bonuses and combo bonuses.
Techniques to eliminate the Boss Executioner: Stay away and do not stop injuring him, as long as he hasn’t started an attack you can pass next to him without any damage, you can stun him with blinding grenades, acid charges, explosive barrels and head shots; when managing to stun him, do a body-to-body attack. You will finish him quickly with a magnum.
Staying inside the bus is a good choice, no enemies will appear behind you and you will be safe from the executioner.

The Mines

To unlock this scenario you will have to get a “B” range or Superior in Public Assembly.
At this level you will find two chickens; the elevated platforms are ideal to heal and cover yourself from the Reaper, but not for the Combos; here it is necessary to always be in movement so you cannot get hurt.
Techniques to eliminate the Boss Reaper: Never stop moving while you fight this creature, the weak points are in his fleshy masses with white and bright larvae shape, they will only be exposed for a few moments, you can also tear off his limbs by shooting them, but he will not die. It is also possible to stun him with a blinding grenade to expose their weak points.

Village

To unlock this scenario you will have to get a “B” range or a Superior in The Mines.
At this level is advisable to use blinding grenades to exterminate the Bui Kichwa, kipepeo y Cephalo.
The chicken will run to hide since the start of this level, if you cannot shoot it use a grenade or the explosive barrels.
Techniques to eliminate the Boss Giant Majini: His mask is invulnerable, so direct your shoots to the torso and legs until they kneel and attack him body-to-body. This enemy is immune to blinding, electric and nitrogen charges.

Ancient Ruins

To unlock this scenario you will have to get a “B” range or Superior in Town.
While you get familiar with this map orientate yourself reminding where the combo bonuses are so you can get a better score.
Techniques: at this level it is advisable to use blinding grenades to finish the duvalia and Cephalo, some areas will be left without enemies if you stay much time in them, then you can go to a good position to shoot from distance (see end of the video).

Experimental Facility

The dangerous enemies here are the Majini (rocket launcher) and the lickers β.
Techniques: The lickers β move in herds, so you can try attract them to finish them with grenades, but it is important to keep distance so his tongue attack doesn’t get you, an elevated area (the one in the video) is a great place to make combos and when cleaning the area collect ammunition (trying not to lose the combo) and return to the same place.

Missile Area

The Boss Gatling Gun Majini will pass the flames without any damage so you won’t have a good place to cover yourself; the advisable is to be always in movement.
Techniques to eliminate the Boss Gatling Gun Majini: it is immune to incendiary and electric charges, use explosives such as proximity bombs and shoot them in the head with a powerful weapon to stun him and attack him body-to-body.

Ship Deck

At this level you will have plenty of time to manage your inventory when climbing stairs, the Chainsaw Majini can reach the top with a jump.
Techniques to eliminate the Boss Chainsaw Majini: To stun him you will need grenades, shooting him in the head with a powerful weapon sucha as a shotgun or a magnum, after stunning him, attack him body-to-body. The best option is get a rocket launcher to finish them, but if this enemies do not explode when dead means they will revive but with low resistance and will die quickly.

Prison

This map is very complicated, try reminding a good route to get all the time and combo bonuses; you can knock down walls with grenades to move faster around this level.
Techniques to eliminate the Boss Red Executioner: This one only appears at this level, it has an improved resistance compared to the Executioner, its weak point is a pink zone that grows in the upper part of its back use hand grenades, blinding grenades and nitrogen charges to stun him and attack it body-to-body; also shoot him in the head is equally efficient to stun it and punch it. There is a good position in which you can make combos but keep your distance from the Boss Red Executioner.
7 Comments
Rage 4 Mar @ 8:33pm 
This is amazing but could you make a similar guide for Resident Evil 4 Remake??!:steammocking:
Arman 12 Mar, 2022 @ 3:54pm 
add me for play
LeoShaddz 4 Mar, 2022 @ 2:58am 
Awesome guide! Do you have a guide like this for Resident Evil 6 Mercenaries?
Sraigius 19 Jul, 2020 @ 8:38am 
Here's a little advice to all the people regarding lickers.

Make sure to rebind your "partner action" button from V (default) into middle mouse button. Because pressing F+V when lickers try to tackle you can prove quite difficult, because your left hand is on WASD. Meanwhile pressing middle mouse button is not a problem, because you're always keeping your right hand on your mouse.

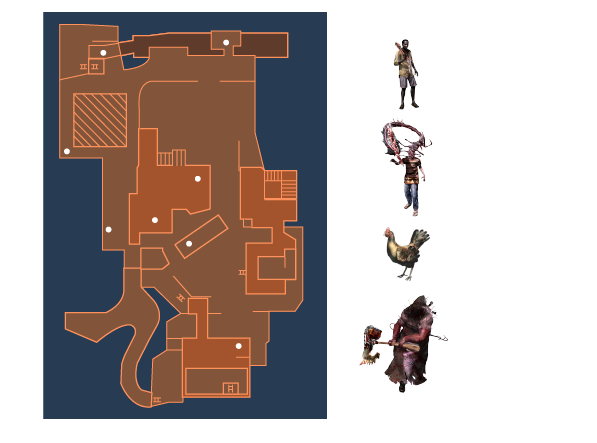
And when lickers roll out and you can hear the distinctive walking sound that they make (clink clink clink clink) MAKE SURE that you keep your left hand's index finger ready on F button while you shoot them in aiming mode. So that if one of them ugly fuckers try to tackle you, you can quickly press F + middle mouse button and counteract it with a melee.

Just make sure to keep your fingers ready on F + middle mouse button as much as possible.

Lickers and reapers, only lickers and reapers. I hate both of them with a passion. And i'm pretty sure that they hate me too. :steamhappy:
BattleMongoose 19 Jul, 2020 @ 7:01am 
Here's a funny tactic in duo when fighting the Reaper. Turn your back on him, he will attack you but he's incapable of instakilling you. Just let your partner take him out with grenades and such and use your back as a buffer. You'll take damage but you won't get a game over.
Bananos 12 Jul, 2020 @ 6:39am 
:vanilla2: very helpful guide :wesker:
Sraigius 2 Aug, 2019 @ 10:31pm 
Awesome guide my friend! Very informative and useful for memorizing the placement of time extensions/bonus extensions in OG mercenaries!
:47_thumb_up: and ⭐ and god bless :steamhappy: