Songbringer

Songbringer

35 ratings
100% Completion Walkthrough: NORRIS
By QuaestComm
In this guide, I will tell you all you need to know to achieve 100% Items and 100% Map on runs on the seed NORRIS. Principles contained within this guide can be applied to runs on other seeds, too!
   
Award
Favorite
Favorited
Unfavorite
Introduction
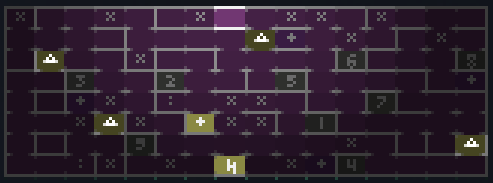
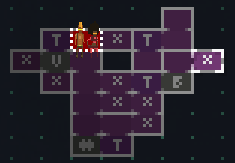
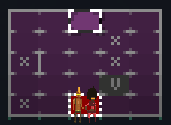
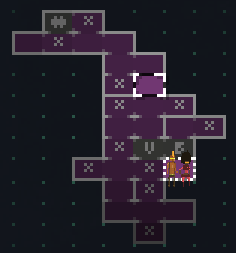
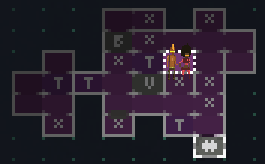
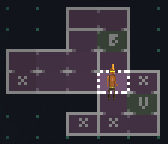
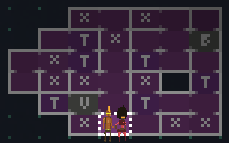
Welcome to my 100% completion walkthrough for the seed NORRIS! I assume you can handle combat on your own, so the principal contents of this walkthrough will be focused on the items and secrets contained within the seeded world. For most major sections, I have also included fully-explored maps so you can more easily tell what remains to be explored in each region of significance.

Some notes before I proceed to the details:

I gathered all the information for this guide on a Normal run while in possession of the Victor's Emblem. If you do not yet possess the Victor's Emblem (i.e. you have never won any runs to date) and you start a Normal run, you may find yourself restricted heavily by brambles not mentioned in the guide - this is a modification intended to encourage you to find and pick up the Nanosword before you proceed into more dangerous territory. If you want your first winning run to be a swordless one, you will need to start a Permadeath run rather than a Normal run so that the extra brambles do not appear.

During my run, I ran into a quirky bug a couple of times involving secrets occuring in the same room as items on the ground in swordless dungeons. If you go for the secret before grabbing the item on the ground, you will end up getting the item on the ground from the secret. Going on to pick up the item on the ground will not give you a duplicate. (If you instead grab the item lying on the ground first, the secret will disappear, suggesting that items on the ground are actually secret items moved out of their hiding places.)

Items which count for 100% Items do not detract from item progress if they are consumed - thus, Bio Detectors and Scanner Drones can be used freely, and elemental cubes can be fused into items, without stopping you from achieving 100% Items.

Definitions
Throughout this guide I use several key words and phrases which I define here:

Secrets
  • Augmented Senses: An effect bestowed on Roq by the use of Meditate in rooms with secrets and by the consumption of Cactus in any room. It reveals most secrets while in effect.
  • Secret Path: An invisible connection between two rooms. Augmented senses will reveal these connections, but they can be traversed regardless of whether they have been revealed.
  • Secret Wall: A connection between two rooms initially blocked by a wall. Augmented senses will reveal the connection, but the wall must be blown up by a Matter Bomb before the passageway opens up.
  • Secret Bush: A bush which spawns an item when damaged. Augmented senses will reveal secret bushes in the room.
  • Secret Cave: An underground room which has its entrance on the Overworld concealed by a bush or cracked wall. Augmented senses will reveal the locations of Secret Cave entrances, but they are not usable until the bush has been set aflame or the cracked wall blown up by a Matter Bomb.
  • Water Secret: An item concealed within a region of liquid. Augmented senses will reveal the locations of Water Secrets, but the regions must be frozen by an Ice-infused item in order to extract the items hidden within them.
Obstacles
  • Brambles: Regrowing weeds which block progress. Can be temporarily destroyed by any damage source to open a way through them.
  • Cracked Pillar: A pillar with many large cracks. Can only be destroyed with explosives.
  • Torch Pillar: A pillar with an indent in the top. Lowers into the ground when set aflame.
  • Movable Pillar: A pillar which can be moved one square by Roq. Cannot be destroyed.
  • Blue Pillar: A pillar with a blue orb in the middle. Can only be destroyed by the projectile of Ghost Sword/Ghost Hat.
  • Cyan Pillar: A pillar with a cyan orb in the middle. Shoots cyan shots toward Roq which can be reflected back with Courage Shield to destroy the pillar.
  • Regrowing PIllar: A dark pillar which rapidly regenerates when damaged. Can only be destroyed by being hit rapidly enough - though this can be done with the Top Hat Drone, it is most reliably executed with the Gloves-enhanced Nanosword.
  • Purple/Orange Switch Pillar: A metallic pillar with purple/orange detailing which can be raised or lowered by pressing a floor button elsewhere.
  • Large Puddle: A large patch of liquid. Without Blink Orb Maxed, requires the usage of an Ice-infused item to cross.
  • Acid Spikes: Pairs of curved brown spikes. Can only be destroyed by an Acid-infused item.
  • Hot Tile: A glowing patch of ground. Without Blink Orb Maxed, can only be crossed once Roq has acquired Shadrach's Tear.
Other Objects of Interest
  • Lore Obelisk: A black pyramid which holds knowledge concerning a significant entity, usually a boss. Using Meditate near one grants the knowledge as well as a Sarira.
  • Lore Rock: A large stone wall in the Overworld which holds knowledge of ancient history. Using Meditate near one grants the knowledge as well as a Sarira.
  • Switch Block: A gray cube with green glowing lines, found in some dungeon rooms. Hitting it with the right kind of item (usually Nanosword or Blink Orb) activates something in the room and causes the block to retract into the ground. Some switch blocks require augmented senses to become tangible so that they can be hit.
  • Item Pedestal: A black pillar with a black box on top and red or green detailing, found in dungeons. Red detailing indicates that the box cannot be opened yet while green detailing indicates that the box is ready to open.
  • Courage Box: A black box, found most frequently in front of boss doors and within boss rooms, which can be broken open to access a Small Demon's Tooth.
Overworld (Part 1)
The Overworld, designated in coordinates by region index 0, is by far the largest region in Songbringer. At the start of a run, Roq starts here and gains a free Bio Detector as he wanders away from the crash site.

For all regions, rooms within the regions are given in an X.Y.Z format where X is the horizontal position relative to the lower-left corner, Y is the vertical position relative to the lower-left corner, and Z is the region index.

Courage Refills
Courage Refills fully replenish Roq's Courage for free and grant an opportunity to save your progress. The Teleport Cube, once acquired, lets you teleport directly to these devices, marked on the map by triangle symbols, from the surface of the Overworld and from most Overworld caves.

Locations: 3.2.0, 1.5.0, 8.6.0, 15.1.0

Hoverbikes
Four wrecked hoverbikes are scattered across the Overworld. Each can be blown up to spawn a small Diamond Stash.
  • Roq's Hoverbike 7.0.0 (gives 50 Diamonds)
  • Smalls's Hoverbike 4.2.0 (gives 55 Diamonds)
  • Ren's Hoverbike 0.7.0 (gives 60 Diamonds)
  • Kiel's Hoverbike 6.7.0 (gives 65 Diamonds)

Stores
Five stores can be found in the Overworld. Marked on the map by plus symbols, each initially offers three items required for 100% Items; on subsequent visits, bought items are replaced with useful pickups. All purchases are made using Diamonds.
  • Southern Store
    • Entrance Location: 10.0.0
    • Initial Stock: Lightning (100), Proton Shield (90), Bio Detector (30)
  • Central Store
    • Entrance Location: 6.2.0
    • Initial Stock: Bio Detector (30), Spirits (20), Scanner Drones (40)
    • Special: The only store to sell Spirits. Spirits only appears if Roq has Spirits Quest or at least one Empty Flask.
  • Western Store
    • Entrance Location: 2.3.0
    • Initial Stock: Matter Bomb Container (80), Bio Detector (30), Magnetic Top Hat Drones (80)
  • Northeastern Store
    • Entrance Location: 9.6.0 (behind waterfall, requires explosives to open)
    • Initial Stock: Fire (120), Sack (80), Blink Orb (500)
  • Eastern Store
    • Entrance Location: 15.4.0
    • Initial Stock: Kilobomb Container (420), Scanner Drones (40), Hyper Top Hat Drones (250)

Lore Rocks
Four Lore Rocks are scattered throughout the Overworld. The knowledge gained from them is always in the same order regardless of the order in which they are visited.

Locations: 5.0.0, 3.0.0, 4.5.0, 14.6.0

Quick-Travel Tunnels
Two Quick-Travel Tunnels connect distant regions of the Overworld. Both tunnels hold a courage box at one end, and the entrances are found in rooms with waterfalls.

Quick-Travel Tunnel 1
  • West End: 1.2.0
  • East End: 14.0.0
  • Entrance Locations: Behind waterfalls (requires explosives to open)

Quick-Travel Tunnel 2
  • West End: 1.7.0
  • East End: 14.7.0
  • Entrance Locations: Under bushes (requires fire to open)

Obstacles
Traversal between certain pairs of rooms is initially blocked by special obstacles which usually require the appropriate item to bypass. However, if both rooms of a pair are visited, the barrier between them will be lowered on the next visit to either room.

  • 4-5.2.0: Blocked by cracked pillars.
  • 7.4-5.0: Blocked by cracked pillars.
  • 15.0-1.0: Blocked by cracked pillars.
  • 1-2.2.0: Blocked by brambles.
  • 3.4-5.0: Blocked by cracked pillars.
  • 1.4-5.0: Blocked by blue pillars.
  • 10.5-6.0: Blocked by torch pillars.

Secret Paths
Two rooms of the Overworld are only accessible via secret paths:
  • 1.1.0 must be accessed via a secret path connecting it to 1.0.0
  • 1.3.0, which contains Durin the wandering Drobth musician, must be accessed via a secret path connecting it to 0.3.0. The path is only usable while Durin is leading you to it (which only occurs at night).

Secret Caves
Riches and useful items can be found underneath the surfaces of many Overworld rooms. Many of them contain items required for 100% Items.

Locations and Contents
  • 10.1.0: The Jibstache
  • 9.3.0: 95-Diamond Stash
  • 5.3.0: Empty Flask
  • 5.1.0: Courage Shield
  • 6.4.0: 85-Diamond Stash
  • 12.0.0: Kilobomb Container
  • 14.0.0: 120-Diamond Stash
  • 0.0.0: Cactus Pouch
  • 1.1.0: 95-Diamond Stash
  • 2.0.0: Lore Obelisk (gives knowledge of Bath Kol, boss of Songbringer Lower Deck)
  • 3.1.0: Sack
  • 1.3.0: 80-Diamond Stash
  • 2.5.0: Cactus Pouch
  • 1.6.0: Scanner Drones
  • 0.5.0: Light Upgrade
  • 2.7.0: Cactus Pouch
  • 4.7.0: 90-Diamond Stash
  • 3.6.0: 100-Diamond Stash
  • 6.6.0: 105-Diamond Stash
  • 7.5.0: 90-Diamond Stash
  • 8.7.0: 110-Diamond Stash
  • 8.4.0: 80-Diamond Stash
  • 13.6.0: Cactus Pouch
  • 15.6.0: Bio Detector
  • 14.5.0: Scanner Drones
  • 14.3.0: Light Upgrade
  • 12.4.0: 115-Diamond Stash

Other Secrets
Not all secrets come in the form of paths and caves. A rare few come in other forms:
  • In 9.0.0, a secret bush conceals a Quarter Demon's Tooth.
  • In 8.2.0, killing all enemies spawns a Quarter Demon's Tooth. Additionally, lighting all four torch pillars in the room spawns a random pickup (?).
  • In 7.3.0, a water secret holds a Matter Bomb Container.
  • Meditating in front of the giant sphere in 11.1.0 causes it to crack. Blowing up the cracked sphere with a Kilobomb starts the boss fight with Kusanagi. Defeating this boss awards an Empty Flask.
  • There are four small floating spheres in 2.2.0 which make musical notes when struck. Hitting all four at once (using explosives) spawns a 70-Diamond Stash.
  • In 8.5.0, there is a pond with a winch in the middle. Hitting the winch with a Top Hat Drone raises some submerged platforms and produces a Barrel of Lutefisk if Roq does not already have one in inventory.
  • 11.6.0 contains a multitude of stone pillars. Destroying a specific one spawns a Quarter Demon's Tooth.
  • A secret bush in 12.7.0 conceals a Cactus Pouch.
Overworld (Part 2)
Dungeon Entrances
The entrances for dungeons 1 through 9 are found in the following rooms:
  • Dungeon 1: 10.2.0
  • Dungeon 2: 5.4.0
  • Dungeon 3: 2.4.0
  • Dungeon 4: 11.0.0
  • Dungeon 5: 9.4.0
  • Dungeon 6: 11.5.0
  • Dungeon 7: 12.3.0
  • Dungeon 8: 15.5.0 (requires Cup to enter)
  • Dungeon 9: 4.1.0 (requires Velle to enter, Blink Extended+ to traverse foyer)

Other Caves of Interest
  • Sword Cave: Entrance in 7.0.0. Contains the Nanosword. Picking up the Nanosword and defeating the miniboss that spawns grants Charge. Extinguishing all four flames in the cave spawns a 75-Diamond Stash.
  • Velle Cave: Region index -18. Entrance in 7.2.0. Contains the Top Hat Drone (0.0.-18), a Quarter Demon's Tooth (0.1.-18, via undetectable secret path from 0.0.-18), and Velle (1.1.-18, requires a Kilobomb to release). Standing in front of the figure in 0.0.-18 while holding the Victor's Emblem will spawn Eiael's Snare if you are in the version 1.2.0 beta.
  • Hunter's Stash: Entrance in 8.3.0. Contains a 40-Diamond Stash.
  • Zumesh Cave: Entrance in 9.7.0. Contains two dated journal entries belonging to Monk Zumesh. If you are in the version 1.2.0 beta, reading both entries will open a way upward leading to the Trial of Ren, the source of Meditate's upgrade Battle Meditation.

Other Points of Interest
  • Crash Site (7.0.0): Roq wakes up here after the conclusion of the introduction. Dead Jib and the Droidsmith are brought here.
  • Kusanagi's Domain: While Kusanagi is alive, it will steal items from Roq if he lingers for too long in 10.1.0 or 11.0.0 (its presence is indicated only by black footsteps appearing out of thin air).
  • Hunter's Camp (8.3.0): The Hunter dwelling here gives Spirits Quest to Roq on first encounter. If Roq returns with Spirits (the passive quest item), he will give Spirits (the equipment item), an item required for 100% Items.
  • Mysterious Ribs (9.2.0): Giant ribs protrude out of the ground here. If the Top Hat Drone has not already been picked up from the Velle Cave, a tough Drobth miniboss will spawn here and drop the item when it is defeated.
  • Stone Archway (3.3.0): If Jib is alive, Roq and Jib will talk about the structure.
  • Smalls's Camp (4.2.0): Smalls, a fellow scout, has set up a campfire here. Bringing him a Barrel of Lutefisk will award Roq with Playa Dust.
  • War Memorial (3.7.0): If Jib is alive, Roq and Jib will talk about this artifact of the Great War.
General Notes on Dungeons
The dungeons of Songbringer share several general aspects which are worth noting before we move on to the specific aspects of each individual dungeon.

Common Rooms - Normal Dungeons
  • Entrance: The starting room of the dungeon, marked on the map by the letter 'E'. If the boss door is powered and the Pre-Boss Room has been visited, a portal appears here which warps Roq to that room.
  • Guarded Stairs: A room, marked on the map by the letter 'V', which usually contains a hive covering a set of stairs leading down to the dungeon's first item. This hive will periodically spawn small enemies until they are all dead, becoming vulnerable to damage once this occurs.
  • Lore Obelisk Room: Often marked as a Point of Interest on the map (i.e. with a square or an X depending on completion status), this room contains a Lore Obelisk which usually holds knowledge concerning the dungeon's boss.
  • Tunnel: Marked on the map by the letter 'T', each Tunnel room connects to another Tunnel room somewhere else within the dungeon through an underground passage.
  • Inter-Dungeon Passage: Marked as a Point of Interest on the map, this room has stairs leading down to one end of a tunnel linking two different dungeons together. The tunnel usually has an obstacle in the middle requiring an item from the lower-numbered dungeon to clear or cross.
  • Switch: Marked on the map by a "brain" symbol, this room has a very high monster density compared to most other rooms in the dungeon. Clearing the Switch room is the only way to power the boss door in most dungeons. Fortunately, the room immediately adjacent to the Switch room usually contains an obstacle which must be cleared using something found at the bottom of the dungeon's Guarded Stairs, allowing you to prepare in advance for an intense fight.
  • Pre-Boss Room: Marked on the map by the letter 'B', the Pre-Boss Room holds two courage boxes and the dungeon's boss door. If the door is powered, a portal opens in this room which warps Roq back to the Entrance.
  • Boss Room: Located just above the Pre-Boss Room, the Boss Room, usually holding two courage boxes, is where the boss of the dungeon resides. Defeating the boss usually spawns a large amount of pickups as well as a Demon's Tooth - acquiring the Demon's Tooth is sometimes mandatory in order to open the path to the Post-Boss Room.
  • Post-Boss Room: Located adjacent to, but not below, the Boss Room and marked as a Point of Interest, the Post-Boss Room usually contains the dungeon's second item as well as a portal back to the Overworld entrance for the dungeon.

Swordless Dungeons - Deviations
  • Entrance: It is impossible to return to the Overworld entrance from the Entrance room in swordless dungeons. Zero takes the Nanosword from Roq in this room, placing it in the Post-Boss Room.
  • Beacon Room: The replacement for Switch rooms in swordless dungeons, marked as Points of Interest. Some task must be accomplished in all three Beacon Rooms of a swordless dungeon before the boss door can be opened.
  • Guarded Stairs: No hive obstructs access to the stairs in swordless dungeons, allowing free access to whatever lies at the bottom of the stairs.
  • Pre-Boss Room: The courage boxes are replaced by three (or two if access is allowed from beneath) beacons which light up as the Beacon Rooms are cleared. Once all beacons are lit, the boss door, which does not open of its accord in swordless dungeons, can then be opened using Meditate.
  • Boss Room: Swordless dungeons do not have bosses. Instead, the Demon's Tooth is already in the room, but it is guarded by fear ghosts which attempt to prevent you from touching it and killing them all instantly.
  • Post-Boss Room: The second item, rather than being found here, is located somewhere else in the dungeon. Unless Roq has not yet taken the Nanosword from the Sword Cave, the portal is replaced by the Nanosword, which has a similar effect when retrieved.
Dungeon 1
Type: Easy Dungeon
Region Index: 1
Guarded Stairs Item: Matter Bomb Container
Boss: Sindraphon
Post-Boss Room Item: Blink Orb
Notes:
  • The boss door is always powered - this is why this dungeon has no Switch room.

Additional Locations of Interest
  • 3.3.1: Entrance
  • 4.3.1: Lore Obelisk Room
  • 2.2.1: Scenario Room
    • Doors lock upon entrance. Pushing the marked movable pillar unlocks the doors.
  • 0.1.1: Point of Interest
    • Stairs lead down to a room with a Keycard and an array of broken cryo sleep pods.
  • 5.2.1: Inter-Dungeon Passage 1 Entrance
    • Passage 1, connecting dungeon 1 with dungeon 2, is blocked by cracked pillars in the middle.

Obstacles
  • 3.3-4.1: Locked door behind brambles.
  • 2-3.1.1: Locked door behind brambles.
  • 4.4-5.1: Cracked pillars.
  • 5.2-3.1: Blue pillars.

Secret Paths and Walls
  • 4.3-4.1: Secret path/wall hybrid.

Item Pedestals and Loose Items
  • 4.3.1: Keycard
  • 1.1.1: Bio Detector
  • 5.4.1: Keycard
  • 5.2.1: Scanner Drones
Dungeon 2
Type: Easy Dungeon
Region Index: 2
Guarded Stairs Item: Ghost Sword
Boss: Lassarium
Post-Boss Room Item: Teleport Cube
Notes:
  • The Switch room, rather than being a high-density monster room, is a miniboss room with three ice dragons as the minibosses.

Additional Locations of Interest
  • 2.2.2: Entrance
  • 2.1.2: Lore Obelisk Room
  • 4.4.2: Inter-Dungeon Passage 1 Entrance
    • Passage 1, connecting dungeon 1 with dungeon 2, is blocked by cracked pillars in the middle.

Obstacles
  • 2.1-2.2: Locked door behind cracked pillars.
  • 2-3.3.2: Locked door behind brambles.
  • 3.2-3.2: Locked door behind cracked pillars.
  • 3-4.4.2: Torch pillars.

Secret Paths and Walls
  • 2-3.3.2: Secret path.
  • 3-4.3.2: Secret path.
  • 4.2-3.2: Secret path.
  • 4-5.3.2: Secret wall.
  • 4.3-4.2: Secret wall.
  • 2-3.1.2: Secret path.
  • 1.1-2.2: Secret wall.

Item Pedestals and Loose Items
  • 2.3.2: Keycard
  • 4.3.2: Bio Detector
  • 4.1.2: Matter Bomb Container
  • 3.1.2: Scanner Drones
  • 3.4.2: Keycard
  • 1.2.2: Keycard
  • 2.0.2: Keycard
  • 4.4.2: Cactus Pouch
Dungeon 3
Type: Swordless Dungeon
Region Index: 3
Guarded Stairs Item: Lighter
Notes:
  • Cactus Pouch obtained just before entering the dungeon for the first time.
  • Beacon Rooms are cleared by lighting the torch pillars within them.
  • Zero grants Meditate to Roq upon entering the Pre-Boss Room with all beacons lit.

Additional Locations of Interest
  • 1.2.3: Entrance
  • 0.3.3: Lore Obelisk (holds knowledge of Monk Zumesh)
  • 1.1.3: Beacon Room
  • 1.3.3: Beacon Room
  • 0.4.3: Beacon Room

Obstacles
  • 2-3.1.3: Large puddle.

Secret Paths
  • 3.1-2.3

Loose and Secret Items
  • 1.0.3: Bio Detector (secret bush)
  • 2.0.3: Cup
  • 0.3.3: Matter Bomb Container (secret bush)
  • 1.4.3: Scanner Drones (secret bush)
  • 3.1.3: Cactus Pouch
Dungeon 4
Type: Easy Dungeon
Region Index: 4
Guarded Stairs Item: Ice
Boss: Radruiel
Post-Boss Room Item: Parry (?)

Additional Locations of Interest
  • 2.5.4: Entrance
  • 3.3.4: Lore Obelisk Room
  • 2.2.4: Falling Bomb Room
  • 0.4.4: Inter-Dungeon Passage 2 Entrance
    • Passage 2, connecting dungeon 4 with dungeon 7, is blocked by blue pillars in the middle.

Tunnel Pairs
  • 1.5.4<->4.5.4
  • 3.0.4<->4.3.4

Obstacles
  • 2.3-4.4: Locked door behind brambles.
  • 0-1.4.4: Locked door behind acid spikes.
  • 2-3.0.4: Large puddle.

Secret Paths and Walls
  • 3-4.5.4: Secret path.
  • 2.1-2.4: Secret wall.
  • 4.3-4.4: Secret path.
  • 3.1-2.4: Secret path.
  • 3-4.1.4: Secret wall.
  • 4.1-2.4: Secret wall.

Item Pedestals and Loose Items
  • 1.3.4: Keycard
  • 3.3.4: Matter Bomb Container
  • 3.2.4: Bio Detector
  • 4.1.4: Scanner Drones (secret switch block)
  • 4.2.4: Keycard
  • 3.5.4: Keycard
  • 0.4.4: Matter Bomb Container
Dungeon 5
This dungeon has 3 floors. The first floor is 5 rooms wide by 5 rooms tall, the second floor is 3 rooms wide by 3 rooms tall, and the last floor fits in a 2-room by 2-room square.

Type: Difficult Dungeon
Region Index: 5 (Floor 1), 56 (Floor 2), 57 (Floor 3)
Guarded Stairs Item: Acid
Boss: Murmuroth
Post-Boss Room Item: Boots
Notes:
  • Boss door in Pre-Boss Room on Floor 2 (0.1.56) blocks way to Floor 2 Exit. Murmuroth makes a brief appearance here while alive.
  • Boss Room located above Floor 3 Entrance.
Additional Locations of Interest
  • 2.0.5: Floor 1 Entrance
  • 2.4.5: Floor 1 Exit
  • 1.0.56: Floor 2 Entrance
  • 0.2.56: Floor 2 Exit
  • 0.0.57: Floor 3 Entrance
  • 3.0.5: Lore Obelisk Room
  • 2.3.5: Falling Bomb Room

Obstacles
  • 0-1.0.5: Hot tiles.
  • 3.4.5: Acid spikes surrounded by liquid impede access to 2.4.5
  • 1-2.2.56: Acid spikes surrounded by liquid.
  • 0.0-1.57: Acid spikes with liquid on either side

Secret Paths and Walls
  • 0.0-1.5: Secret wall.
  • 0.1-2.5: Secret wall.
  • 0.2-3.5: Secret wall.
  • 0-1.2.5: Secret path.

Item Pedestals and Loose Items
  • 0.0.5: Sack (secret switch block)
  • 0.2.5: Scanner Drones
  • 3.3.5: Bio Detector
  • 3.2.5: Matter Bomb Container
Dungeon 6
Type: Difficult Dungeon
Region Index: 6
Guarded Stairs Item: Shadrach's Tear
Boss: Puriel
Post-Boss Room Item: Courage Shield
Additional Locations of Interest
  • 5.3.6: Entrance
  • 4.5.6: Lore Obelisk Room
  • 4.7.6: Falling Bomb Room

Hot Rooms
  • 3.6.6
  • 1.9.6
  • 2.10.6
  • 0.9.6
  • 3.1.6
  • 4.1.6
  • 4.5.6
  • 5.6.6
  • 4.7.6

Obstacles
  • 3-4.8.6: Locked door behind large puddle.
  • 1.9-10.6: Hot tiles.
  • 3.1-2.6: Locked door behind torch pillars.
  • 4.1-2.6: Locked door behind cracked pillars.
  • 4.4-5.6: Locked door behind brambles.
  • 3-4.6.6: Regrowing pillars.
  • 4.6-7.6: Blue pillars.

Secret Paths and Walls
  • 3-4.3.6: Secret wall.
  • 3.3-4.6: Secret wall.
  • 3-4.4.6: Secret wall.
  • 3.5-6.6: Secret wall.
  • 3.6-7.6: Secret path.
  • 3.7-8.6: Secret wall.
  • 4-5.6.6: Secret wall.

Item Pedestals and Loose Items
  • 4.3.6: Keycard
  • 2.3.6: Keycard (from killed monster)
  • 3.4.6: Keycard
  • 3.6.6: Light Upgrade (secret switch block)
  • 3.7.6: Keycard
  • 1.9.6: Bio Detector (from killed monster)
  • 2.10.6: Matter Bomb Container
  • 4.0.6: Keycard
  • 4.2.6: Keycard
  • 5.6.6: Scanner Drones
Dungeon 7
Type: Difficult Dungeon
Region Index: 7
Guarded Stairs Item: Gloves
Boss: Eiael
Post-Boss Room Item: Vibrachip
Notes:
  • The Pre-Boss and Boss Rooms of other dungeons are replaced by the Lower and Upper Boss Rooms in this dungeon. The quick-travel portal still takes Roq to the Lower Boss Room (marked on the map by the letter 'B'), but neither room contains courage boxes.
  • Due to the lack of a Pre-Boss Room, there is no boss door in this dungeon. Rather, all doors allowing entrance into the Lower Boss Room are initially unpowered and only become operational once the Switch room is cleared.

Additional Locations of Interest
  • 5.4.7: Entrance
  • 4.5.7: Lore Obelisk Room
  • 7.4.7: Falling Bomb Room
  • 3.1.7: Inter-Dungeon Passage 2 Entrance
    • Passage 2, connecting dungeon 4 with dungeon 7, is blocked by blue pillars in the middle.

Tunnel Pairs
  • 1.3.7<->4.4.7
  • 2.3.7<->5.1.7

Obstacles
  • 3.1-2.7: Cyan pillars.
  • 4.3-4.7: Locked door behind brambles.
  • 5-6.5.7: Locked door behind cracked pillars.
  • 6.0-1.7: Regrowing pillars.

Secret Paths and Walls (still to-do)
  • 1-2.3.7: Secret path.
  • 3-4.4.7: Secret wall.
  • 6-7.4.7: Secret path.
  • 6.4-5.7: Secret wall.
  • 6.2-3.7: Secret wall.
  • 6.1-2.7: Secret wall.
  • 4-5.2.7: Secret wall.
  • 5-6.2.7: Secret wall.
  • 4-5.3.7: Secret path.

Item Pedestals and Loose Items
  • 3.1.7: [Fear] (secret switch block)
  • 3.4.7: Keycard
  • 6.6.7: Keycard
  • 6.3.7: Keycard
  • 6.2.7: Bio Detector
  • 5.3.7: Scanner Drones
  • 4.5.7: Keycard
  • 1.1.7: Matter Bomb Container
Dungeon 8

Type: Swordless Dungeon
Region Index: 8
Guarded Stairs Item: Courage Shield
Notes:
  • Dungeon entered by using Cup to drink from a specific pool.
  • Beacon Rooms are cleared by destroying the cyan pillars within them.

Additional Locations of Interest
  • 3.2.8: Entrance / Pillar Switch
  • 1.2.8: Lore Obelisk (holds knowledge of Sand of the Mer People)
  • 0.2.8: Beacon Room
  • 3.0.8: Beacon Room
  • 4.2.8: Beacon Room
  • 2.4.8: Pillar Switch

Obstacles
  • 3.3.8: Orange switch pillars impede traversal of this room.
  • 3.0.8: Cyan pillar is surrounded by purple switch pillars.

Secret Paths
  • 2-3.0.8

Loose and Secret Items
  • 1.2.8: Sand's Locket
  • 1.3.8: Scanner Drones (water secret)
  • 2.3.8: Matter Bomb Container (water secret)
  • 2.0.8: Bio Detector
Songbringer Lower Deck
Type: Difficult Dungeon
Region Index: 10
Guarded Stairs Item: Blink Orb
Boss: Bath Kol
Notes:
  • This dungeon requires the Droidsmith (and the Captain's Note by extension) to enter for the first time. Make sure to do all your crafting before attempting to enter this place.
  • This dungeon has no Post-Boss Room. Rather, the dungeon's Demon's Tooth is hidden in another room, and Bath Kol drops a Kilobomb Container just before triggering an escape sequence.
  • This dungeon does not have a Lore Obelisk Room. Rather, the Lore Obelisk for this dungeon's boss is found in a Secret Cave in the Overworld.
  • Bath Kol lays a Kilobomb in the Pre-Boss Room which must be allowed to kill Jib (if alive at this point) in order for Roq to access the Boss Room.

Additional Locations of Interest
  • 3.0.10: Entrance
  • 2.2.4: Engine Room
    • Roq makes a comment in this room on first visitation if Bath Kol is undefeated.
    • Notable for being the only non-combat room which disallows the use of Meditate.
  • 4.2.10: Computer Room
    • The Droidsmith is dropped off (and, later, picked up) here to work on the ship's computers.

Tunnel Pairs
  • 2.3.10<->4.1.10
  • 1.1.10<->4.3.10
  • 2.4.10<->6.2.10

Obstacles
  • 6.4-5.10: Gap requiring Blink Orb Extended or Maxed to cross.
  • 3-4.0.10: Locked door.
  • 5-6.1.10: Locked door.

Secret Paths and Walls
  • 4.2-3.10: Secret path.
  • 2-3.2.10: Secret wall.
  • 1-2.2.10: Secret path.
  • 1.2-3.10: Secret wall.
  • 1-2.3.10: Secret wall.
  • 2.3-4.10: Secret wall.
  • 2-3.5.10: Secret wall.
  • 3-4.5.10: Secret path.
  • 5-6.0.10: Secret wall.

Loose Items
  • 2.0.10: Keycard
  • 4.2.10: Keycard
  • 1.2.10: Matter Bomb Container
  • 1.3.10: Demon's Tooth
  • 3.4.10: Keycard
  • 2.5.10: Amber Mosquito Fossil
  • 4.5.10: Circuit Breaker
  • 6.0.10: Keycard
  • 5.0.10: Bio Detector
Dungeon 9
Dungeon 9 has 5 floors, each 2x2 in size and with connections making them into U-shapes. There are very few of the usual dungeon rooms and objects here - instead, there are a total of four roughly-consecutive boss fights, one on each floor except for the fourth.

Type: Difficult Dungeon
Region Index: 9 (Floor 1), 96-98 (Floors 2-4), 99 (Apex)
Floor 1 Boss: Twin Radruiel (spawns Matter Bomb Container on defeat)
Floor 2 Boss: Twin Puriel
Floor 3 Boss: Naga Kiel (spawns Demon's Tooth on death)
Apex Boss: Metatron

Additional Locations of Interest
  • 0.1.9: Floor 1 Entrance
  • 0.0.9: Falling Bomb Room
  • 1.0.96: Lore Obelisk Room (holds knowledge of Metatron)
  • 0.1.98: Cortex Room
  • 0.0.99: Courage Refill (valid destination for teleportation)
  • 1.1.99: Apex Boss Room

Apex Boss and Post-Boss Notes
  • Metatron is a three-phase boss which grows larger and changes attack patterns in between phases.
  • At the beginning of the second and third phases, Metatron starts to bombard the stage from afar. The only ways to force him to return to the arena are to use Meditate (a technique not normally usable during boss fights) or consume a Cactus each time.
  • Upon Metatron's death, return to the Cortex Room and use Meditate within the time limit to win the game.
100% Items Checklist

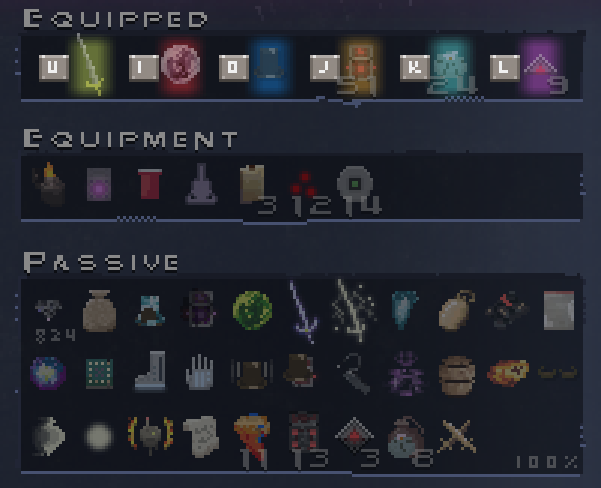
Roughly from left to right, top to bottom, the items required for 100% Items on the NORRIS seed are as follows (note: this may be skewed due to the bug mentioned in the Introduction; also, I have some items not needed for 100% Items in the screenshot above):
  • Nanosword
  • Blink Orb Maxed (acquired by collecting Blink 3 times)
  • Top Hat Drone
  • Lighter
  • Teleport Cube
  • Cup
  • Meditate
  • A combined total of 3 Spirits and Empty Flasks (can be 3/0, 2/1, 1/2, or 0/3)
  • 12x Scanner Drones collected (can be used after collection)
  • 14x Bio Detector collected (can be used after collection)
  • Big Sack (acquired by collecting Sack 3 times)
  • Ghost Sword/Ghost Hat
  • Shadrach's Tear
  • Sand's Locket
  • Circuit Breaker
  • Playa Dust
  • Enlightenment (acquired by collecting all 14 Sarira)
  • Vibrachip
  • Boots
  • Gloves
  • Hyper Top Hat Drones
  • Magnetic Top Hat Drones
  • Holocomm
  • Courage Shield Maxed (acquired by collecting Courage Shield 3 times)
  • Amber Mosquito Fossil
  • The Jibstache
  • Speed Booster
  • Light Upgrade x3 (acquired by collecting Light Upgrade 3 times)
  • Proton Shield
  • Captain's Note
  • 11x Demon's Tooth (10 acquired whole, 1 acquired from collecting four Quarter Demon's Tooth items)
  • 13x Matter Bomb Container
  • 3x Kilobomb Container
  • 8x Cactus Pouch
  • Fire collected (I fused mine into Proton Shield to get Fiery Proton Shield)
  • Ice collected (I fused mine into Top Hat Drone to get Icy Top Hat Upgrade)
  • Lightning collected (I fused mine into Ghost Sword to get Lightning Sword Upgrade)
  • Acid collected (I fused mine into Blink Orb to get Acid Blink Upgrade)
  • [Fear] collected (I fused mine into Matter Bomb to get Fear Bomb)
Conclusion
Thank you for taking a look at this 100% completion walkthrough for the seed NORRIS!

I would greatly appreciate it if you would rate this guide and leave any feedback you might have down in the comments section. Anything concerning runs on the seed NORRIS is also fair game, whether it takes the form of corrections, advice to others, what you like or dislike about this seed compared to other seeds you have played, or something else entirely.

If you like Songbringer and want to make a contribution to the community, you may want to check out the game's official wiki.[songbringer.gamepedia.com] Much remains to be added as of November 7, 2017, so this is a great opportunity to make a big impact if you are so inclined.

P.S.: This walkthrough was valid as of version 1.0.3. Changes to the game introduced with updates through the 1.1.0 update (as well as the 1.2.0 update if you attempt this seed on the beta branch) may have altered world generation, but this has not been "formally" tested.
6 Comments
QuaestComm  [author] 13 Feb, 2021 @ 8:56pm 
Also, here is a long-overdue response concerning Durin: At night, the musician can be found wandering the rooms immediately adjacent to their secret room, though the secret path from this room only connects to one of the rooms they can wander. For the seed NORRIS in particular, you can spot Durin in rooms 0.3.0, 2.3.0, 1.4.0 and 1.2.0 ; however, as mentioned in Overworld (Part 1)>Secret Rooms , only the sighting in 0.3.0 will allow you to access 1.3.0 .
QuaestComm  [author] 13 Feb, 2021 @ 8:55pm 
For those of you who didn't come here from the announcements , Wizardfu (the game developer) is currently running a 100% Items seeded speedrun contest using the very seed covered by this guide, with the winner's prize being 25,000 points (about 32 Golden Unicorn awards)! Submissions for the contest close at 10am Pacific time on February 22nd, 2021, so do not let this opportunity to make Chuck Norris jokes relevant again pass you by!
Worrior 24 Aug, 2018 @ 3:48am 
I can't find Durin the wandering, it's night but isn't appear, can you tell me where is he?
thitz 5 Jan, 2018 @ 2:39am 
Yes. The elevator to the next floor!
Sadly I used the note to the Droid and now he left the station. I'm not sure if he's coming back later but it seems like I have to complete the lower deck of Songbringer now before I can ho ahead D5.
Thank you so much :steamsad:
QuaestComm  [author] 4 Jan, 2018 @ 5:02pm 
The rooms with acid spikes usually have water in them as well, so as long as you have crafted Ice or Acid (elemental cubes) into one of your other items, you should be able to use that item (and Blink Orb as needed) to get past the barriers. (You need to teleport to the Songbringer ship using the Teleport Cube from Dungeon 2 in order to access crafting.)

I assume you're talking about the elevator to the next floor. Or are you talking about the Guarded Stairs holding the Acid item?
thitz 4 Jan, 2018 @ 3:55pm 
Awesome guide! Can you help me with D5? I don't know how to reach the stairs, there are few spikes blocking the way.