Sky Knights

Sky Knights

Not enough ratings
Beginner's Guide to Sky Knights
By TorchedForever
There's quite a difference between slaying endless hordes of AI bots and fighting players in this game. This guide attempts to provide the information, tricks, and advice necessary for newer players to play effectively against other players.
   
Award
Favorite
Favorited
Unfavorite
Introduction
After reaching the level cap, as well as Ace rank, and acquiring every single achievement, hopefully I am a reputable source of advice for players. While I admit there are holes in my knowledge (greater exposure to certain maps and aircraft than others), my experience and time spent developing strategies will be enough to help out newer players.

Now, this guide is rather long. As such, it is probably best not to read it in one sitting. I certainly didn't write it in one. Feel free to read a bit, absorb it, try to apply it in-game, and repeat. Hopefully it won't be too overwhelming.

This guide uses quite a bit of terminology. ASF stands for air superiority fighter. This includes F-15s and Su-27s. LFB stands for light fighter-bomber. This includes F-16s and MiG-29s. CAS stands for close air support. This includes A-10s and Su-25s. LF stands for light fighter. This includes F-5Es and MiG-21s. MFM stands for maximum forward momentum. It is used behind the scenes to determine the top speed of aircraft. It can be more useful than just top speed data in comparing aircraft due to rounder numbers and less data inaccuracy. Already in-game terminology includes: FOB (forward operating base, the bases you destroy) and AAA (anti-air artillery).

Best of luck and have fun flying out there!
General Information
Unfortunately, there is a decent amount of information regarding the game and its mechanics that is not immediately obvious. Damage values, credit rewards, and details of how things work are not found in-game. This section of the guide provides some of that much needed info.

Damage Values (based on quote from Bankler)
Anti-tank missile: 200-210 damage
Anti-radar missile: 500-600 damage
Bomb: 400-500 damage
Heatseeker: 50-110 damage
SARH missile: 60-120 damage

FOB Etimates (based on experiment)
Each FOB has roughly 6000 health
Each FOB is worth 60 object damage
Each object damage is roughly 100 damage
About 12 to 15 bombs to destroy a FOB
About 30 anti-tank missiles to destroy a FOB
About 300 gun ammo to destroy a FOB
About 3 or 4 full CAS attack runs to destroy a FOB

Rewards
Perfect Landing: 25
IFV or Recon Kill: 30 (20 for assist)
MBT Kill: 80 (20 for assist)
AAA Kill: 100 (20 for assist)
Player Kill: 120 (60 for assist) This number will vary (50 to 300), but goes up based on the target's kill steak.
FOB Kill: 300 (150 for assist)

CAS Basic Stats
  • 130 base health
  • 200 gun ammo
  • 4 anti-tank missiles
  • 2 bombs
  • 8 flares
  • No afterburner!

LFB Basic Stats
  • 90 base health
  • 120 gun ammo
  • 2 heatseekers
  • 2 bombs
  • 6 flares

ASF Basic Stats
  • 120 base health
  • 150 gun ammo
  • 2 heatseekers
  • 2 SARH missiles
  • 8 flares

LF Basic Stats
  • 85 base health
  • 120 gun ammo
  • 2 heatseekers
  • 0 bombs (can be used due to bomber loadout)
  • 8 flares

    Differences Between Factions
    The F-15 is more speed-oriented than its PACT counterpart, the Su-27. In addition to a greater top speed, it has the strongest afterburner in the game and higher ideal turn speed. That afterburner can be used to keep pressure on the enemy despite a lower turn rate. The Su-27 on the other hand, has a large focus on turning. With the second highest turn rate and an ideal turn speed well below its cruising speed, it has a significant advantage in 1 on 1 dogfights.

    The F-16 and MiG-29 are identical in every stat. They only differ in how they interact with the other aircraft of their faction.

    The A-10 focuses on destroying vehicles, dealing 40 damage with its gun against them. This is particularly useful in destroying AAA. However, the Su-25's base gun damage of 24 and higher speed make it better suited for dealing with enemy aircraft and attacking FOBs.

    The F-5E and MiG-21 are incredibly different aircraft despite sharing the same class. The F-5E's incredible turn rate makes it very powerful in a dogfight, but its poor acceleration and afterburner make it a vulnerable target at longer ranges. It is worth noting that it has increased fuel and better radar than the MiG-21. While the F-5E has the best turn rate, the MiG-21 has the greatest speed in the game. This lets it execute quick intercepts or bomb runs before using its speed to get away.
Weapons and Combat
Guns
These are your main weapons. While all the missiles and bombs have a lot of usefulness, they cannot exceed the raw source of damage and versatility of the guns. Even the LFBs' low ammo count still has a total potential of 2400 damage and an upgraded A-10 can kill over 50 vehicles on a single load of ammo. Additionally, gun damage cannot be directly avoided. While a flare and chaff release might defeat a missile, there's no countermeasure for bullets.

As such, gun aim is crucial to your ability to compete in Sky Knights. Good gun aim can be the difference between life and death in a head-on encounter. The two main instances in Sky Knights where gun aim is difficult is intercepting at an angle and brief openings. Bots are good practice for interceptions due to CASs and LFBs generally flying straight. Try approaching them from an angle other than directly behind (afterburner might be useful to catch them this way) and tracking them well enough to get a kill in one pass. Unfortunately, bots aren't great at simulating the brief openings in PvP combat where quick gun aim is needed. That will have to come from actual matches.
The square indicates what you are currently aiming at and if you are in-line with it. It will lock onto the closest target and not switch until it cannot be aimed at. As such, you might have to briefly turn the plane in order to change targets when attacking ground targets. However, it will form around targets that are not within your gun range. The triangles on the ground provide the indication of range. An enemy with the square aim indicator on it within the triangles will be hit. The one exception is altitude difference.

Heatseekers
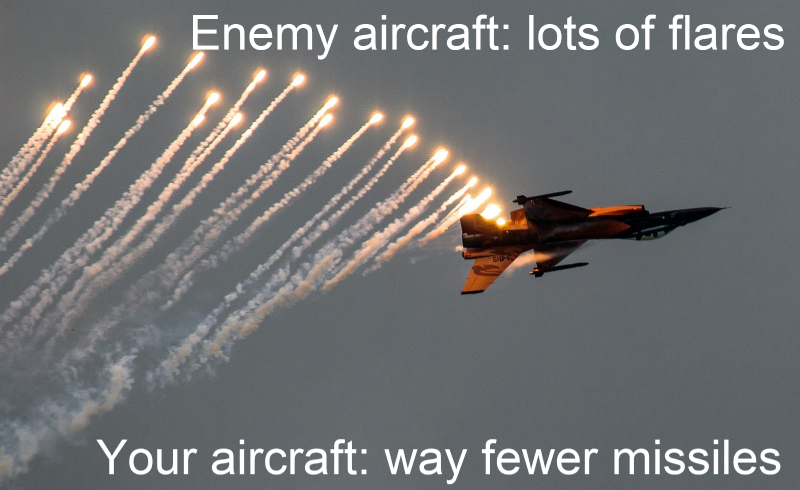
Heatseekers, carried by ASFs and LFBs, are difficult to use against players, but a hit can deal significant damage and potentially kill a LFB in one shot. Flares, carried by everyone, are fairly easy to use and can turn a potential kill into a waste of resources. This is rather unfortunate for heatseeker users. However, the key weakness of flares is they require the pilot to be aware. Abusing this weakness is the basis of heatseeker strategy. Now, the tutorials mention using flares prior to a missile being fired, in order to prevent a lock. This strategy isn't all that good. You end up spending a resource while the opponent does not. That is why you should wait until a missile is fired before dropping a flare. The only exceptions are when the enemy is close enough that you couldn't react if they fired or in such chaos that you cannot tell if one is being fired at you.

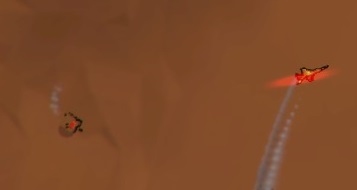
These missiles lock-on the fastest when approaching from behind. In this situation, the best way to catch an enemy by surprise with the missile is to launch it at close range. It gives them less time to react and less time for the flare to really work. However, the danger of being close is that it is much easier for them to break the lock by evading. Any situation that might distract the target or obscure the missile launch is favorable. Examples include big dogfights, the target chasing down an ally, or clouds partially obscuring the launch. A much sneakier method is to fire while outside the map (indicated by red diagonal lines). Many of the visual effects of the missile aren't rendered in this area. It is a little difficult to set up, but the target isn't likely to see the missile.

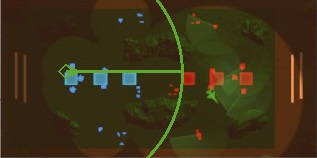
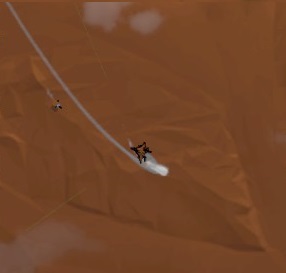
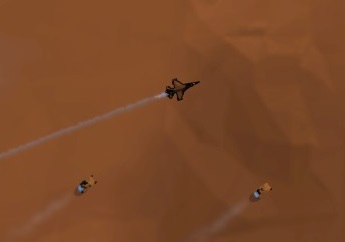
This image shows the approximate range on a heatseeker. This is not the lock-on range, but rather the range of the missile itself. Heatseekers can be fired without a lock. Given enough distance, missiles fired like this can hit head-on targets a reasonable distance away. This method is very useful in the beginning stages of a match. However, you have very little control of what it locks on.

SARH missiles
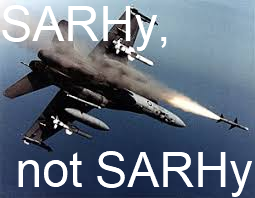
Exclusive to ASFs, these missiles provide an easy and safe method of distributing long-range death. The radar lock happens at much greater ranges than heatseekers and from all angles. As long as you aren't under threat, it is fairly easy to track the target. Just be sure to keep it in the aiming cone. These are best used at a range where the cone is wider and other weapons won't work. However, the missiles can be outrun, so targeting engaged enemies is ideal.

Now, being on the receiving end of a SARH is rather difficult. A red line originating from your aircraft indicates that someone is locking on with radar and the direction it is coming from. If you have chaff, defeating the missile is simply a matter of timing. Otherwise, drastic maneuvers or high speeds are required. In theory, a SARH can be avoided simply through maneuvers, but this is not very reliable. Afterburning away from the source is the safest solution. If you are too close to run away from the missile, heading towards the source at a slight angle at high speed can save you. Maneuvering at close range by both turning and using the maneuver key can get you outside of the aiming cone and break the lock. However, you must act quickly to evade the missile with this method.

Bombs and Anti-Tank Missiles
These two weapons are the main sources of damage against ground targets and FOBs. One bomb or two anti-tank missiles can eliminate an AAA quickly. This is probably the best role for anti-tank missiles. It has the highest reward per resource payoff of any use of them and is the second safest (anti-radar missiles are first, but no one uses them) method of destroying AAA. If ground forces are crowded around your base, the missiles can provide the additional damage necessary to save your team, but otherwise, you are better off destroying vehicles with your gun.

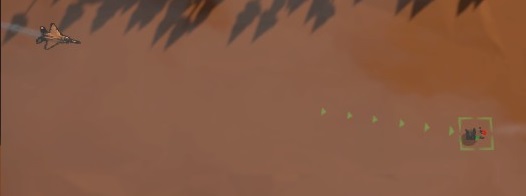
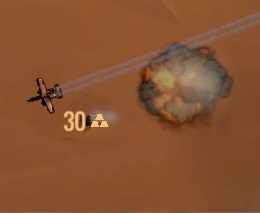
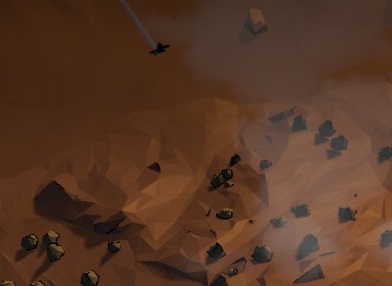
Similarly, bombs have the potential to erase large amounts of ground targets, but it requires them to be clustered. As such, they should generally be used to deal damage to FOBs. The blast radius of the bombs is rather hard to judge, but it does give reasonable margin of error. As you can see in the picture, it seems to be quite large. A good bomb drop against concentrated targets can pick up 3 to 5 kills. Vehicles attacking bases seem to be the most vulnerable to such multi-kills. Also, bear in mind that the bombs do have a drop time, so you will need to lead moving targets.

Initial Strategy
Due to graphic processing limits, I do not have much experience on the Woodlands map. As such, this section mostly applies to Desert Trap. This section will probably be expanded upon in the future.
The very beginning of the match has different dynamics from normal gameplay. In Desert Trap, SARHs, lockless heatseekers, and AAA fire make a mess in the center of the map. Both AIs and players can quickly die in the chaos. As such, it is beneficial to take a more cautious approach and stay towards the back of the pack or to the sides of the map. Let bots fly straight on to tank damage and experienced players fly ahead of you. However, lagging too far behind will make contributing difficult. LFBs are especially bad in this stage of the map. While the mixture of air-to-air and air-to-ground seems ideal for destroying the forward AAA and then engaging enemies, the low health of the aircraft often results in unnecessary and rapid death. ASFs can use SARHs and lockless heatseekers to put significant damage into enemy planes. Afterwards, they should engage survivors while staying outside of the AAA's reach. A huge benefit CASs can provide to their team is to remove the forward AAA. Just be sure not to die at the beginning of the onslaught. However, taking a bit of damage, but not enough to die, can be helpful as you have the most health.
Maneuvers and Flight Techniques
Maneuvers
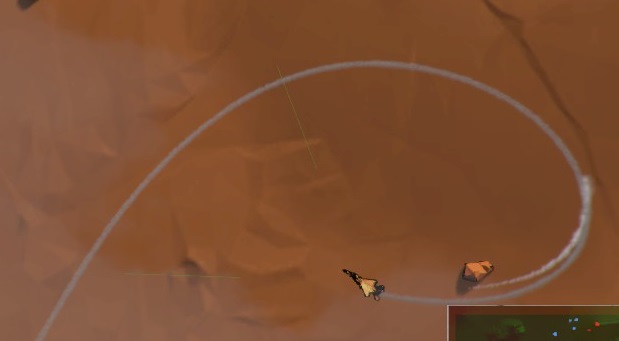
Two basic maneuvers are explained in-game: the loop and the Immelman. While these two do have their value, they take a significant amount of time to complete and aren't always incredibly effective. However, far more can be done with the maneuver function. Using the maneuver key in addition to turn input, throttle change, or afterburners opens up a much larger range of abilities.

One of these more advanced maneuvers is a method to produce tighter turns. It is similar to the real-life wingover or high yo-yo maneuvers. While turning, briefly hold the maneuver key. Your aircraft should make a much tighter turn and gain a little altitude. Be careful using this maneuver in a close-range turn battle as the altitude difference may prevent you from getting your guns on target. That is why it is important to use the maneuver key as sparingly as possible while still getting the desired effect.

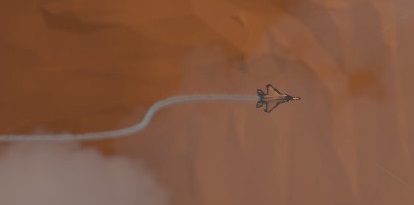
This next one is an excellent defensive maneuver. It has no accurate real-life counterpart as it mostly abuses the game's gun mechanics. While flying straight, engage the afterburners and quickly press the maneuver key. Hold both the afterburners and maneuver key until the plane starts levelling out after travelling significantly vertically. If you are performing this maneuver without afterburners, wait until the plane passes vertical and just starts to go upside-down before releasing the maneuver button. Doing so will give you the most time climbing. This quickly brings you out of gun range and the time it takes for your plane to descend from that altitude keeps you safe for a while. Keep in mind that you cannot retaliate during or immediately after this maneuver. Depending on the timing and turning input, this maneuver can leave you pointing in just about any direction you wish.

This final maneuver is far less polished than the other two and its value in combat is less proven. However, if properly executed, it can rapidly turn the tide of a dogfight. The intended effect is similar to Pugachev's Cobra, but is basically just a method of bleeding speed. The throttle is lowered to 0% while using the maneuver key to point up. As with the other maneuvers, the maneuver key should be used as little as possible. Once the target has hopefully overshot, release the maneuver key and throttle up, possibly engaging afterburners. This is best used when the target is not directly on your tail as it provides them an excellent opportunity to kill you with their guns. Additionally, this maneuver can be used just prior to intercepting a slower moving aircraft (especially after chasing it with afterburners) to match speed.

Flight Techniques
There's much more to flying effectively than just pulling fancy maneuvers. Landings provide an opportunity to squeeze out a little extra value and a failed one can waste a lot of valuable time, AAA can rip a plane to shreds if they are not handled carefully, and mountains are useful speed brakes and potential stamina traps.

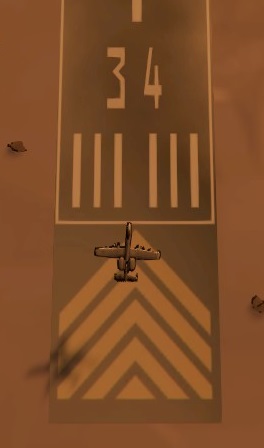
Now, the tutorial teaches a rather slow and safe approach to landing. A lot of time is spent lining up your approach and slowing down to minimum cruising speed. However, this takes time and leaves you vulnerable. While difficult, enemies can still attack you until you actually get the "cleared for landing" message. Perfect landings are defined by the game as being close to the center of the runway and pointing parallel to the lines. Speed and placement down the runway are not a factor. However, the slower your speed, the less time it takes to land and the less likely it is that you will have to roll backwards prior to takeoff. Sudden turns and maneuvers done before lining up to the runway can bleed off a lot of speed. Additionally, the mountains near the runway approaches can be used as speed brakes. The key to a quick landing is to lessen the distance of the approach and use the turn to the runway to bleed speed. In the end, practice makes perfect, and some repetitions in a practice match (host a private match with zero bots) can do a lot to improve your landings.

AAA deal a lot of damage, can only be avoided by destroying them, and limit the areas you can operate in. Generally, it is preferable to remove AAA prior to any bombing runs on the base. Left alive, they can remove the majority of any LFBs that attempt to bomb the FOBs. While their damage cannot be avoided, it can be minimized. The accuracy of AAA increases the closer you are. As such, try to line up your attacks well outside of their reach to reduce how close you need to get to them. Do not perform maneuvers while within their reach. Maneuvers leave you in the same place for far too long.

Mountains are basically just forced altitude change. Your plane will automatically perform a maneuver to fly over them. However, sudden changes in speed or heading can make that adjustment more extreme, potentially leaving you facing the opposite direction. Additionally, mountains provide some barrier to weapons. Long-range SARH missiles can occasionally be blocked by them. The altitude differences also frequently put aircraft out of eachother's gun range. In general, keeping the mountains in between you and an approaching enemy will provide a decent measure of safety. However, you do not want to engage enemies right next to mountains for too long.

The final subject for flight techniques is the afterburner. It is an incredibly useful tool that sometimes goes to waste (don't use it during takeoff). The afterburner's sudden increase in speed allows you a greater degree of control over what situations you are in. It can be used for rapid interceptions, escapes, quick returns to base, and can buy time for your stamina to recover. Just watch how much you have left. In direct combat, you can use it to stay away from the enemy's guns. Always keep a little when outside your team's immediate territory for a potential escape. The afterburner's speed is especially useful in the Woodlands map's greater distances.
NATO Planes and Specific Advice
NOTICE These might be further revised because of the F-5E's release NOTICE


F-15 ASF
Role: Interception and recon
Strengths: Speed and radar range
Good Traits: Speed Freak, and Recon Specialist/Gunslinger
The F-15's advantage over the Su-27 is its speed. This allows it to switch between targets quickly and patrol the large area of Woodlands. Avoid sustained engagements with Su-27s as they will eventually out-turn you. The F-15 is good at controlling the skies, enabling F-16s and A-10s to use their payloads. MiG-21s are generally priority targets as other NATO planes have issues killing them. SARHs have a good chance of one-shotting them and cannot be easily avoided. Close or medium range locks are needed to prevent the MiG-21 from simply out-running them. This plane is also rather good in the early game. SARHs are good head-on and the speed lets it get to an ideal position before engaging. In the late game, your main priority will be shooting down enemy aircraft before they can reach your bases.
Speed Freak makes the F-15's advantages more dramatic and Recon Specialist improves scouting and the effective range of SARHs. Gunslinger is a generally good trait that works well as an alternative when a large radar range is not needed.

F-16 LFB
Role: FOB assault and air combat
Strengths: All upgrades apply
Good Traits: Hellbender and Bounty Hunter
The F-16 is terrible until upgraded. Low health, low payload, and a lack of specialist tools makes it rather weak. However, because every upgrade applies to the F-16 its mixture of air-to-air and air-to-ground capabilities can expand dramatically by the late game. The general role of the F-16 is to assist in downing enemy planes and once clear, drop its bomb load. If you're not as confident in your air-to-air skills, treat it as more of an attacker that can defend itself. Just be aware that being on the defensive is a disadvantage in a dogfight. This might mean you need to engage targets before they reach you. Both MiG-21s and Su-27s are risky for you to pursue but feel free to take a shot at them if the opportunity presents itself. Try to operate where the A-10s aren't. The A-10s can drop more ordinance and probably don't need the little extra you can provide. The F-16 can work well in both the flanks and center due to its speed and moderate dogfighting capabilities. The Stealth and Engine Tuning upgrades allow it to make quick strikes against FOBs, especially in Woodlands.
Hellbender helps keep the F-16 viable in a dogfight and Bounty Hunter makes the F-16's transition happen sooner. Alternatively, Businessman can be used if Bounty Hunter is not available or kill frequency is low.

A-10 CAS
Role: Ground cleanup and SEAD
Strengths: Bonus damage against vehicles
Good Traits: Gunslinger and Hellbender
While CAS have the most potential for sheer FOB destruction, the A-10's gun makes destroying ground vehicles more important. If left unchecked, ground forces can deal a lot of damage to your FOBs while AAAs limit the F-16's ability to counterattack. Additionally, the doubled gun damage against vehicles means a single anti-tank missile and brief gunfire can efficiently kill AAAs. The A-10 isn't as suited for head-on combat and tanking as the Su-25. If you must engage in air-to-air combat, your best chance is during the first pass. Your health and gun damage are large advantages here and your lack of dogfighting performance makes you unlikely to survive afterwards. Also, the A-10 is the slowest plane in the game. Throttling down is very useful in getting enemies to overshoot. MiG-21s can be the bane of your existence. As such, staying under the protection of a F-15 is advised and bombing runs in the middle of the map might be a bit safer. However, if no MiG-21s are in the game, the sides are free for attack and are probably more ideal. The sides generally have fewer enemy aircraft and so you can operate under less threat.
Gunslinger dramatises the already impressive A-10 gun and Hellbender provides a couple of benefits. It helps greatly in staying on target during the first pass and can be beneficial when attacking ground units. Fortunately, the afterburner penalty does not apply.

F-5E LF
Role: Brawling and ground defense
Strengths: Turn speed, better guns, and radar
Good Traits: Gunslinger and Hellbender
The F-5E is almost crippled by its low speed. This in combination with low health makes it an easy target. As such, it is reliant on its turn rate and guns to shoot down the enemy first. The F-5E can be incredibly dangerous when these two aspects are upgraded, but keep in mind how fragile it is. Its guns are also useful in cleaning up ground units. You can reach nearly 30 gun damage with just Gunslinger and High Explosive Bullets. It can also get two bombs from bomber loadout. Given your low speed, these are best used to take out large groups of ground units.
Gunslinger and Hellbender both exaggerate the F-5E's strengths, allowing to be a fragile but deadly aircraft.
PACT Aircraft and Specific Advice

Su-27 ASF
Role: Threat elimination and escort
Strengths: Turn rate and decent afterburner
Good Traits: Gunslinger and Speed Freak
The Su-27 cannot compete with the F-15 in terms of speed. While it may lack top speed, it still has good acceleration and afterburner power. This lets it perform very well in close range dogfights. The Su-27 is easily the best one-on-one aircraft in the game. Decent health, access to lots of missiles, and low-speed turning power all make it excellent at this job. Using the afterburner in conjunction with its good turning keeps the pressure on your target. On larger maps like Woodlands, the Su-27's lack of speed keeps it from intercepting quite as well as the F-15. Instead, clearing the skies for other aircraft should be the primary focus of the Su-27. If present, F-5Es should be priority targets. They are best faced head-on or with a long range missile. SARHs should be reserved for eliminating targets that run away rather than as methods of engagement. Leave killing flankers to MiG-29s and 21s.
Gunslinger improves its dogfighting capabilities and Speed Freak helps it engage targets better.

MiG-29 LFB
Role: Flank assault and protection
Strengths: Heavy and mixed payload
Good Traits: Hellbender and Bounty Hunter
The MiG-29 and F-16 are in fact, functionally identical, but the differences in other aircraft on their team changes their role. It does suffer the same weakness though, so upgrades are just as critical to its success. Due to the Su-27's limited capability for intercepting attacks, that role somewhat falls to the MiG-29 if a MiG-21 is not present. Your advantage over the MiG-21 is much greater ground attack capability and so a greater focus on destroying FOBs is beneficial. However, you should be primarily focused on the flanks or outskirts of maps. Here, the plane can perform a mixture of attacks against the enemy bases and shooting down enemies.
Bounty Hunter provides the extra income required for the MiG-29 to progress well. Like with the F-16, Businessman is a decent alternative. Hellbender helps keep it effective in dogfights.

Su-25 CAS
Role: FOB assault and limited air combat
Strengths: Health and powerful gun
Good Traits: Gunslinger and Hellbender
The Su-25 is faster and has a universally more powerful gun than the A-10. While the gun deals less to vehicles, it deals more in all other situations. The higher speed makes it easier to hit a FOB with the entire payload, turn around, and escape. The main feature of the Su-25 is the gun though. It can very quickly tear apart any plane and can deal lots of damage to bases. The key is achieving kills despite the poor turning. The maneuver key and attacking distracted enemies helps a lot in this endeavour. The high health and powerful gun also make the Su-25 suitable for the initial head-on engagement. Just be wary of damage from missiles.
Gunslinger makes the Su-25 better at all its roles and Hellbender softens the turning weakness and the plane does not suffer the fuel penalty.

MiG-21 LF
Role: Interception and quick assault
Strengths: Speed and mixed payload
Good Traits: Gunslinger and Bounty Hunter or Recon Specialist
The MiG-21 fills the holes left by the Su-27. Its speed is truly impressive and that in combination with a powerful gun lets it catch and dispatch enemy targets that stray away from battle. However, it also has the lowest health in the game. As such, speed is vital to your survival. Use it to engage targets from a favorable position and then use the afterburner to get away. Your main priority should be A-10s and F-16s attacking bases and far off bases in particular. Try not to use your afterburner to reach targets as it is a necessary part of your survival. You can strike at bases using the bomber loadout's bombs. However, this is not very efficient and should mostly be used as some late game extra value.
While Speed Freak seems like a good method to exaggerate this plane's advantages, the speed increase makes it a little difficult to control well enough. Gunslinger is an excellent boost to its already powerful guns. Bounty Hunter is useful for quickly progressing into a powerful mixed payload and Recon Specialist provides the vision to shut down a flank on Woodlands.


Conclusion
Well, that's it. Hopefully, this guide was helpful. This guide is pretty big and there's probably some errors in it. If you notice any, please let me know.


If you're looking for more information and advice, here are some of the other guides I've written:
Maneuvers and Advanced Flight Guide
Tips and Tricks
Time Race Guide
3 Comments
Unit 501 22 Aug, 2018 @ 2:43pm 
Thanks for the guide. Got a chance to use the Pugachev's Cobra-esque maneuver today. Went into a loop to try and trick an enemy into thinking I was doing a Immelman, he didn't buy it and was right nose to tail with me at the end of the turn.

Coming out of the loop, I used the maneuver key to flare up and bleed speed. I was then behind him and winning the turning war even though I was in an f16 (maybe he was low on stamina?) and he was an Su-27. As I was real close to being on target, I started firing and was about to sweep my fire up his tail... but then I ran out of ammo.

I then dodged around for minute or so and inevitably lost the fight. I was without both guns and missiles, but it worked well and I would have had him if I had just a bit more ammo.
nukeofwf 1 Jul, 2018 @ 2:51am 
You did an amazing job, the level of information and usability here is great. It has made me the pilot I am today.
S Nomad 15 Oct, 2017 @ 12:57pm 
Good guide, thanks for trying to help out the newer players.