Killing Floor

Killing Floor

348 ratings
Demolitions Guide
By DarkFalz and 1 collaborators
This guide will discuss the Demolition perk's role in the team and strategies for playing the role effectively.
   
Award
Favorite
Favorited
Unfavorite
Basic Information
*NOTE* As with my other guides, this guide is more aimed towards intermediate level players preparing themselves for the higher difficulties. We're assuming you've already gotten your feet wet in KF and have at least a basic understanding of the game, the ZEDs and some of the mechanics. All videos in this guide are done on 6 player Hell on Earth difficulty unless otherwise noted.

The Demolitions (or Demo as most players prefer to call it) is the team's explosive specialist. As such, the perk gets damage bonuses and price discounts for all explosive weapons. The Demo is best described as a heavy support class. The Demo player will mainly be staying behind other players and using the splash damage of his explosives to thin out large clumps of ZEDs when they appear. The Demo can also be seen as the team's panic button since in an emergency when the team is getting overrun, he can quickly clear a hallway out with a barrage of M32 grenades or a well placed LAW rocket and give the team a few seconds to reform their defensive line and heal each other.

But the Demo's explosives are a double edged sword. Although they can easily blast apart large groups of trash ZEDs, they create clouds of smoke that will blind the team for a few seconds. There's also the possibility of the Demo player blowing himself up if he's not careful. The Demo can also be a very expensive perk to maintain so players need to be sure they're using their weapons efficiently and effectively.
Perk Bonuses
Level 0

5% extra damage with explosives
25% resistance to explosive damage
10% discount on explosives
50% discount on Pipe Bombs

Level 1

10% extra damage with explosives
30% resistance to explosive damage
20% increase in grenade carrying capacity
Can carry up to 3 Pipe Bombs
20% discount on explosives
54% discount on Pipe Bombs

Level 2

20% extra damage with explosives
35% resistance to explosive damage
40% increase in grenade carrying capacity
Can carry up to 4 Pipe Bombs
30% discount on explosives
58% discount on Pipe Bombs

Level 3

30% extra damage with explosives
40% resistance to explosive damage
60% increase in grenade carrying capacity
Can carry up to 5 Pipe Bombs
40% discount on explosives
62% discount on Pipe Bombs

Level 4

40% extra damage with explosives
45% resistance to explosive damage
80% increase in grenade carrying capacity
Can carry up to 6 Pipe Bombs
50% discount on explosives
66% discount on Pipe Bombs

Level 5

50% extra damage with explosives
50% resistance to explosive damage
100% increase in grenade carrying capacity
Can carry up to 7 Pipe Bombs
60% discount on explosives
70% discount on Pipe Bombs
Spawn with 2 Pipe Bombs

Level 6

60% extra damage with explosives
55% resistance to explosive damage
120% increase in grenade carrying capacity
Can carry up to 8 Pipe Bombs
70% discount on explosives
74% discount on Pipe Bombs
Spawn with an M79 and 2 Pipe Bombs
Weapons
M79 Grenade Launcher


Base Cost: £1250

Base Damage: 350

Weight: 4kg

Total Ammo Capacity: 24

The M79 is a single shot, break-action grenade launcher that fires a 40mm high explosive round. This is the Demo's most basic weapon. It's great for blasting apart groups of Clots, Crawlers and other trash ZEDs but since it has to be reloaded after every shot, it doesn't work well for taking on any of the bigger ZEDs. It's cheap to buy and even better, level 6 Demo players will spawn with it. In the earlier waves, it works well enough as your primary weapon since most of the ZEDs will be easily obliterated by it but at around the halfway point of the game, you should definitely have some heavier weapons on you. But even in the later waves, the M79 works great as a backup weapon to conserve ammo in your heavier weapons.

--------------------------------------------------------------------------------------------------------------------------

Orca Bomb Propeller (DLC only weapon)


Base Cost: £1250

Base Damage: 350

Weight: 4kg

Total Ammo Capacity: 24

The latest addition to the Demo's arsenal, this weapon is best described as a sidegrade to the M79. The only difference is that this weapon's projectiles will not immediately detonate when they hit the wall or floor. Instead they will bounce off and finally explode when their fuse runs out. However, the projectiles will still explode immediately if they hit a ZED. Note that you cannot buy the Orca Bomb Propeller unless you own the Community Weapons Pack 2 or ask a player who owns the pack to buy the weapon for you.

--------------------------------------------------------------------------------------------------------------------------

M32 Grenade Laucher


Base Cost: £4000

Base Damage: 350

Weight: 7kg

Total Ammo Capacity: 36

The M32 is a 6 shot multiple grenade launcher that fires the same rounds as the M79 and does the same damage per shot. But the M32 can fire six times before it has to be reloaded and it can fire as fast as you can click the mouse button. This is often the weapon of choice for many Demos since a barrage of grenades from it can clear a hallway out and decimate Fleshpounds (provided you aim the shots properly). Unfortunately, the M32 also takes a while to reload if you empty all the shots out of it so you should be sure to reload it any time you have a chance.

--------------------------------------------------------------------------------------------------------------------------

M4 M203


Base Cost: £2750

Base Damage: 35 (M4 Rifle) | 350 (M203 Grenade Launcher)

Weight: 6kg

Total Ammo Capacity: 300 (M4 Rifle) | 12 (M203 Grenade Launcher)

As implied by the name, this is an M4 assault rifle with an M203 grenade launcher attached. The M203 fires the same rounds as the M79 and does the same damage. In it's current state, this weapon is generally seen as the black sheep in the Demo's arsenal due to it's unreasonably high cost, low damage and high recoil of the assault rifle portion and low ammount of ammo for the M203. Honestly, I can't think of any reason you should take this over any other Demo weapon. Unless Tripwire releases an update which makes this weapon viable, it should just be left at the trader's shop. If it ever does become a viable weapon, the guide will be updated accordingly.

--------------------------------------------------------------------------------------------------------------------------

LAW


Base Cost: £3000

Base Damage: 950

Weight: 13kg

Total Ammo Capacity: 10 (+2 for each Demo level) | 22 at Demo level 6

The LAW (Light Anti-tank Weapon) is the Demo's biggest heavy weapon. In fact it's so heavy, you can't carry anything other than Pipe Bombs or a Machete with it. The LAW is all about causing massive damage over a wide area. It has a much bigger blast radius than the grenade launchers so groups of trash don't stand a chance against it. But the biggest downside to it is you trade your ability to effectively kill Fleshpounds. Yes you can cause a lot of damage to them with a direct hit, but there is no way you can kill them before they reach your team mates. But if your team is good at dealing with Fleshpounds (or you have plenty of spare cash for Pipe Bombs), then the LAW is definitely one of the most satisfying and fun weapons to use. The LAW also benefits from the Demo's increased grenade capacity bonus, steadily increasing the maximum ammo you can carry with every level.

--------------------------------------------------------------------------------------------------------------------------

Pipe Bomb


Base Cost: £1500

Base Damage: 1500

Weight: 1kg

Total ammo capacity: 2 (+1 for each Demo level) | 8 at Demo level 6

Pipe Bombs are one of the Demo's most powerful weapons. They have a massive blast radius, cause a huge amount damage and on HOE, nothing below a Scrake will survive if they are close to the explosion. Pipe Bombs are best used for setting up traps for the bigger ZEDs or as something your team can fall back on if they're getting overrun by the horde. But you have to be very careful about where you place your Pipe Bombs. Sirens can destroy them with their scream and Husks can detonate them if they score a direct hit on them. You also don't want to be standing too close to them when they go off since you could easily be killed in the explosion too.
Demo Tactics/Strategies
When, How, and What to shoot

Placing your shots is important for Demo; explosions result in smoke which can impair your team's vision. It's important to make sure that a raging Scrake, Fleshpound or Siren(s) won't be coming out of the smoke cloud and tear your team to shreds. Many server admins and other players are also highly intolerant of "spam happy" Demos and they won't hesitate to kick you out of the game if you're blinding the team too much and wasting ammo. On dedicated servers, if you aim for a specimens head, the grenade will appear to travel through the specimen and detonate on whichever surface is behind the specimens head. In actuality, you are hitting the specimens head - AND dealing 2x damage with the head/upper body explosive shot. This can put smoke clouds far behind where your grenade actually detonated, leaving the affected area smoke-free.

As just mentioned with headshots, they do 2x damage. This is paramount in every Demolition Fleshpound combo, and consistent headshots on any specimen will ensure you are dealing maximum damage and reducing smoke. This allows for a few points:

  • 1 M79 or M32 headshot can kill a Siren or Gorefast
  • 1 M79 or M32 headshot can stun a Husk
  • Headshotting a Bloat will [sometimes] mess up the Bloat's head hitbox on dedicated servers (commonly called a level 6 Bloat)

This can be used effectively against groups of specimens with the right shot priority. EG. There is a Gorefast, some Clots and Crawlers, aim at the Gorefasts head - you will kill them all instead of leaving a stunned Gorefast in a smoke cloud.

If there is a group of Gorefasts, or multiple Husks, Sirens, etc. keep in mind that you can detonate your own frag grenades with your launched grenades. It is useful to throw a frag grenade at the group or area you wish to clear, and immediately set it off with a grenade from the M32 or M79. Doing this with 1 frag grenade will kill everything below a Scrake if they are close enough to the explosion, and you can use multiple frags to enlarge the AoE.

A good rule of thumb to follow is try to wait for a tightly packed group of at least 5 ZEDs to show up before you fire. When you do shoot, aim for a specimen's head at the center of the group so you damage/kill as many ZEDs as possible. Of course there will be times when this rule won't apply. For example, if you see a couple Clots, Gorefasts, or a Crawler running up to a team mate who is near death, don't hesitate to shoot - at the very least you will stun the Gorefasts. Yeah you will lose some money since you only killed 1 or 2 ZEDs with that shot, but it's better than losing a team mate who can help protect you.

Another good rule of thumb is when Scrakes are around, hold your fire. Scrakes may not have explosive resistance, but they do have a ton of health and on the higher difficulties, it doesn't take much damage to make them rage. I've had many wipes caused by Demos who repeatedly raged Scrakes into the team and it's even worse when a Sharpshooter or Berserker was already safely handling the Scrake. So remember in general. do not shoot at Scrakes. You're only doing much more harm than good, Rare exceptions to this are covered in another section of this guide.
Demolitions Loadouts
What weapons should you hold?

This part is mostly up to the player. However you should keep in mind that as a Demo, you are the player most suited for dealing with Fleshpounds and your loadout should reflect that. The most effective weapon in the Demo's arsenal for dealing with Fleshpounds is easily the M32 Grenade Launcher. Any loadout that incorporates it can be extremely effective in the right hands.

That said, here are 3 basic Demolition loadouts that have been tried, tested, and are regarded as effective Demolition loadouts. Keep in mind these are not the only loadouts that can be effective, but they are arguably the easiest to use to play to your perks strengths and acquire by your own means.

  • M79 + M32 + Pipe Bombs + MK23*
  • M32 + Pipe Bombs + Katana + MK23*
  • M32 + Pipe Bombs + Lever Action Rifle

*Feel free to substitute any 2kg sidearm of your choice

Wait a minute, what about the LAW?

The LAW is a beast of a weapon. It deals massive damage and has a huge AoE. The drawback being you only get to carry 1 extra kg of equipment with it. Now with a description like that, it sounds like something that would be great against the games biggest specimens, but that is not the case. It excels at crowd clearing and supporting the takedown of larger specimens, but on it's own it leaves the LAW shooter very vulnerable. Against Fleshpounds, it only rages them into the team. It is best used against Fleshpounds as a secondary shot after someone who is more capable has put themselves in a position to rage and take down the Fleshpound. The same goes for Scrakes, but is only necessary if the Scrake has been mishandled and is raging into the team. All in all, the versatility of the LAW is very low and on higher difficulties it is regarded as an inferior choice for a Demo's loadout

Acquiring your loadout

Demo can be an expensive perk to play, especially for low levels. It is essential that you have enough money to fund your perk before you switch to Demolition, or if you're just joining a game, that the players there will be able and willing to fund you.

Sometimes it is wise to play as a perk that does not require a lot of cost upkeep before switching to Demolition. These perks are Sharpshooter, Commando, Firebug, or Beserker. Using this method will also allow you to purchase your own sidearm with a perk discount before switching to Demolition and buying your grenade launchers. It is common for players to do this up until wave 7, when Fleshpounds first start appearing. If you're doing this, it's important to let the team know so as to not leave a gaping weakness to other specimens that the team expected you to deal with as your initial perk: EG.Switching from Sharp to Demo. Scrakes might be a problem if you were the only Sharpshooter.

You can also play as only Demo from any early wave until the end of the game, provided you ensure you have enough money that you can equip yourself to deal with Fleshpounds starting on wave 7.

Pipe Bombs are expensive, but you shouldn't have to, nor do you need to be constantly replenish them. Most of the time you will have sufficient money to have enough Pipe Bombs, but if your team funds you, then by all means use the money for them.
Dealing with Scrakes and Fleshpounds
Scrakes are best left to other more suitable perks, namely Sharpshooters. They have too much hp for a Demolitions to be very effective on them. That said, using a LAW will enable a Demo to stun a Scrake. This is a poor primary method of dispatch because you need a direct hit on the Scrake which is often hiding behind other specimens. If your team is not able to kill it before its stun animation is expired, you will either need to restun it or hope your team does not suffer a casualty before the Scrake is killed. You can deal with Scrakes with an M32 launcher, however it is very cost ineffective, ammo intensive, and dangerous. It should only be used in emergencies such as when you are alone with a Scrake that has wandered onto a Pipe Bomb and is going to soon be charging at you, a teammate is busy being sawed and is in need of help, or the situation has left you no other choice but to take on the Scrake yourself. You will want to use the 2x damage on headshot with the M32, and all 6 shells. This is demonstrated in this video:


Another thing to keep in mind is firing grenades in the presence of Scrakes. Your explosions might rage the Scrake, and if the Scrake is already stunned, an explosion will force the Scrake to become unstunned and rage into the team. This can wipe a team very quickly. If you need to deal with specimens while a Scrake is stunned and being dealt with, that is the appropriate time to use your sidearm so you don't unstun the Scrake with explosives.

Fleshpounds are Demo's specialty (They take extra damage from explosives) and are best dealt with using an M32 Grenade Launcher with, but not necessarily, frag grenades. 5 consecutive head shots with grenades from the M32 will kill a Fleshpound. This method leaves you with 1 extra grenade (in case you miss a shot) and will have you reloading almost a whole drum. Another method is to use the mechanic of exploding your own frag grenades with a launched grenade. The easiest combo works as so: throw a grenade at the Fleshpound, then hit the fleshpound in the head with a grenade from the M32. Immediately throw 2 more frag grenades at the Fleshpound, and then hit the Fleshpound again in the head with another M32 grenade. Both of these methods are demonstrated in these videos:


If you are using a Pipe Bomb, in order to finish off the Fleshpound after it has stepped on your Pipe Bomb, you will need to throw a frag grenade at it and detonate it with either your M79 or M32- preferably before he finishes his rage animation - it will make him easier to hit.

Fleshpounds may not always be alone when they spawn, so before you start performing a combo, make sure it is safe to do so. This means that no Gorefasts will be rushing at you, no Crawlers jumping in your face, and no Scrakes are beside the Fleshpound.

If a Scrake is beside your Fleshpound(s), and the Fleshpound(s) must be dealt with before a Sharp has a chance to get the Scrake, make sure your team is prepared for a raging Scrake. This means that a Medic is in position to tank the hit, or that Supports are ready to unload. Ideally, you will have safety Pipe Bombs to stun any Scrakes that make it past the front line.

Multiple Fleshpounds can be a nuissance depending on how spaced apart they are. The safest way of dealing with multiple Fleshpounds is with a combination of Pipe Bombs, frag grenades, and an M32 launcher. The closer together the Fleshpounds are, usually the easier they are to manage. If the Fleshpounds are not going to be walking over a Pipe Bomb, start a combo like you would with a single Fleshpound using a frag grenade(s), detonate it with an M32 grenade, and detonate 2 more grenades while they are both in their rage animation using M32 headshots (and frags if needed) to finish them off.

A common technique is have Supports throw grenades as the Demo is raging them so if the Demo's grenade combo is not enough to kill them all off, the Supports grenades can finish the job. If the Support is going to help like this, it's important to throw the grenades as the Demo is starting the combo and not after or during - it will only make the surviving Fleshpounds dance around the grenades very quickly and be difficult for the Demo to get M32 headshots. Usually if the Demo is precise with their shots, the assistance is not needed.
Location Location Location
This is one of if not the most important part of playing Demolitions. You need to position yourself in a location in which you are a safe distance from ZEDs, have line of sight on the ZEDs for firing on them, you are not in anyone elses way, and you are not near any of your own Pipe Bombs. This is usually behind your team or on an elevated portion of the map. Also, a very overlooked and often forgotten about aspect: Pipe Bomb placement.

You want to maintain a position that allows for a cushion between you and the ZEDs. As Demolition, you will damage yourself if you fire at ZEDs that are too close and you will fire duds if the ZEDs are in your face. A common thing I see that Demolitions do is when they spot a fleshpound, will run to the front like a hero and perform a combo. This sometimes works out just fine, they remove the Fleshpound, and run back to their spot in the back. However you do not need to run to the front. In the event you do not perform the combo correctly, you will have a raging Fleshpound running straight at you causing you to either damage yourself as you shoot at it while it encloses on you, or do almost no damage at all as it hugs you with it's drilldos. The cushion will allow you more time to aim and shoot grenades at the Fleshpound, and if you have a Medic inbetween you and the Fleshpound, hopefully the Medic is tanking any potential hits and you are far enough away to not blow yourself up as you finish it off.

Location of Pipe Bombs is just as important. Don't get too excited about having Pipe Bombs and lay all 8 before trader time is up where the team is camping. This sometimes works out, but more often than not, a siren wanders in at one point and screams away 5+ Pipe Bombs after or before the first set of Fleshpound(s) were dealt with. Also do not lay Pipe Bombs out of the line of sight of where the team is camping. This is a bad tactic because it is a surefire way to have a surprise raging Scrake or Fleshpound come running out of nowhere. A very dangerous surprise.

A better tactic is to concentrate on how you want to use your Pipe Bombs - defensively or offensively.

Offensive Pipe Bombs should be used sparingly and laid as you need them. This means during trader time in spots where you know Fleshpounds will walk over them when the wave starts, or you have spotted a Fleshpound and are laying one in it's path. Pre-laying Pipe Bombs in the open rarely works out and are almost certain to be set off by trash specimens, Scrakes, or lost in Siren screams.

Using Pipe Bombs defensively can literally be a life saver. This is when you place Pipe Bombs in areas you know teammates will fall back to when they are either being overwhelmed or run at by a raging Scrake or Fleshpound, and are usually gaurded by objects or walls of the map. Where you lay them is entirely dependant on what location you are holding within a map and requires strategic forethought by a Demolitionist about where your teammates are going to need the help, and where you should put the Pipe Bomb as to not get siren screamed or blown up unnecessarily.

For an example of this, I will use the spawn location on Biotics Lab.

The barrels make great barricades for Siren screams and most decent teams can hold back the horde to a point well before the first barrel down the long hallway. Placing a Pipe Bomb behind this barrel means that any group of specimens that makes it past this point will be blown up, or if a Scrake or Fleshpound make it there, they will either be stunned or have a great deal of damage dealt to them. This is a 2nd line of defense - if the team can't hold the line, maybe the Pipe Bomb will blow the line a little bit farther away.

Emergency Pipe Bombs can also be very helpful. When the team is in trouble, usually they will retreat down the side hallways towards welded doors, and the back portion towards the elevator.
Laying Pipe Bombs in these areas can protect them from being overwhelmed - which is probably the case since they were forced to retreat in the first place. It is important to leave one of the hallways clear of pipes for yourself to retreat down. You do not want to ever be on, or have to retreat over your own Pipe Bombs. It's a surefire way to blow up if you're being chased by specimens. Placing Pipe Bombs in these (see pictures) locations will keep 2 of the possible retreat areas gaurded, and leave the back-right hallway for your own retreat. This area is safer for you to retreat to with teammates because if needed, your team can hold the hallway and you can locate yourself in the room, firing through the window, keeping that cushion between you and the zeds to prevent blowing yourself up.


Place a Pipe Bomb behind the barrel to the left.


Putting Pipe Bombs here will save teammates who are pushed back by a horde or raging ZEDs


Putting a Pipe Bomb halfway down this hallway, maybe using the barrels as a guard will help save teammates who are pushed back this direction.


Keep this way clear for your own retreat - you don't want to be blown up by your own Pipe Bombs.


Putting Pipe Bombs down the hallway can be beneficial at the start of the wave. Make sure they are in line of sight of the team so you can see the Fleshpound(s) as they rage, or deal with Scrakes that set them off.


Similar tactics can be applied on different maps.


The concept behind this is finding places where your Pipe Bombs will be able to save your teammates while at the same time protecting the Pipe Bombs from non-emergencies, and staying
away from your own Pipe Bombs. This can be applied on many maps in many situations differently.
Kiting as a Demolitionist
This can be very dangerous but as always, a good Demolitionist will be a huge help as part of a kiting team. A Demo's weakness is any zed within close proximity. While kiting, this situation can come up extremely often. Keeping this in mind you will probably want an offperk sidearm to help defend yourself. Popular choices include the pistols, Lever Action Rifle, or the Axe or Katana. With clever perk switching or a helpful friend, a Katana is not impossible to afford and is a very good sidearm in this situation. You run faster with a melee weapon out, you won't run out of ammo, and it cleaves through most of the trash specimens very easily even off perk. With Pipe Bombs you can run ahead of the horde and place them in choke points you know will be walked over. Be careful not to rage Scrakes like this - you probably won't survive if you have to deal with a surprise raging Scrake yourself. As always, you will be the go to person for Fleshpounds. Since you can dictate the path which they will walk, using Pipe Bombs will allow you to conserve launcher and frag grenades - a huge advantage if you are only carrying one launcher due to weight restrictions imposed by carrying a capable sidearm.

It may be tempting to take that launcher and fire it into the giant horde you are kiting, but this is generally a bad idea. Killing off a big chunk at once means that big chunk is going to respawn - usually ahead of you. This means you probably just became the meat in a ZED sandwich.
Demo Gameplay on Hell on Earth
Definitely not my greatest performance as a Demo, but you can see several of the strategies in this guide being put to good use here:

32 Comments
{ST}Immortal Nub 30 Jan @ 3:24pm 
Randomystick

Pipe bombs are too important to pass up. It's not like you're using them every wave, and they're much cheaper than trying to reimburse someone who got killed. You just need to use them right.
Randomystick 30 Jan @ 1:46pm 
re: Scrakes

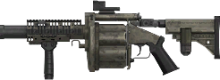
you can and should help out with Scrake damage if urgently needed. a frag grenade + grenade launcher combo still deals a LOT of damage and can help finish off a Scrake in dire situations e.g. your Sharp is dead and your Support failed at killing him and is currently reloading.

of course, only help out when
1) the Scrake is already enraged + not stunned, and
2) you have enough frag grenades + grenade launcher ammo left. remember you need 3 frag grenades + 3 M32 grenades to comfortably kill a single Fleshpound (assume no headshots), and that's your main purpose on the team! you will not have enough ammo to help out every Scrake and still deal with Fleshpounds, so offer your help judiciously e.g. to save lives.
Randomystick 30 Jan @ 1:01pm 
in practice I find Pipe Bombs too impractical to be used on higher difficulties. it's too expensive to use offensively ($195 = 5 grenades!) and is rarely useful even when used defensively because your teammates have to remember to retreat towards your pipe bomb. you also can't retreat with them, so you are forced to separate from your team!

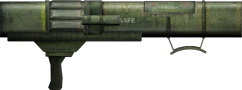
unless you/your team has superb coordination, you're better off saving that $195 as emergency cash in case anyone dies or needs more money (that includes yourself in future waves).
{ST}Immortal Nub 17 Apr, 2017 @ 4:59pm 
I know I'm super late, but there is a trick with the M4/M203. When you reload the mag, it will be tied to the grenade reload if you use it. So if you ever need to use an M203 shot, reload the mag so you can reload two things at the same time. Alternatively, an Mk23 + M79 works for 6kg.
TheNerdyOne 9 Feb, 2016 @ 2:35am 
Great guide, except I realized that you were missing 2 of the DLC weapons in there, the Seeker Six and the Harpoon Bomber. Just wondering what you have to say about those.
Nderyu 3 Aug, 2015 @ 9:10pm 
Vlordstarkiller
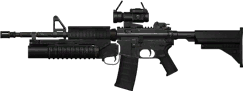
people think its mostly a commando weapon and not much of a demolition but they don't realise that they can defend themselves much easier with the M4/203 bullets and instead of spamming launchers and dieing over them
Highlord Starkiller 11 Jul, 2015 @ 12:03am 
Why does Peaple Hate the M4/203
Its Good you safe up your ammo and is a hybrid weapon
Perezge_ 12 May, 2015 @ 2:30pm 
Lol LAW is bad? It's the best weapon for demo at the later rounds. Headshot fleshpound with 6ppl and it takes over 3/4 health down on suicidal. Doens't sound any bad to me and you can do same to scrake + stun it
Moon Dweller 25 Feb, 2015 @ 12:27pm 
This class I want to learn how to play but it definitly isn't a easy one since explosives are expensive (obviously) so for starter waves you have to find your own way of getting money.
cola.beans 22 Feb, 2015 @ 8:17pm 
All this guide needs is a section about pipebomb hats. No demo is complete without one :Horzine: